
Biomes (Subnautica): Difference between revisions
(added the "its own set" line, added missing bullet points to depths, cleaned up some grammar and wording, added missing bold) Tags: Visual edit apiedit |
MilotronZeta (talk | contribs) m (kyanite deposits can be found in the ILZ corridor) |
||
| (168 intermediate revisions by 66 users not shown) | |||
| Line 1: | Line 1: | ||
__FORCETOC__ |
|||
{{SubnauticaLink|the Biomes}} |
|||
{{Spoiler}} |
{{Spoiler}} |
||
''[[Subnautica]]'' features a wide range of '''Biomes''' to explore and exploit. They all represent miniature ecosystems from the real world. |
|||
{{ExperimentalMode}} |
|||
''[[Subnautica]]'' features a wide range of '''Biomes''' to explore and coexist with, which represent miniature ecosystems in the real world. |
|||
There is a |
There is a huge variety of Biomes, from the vibrant [[Kelp Forest]] to the sizzling depths of the enigmatic [[Lava Lakes]]. Each Biome contains its own set of [[Flora]] and [[Fauna]] to discover and resources to harvest. |
||
==Biomes== |
==Biomes== |
||
=== |
===Aquatic Biomes=== |
||
{| class="article-table sortable" style="width: 100%;" border="0" cellpadding="1" cellspacing="1" |
{| class="article-table sortable" style="width: 100%;" border="0" cellpadding="1" cellspacing="1" |
||
|- |
|- |
||
! class="unsortable" style="width: 25%; text-align: center;" |Biome |
! class="unsortable" style="width: 25%; text-align: center;" |Biome |
||
! class="unsortable" style="width: 20%; text-align: center;" |Depth Range |
! class="unsortable" style="width: 20%; text-align: center;" |Depth Range |
||
! class="unsortable" style="width: 20%; text-align: center;" | |
! class="unsortable" style="width: 20%; text-align: center;" |Resources |
||
! class="unsortable" style="width: 25%; text-align: center;" |Points of Interest |
! class="unsortable" style="width: 25%; text-align: center;" |Points of Interest |
||
|- |
|- |
||
| style="text-align:center; font-size:12px;" |[[File: |
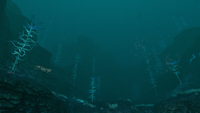
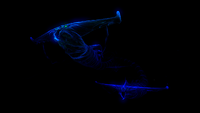
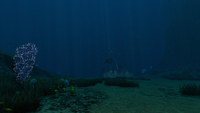
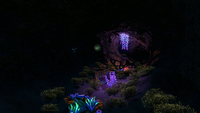
| style="text-align:center; font-size:12px;" |[[File:BloodKelpZoneNorthTrue.png|200px|center|link=Blood Kelp Zone]][[Blood Kelp Zone]] |
||
| style="text-align:center; font-size:12px;" | |
| style="text-align:center; font-size:12px;" | |
||
* 150 - 675 meters (Trench) |
* 150 - 675 meters (Trench) |
||
* 200 - 580 meters (Northern) |
* 200 - 580 meters (Northern) |
||
| style="text-align:center; font-size:12px;" | |
| style="text-align:center; font-size:12px;" | |
||
* [[ |
* [[Eggs|Ampeel Egg]] (Trench) |
||
* [[Blood Oil]] |
|||
* [[Eggs|Crabsquid Egg]] (Northern) |
|||
* [[Deep Shroom]] |
|||
* [[Diamond (Subnautica)|Diamond]] |
|||
* [[Gel Sack (Subnautica)|Gel Sack]] |
|||
* [[Ghost Weed|Ghost Weed Seed]] |
|||
* [[Gold (Subnautica)|Gold]] |
|||
* [[Large Resource Deposits (Subnautica)|Large Copper Deposit]] |
|||
* [[Large Resource Deposits (Subnautica)|Large Gold Deposit]] |
|||
* [[Large Resource Deposits (Subnautica)|Large Lead Deposit]] |
|||
* [[Lithium (Subnautica)|Lithium]] |
|||
* [[Magnetite (Subnautica)|Magnetite]] |
|||
* [[Quartz (Subnautica)|Quartz]] |
|||
* [[Ruby (Subnautica)|Ruby]] |
|||
* [[Salt Deposit (Subnautica)|Salt Deposit]] (Northern) |
|||
* [[Uraninite Crystal (Subnautica)|Uraninite Crystal]] |
|||
| style="text-align:left; font-size:12px;" | |
| style="text-align:left; font-size:12px;" | |
||
* [[Destroyed Lifepods|Destroyed Lifepod]] (Northern) |
|||
* [[Wrecks|Large Wreck]] (1) (Trench) |
|||
* [[ |
* [[Alien Caches|Blood Kelp Sanctuary]] (Northern) |
||
* [[ |
* [[Wrecks|Large Wreck]] (Trench) |
||
|- |
|- |
||
| style="text-align:center; font-size:12px;" |[[File: |
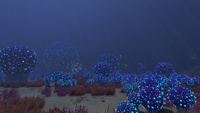
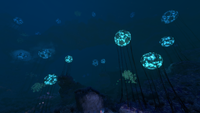
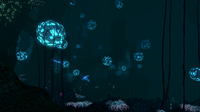
| style="text-align:center; font-size:12px;" |[[File:BulbZoneTrue.png|200px|center|link=Bulb Zone]][[Bulb Zone]] |
||
| style="text-align:center; font-size:12px;" | |
| style="text-align:center; font-size:12px;" | |
||
* 140 - 480 meters |
* 140 - 480 meters |
||
| style="text-align:center; font-size:12px;" | |
| style="text-align:center; font-size:12px;" | |
||
* [[ |
* [[Eggs|Ampeel Egg]] |
||
* [[ |
* [[Eggs|Boneshark Egg]] |
||
* [[Bulb Bush Sample]] |
|||
* [[Coral Tube Sample]] |
|||
* [[Diamond (Subnautica)|Diamond]] |
|||
* [[Ghost Weed|Ghost Weed Seed]] |
|||
* [[Gold (Subnautica)|Gold]] |
|||
* [[Large Resource Deposits (Subnautica)|Large Gold Deposit]] |
|||
* [[Large Resource Deposits (Subnautica)|Large Lithium Deposit]] |
|||
* [[Large Resource Deposits (Subnautica)|Large Titanium Deposit]] |
|||
* [[Lead (Subnautica)|Lead]] |
|||
* [[Lithium (Subnautica)|Lithium]] |
|||
* [[Eggs|Mesmer Egg]] |
|||
* [[Metal Salvage (Subnautica)|Metal Salvage]] |
|||
* [[Ruby (Subnautica)|Ruby]] |
|||
* [[Salt Deposit (Subnautica)|Salt Deposit]] |
|||
* [[Sea Crown|Sea Crown Seed]] |
|||
* [[Table Coral Sample (Subnautica)|Table Coral Sample]] |
|||
| style="text-align:left; font-size:12px;" | |
| style="text-align:left; font-size:12px;" | |
||
* [[Alien Caches|Bulb Zone Arch Cache]] |
|||
* [[Wrecks|Large Wreck]] (2) |
|||
* [[Destroyed Lifepods|Destroyed Lifepod]] |
* [[Destroyed Lifepods|Destroyed Lifepod]] |
||
* [[Wrecks|Large Wrecks]] (2) |
|||
* [[Lava Geyser]]s (3) |
* [[Lava Geyser]]s (3) |
||
* [[Precursor Caches|Bulb Zone Warp Gate Cache]] (1) |
|||
|- |
|- |
||
| style="text-align:center; font-size:12px;" |[[File:Crag Field |
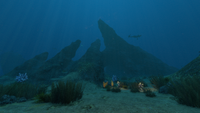
| style="text-align:center; font-size:12px;" |[[File:Crag Field Biome.png|200px|center|link=Crag Field]][[Crag Field]] |
||
| style="text-align:center; font-size:12px;" | |
| style="text-align:center; font-size:12px;" | |
||
* 125 - 460 meters |
* 125 - 460 meters |
||
| style="text-align:center; font-size:12px;" | |
| style="text-align:center; font-size:12px;" | |
||
* [[Copper Ore (Subnautica)|Copper Ore]] |
|||
* [[Basalt Outcrop]] |
|||
* [[Diamond (Subnautica)|Diamond]] |
|||
* [[Limestone Outcrop]] |
|||
* [[Eye Stalk|Eye Stalk Seed]] |
|||
* [[Gold (Subnautica)|Gold]] |
|||
* [[Large Resource Deposits (Subnautica)|Large Silver Deposit]] |
|||
* [[Large Resource Deposits (Subnautica)|Large Quartz Deposit]] |
|||
* [[Lithium (Subnautica)|Lithium]] |
|||
* [[Metal Salvage (Subnautica)|Metal Salvage]] |
|||
* [[Quartz (Subnautica)|Quartz]] |
|||
* [[Salt Deposit (Subnautica)|Salt Deposit]] |
|||
* [[Titanium (Subnautica)|Titanium]] |
|||
| style="text-align:left; font-size:12px;" | |
| style="text-align:left; font-size:12px;" | |
||
* [[ |
* [[Alien Caches|Crag Field Arch Cache]] |
||
* [[Destroyed Lifepods|Destroyed Lifepod]] |
* [[Destroyed Lifepods|Destroyed Lifepod]] |
||
|- |
|- |
||
| style="text-align:center; font-size:12px;" |[[File: |
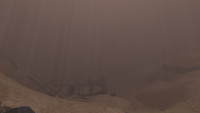
| style="text-align:center; font-size:12px;" |[[File:CrashZoneTrue.png|200px|center|link=Crash Zone]][[Crash Zone]] |
||
| style="text-align:center; font-size:12px;" | |
| style="text-align:center; font-size:12px;" | |
||
* 0 - 370 meters |
* 0 - 370 meters |
||
| style="text-align:center; font-size:12px;" | |
| style="text-align:center; font-size:12px;" | |
||
* [[ |
* [[Acid Mushroom]] |
||
* [[Copper Ore (Subnautica)|Copper Ore]] |
|||
* [[Sandstone Outcrop]] |
|||
* [[ |
* [[Coral Tube Sample]] |
||
* [[Gold (Subnautica)|Gold]] |
|||
* [[Large Resource Deposits (Subnautica)|Large Lead Deposit]] |
|||
* [[Large Resource Deposits (Subnautica)|Large Titanium Deposit]] |
|||
* [[Lead (Subnautica)|Lead]] |
|||
* [[Metal Salvage (Subnautica)|Metal Salvage]] |
|||
* [[Quartz (Subnautica)|Quartz]] |
|||
* [[Salt Deposit (Subnautica)|Salt Deposit]] |
|||
* [[Silver Ore (Subnautica)|Silver Ore]] |
|||
* [[Stalker Teeth]] |
|||
* [[Table Coral Sample (Subnautica)|Table Coral Sample]] |
|||
* [[Titanium (Subnautica)|Titanium]] |
|||
* [[Supply Crate]] |
|||
| style="text-align:left; font-size:12px;" | |
| style="text-align:left; font-size:12px;" | |
||
* [[Aurora]] |
* [[Aurora]] |
||
* [[Destroyed Lifepods|Destroyed Lifepod]] |
* [[Destroyed Lifepods|Destroyed Lifepod]] |
||
|- |
|||
| style="text-align:center; font-size:12px;" |[[File:Void GL.png|200px|center|link=Crater Edge]][[Crater Edge]] |
|||
| style="text-align:center; font-size:12px;" | |
|||
* 0 - 8192 meters |
|||
| style="text-align:center; font-size:12px;" | |
|||
N/A |
|||
| style="text-align:left; font-size:12px;" | |
|||
* Death |
|||
|- |
|- |
||
| style="text-align:center; font-size:12px;" |[[File:Dunes |
| style="text-align:center; font-size:12px;" |[[File:Dunes Biome.png|200px|center|link=Dunes]][[Dunes]] |
||
| style="text-align:center; font-size:12px;" | |
| style="text-align:center; font-size:12px;" | |
||
* 65 - 400 meters |
* 65 - 400 meters |
||
| style="text-align:center; font-size:12px;" | |
| style="text-align:center; font-size:12px;" | |
||
* [[ |
* [[Acid Mushroom]] |
||
* [[Copper Ore (Subnautica)|Copper Ore]] |
|||
* [[Sandstone Outcrop]] |
|||
* [[Eggs|Cuddlefish Egg]] |
|||
* [[Gas Pod]] |
|||
* [[Eggs|Gasopod Egg]] |
|||
* [[Gel Sack (Subnautica)|Gel Sack]] |
|||
* [[Gold (Subnautica)|Gold]] |
|||
* [[Large Resource Deposits (Subnautica)|Large Quartz Deposit]] |
|||
* [[Large Resource Deposits (Subnautica)|Large Salt Deposit]] |
|||
* [[Large Resource Deposits (Subnautica)|Large Silver Deposit]] |
|||
* [[Large Resource Deposits (Subnautica)|Large Titanium Deposit]] |
|||
* [[Lead (Subnautica)|Lead]] |
|||
* [[Lithium (Subnautica)|Lithium]] |
|||
* [[Metal Salvage (Subnautica)|Metal Salvage]] |
|||
* [[Quartz (Subnautica)|Quartz]] |
|||
* [[Ruby (Subnautica)|Ruby]] |
|||
* [[Salt Deposit (Subnautica)|Salt Deposit]] |
|||
* [[Sea Crown|Sea Crown Seed]] |
|||
* [[Silver Ore (Subnautica)|Silver Ore]] |
|||
* [[Titanium (Subnautica)|Titanium]] |
|||
| style="text-align:left; font-size:12px;" | |
| style="text-align:left; font-size:12px;" | |
||
* [[Alien Vents#Entrance Points|Alien Vent Entrance Point]] |
|||
* [[Wrecks|Large Wreck]] (1) |
|||
* [[Alien Caches|Dunes Sanctuary]] |
|||
* Meteor Crater |
|||
* Giant Sinkhole |
* Giant Sinkhole |
||
* [[ |
* [[Wrecks|Large Wrecks]] (3) |
||
* Meteor Crater |
|||
* [[Alien Pipe System#Entrance_Points|Alien Pipe Entrance Point]] |
|||
* Thermal Vents (9) |
|||
|- |
|- |
||
| style="text-align:center; font-size:12px;" |[[File: |
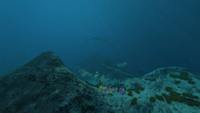
| style="text-align:center; font-size:12px;" |[[File:Grand Reef Biome.png|200px|center|link=Grand Reef]][[Grand Reef]] |
||
| style="text-align:center; font-size:12px;" | |
| style="text-align:center; font-size:12px;" | |
||
* 150 - 480 meters |
* 150 - 480 meters |
||
| style="text-align:center; font-size:12px;" | |
| style="text-align:center; font-size:12px;" | |
||
* [[Copper Ore (Subnautica)|Copper Ore]] |
|||
* [[Basalt Outcrop]] |
|||
* [[Diamond (Subnautica)|Diamond]] |
|||
* [[Gel Sack (Subnautica)|Gel Sack]] |
|||
* [[Gold (Subnautica)|Gold]] |
|||
* [[Large Resource Deposits (Subnautica)|Large Copper Deposit]] |
|||
* [[Large Resource Deposits (Subnautica)|Large Quartz Deposit]] |
|||
* [[Lead (Subnautica)|Lead]] |
|||
* [[Lithium (Subnautica)|Lithium]] |
|||
* [[Quartz (Subnautica)|Quartz]] |
|||
* [[Ruby (Subnautica)|Ruby]] |
|||
* [[Silver Ore (Subnautica)|Silver Ore]] |
|||
* [[Eggs|Spadefish Egg]] |
|||
* [[Titanium (Subnautica)|Titanium]] |
|||
* [[Uraninite Crystal (Subnautica)|Uraninite Crystal]] |
|||
| style="text-align:left; font-size:12px;" | |
| style="text-align:left; font-size:12px;" | |
||
* [[Alien Vents#Entrance Points|Alien Vent Entrance Point]] |
|||
* [[Wrecks|Large Wrecks]] (2) |
* [[Wrecks|Large Wrecks]] (2) |
||
* Thermal Vents (5) |
* Thermal Vents (5) |
||
* [[Alien Pipe System#Entrance_Points|Alien Pipe Entrance Point]] |
|||
|- |
|- |
||
| style="text-align:center; font-size:12px;" |[[File: |
| style="text-align:center; font-size:12px;" |[[File:Grassy Plateaus Biome.png|200px|center|link=Grassy Plateaus]][[Grassy Plateaus]] |
||
| style="text-align:center; font-size:12px;" | |
| style="text-align:center; font-size:12px;" | |
||
* 50 - 170 meters |
* 50 - 170 meters |
||
| style="text-align:center; font-size:12px;" | |
| style="text-align:center; font-size:12px;" | |
||
* [[ |
* [[Acid Mushroom]] |
||
* [[Copper Ore (Subnautica)|Copper Ore]] |
|||
* [[Sandstone Outcrop]] |
|||
* [[Coral Tube Sample]] |
|||
* [[Gold (Subnautica)|Gold]] |
|||
* [[Large Resource Deposits (Subnautica)|Large Salt Deposit]] |
|||
* [[Lead (Subnautica)|Lead]] |
|||
* [[Lithium (Subnautica)|Lithium]] |
|||
* [[Metal Salvage (Subnautica)|Metal Salvage]] |
|||
* [[Quartz (Subnautica)|Quartz]] |
|||
* [[Salt Deposit (Subnautica)|Salt Deposit]] |
|||
* [[Eggs|Sand Shark Egg]] |
|||
* [[Silver Ore (Subnautica)|Silver Ore]] |
|||
* [[Table Coral Sample (Subnautica)|Table Coral Sample]] |
|||
* [[Titanium (Subnautica)|Titanium]] |
|||
| style="text-align:left; font-size:12px;" | |
| style="text-align:left; font-size:12px;" | |
||
* [[Destroyed Lifepods]] (2) |
|||
* [[Wrecks|Large Wrecks]] (5) |
* [[Wrecks|Large Wrecks]] (5) |
||
* [[Wrecks|Small Wrecks]] (6) |
* [[Wrecks|Small Wrecks]] (6) |
||
* [[Destroyed Lifepods]] (2) |
|||
|- |
|- |
||
| style="text-align:center; font-size:12px;" |[[File: |
| style="text-align:center; font-size:12px;" |[[File:KelpForestTrue.png|200px|center|link=Kelp Forest]][[Kelp Forest]] |
||
| style="text-align:center; font-size:12px;" | |
| style="text-align:center; font-size:12px;" | |
||
* 0 - 160 meters |
* 0 - 160 meters |
||
| style="text-align:center; font-size:12px;" | |
| style="text-align:center; font-size:12px;" | |
||
* [[Copper Ore (Subnautica)|Copper Ore]] |
|||
* [[Limestone Outcrop]] |
|||
* [[ |
* [[Coral Tube Sample]] |
||
* [[Creepvine Sample (Subnautica)|Creepvine Sample]] |
|||
* [[Creepvine Seed Cluster (Subnautica)|Creepvine Seed Cluster]] |
|||
* [[Gold (Subnautica)|Gold]] |
|||
* [[Lead (Subnautica)|Lead]] |
|||
* [[Metal Salvage (Subnautica)|Metal Salvage]] |
|||
* [[Salt Deposit (Subnautica)|Salt Deposit]] |
|||
* [[Silver Ore (Subnautica)|Silver Ore]] |
|||
* [[Eggs|Stalker Egg]] |
|||
* [[Stalker Teeth]] |
|||
* [[Titanium (Subnautica)|Titanium]] |
|||
| style="text-align:left; font-size:12px;" | |
| style="text-align:left; font-size:12px;" | |
||
* [[Destroyed Lifepods|Destroyed Lifepod]] |
|||
* [[Wrecks|Large Wrecks]] (4) |
|||
* [[ |
* [[Wrecks|Large Wrecks]] (2) |
||
|- |
|- |
||
| style="text-align:center; font-size:12px;" |[[File: |
| style="text-align:center; font-size:12px;" |[[File:Mountains Biome.png|200px|center|link=Mountains]][[Mountains]] |
||
| style="text-align:center; font-size:12px;" | |
| style="text-align:center; font-size:12px;" | |
||
* 0 - 500 meters |
* 0 - 500 meters |
||
| style="text-align:center; font-size:12px;" | |
| style="text-align:center; font-size:12px;" | |
||
* [[Diamond (Subnautica)|Diamond]] |
|||
* [[Sandstone Outcrop]] |
|||
* [[Gel Sack (Subnautica)|Gel Sack]] |
|||
* [[Basalt Outcrop]] |
|||
* [[Ghost Weed|Ghost Weed Seed]] |
|||
* [[Gold (Subnautica)|Gold]] |
|||
* [[Large Resource Deposits (Subnautica)|Large Lead Deposit]] |
|||
* [[Large Resource Deposits (Subnautica)|Large Salt Deposit]] |
|||
* [[Large Resource Deposits (Subnautica)|Large Silver Deposit]] |
|||
* [[Lead (Subnautica)|Lead]] |
|||
* [[Lithium (Subnautica)|Lithium]] |
|||
* [[Magnetite (Subnautica)|Magnetite]] |
|||
* [[Silver Ore (Subnautica)|Silver Ore]] |
|||
* [[Uraninite Crystal (Subnautica)|Uraninite Crystal]] |
|||
| style="text-align:left; font-size:12px;" | |
| style="text-align:left; font-size:12px;" | |
||
* [[Alien Arches|Alien Arch Platform]] |
|||
* [[Wrecks|Large Wreck]] (1) |
|||
* [[Alien Vents#Entrance Points|Alien Vent Entrance Point]] |
|||
* [[Wrecks|Large Wrecks]] (2) |
|||
* Thermal Vents (10) |
* Thermal Vents (10) |
||
* [[Alien Warp Gates|Alien Warp Gate Platform]] (1) |
|||
* [[Alien Pipe System#Entrance_Points|Alien Pipe Entrance Point]] |
|||
|- |
|- |
||
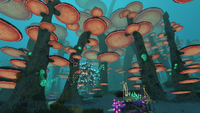
| style="text-align:center; font-size:12px;" |[[File: |
| style="text-align:center; font-size:12px;" |[[File:MushroomEastTrue.png|200px|center|link=Mushroom Forest]][[Mushroom Forest]] |
||
| style="text-align:center; font-size:12px;" | |
| style="text-align:center; font-size:12px;" | |
||
* 75 - 250 meters (Northwestern) |
* 75 - 250 meters (Northwestern) |
||
* 125 - 200 meters (Northeastern) |
* 125 - 200 meters (Northeastern) |
||
| style="text-align:center; font-size:12px;" | |
| style="text-align:center; font-size:12px;" | |
||
* [[ |
* [[Acid Mushroom]] |
||
* [[ |
* [[Eggs|Boneshark Egg]] |
||
* [[Copper Ore (Subnautica)|Copper Ore]] |
|||
* [[Purple Pinecone]] |
|||
* [[Coral Tube Sample]] (Northwestern) |
|||
* [[Sandstone Outcrop]] |
|||
* [[ |
* [[Diamond (Subnautica)|Diamond]] |
||
* [[Fungal Sample]] |
|||
* [[Gel Sack (Subnautica)|Gel Sack]] (Northwestern) |
|||
* [[Gold (Subnautica)|Gold]] |
|||
* [[Eggs|Jellyray Egg]] |
|||
* [[Large Resource Deposits|Large Copper Deposits]] |
|||
* [[Large Resource Deposits|Large Lithium Deposits]] |
|||
* [[Large Resource Deposits|Large Salt Deposits]] |
|||
* [[Lead (Subnautica)|Lead]] |
|||
* [[Lithium (Subnautica)|Lithium]] |
|||
* [[Salt Deposit (Subnautica)|Salt Deposit]] |
|||
* [[Silver Ore (Subnautica)|Silver Ore]] |
|||
* [[Table Coral Sample (Subnautica)|Table Coral Sample]] (Northwestern) |
|||
* [[Titanium (Subnautica)|Titanium]] |
|||
| style="text-align:left; font-size:12px;" | |
| style="text-align:left; font-size:12px;" | |
||
* [[Alien Vents#Entrance Points|Alien Vent Entrance Point]] (Northeastern) |
|||
* [[Wrecks|Large Wreck]] (1) |
|||
* [[Destroyed Lifepods|Destroyed Lifepod]] ( |
* [[Destroyed Lifepods|Destroyed Lifepod]] (Northwestern) |
||
* [[Wrecks|Large Wreck]] (Northwestern) |
|||
* [[Alien Warp Gates|Mushroom Forest Warp Gate Cache]] (1) |
|||
* [[Alien |
* [[Alien Arches|Mushroom Forest Arch Cache]] (Northwestern) |
||
|- |
|- |
||
| style="text-align:center; font-size:12px;" |[[File: |
| style="text-align:center; font-size:12px;" |[[File:SafeShallowsTrue.png|200px|center|link=Safe Shallows]][[Safe Shallows]] |
||
| style="text-align:center; font-size:12px;" | |
| style="text-align:center; font-size:12px;" | |
||
* 0 - 80 meters |
* 0 - 80 meters |
||
| style="text-align:center; font-size:12px;" | |
| style="text-align:center; font-size:12px;" | |
||
* [[ |
* [[Acid Mushroom]] |
||
* [[Copper Ore (Subnautica)|Copper Ore]] |
|||
* [[Sandstone Outcrop]] |
|||
* [[Coral Tube Sample]] |
|||
* [[Gas Pod]] |
|||
* [[Eggs|Gasopod Egg]] |
|||
* [[Gold (Subnautica)|Gold]] |
|||
* [[Lead (Subnautica)|Lead]] |
|||
* [[Metal Salvage (Subnautica)|Metal Salvage]] |
|||
* [[Quartz (Subnautica)|Quartz]] |
|||
* [[Eggs|Rabbit Ray Egg]] |
|||
* [[Silver Ore (Subnautica)|Silver Ore]] |
|||
* [[Table Coral Sample (Subnautica)|Table Coral Sample]] |
|||
* [[Titanium (Subnautica)|Titanium]] |
|||
| style="text-align:left; font-size:12px;" | |
| style="text-align:left; font-size:12px;" | |
||
* [[Wrecks|Large Wrecks]] (2) |
* [[Wrecks|Large Wrecks]] (2) |
||
* [[Wrecks|Small Wrecks]] (7) |
|||
* [[Lava Geyser]]s (2) |
* [[Lava Geyser]]s (2) |
||
* [[Lifepod 5]] |
|||
* [[Destroyed Lifepods|Destroyed Lifepod]] (1) |
|||
* [[Wrecks|Small Wrecks]] (7) |
|||
|- |
|- |
||
| style="text-align:center; font-size:12px;" |[[File: |
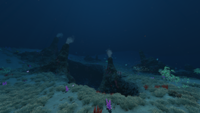
| style="text-align:center; font-size:12px;" |[[File:STPTrue.png|200px|center|link=Sea Treader's Path]][[Sea Treader's Path]] |
||
| style="text-align:center; font-size:12px;" | |
| style="text-align:center; font-size:12px;" | |
||
* 170 - 360 meters |
* 170 - 360 meters |
||
| style="text-align:center; font-size:12px;" | |
| style="text-align:center; font-size:12px;" | |
||
* [[Copper Ore (Subnautica)|Copper Ore]] |
|||
* [[Basalt Outcrop]] |
|||
* [[Deep Shroom]] |
|||
* [[Diamond (Subnautica)|Diamond]] |
|||
* [[Gold (Subnautica)|Gold]] |
|||
* [[Lead (Subnautica)|Lead]] |
|||
* [[Lithium (Subnautica)|Lithium]] |
|||
* [[Magnetite (Subnautica)|Magnetite]] |
|||
* [[Quartz (Subnautica)|Quartz]] |
|||
* [[Salt Deposit (Subnautica)|Salt Deposit]] |
|||
* [[Silver Ore (Subnautica)|Silver Ore]] |
|||
* [[Titanium (Subnautica)|Titanium]] |
|||
| style="text-align:left; font-size:12px;" | |
| style="text-align:left; font-size:12px;" | |
||
* [[Wrecks|Large Wreck]] |
* [[Wrecks|Large Wreck]] |
||
|- |
|- |
||
| style="text-align:center; font-size:12px;" |[[File: |
| style="text-align:center; font-size:12px;" |[[File:Sparse Reef Biome.png|200px|center|link=Sparse Reef]][[Sparse Reef]] |
||
| style="text-align:center; font-size:12px;" | |
| style="text-align:center; font-size:12px;" | |
||
* 40 - 310 meters |
* 40 - 310 meters |
||
| style="text-align:center; font-size:12px;" | |
| style="text-align:center; font-size:12px;" | |
||
* [[Copper Ore (Subnautica)|Copper Ore]] |
|||
* [[Limestone Outcrop]] |
|||
* [[Diamond (Subnautica)|Diamond]] |
|||
* [[Ruby (Subnautica)|Ruby]] |
|||
* [[Gel Sack (Subnautica)|Gel Sack]] |
|||
* [[Eye Stalk|Eye Stalk Seed]] |
|||
* [[Gold (Subnautica)|Gold]] |
|||
* [[Large Resource Deposits (Subnautica)|Large Lead Deposit]] |
|||
* [[Large Resource Deposits (Subnautica)|Large Lithium Deposit]] |
|||
* [[Large Resource Deposits (Subnautica)|Large Quartz Deposit]] |
|||
* [[Lithium (Subnautica)|Lithium]] |
|||
* [[Quartz (Subnautica)|Quartz]] |
|||
* [[Salt Deposit (Subnautica)|Salt Deposit]] |
|||
* [[Table Coral Sample (Subnautica)|Table Coral Sample]] |
|||
* [[Titanium (Subnautica)|Titanium]] |
|||
| style="text-align:left; font-size:12px;" | |
| style="text-align:left; font-size:12px;" | |
||
* [[Alien |
* [[Alien Vents#Entrance Points|Alien Vent Entrance Point]] |
||
|- |
|- |
||
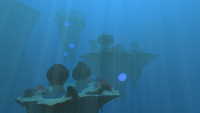
| style="text-align:center; font-size:12px;" |[[File:UnderIslandsInfobox.png|200px|center|link=Underwater Islands]][[Underwater Islands]] |
| style="text-align:center; font-size:12px;" |[[File:UnderIslandsInfobox.png|200px|center|link=Underwater Islands]][[Underwater Islands]] |
||
| Line 162: | Line 337: | ||
* 35 - 500 meters |
* 35 - 500 meters |
||
| style="text-align:center; font-size:12px;" | |
| style="text-align:center; font-size:12px;" | |
||
* [[Copper Ore (Subnautica)|Copper Ore]] |
|||
* [[Basalt Outcrop]] |
|||
* [[ |
* [[Coral Tube Sample]] |
||
* [[Diamond (Subnautica)|Diamond]] |
|||
* [[Large Resource Deposits (Subnautica)|Large Gold Deposit]] |
|||
* [[Large Resource Deposits (Subnautica)|Large Silver Deposit]] |
|||
* [[Large Resource Deposits (Subnautica)|Large Uraninite Deposit]] |
|||
* [[Lead (Subnautica)|Lead]] |
|||
* [[Lithium (Subnautica)|Lithium]] |
|||
* [[Quartz (Subnautica)|Quartz]] |
|||
* [[Salt Deposit (Subnautica)|Salt Deposit]] |
|||
* [[Silver Ore (Subnautica)|Silver Ore]] |
|||
* [[Eggs|Spadefish Egg]] |
|||
* [[Titanium (Subnautica)|Titanium]] |
|||
* [[Eggs|Boneshark Egg]] |
|||
| style="text-align:left; font-size:12px;" | |
| style="text-align:left; font-size:12px;" | |
||
* [[Alien Vents#Entrance Points|Alien Vent Entrance Point]] |
|||
* [[Wrecks|Large Wreck]] (1) |
|||
* [[Wrecks|Large Wreck]] |
|||
* [[Lava Geyser]]s (8) |
* [[Lava Geyser]]s (8) |
||
* Thermal Vents (1) |
|||
* [[Alien Pipe System#Entrance_Points|Alien Pipe Entrance Point]] |
|||
|} |
|} |
||
| Line 175: | Line 363: | ||
! class="unsortable" style="width: 25%; text-align: center;" |Biome |
! class="unsortable" style="width: 25%; text-align: center;" |Biome |
||
! class="unsortable" style="width: 20%; text-align: center;" |Depth Range |
! class="unsortable" style="width: 20%; text-align: center;" |Depth Range |
||
! class="unsortable" style="width: 20%; text-align: center;" | |
! class="unsortable" style="width: 20%; text-align: center;" |Resources |
||
! class="unsortable" style="width: 25%; text-align: center;" |Points of Interest |
! class="unsortable" style="width: 25%; text-align: center;" |Points of Interest |
||
|- |
|- |
||
| Line 182: | Line 370: | ||
* Above sea level |
* Above sea level |
||
| style="text-align:center; font-size:12px;" | |
| style="text-align:center; font-size:12px;" | |
||
N/A |
|||
- |
|||
| style="text-align:left; font-size:12px;" | |
| style="text-align:left; font-size:12px;" | |
||
* [[Degasi Seabases]] (3) |
* [[Degasi Seabases]] (3) |
||
* [[ |
* [[Alien Caches|Floating Island Arch Cache]] |
||
|- |
|- |
||
| style="text-align:center; font-size:12px;" |[[File: |
| style="text-align:center; font-size:12px;" |[[File:MountainIslandHeaderImage.png|200px|center|link=Mountain Island]][[Mountain Island]] |
||
| style="text-align:center; font-size:12px;" | |
| style="text-align:center; font-size:12px;" | |
||
* Above sea level |
* Above sea level |
||
| style="text-align:center; font-size:12px;" | |
| style="text-align:center; font-size:12px;" | |
||
* [[ |
* [[Diamond (Subnautica)|Diamond]] |
||
* [[ |
* [[Gold (Subnautica)|Gold]] |
||
* [[Large Resource Deposits (Subnautica)|Large Lead Deposit]] |
|||
* [[Lithium (Subnautica)|Lithium]] |
|||
* [[Salt Deposit (Subnautica)|Salt Deposit]] |
|||
| style="text-align:left; font-size:12px;" | |
| style="text-align:left; font-size:12px;" | |
||
* [[Alien Caches|Mountain Island Arch Cache]] |
|||
* [[Quarantine Enforcement Platform]] |
* [[Quarantine Enforcement Platform]] |
||
* [[Precursor Caches|Mountain Island Warp Gate Cache]]<span> (1)</span> |
|||
|} |
|} |
||
===Cave Biomes=== |
===Cave Biomes=== |
||
<nowiki/> |
|||
{| class="article-table sortable" style="width: 100%;" border="0" cellpadding="1" cellspacing="1" |
{| class="article-table sortable" style="width: 100%;" border="0" cellpadding="1" cellspacing="1" |
||
|- |
|- |
||
! class="unsortable" style="width: 25%; text-align: center;" |Biome |
! class="unsortable" style="width: 25%; text-align: center;" |Biome |
||
! class="unsortable" style="width: 25%; text-align: center;" |Depth Range |
! class="unsortable" style="width: 25%; text-align: center;" |Depth Range |
||
! class="unsortable" style="width: 25%; text-align: center;" | |
! class="unsortable" style="width: 25%; text-align: center;" |Resources |
||
! class="unsortable" style="width: 25%; text-align: center;" |Points of Interest |
! class="unsortable" style="width: 25%; text-align: center;" |Points of Interest |
||
|- |
|- |
||
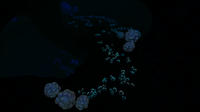
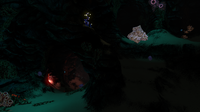
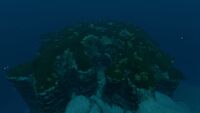
| style="text-align:center; font-size:12px;" |[[File:BloodKelpCavesInfoboxTrue.png|200px|center|link=Blood Kelp Caves]][[Blood Kelp Caves]] |
| style="text-align:center; font-size:12px;" |[[File:BloodKelpCavesInfoboxTrue.png|200px|center|link=Blood Kelp Caves]][[Blood Kelp Caves]] |
||
| style="text-align:center; font-size:12px;" | |
| style="text-align:center; font-size:12px;" | |
||
* |
* 285 - 675 meters |
||
| style="text-align:center; font-size:12px;" | |
| style="text-align:center; font-size:12px;" | |
||
* [[ |
* [[Blood Oil]] |
||
* [[Diamond (Subnautica)|Diamond]] |
|||
| style="text-align:left; font-size:12px;" | - |
|||
* [[Ghost Weed|Ghost Weed Seed]] |
|||
* [[Gold (Subnautica)|Gold]] |
|||
* [[Large Resource Deposits (Subnautica)|Large Copper Deposit]] |
|||
* [[Large Resource Deposits (Subnautica)|Large Gold Deposit]] |
|||
* [[Large Resource Deposits (Subnautica)|Large Uraninite Deposit]] |
|||
* [[Lithium (Subnautica)|Lithium]] |
|||
* [[Quartz (Subnautica)|Quartz]] |
|||
* [[Uraninite Crystal (Subnautica)|Uraninite Crystal]] |
|||
* [[Magnetite (Subnautica)|Magnetite]] |
|||
| style="text-align:left; font-size:12px;" | N/A |
|||
|- |
|- |
||
| style="text-align:center; font-size:12px;" | |
| style="text-align:center; font-size:12px;" | |
||
| Line 219: | Line 419: | ||
* 610 - 710 meters |
* 610 - 710 meters |
||
| style="text-align:center; font-size:12px;" | |
| style="text-align:center; font-size:12px;" | |
||
* [[Diamond (Subnautica)|Diamond]] |
|||
- |
|||
* [[Gel Sack (Subnautica)|Gel Sack]] |
|||
| style="text-align:left; font-size:12px;" | - |
|||
* [[Large Resource Deposits (Subnautica)|Large Gold Deposit]] |
|||
* [[Large Resource Deposits (Subnautica)|Large Lithium Deposit]] |
|||
* [[Magnetite (Subnautica)|Magnetite]] |
|||
* [[Nickel Ore (Subnautica)|Nickel Ore]] |
|||
* [[Ruby (Subnautica)|Ruby]] |
|||
| style="text-align:left; font-size:12px;" | N/A |
|||
|- |
|- |
||
| style="text-align:center; font-size:12px;" |[[File:BulbZonecavesinfobox.png|200px|center|link=Bulb Zone Caves]][[Bulb Zone Caves]] |
| style="text-align:center; font-size:12px;" |[[File:BulbZonecavesinfobox.png|200px|center|link=Bulb Zone Caves]][[Bulb Zone Caves]] |
||
| Line 226: | Line 432: | ||
* 220 - 315 meters |
* 220 - 315 meters |
||
| style="text-align:center; font-size:12px;" | |
| style="text-align:center; font-size:12px;" | |
||
* [[ |
* [[Diamond (Subnautica)|Diamond]] |
||
* [[ |
* [[Eye Stalk|Eye Stalk Seed]] |
||
* [[Gold (Subnautica)|Gold]] |
|||
* [[Lithium (Subnautica)|Lithium]] |
|||
* [[Eggs|Mesmer Eggs]] |
|||
* [[Ruby (Subnautica)|Ruby]] |
|||
* [[Uraninite Crystal (Subnautica)|Uraninite Crystal]] |
|||
| style="text-align:left; font-size:12px;" | |
| style="text-align:left; font-size:12px;" | |
||
* [[Lava Geyser]] |
* [[Lava Geyser]] |
||
|- |
|- |
||
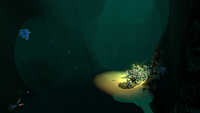
| style="text-align:center; font-size:12px;" |[[File:DeepGradnInfoboxTrue.png|200px|center|link=Deep Grand Reef]][[Deep Grand Reef]] |
| style="text-align:center; font-size:12px;" |[[File:DeepGradnInfoboxTrue.png|200px|center|link=Deep Grand Reef]][[Deep Grand Reef]] |
||
| Line 235: | Line 446: | ||
* 425 - 630 meters |
* 425 - 630 meters |
||
| style="text-align:center; font-size:12px;" | |
| style="text-align:center; font-size:12px;" | |
||
* [[ |
* [[Eggs|Crabsquid Egg]] |
||
* [[Eggs|Cuddlefish Egg]] (Degasi Seabase) |
|||
* [[Basalt Outcrop]] |
|||
* [[Diamond (Subnautica)|Diamond]] |
|||
* [[Gel Sack (Subnautica)|Gel Sack]] |
|||
* [[Large Resource Deposits (Subnautica)|Large Lead Deposit]] |
|||
* [[Large Resource Deposits (Subnautica)|Large Titanium Deposit]] |
|||
* [[Uraninite Crystal (Subnautica)|Uraninite Crystal]] |
|||
| style="text-align:left; font-size:12px;" | |
| style="text-align:left; font-size:12px;" | |
||
*[[Degasi Seabases|Degasi Seabase]] |
*[[Degasi Seabases|Degasi Seabase]] |
||
|- |
|- |
||
| style="text-align:center; font-size:12px;" |[[File:DeepSparse.png|200px|center|link=Deep Sparse Reef]][[Deep Sparse Reef]] |
| style="text-align:center; font-size:12px;" |[[File:DeepSparse.png|200px|center|link=Deep Sparse Reef]][[Deep Sparse Reef]] |
||
| Line 244: | Line 460: | ||
* 210 - 290 meters |
* 210 - 290 meters |
||
| style="text-align:center; font-size:12px;" | |
| style="text-align:center; font-size:12px;" | |
||
* [[Diamond (Subnautica)|Diamond]] |
|||
* [[Limestone Outcrop]] |
|||
* [[Eye Stalk|Eye Stalk Seed]] |
|||
* [[Gel Sack (Subnautica)|Gel Sack]] |
|||
* [[Gold (Subnautica)|Gold]] |
|||
* [[Large Resource Deposits (Subnautica)|Large Lithium Deposit]] |
|||
* [[Large Resource Deposits (Subnautica)|Large Quartz Deposit]] |
|||
* [[Lead (Subnautica)|Lead]] |
|||
* [[Lithium (Subnautica)|Lithium]] |
|||
* [[Quartz (Subnautica)|Quartz]] |
|||
* [[Ruby (Subnautica)|Ruby]] |
|||
* [[Silver Ore (Subnautica)|Silver Ore]] |
|||
* [[Eggs|Spadefish Egg]] |
|||
* [[Table Coral Sample (Subnautica)|Table Coral Sample]] |
|||
| style="text-align:left; font-size:12px;" | |
| style="text-align:left; font-size:12px;" | |
||
* [[Destroyed Lifepods|Destroyed Lifepod]] |
|||
* [[Precursor Caches|Sparse Reef Sanctuary]] |
|||
* [[Alien Caches|Sparse Reef Sanctuary]] |
|||
* [[Destroyed Lifepods|Destroyed Lifepod]] (1) |
|||
|- |
|- |
||
| style="text-align:center; font-size:12px;" |[[File:DunesCavesInfoboxImage.png|200px|center|link=Dunes Caves]][[Dunes Caves]] |
| style="text-align:center; font-size:12px;" |[[File:DunesCavesInfoboxImage.png|200px|center|link=Dunes Caves]][[Dunes Caves]] |
||
| Line 253: | Line 481: | ||
* 400 - 420 meters |
* 400 - 420 meters |
||
| style="text-align:center; font-size:12px;" | |
| style="text-align:center; font-size:12px;" | |
||
* [[ |
* [[Acid Mushroom]] |
||
* [[Copper Ore (Subnautica)|Copper Ore]] |
|||
* [[Gold (Subnautica)|Gold]] |
|||
* [[Large Resource Deposits|Large Silver Deposits]] |
|||
* [[Large Resource Deposits|Large Titanium Deposits]] |
|||
* [[Lead (Subnautica)|Lead]] |
|||
* [[Quartz (Subnautica)|Quartz]] |
|||
* [[Sea Crown|Sea Crown Seed]] |
|||
* [[Silver Ore (Subnautica)|Silver Ore]] |
|||
* [[Titanium (Subnautica)|Titanium]] |
|||
| style="text-align:left; font-size:12px;" | |
| style="text-align:left; font-size:12px;" | |
||
N/A |
|||
- |
|||
|- |
|- |
||
| style="text-align:center; font-size:12px;" |[[File: |
| style="text-align:center; font-size:12px;" |[[File:GR Caves Infobox.png|200px|center|link=Grand Reef Caves]][[Grand Reef Caves]] |
||
| style="text-align:center; font-size:12px;" | |
| style="text-align:center; font-size:12px;" | |
||
* |
* 120 - 410 meters |
||
| style="text-align:center; font-size:12px;" | |
| style="text-align:center; font-size:12px;" | |
||
* [[Diamond (Subnautica)|Diamond]] |
|||
* [[Limestone Outcrop]] |
|||
* [[Gold (Subnautica)|Gold]] |
|||
* [[Lithium (Subnautica)|Lithium]] |
|||
* [[Ruby (Subnautica)|Ruby]] |
|||
* [[Uraninite Crystal (Subnautica)|Uraninite Crystal]] |
|||
| style="text-align:left; font-size:12px;" | |
| style="text-align:left; font-size:12px;" | |
||
N/A |
|||
- |
|||
|- |
|- |
||
| style="text-align:center; font-size:12px;" |[[File:GrassyPlateausCavesInfoboxTrue.png|200px|center|link=Grassy Plateaus Caves]][[Grassy Plateaus Caves]] |
| style="text-align:center; font-size:12px;" |[[File:GrassyPlateausCavesInfoboxTrue.png|200px|center|link=Grassy Plateaus Caves]][[Grassy Plateaus Caves]] |
||
| Line 269: | Line 510: | ||
* 120 - 175 meters |
* 120 - 175 meters |
||
| style="text-align:center; font-size:12px;" | |
| style="text-align:center; font-size:12px;" | |
||
* [[ |
* [[Acid Mushroom]] |
||
* [[Copper Ore (Subnautica)|Copper Ore]] |
|||
* [[Sandstone Outcrop]] |
|||
* [[ |
* [[Coral Tube Sample]] |
||
* [[Gold (Subnautica)|Gold]] |
|||
* [[Lead (Subnautica)|Lead]] |
|||
* [[Quartz (Subnautica)|Quartz]] |
|||
* [[Salt Deposit (Subnautica)|Salt Deposit]] |
|||
* [[Sea Crown|Sea Crown Seed]] |
|||
* [[Silver Ore (Subnautica)|Silver Ore]] |
|||
* [[Eggs|Spadefish Egg]] |
|||
* [[Titanium (Subnautica)|Titanium]] |
|||
| style="text-align:left; font-size:12px;" | |
| style="text-align:left; font-size:12px;" | |
||
N/A |
|||
- |
|||
|- |
|- |
||
| style="text-align:center; font-size:12px;" |[[File:Lava_9.gif|200px|center|link=Inactive Lava Zone]][[Inactive Lava Zone]] |
| style="text-align:center; font-size:12px;" |[[File:Lava_9.gif|200px|center|link=Inactive Lava Zone]][[Inactive Lava Zone]] |
||
| Line 279: | Line 528: | ||
* 900 - 1300 meters |
* 900 - 1300 meters |
||
| style="text-align:center; font-size:12px;" | |
| style="text-align:center; font-size:12px;" | |
||
* [[Copper Ore (Subnautica)|Copper Ore]] |
|||
* [[Obsidian Outcrop]] |
|||
* [[Crystalline Sulfur (Subnautica)|Crystalline Sulfur]] |
|||
* [[Deep Shroom]] |
|||
* [[Diamond (Subnautica)|Diamond]] |
|||
* [[Gold (Subnautica)|Gold]] |
|||
* [[Kyanite (Subnautica)|Kyanite]] |
|||
* [[Large Resource Deposits (Subnautica)|Large Copper Deposit]] |
|||
* [[Large Resource Deposits (Subnautica)|Large Gold Deposit]] |
|||
* [[Large Resource Deposits (Subnautica)|Large Lead Deposit]] |
|||
* [[Large Resource Deposits (Subnautica)|Large Quartz Deposit]] |
|||
* [[Large Resource Deposits (Subnautica)|Large Silver Deposit]] |
|||
* [[Large Resource Deposits (Subnautica)|Large Titanium Deposit]] |
|||
* [[Large Resource Deposits (Subnautica)|Large Uraninite Deposit]] |
|||
* [[Lithium (Subnautica)|Lithium]] |
|||
* [[Magnetite (Subnautica)|Magnetite]] |
|||
* [[Nickel Ore (Subnautica)|Nickel Ore]] |
|||
* [[Quartz (Subnautica)|Quartz]] |
|||
* [[Ruby (Subnautica)|Ruby]] |
|||
| style="text-align:left; font-size:12px;" | |
| style="text-align:left; font-size:12px;" | |
||
* [[Alien Thermal Plant]] |
|||
* [[Lava Castle]] |
* [[Lava Castle]] |
||
* [[Precursor Thermal Power Generator]] |
|||
|- |
|- |
||
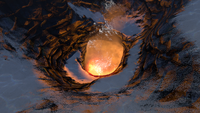
| style="text-align:center; font-size:12px;" |[[File:2016-02-07 00009.jpg|200px|center|link= |
| style="text-align:center; font-size:12px;" |[[File:2016-02-07 00009.jpg|200px|center|link=Jellyshroom Cave]][[Jellyshroom Cave]] |
||
| style="text-align:center; font-size:12px;" | |
| style="text-align:center; font-size:12px;" | |
||
* 180 - 300 meters |
* 180 - 300 meters |
||
| style="text-align:center; font-size:12px;" | |
| style="text-align:center; font-size:12px;" | |
||
* [[ |
* [[Eggs|Crabsnake Egg]] |
||
* [[ |
* [[Diamond (Subnautica)|Diamond]] |
||
* [[Gold (Subnautica)|Gold]] |
|||
* [[Large Resource Deposits (Subnautica)|Large Gold Deposit]] |
|||
* [[Large Resource Deposits (Subnautica)|Large Lithium Deposit]] |
|||
* [[Large Resource Deposits (Subnautica)|Large Magnetite Deposit]] |
|||
* [[Lithium (Subnautica)|Lithium]] |
|||
* [[Magnetite (Subnautica)|Magnetite]] |
|||
| style="text-align:left; font-size:12px;" | |
| style="text-align:left; font-size:12px;" | |
||
* [[Degasi Seabases|Degasi Seabase]] |
* [[Degasi Seabases|Degasi Seabase]] |
||
|- |
|- |
||
| style="text-align:center; font-size:12px;" |[[File:KelpForestCavesInfobox.png|200px|center|link=Kelp Forest Caves]][[Kelp Forest Caves]] |
| style="text-align:center; font-size:12px;" |[[File:KelpForestCavesInfobox.png|200px|center|link=Kelp Forest Caves]][[Kelp Forest Caves]] |
||
| Line 297: | Line 569: | ||
* 90 - 170 meters |
* 90 - 170 meters |
||
| style="text-align:center; font-size:12px;" | |
| style="text-align:center; font-size:12px;" | |
||
* [[ |
* [[Cave Sulfur]] |
||
* [[ |
* [[Eggs|Crashfish Egg]] |
||
* [[Copper Ore (Subnautica)|Copper Ore]] |
|||
| style="text-align:left; font-size:12px;" | - |
|||
* [[Eye Stalk|Eye Stalk Seed]] |
|||
* [[Gold (Subnautica)|Gold]] |
|||
* [[Lead (Subnautica)|Lead]] |
|||
* [[Quartz (Subnautica)|Quartz]] |
|||
* [[Silver Ore (Subnautica)|Silver Ore]] |
|||
* [[Titanium (Subnautica)|Titanium]] |
|||
| style="text-align:left; font-size:12px;" | N/A |
|||
|- |
|- |
||
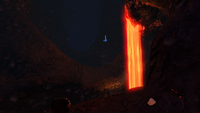
| style="text-align:center; font-size:12px;" |[[File:ALZ1.jpg|200px|center|link=Lava Lakes]][[Lava Lakes]] |
| style="text-align:center; font-size:12px;" |[[File:ALZ1.jpg|200px|center|link=Lava Lakes]][[Lava Lakes]] |
||
| style="text-align:center; font-size:12px;" | |
| style="text-align:center; font-size:12px;" | |
||
* 1300 - |
* 1300 - 1500 meters |
||
| style="text-align:center; font-size:12px;" | |
| style="text-align:center; font-size:12px;" | |
||
* [[Crystalline Sulfur (Subnautica)|Crystalline Sulfur]] |
|||
* [[Obsidian Outcrop]] |
|||
* [[Kyanite (Subnautica)|Kyanite]] |
|||
* [[Large Resource Deposits|Large Kyanite Deposit]] |
|||
| style="text-align:left; font-size:12px;" | |
| style="text-align:left; font-size:12px;" | |
||
* [[Primary Containment Facility]] |
* [[Primary Containment Facility]] |
||
| Line 313: | Line 594: | ||
* 550 - 1000 meters |
* 550 - 1000 meters |
||
| style="text-align:center; font-size:12px;" | |
| style="text-align:center; font-size:12px;" | |
||
* [[Acid Mushroom]] (Mountains Corridor) |
|||
- |
|||
* [[Copper Ore (Subnautica)|Copper Ore]] |
|||
* [[Crystalline Sulfur (Subnautica)|Crystalline Sulfur]] |
|||
* [[Diamond (Subnautica)|Diamond]] |
|||
* [[Deep Shroom]] (Tree Cove) |
|||
* [[Gel Sack (Subnautica)|Gel Sack]] |
|||
* [[Ghost Weed|Ghost Weed Seed]] |
|||
* [[Gold (Subnautica)|Gold]] |
|||
* [[Large Resource Deposits (Subnautica)|Large Gold Deposit]] |
|||
* [[Large Resource Deposits (Subnautica)|Large Lithium Deposit]] |
|||
* [[Large Resource Deposits (Subnautica)|Large Nickel Deposit]] |
|||
* [[Large Resource Deposits (Subnautica)|Large Quartz Deposit]] |
|||
* [[Large Resource Deposits (Subnautica)|Large Silver Deposit]] |
|||
* [[Large Resource Deposits (Subnautica)|Large Titanium Deposit]] |
|||
* [[Large Resource Deposits (Subnautica)|Large Uraninite Deposit]] |
|||
* [[Lead (Subnautica)|Lead]] |
|||
* [[Lithium (Subnautica)|Lithium]] |
|||
* [[Magnetite (Subnautica)|Magnetite]] |
|||
* [[Eggs|Mesmer Eggs]] (Bone Fields) |
|||
* [[Nickel Ore (Subnautica)|Nickel Ore]] |
|||
* [[Quartz (Subnautica)|Quartz]] |
|||
* [[Ruby (Subnautica)|Ruby]] |
|||
* [[Silver Ore (Subnautica)|Silver Ore]] |
|||
* [[Table Coral Sample (Subnautica)|Table Coral Sample]] (Junction) |
|||
* [[Titanium (Subnautica)|Titanium]] |
|||
* [[Uraninite Crystal (Subnautica)|Uraninite Crystal]] |
|||
| style="text-align:left; font-size:12px;" | |
| style="text-align:left; font-size:12px;" | |
||
* [[Disease Research Facility]] |
* [[Disease Research Facility]] |
||
* [[ |
* [[Gargantuan Fossil]] |
||
* [[Alien Arches|Ghost Forest Arch Cache]] |
|||
* [[Precursor Caches|Lost River Laboratory]] (1) |
|||
* [[Alien |
* [[Alien Caches|Lost River Laboratory]] |
||
|- |
|- |
||
| style="text-align:center; font-size:12px;" |[[File:20170424174843_1.jpg|200px|center|link= |
| style="text-align:center; font-size:12px;" |[[File:20170424174843_1.jpg|200px|center|link=Mountains Caves]][[Mountains Caves]] |
||
| style="text-align:center; font-size:12px;" | |
| style="text-align:center; font-size:12px;" | |
||
* 0 - 380 meters |
* 0 - 380 meters |
||
| style="text-align:center; font-size:12px;" | |
| style="text-align:center; font-size:12px;" | |
||
* [[ |
* [[Coral Tube Sample]] |
||
* [[Diamond (Subnautica)|Diamond]] |
|||
* [[Eye Stalk|Eye Stalk Seed]] |
|||
* [[Gold (Subnautica)|Gold]] |
|||
* [[Large Resource Deposits (Subnautica)|Large Salt Deposit]] |
|||
* [[Large Resource Deposits (Subnautica)|Large Quartz Deposit]] |
|||
* [[Lithium (Subnautica)|Lithium]] |
|||
* [[Magnetite (Subnautica)|Magnetite]] |
|||
* [[Ruby (Subnautica)|Ruby]] |
|||
* [[Uraninite Crystal (Subnautica)|Uraninite Crystal]] |
|||
| style="text-align:left; font-size:12px;" | |
| style="text-align:left; font-size:12px;" | |
||
* Thermal Vents ( |
* [[Thermal Vents]] (2) |
||
|- |
|- |
||
| style="text-align:center; font-size:12px;" |[[File:2016-02-11_00031.jpg|200px|center|link=Mushroom Forest Caves]][[Mushroom Forest Caves]] |
| style="text-align:center; font-size:12px;" |[[File:2016-02-11_00031.jpg|200px|center|link=Mushroom Forest Caves]][[Mushroom Forest Caves]] |
||
| Line 332: | Line 647: | ||
* 170 - 250 meters |
* 170 - 250 meters |
||
| style="text-align:center; font-size:12px;" | |
| style="text-align:center; font-size:12px;" | |
||
* [[Eggs|Boneshark Egg]] (Northwestern) |
|||
* [[Shale Outcrop]] |
|||
* [[Coral Tube Sample]] (Northeastern) |
|||
* [[Eggs|Cuddlefish Egg]] |
|||
* [[Diamond (Subnautica)|Diamond]] |
|||
* [[Gold (Subnautica)|Gold]] |
|||
* [[Eggs|Jellyray Egg]] (Northwestern) |
|||
* [[Large Resource Deposits (Subnautica)|Large Lithium Deposit]] (Northeastern) |
|||
* [[Lithium (Subnautica)|Lithium]] |
|||
| style="text-align:left; font-size:12px;" | |
| style="text-align:left; font-size:12px;" | |
||
* [[Cuddlefish]] Egg |
|||
- |
|||
|- |
|- |
||
| style="text-align:center; font-size:12px;" |[[File:SAFECAVES3.png|200px|center|link=Safe Shallows Caves]][[Safe Shallows Caves]] |
| style="text-align:center; font-size:12px;" |[[File:SAFECAVES3.png|200px|center|link=Safe Shallows Caves]][[Safe Shallows Caves]] |
||
| Line 340: | Line 662: | ||
* 10 - 75 meters |
* 10 - 75 meters |
||
| style="text-align:center; font-size:12px;" | |
| style="text-align:center; font-size:12px;" | |
||
* [[ |
* [[Acid Mushroom]] |
||
* [[Copper Ore (Subnautica)|Copper Ore]] |
|||
* [[Sandstone Outcrop]] |
|||
* [[Coral Tube Sample]] |
|||
* [[Eggs|Crashfish Egg]] |
|||
* [[Cave Sulfur]] |
|||
* [[Gold (Subnautica)|Gold]] |
|||
* [[Lead (Subnautica)|Lead]] |
|||
* [[Quartz (Subnautica)|Quartz]] |
|||
* [[Silver Ore (Subnautica)|Silver Ore]] |
|||
* [[Titanium (Subnautica)|Titanium]] |
|||
| style="text-align:left; font-size:12px;" | |
| style="text-align:left; font-size:12px;" | |
||
N/A |
|||
- |
|||
|- |
|- |
||
| style="text-align:center; font-size:12px;" |[[File:2016-02-08 00003.jpg|200px|center|link=Sea Treader's Tunnel Caves]][[Sea Treader's Tunnel Caves]] |
| style="text-align:center; font-size:12px;" |[[File:2016-02-08 00003.jpg|200px|center|link=Sea Treader's Tunnel Caves]][[Sea Treader's Tunnel Caves]] |
||
| Line 349: | Line 679: | ||
* 200 - 340 meters |
* 200 - 340 meters |
||
| style="text-align:center; font-size:12px;" | |
| style="text-align:center; font-size:12px;" | |
||
* [[Copper Ore (Subnautica)|Copper Ore]] |
|||
* [[Basalt Outcrop]] |
|||
* [[Deep Shroom]] |
|||
* [[Diamond (Subnautica)|Diamond]] |
|||
* [[Gel Sack (Subnautica)|Gel Sack]] |
|||
* [[Gold (Subnautica)|Gold]] |
|||
* [[Large Resource Deposits (Subnautica)|Large Lithium Deposit]] |
|||
* [[Large Resource Deposits (Subnautica)|Large Salt Deposit]] |
|||
* [[Lithium (Subnautica)|Lithium]] |
|||
* [[Quartz (Subnautica)|Quartz]] |
|||
* [[Ruby (Subnautica)|Ruby]] |
|||
* [[Salt Deposit (Subnautica)|Salt Deposit]] |
|||
* [[Titanium (Subnautica)|Titanium]] |
|||
| style="text-align:left; font-size:12px;" | |
| style="text-align:left; font-size:12px;" | |
||
N/A |
|||
- |
|||
|- |
|- |
||
| style="text-align:center; font-size:12px;" |[[File:Screen Shot 2017-03-02 at 17.20.59.png|200px|center|link=Underwater Islands Caves]][[Underwater Islands Caves]] |
| style="text-align:center; font-size:12px;" |[[File:Screen Shot 2017-03-02 at 17.20.59.png|200px|center|link=Underwater Islands Caves]][[Underwater Islands Caves]] |
||
| Line 357: | Line 698: | ||
* 205 - 255 meters |
* 205 - 255 meters |
||
| style="text-align:center; font-size:12px;" | |
| style="text-align:center; font-size:12px;" | |
||
* [[ |
* [[Coral Tube Sample]] |
||
* [[Diamond (Subnautica)|Diamond]] |
|||
* [[Limestone Outcrop]] |
|||
* [[Gold (Subnautica)|Gold]] |
|||
* [[Lithium (Subnautica)|Lithium]] |
|||
* [[Quartz (Subnautica)|Quartz]] |
|||
* [[Ruby (Subnautica)|Ruby]] |
|||
| style="text-align:left; font-size:12px;" | |
| style="text-align:left; font-size:12px;" | |
||
N/A |
|||
- |
|||
|} |
|} |
||
| Line 368: | Line 713: | ||
! class="unsortable" style="width: 25%; text-align: center;" |Biome |
! class="unsortable" style="width: 25%; text-align: center;" |Biome |
||
! class="unsortable" style="width: 25%; text-align: center;" |Depth Range |
! class="unsortable" style="width: 25%; text-align: center;" |Depth Range |
||
! class="unsortable" style="width: 25%; text-align: center;" | |
! class="unsortable" style="width: 25%; text-align: center;" |Resources |
||
! class="unsortable" style="width: 25%; text-align: center;" |Points of Interest |
! class="unsortable" style="width: 25%; text-align: center;" |Points of Interest |
||
|- |
|- |
||
| Line 375: | Line 720: | ||
* 150 - 330 meters |
* 150 - 330 meters |
||
| style="text-align:center; font-size:12px;" | |
| style="text-align:center; font-size:12px;" | |
||
* [[ |
* [[Coral Tube Sample]] |
||
* [[Copper Ore (Subnautica)|Copper Ore]] |
|||
* [[Limestone Outcrop]] |
|||
* [[Diamond (Subnautica)|Diamond]] |
|||
* [[Eggs|Gasopod Egg]] |
|||
* [[Gold (Subnautica)|Gold]] |
|||
* [[Large Resource Deposits (Subnautica)|Large Salt Deposit]] |
|||
* [[Lead (Subnautica)|Lead]] |
|||
* [[Lithium (Subnautica)|Lithium]] |
|||
* [[Metal Salvage (Subnautica)|Metal Salvage]] |
|||
* [[Quartz (Subnautica)|Quartz]] |
|||
* [[Ruby (Subnautica)|Ruby]] |
|||
* [[Salt Deposit (Subnautica)|Salt Deposit]] |
|||
* [[Silver Ore (Subnautica)|Silver Ore]] |
|||
* [[Table Coral Sample (Subnautica)|Table Coral Sample]] |
|||
* [[Titanium (Subnautica)|Titanium]] |
|||
| style="text-align:left; font-size:12px;" | |
| style="text-align:left; font-size:12px;" | |
||
N/A |
|||
- |
|||
|- |
|- |
||
| style="text-align:center; font-size:12px;" |[[File:LavaGeyserInfobox.png|200px|center|link=Lava Geyser]][[Lava Geyser]] |
| style="text-align:center; font-size:12px;" |[[File:LavaGeyserInfobox.png|200px|center|link=Lava Geyser]][[Lava Geyser]] |
||
| style="text-align:center; font-size:12px;" | |
| style="text-align:center; font-size:12px;" | |
||
* 60 - 560 meters |
|||
* Varies |
|||
| style="text-align:center; font-size:12px;" | |
| style="text-align:center; font-size:12px;" | |
||
* Varies |
|||
* [[Basalt Outcrop]] |
|||
* [[Sandstone Outcrop]] |
|||
* [[Limestone Outcrop]] |
|||
| style="text-align:left; font-size:12px;" | |
| style="text-align:left; font-size:12px;" | |
||
N/A |
|||
- |
|||
|- |
|- |
||
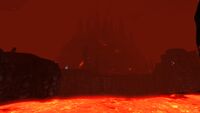
| style="text-align:center; font-size:12px;" |[[File:LavaCastle2.jpg|200px|center|link=Lava Castle]][[Lava Castle]] |
| style="text-align:center; font-size:12px;" |[[File:LavaCastle2.jpg|200px|center|link=Lava Castle]][[Lava Castle]] |
||
| Line 394: | Line 750: | ||
* 1100 - 1300 meters |
* 1100 - 1300 meters |
||
| style="text-align:center; font-size:12px;" | |
| style="text-align:center; font-size:12px;" | |
||
* [[Crystalline Sulfur (Subnautica)|Crystalline Sulfur]] |
|||
* [[Obsidian Outcrop]] |
|||
* [[Kyanite (Subnautica)|Kyanite]] |
|||
* [[Eggs|Lava Lizard Egg]] |
|||
* [[Magnetite (Subnautica)|Magnetite]] |
|||
| style="text-align:left; font-size:12px;" | |
| style="text-align:left; font-size:12px;" | |
||
* [[ |
* [[Alien Thermal Plant]] |
||
|- |
|- |
||
| style="text-align:center; font-size:12px;" |[[File:Infobox ILZC.png|200px|center|link=Inactive Lava Zone Corridor]][[Inactive Lava Zone Corridor]] |
| style="text-align:center; font-size:12px;" |[[File:Infobox ILZC.png|200px|center|link=Inactive Lava Zone Corridor]][[Inactive Lava Zone Corridor]] |
||
| style="text-align:center; font-size:12px;" | |
| style="text-align:center; font-size:12px;" | |
||
* |
* 800 - 1200 meters |
||
| style="text-align:center; font-size:12px;" | |
| style="text-align:center; font-size:12px;" | |
||
* [[Crystalline Sulfur (Subnautica)|Crystalline Sulfur]] |
|||
* [[Obsidian Outcrop]] |
|||
* [[Diamond (Subnautica)|Diamond]] |
|||
| style="text-align:left; font-size:12px;" | - |
|||
* [[Gold (Subnautica)|Gold]] |
|||
|} |
|||
* [[Large Resource Deposits (Subnautica)|Large Copper Deposit]] |
|||
===In Development=== |
|||
* [[Large Resource Deposits (Subnautica)|Large Kyanite Deposit]] |
|||
<nowiki/> |
|||
* [[Large Resource Deposits (Subnautica)|Large Lead Deposit]] |
|||
{| class="article-table sortable" style="width: 100%;" border="0" cellpadding="1" cellspacing="1" |
|||
* [[Large Resource Deposits (Subnautica)|Large Titanium Deposit]] |
|||
|- |
|||
* [[Lithium (Subnautica)|Lithium]] |
|||
! class="unsortable" style="width: 25%; text-align: center;" |Biome |
|||
* [[Nickel Ore (Subnautica)|Nickel Ore]] |
|||
! class="unsortable" style="width: 25%; text-align: center;" |Depth Range |
|||
* [[Silver Ore (Subnautica)|Silver Ore]] |
|||
! class="unsortable" style="width: 25%; text-align: center;" |Harvesting Nodes |
|||
| style="text-align:left; font-size:12px;" | N/A |
|||
|- |
|||
| style="text-align:center; font-size:12px;" |[[File:Void Infobox.png|200px|center|link=Void]][[Void]] |
|||
| style="text-align:center; font-size:12px;" | |
|||
* 0 - 3000 meters |
|||
| style="text-align:center; font-size:12px;" | |
|||
''Unknown'' |
|||
| style="text-align:left; font-size:12px;" | |
|||
''Unknown'' |
|||
|} |
|||
===Possible Biomes=== |
|||
{| class="article-table sortable" style="width: 100%;" border="0" cellpadding="1" cellspacing="1" |
|||
|- |
|||
! class="unsortable" style="width: 25%; text-align: center;" |Biome |
|||
! class="unsortable" style="width: 25%; text-align: center;" |Depth Range |
|||
! class="unsortable" style="width: 25%; text-align: center;" |Harvesting Nodes |
|||
! class="unsortable" style="width: 25%; text-align: center;" |Points of Interest |
|||
|- |
|||
| style="text-align:center; font-size:12px;" |[[File:BiosphereSheet Arctic page01.jpg|200px|center|link=Arctic Biome]][[Arctic Biome]] |
|||
| style="text-align:center; font-size:12px;" | |
|||
''Unknown'' |
|||
| style="text-align:center; font-size:12px;" | |
|||
''Unknown'' |
|||
| style="text-align:left; font-size:12px;" | |
|||
''Unknown'' |
|||
|- |
|||
| style="text-align:center; font-size:12px;" |[[File:LilypadWaterIslands LowRes.jpg|200px|center|link=Lilypad Islands]][[Lilypad Islands]] |
|||
| style="text-align:center; font-size:12px;" | |
|||
''Unknown'' |
|||
| style="text-align:center; font-size:12px;" | |
|||
''Unknown'' |
|||
| style="text-align:left; font-size:12px;" | |
|||
''Unknown'' |
|||
|- |
|||
| style="text-align:center; font-size:12px;" |[[File:TwistyBridges01.jpg|200px|center|link=Twisty Bridges]][[Twisty Bridges]] |
|||
| style="text-align:center; font-size:12px;" | |
|||
''Unknown'' |
|||
| style="text-align:center; font-size:12px;" | |
|||
''Unknown'' |
|||
| style="text-align:left; font-size:12px;" | |
|||
''Unknown'' |
|||
|} |
|} |
||
==Gallery== |
==Gallery== |
||
<gallery widths="200" spacing="small"> |
<gallery widths="200" spacing="small"> |
||
Subnautica-Depth-v1.2.png|Depth Chart of Biomes and Vehicles |
|||
BiosphereSheet_Arctic_page01.jpg|Arctic biome's reference sheet, made by the developers |
|||
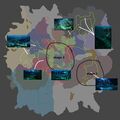
BiomeMapnew.png|Latest Clean Subnautica Map (28/10/2017) |
|||
7HDDouF.png|Early development '''biomes'''' reference sheet |
|||
7HDDouF.png|Early development biomes reference sheet |
|||
LostRiver_Layout.jpg|The [[Lost River]]'s early map |
|||
LostRiver Layout.jpg|The [[Lost River]]'s early map |
|||
Subnautica_NewMap.jpg| (Outdated) Latest [[Subnautica]] map (17/12/2016) |
|||
File:Subnautica Labelled Map Zones and Textures.png|Map that shows the names and terrain of subnautica |
|||
BiomeMap.PNG|(Outdated) Latest clean [[Subnautica]] map (17/12/2016) |
|||
BiomeMap2.png|(Outdated) Latest clean Subnautica map (25/02/2017) |
|||
BiomeMap_1024_new_May192017.png|Latest clean Subnautica Map (19/05/2017) |
|||
ILZ_Map_with_background_small.png|(Outdated) Latest [[Subnautica]] map with [[Inactive Lava Zone|ILZ]] - made by pie1055 |
|||
</gallery> |
</gallery> |
||
==Trivia== |
==Trivia== |
||
* There were three unused biomes during Subnautica's development, not including unused Biome IDs. These three biomes were the Arctic (represented as a light blue on the biome map), Twisty Bridges (represented as a green-blue color on the biome map), and the Lilypad Islands, which never received an associated biome color or were ever placed on the biome map during development. |
|||
* Developers' footages of '''biome''' generation can be seen [https://www.youtube.com/playlist?list=PLZmVk4US70ohuD_LO46SQlbRuorDjM1Ey on a playlist] from Russel Maekim's YouTube channel. |
|||
**The arctic biome received a few unique objects for it, such as snowy rocks, sounds, and even an unused cold effect. |
|||
* The game considers the inside of an [[Observatory]], [[Lifepod 5|Lifepod]], and [[Scanner Room]] to be separate '''biomes'''. This is also true for the [[Aurora]] and for some of the large [[wrecks]] in the [[Bulb Zone]] and [[Grassy Plateaus]] (labelled crashedShip and wreck, respectively). |
|||
**One of the Twisty Bridge regions actually appeared during development, and were seen in the first Early Access build. They also had a unique cut plant and unused reference models for the bridges. |
|||
* Early '''biome''' concepts included '''Crystal''' and '''Arctic''' biomes. Considering the '''Arctic''' has since gained a development work-sheet, it might be added in future updates after the release of the official game. |
|||
**The only thing the [https://subnautica.fandom.com/wiki/Cut_Content_(Subnautica)#Lilypad_Islands Lilypad Islands] received were some models. |
|||
* Early surface '''biome''' concepts were divided into '''Kelp Forest''', '''Dense Kelp Forest''', '''Sunny Kelp Forest''', '''Coral Reef''', '''Danger Reef''', '''Safe Shallows''', '''Grand Reefs''', and '''Floating Island'''. Four of these have since been fully developped/implemented ([[Safe Shallows]], [[Kelp Forest]], [[Floating Island]], [[Grand Reef]] and [[Deep Grand Reef]]). |
|||
**All three of these biomes were later repurposed for Below Zero. |
|||
* Early lava zone '''biome''' concepts were divided into '''Lava Zone''', '''Lava Bridges''', '''Inactive Lava Zones '''and '''Thermal Vents'''. These were all implemented in some form, though the '''Thermal Vents''' have been reduced to geological features rather than a full '''biome'''. |
|||
* Early development footages of biome generation can be seen [https://www.youtube.com/playlist?list=PLZmVk4US70ohuD_LO46SQlbRuorDjM1Ey on a playlist] from Russel Maekim's YouTube channel. |
|||
**This includes the unused Twisty Bridges biome. |
|||
* The game considers the inside of an [[Observatory (Subnautica)|Observatory]], [[Lifepod 5|Lifepod]], [[Scanner Room (Subnautica)|Scanner Room]], [[Alien Containment (Subnautica)|Alien Containment]], and inside the aquarium in the [[Primary Containment Facility]] to be completely separate biomes. |
|||
* Early surface biome concepts were divided into Kelp Forest, Dense Kelp Forest, Sunny Kelp Forest, Coral Reef, Danger Reef, Safe Shallows, Grand Reefs, and Floating Islands. |
|||
* Early lava zone biome concepts were divided into Lava Zone, Lava Bridges, Inactive Lava Zones, and Thermal Vents. |
|||
* The Lava Lakes and the Crater Edge are the only biomes that do not contain any Flora. |
|||
{{Navbox Biomes}} |
{{Navbox Biomes}} |
||
__NOTOC__ |
|||
[[de:Biome]] |
|||
[[es:Biomas]] |
|||
[[pl:Biomy]] |
|||
[[fr:Biomes]] |
|||
[[pt-br:Biomas]] |
|||
[[ru:Биомы]] |
|||
[[nl:Biomes (Subnautica)]] |
|||
[[Category:Biomes]] |
[[Category:Biomes]] |
||
[[Category:In Development]] |
|||
Latest revision as of 14:58, 10 March 2025
This article is about the Biomes in Subnautica. [[{{#explode:Biomes (Subnautica)|(}} (Below Zero)|Click here]] for information on this subject in Below Zero.
.png)
|
Read at own risk This article contains unmarked spoilers. Players new to the game would want to avoid or be cautious toward this article. |
Subnautica features a wide range of Biomes to explore and exploit. They all represent miniature ecosystems from the real world.
There is a huge variety of Biomes, from the vibrant Kelp Forest to the sizzling depths of the enigmatic Lava Lakes. Each Biome contains its own set of Flora and Fauna to discover and resources to harvest.
Biomes
Aquatic Biomes


Islands
| Biome | Depth Range | Resources | Points of Interest |
|---|---|---|---|
 |
|
N/A |
|
 |
|
Cave Biomes


Mini-Biomes
| Biome | Depth Range | Resources | Points of Interest |
|---|---|---|---|
 |
|
N/A | |
 |
|
|
N/A |
 |
|
||
 |
|
N/A |
Gallery
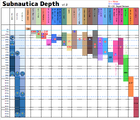
Depth Chart of Biomes and Vehicles

Latest Clean Subnautica Map (28/10/2017)
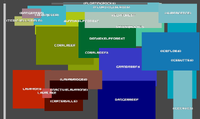
Early development biomes reference sheet
The Lost River's early map

Map that shows the names and terrain of subnautica


Trivia
- There were three unused biomes during Subnautica's development, not including unused Biome IDs. These three biomes were the Arctic (represented as a light blue on the biome map), Twisty Bridges (represented as a green-blue color on the biome map), and the Lilypad Islands, which never received an associated biome color or were ever placed on the biome map during development.
- The arctic biome received a few unique objects for it, such as snowy rocks, sounds, and even an unused cold effect.
- One of the Twisty Bridge regions actually appeared during development, and were seen in the first Early Access build. They also had a unique cut plant and unused reference models for the bridges.
- The only thing the Lilypad Islands received were some models.
- All three of these biomes were later repurposed for Below Zero.
- Early development footages of biome generation can be seen on a playlist from Russel Maekim's YouTube channel.
- This includes the unused Twisty Bridges biome.
- The game considers the inside of an Observatory, Lifepod, Scanner Room, Alien Containment, and inside the aquarium in the Primary Containment Facility to be completely separate biomes.
- Early surface biome concepts were divided into Kelp Forest, Dense Kelp Forest, Sunny Kelp Forest, Coral Reef, Danger Reef, Safe Shallows, Grand Reefs, and Floating Islands.
- Early lava zone biome concepts were divided into Lava Zone, Lava Bridges, Inactive Lava Zones, and Thermal Vents.
- The Lava Lakes and the Crater Edge are the only biomes that do not contain any Flora.
Lua error in package.lua at line 80: module 'Dev:Navbox' not found.