
User:GemmaBeepo/Sandbox: Difference between revisions
GemmaBeepo (talk | contribs) Tag: 2017 source edit |
GemmaBeepo (talk | contribs) Tag: 2017 source edit |
||
| Line 22: | Line 22: | ||
! class="unsortable" | Biome |
! class="unsortable" | Biome |
||
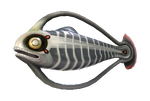
{{tr|name=Ampeel|filename=Ampeel Fauna.png|c2=Aggressive|c3= |
{{tr|name=Ampeel|filename=Ampeel Fauna.png|c2= * Aggressive|c3= |
||
* [[Blood Kelp Caves]] |
* [[Blood Kelp Caves]] |
||
* [[Blood Kelp Zone]] |
* [[Blood Kelp Zone]] |
||
* [[Bulb Zone]]}} |
* [[Bulb Zone]]}} |
||
{{tr|name=Biter|filename=Biter Fauna.png|c2=Aggressive|c3= |
{{tr|name=Biter|filename=Biter Fauna.png|c2= * Aggressive|c3= |
||
* [[Crash Zone Mesas]] |
* [[Crash Zone Mesas]] |
||
* [[Grassy Plateaus]] |
* [[Grassy Plateaus]] |
||
| Line 35: | Line 35: | ||
* [[Mountains Caves]]}} |
* [[Mountains Caves]]}} |
||
{{tr|name=Blighter|filename=Blighter Fauna.png|c2=Aggressive|c3= |
{{tr|name=Blighter|filename=Blighter Fauna.png|c2= * Aggressive|c3= |
||
* [[Blood Kelp Caves]] |
* [[Blood Kelp Caves]] |
||
* [[Blood Kelp Zone]]}} |
* [[Blood Kelp Zone]]}} |
||
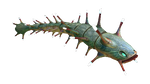
{{tr|name=Boneshark|filename=Boneshark Fauna.png|c2=Aggressive|c3= |
{{tr|name=Boneshark|filename=Boneshark Fauna.png|c2= * Aggressive|c3= |
||
* [[Bulb Zone]] |
* [[Bulb Zone]] |
||
* [[Crag Field]] |
* [[Crag Field]] |
||
| Line 47: | Line 47: | ||
* [[Underwater Islands]]}} |
* [[Underwater Islands]]}} |
||
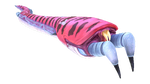
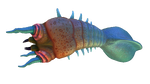
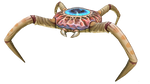
{{tr|name=Crabsnake|filename=Crabsnake Fauna.png|c2=Aggressive|c3= |
{{tr|name=Crabsnake|filename=Crabsnake Fauna.png|c2= * Aggressive|c3= |
||
* [[Jellyshroom Cave]]}} |
* [[Jellyshroom Cave]]}} |
||
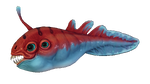
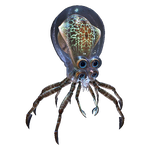
{{tr|name=Crabsquid|filename=Crabsquid Fauna.png|c2=Aggressive|c3= |
{{tr|name=Crabsquid|filename=Crabsquid Fauna.png|c2= * Aggressive|c3= |
||
* [[Deep Grand Reef]] |
* [[Deep Grand Reef]] |
||
* [[Blood Kelp Caves|Northern Blood Kelp Caves]] |
* [[Blood Kelp Caves|Northern Blood Kelp Caves]] |
||
| Line 58: | Line 58: | ||
** [[Lost River|Ghost Canyon]]}} |
** [[Lost River|Ghost Canyon]]}} |
||
{{tr|name=Crashfish (Subnautica)|display=Crashfish|filename=Crashfish Fauna.png|c2=Aggressive|c3= |
{{tr|name=Crashfish (Subnautica)|display=Crashfish|filename=Crashfish Fauna.png|c2= * Aggressive|c3= |
||
* [[Kelp Forest Caves]] |
* [[Kelp Forest Caves]] |
||
* [[Safe Shallows Caves]]}} |
* [[Safe Shallows Caves]]}} |
||
{{tr|name=Lava Lizard|filename=Lava Lizard Fauna.png|c2=Aggressive|c3= |
{{tr|name=Lava Lizard|filename=Lava Lizard Fauna.png|c2= * Aggressive|c3= |
||
* [[Inactive Lava Zone Corridor]] |
* [[Inactive Lava Zone Corridor]] |
||
* [[Inactive Lava Zone]] |
* [[Inactive Lava Zone]] |
||
| Line 68: | Line 68: | ||
* [[Lava Castle]]}} |
* [[Lava Castle]]}} |
||
{{tr|name=Mesmer|filename=Mesmer Fauna.png|c2=Aggressive|c3= |
{{tr|name=Mesmer|filename=Mesmer Fauna.png|c2= * Aggressive|c3= |
||
* [[Bulb Zone]] |
* [[Bulb Zone]] |
||
* [[Crag Field]] |
* [[Crag Field]] |
||
| Line 76: | Line 76: | ||
* [[Mushroom Forest|Northeastern Mushroom Forest]]}} |
* [[Mushroom Forest|Northeastern Mushroom Forest]]}} |
||
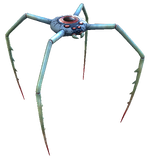
{{tr|name=River Prowler|filename=River Prowler Fauna.png|c2=Aggressive|c3= |
{{tr|name=River Prowler|filename=River Prowler Fauna.png|c2= * Aggressive|c3= |
||
* [[Lost River]] |
* [[Lost River]] |
||
** [[Lost River|Bone Fields]] |
** [[Lost River|Bone Fields]] |
||
| Line 83: | Line 83: | ||
** [[Lost River|Mountains Corridor]]}} |
** [[Lost River|Mountains Corridor]]}} |
||
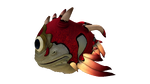
{{tr|name=Sand Shark|filename=Sand Shark Fauna.png|c2=Aggressive|c3= |
{{tr|name=Sand Shark|filename=Sand Shark Fauna.png|c2= * Aggressive|c3= |
||
* [[Crash Zone]] |
* [[Crash Zone]] |
||
* [[Dunes]] |
* [[Dunes]] |
||
* [[Grassy Plateaus]]}} |
* [[Grassy Plateaus]]}} |
||
{{tr|name=Stalker|filename=Stalker Fauna.png|c2=Aggressive|c3= |
{{tr|name=Stalker|filename=Stalker Fauna.png|c2= * Aggressive|c3= |
||
* [[Crash Zone]] |
* [[Crash Zone]] |
||
* [[Kelp Forest]] |
* [[Kelp Forest]] |
||
| Line 94: | Line 94: | ||
* [[Primary Containment Facility#Aquarium|Primary Containment Facility Aquarium]]}} |
* [[Primary Containment Facility#Aquarium|Primary Containment Facility Aquarium]]}} |
||
{{tr|name=Warper|filename=Warper Fauna.png|c2=Aggressive |
{{tr|name=Warper|filename=Warper Fauna.png|c2= * Aggressive (when target has [[Kharaa]]) |
||
* Passive when target is not infected|c3= |
|||
* [[Blood Kelp Caves]] |
* [[Blood Kelp Caves]] |
||
* [[Blood Kelp Zone]] |
* [[Blood Kelp Zone]] |
||
| Line 117: | Line 118: | ||
! class="unsortable" | Biome |
! class="unsortable" | Biome |
||
{{tr|name=Bladderfish (Subnautica)|display=Bladderfish|filename=Bladderfish Fauna.png|c2=Passive|c3= |
{{tr|name=Bladderfish (Subnautica)|display=Bladderfish|filename=Bladderfish Fauna.png|c2= * Passive|c3= |
||
* [[Crash Zone Mesas]] |
* [[Crash Zone Mesas]] |
||
* [[Dunes]] |
* [[Dunes]] |
||
| Line 129: | Line 130: | ||
* [[Safe Shallows]]}} |
* [[Safe Shallows]]}} |
||
{{tr|name=Boomerang (Subnautica)|display=Boomerang|filename=Boomerang Fauna.png|c2=Passive|c3= |
{{tr|name=Boomerang (Subnautica)|display=Boomerang|filename=Boomerang Fauna.png|c2= * Passive|c3= |
||
* [[Bulb Zone]] |
* [[Bulb Zone]] |
||
* [[Crag Field]] |
* [[Crag Field]] |
||
| Line 147: | Line 148: | ||
* [[Underwater Islands]]}} |
* [[Underwater Islands]]}} |
||
{{tr|name=Crimson Ray|filename=Crimson Ray Fauna.png|c2=Passive|c3= |
{{tr|name=Crimson Ray|filename=Crimson Ray Fauna.png|c2= * Passive|c3= |
||
* [[Inactive Lava Zone]] |
* [[Inactive Lava Zone]] |
||
* [[Lava Lakes]]}} |
* [[Lava Lakes]]}} |
||
{{tr|name=Cuddlefish|filename=Cuddlefish Fauna.png|c2=Passive|c3= |
{{tr|name=Cuddlefish|filename=Cuddlefish Fauna.png|c2= * Passive|c3= |
||
*[[Eggs]] |
*[[Eggs]] |
||
** [[Degasi Seabases|Deep Grand Reef Degasi Base]] |
** [[Degasi Seabases|Deep Grand Reef Degasi Base]] |
||
| Line 158: | Line 159: | ||
** [[Mushroom Forest Caves]]}} |
** [[Mushroom Forest Caves]]}} |
||
{{tr|name=Eyeye|filename=Eyeye Fauna.png|c2=Passive|c3= |
{{tr|name=Eyeye|filename=Eyeye Fauna.png|c2= * Passive|c3= |
||
* [[Bulb Zone]] |
* [[Bulb Zone]] |
||
* [[Bulb Zone Caves]] |
* [[Bulb Zone Caves]] |
||
| Line 170: | Line 171: | ||
* [[Sea Treader's Tunnel Caves]]}} |
* [[Sea Treader's Tunnel Caves]]}} |
||
{{tr|name=Garryfish|filename=Garryfish Fauna.png|c2=Passive|c3= |
{{tr|name=Garryfish|filename=Garryfish Fauna.png|c2= * Passive|c3= |
||
* [[Crash Zone Mesas]] |
* [[Crash Zone Mesas]] |
||
* [[Dunes]] |
* [[Dunes]] |
||
| Line 178: | Line 179: | ||
* [[Underwater Islands]]}} |
* [[Underwater Islands]]}} |
||
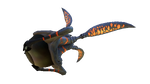
{{tr|name=Gasopod|filename=Gasopod Fauna.png|c2=Passive|c3= |
{{tr|name=Gasopod|filename=Gasopod Fauna.png|c2= * Passive|c3= |
||
* [[Crash Zone Mesas]] |
* [[Crash Zone Mesas]] |
||
* [[Dunes]] |
* [[Dunes]] |
||
* [[Safe Shallows]]}} |
* [[Safe Shallows]]}} |
||
{{tr|name=Ghostray|filename=Ghostray Fauna.png|c2=Passive|c3= |
{{tr|name=Ghostray|filename=Ghostray Fauna.png|c2= * Passive|c3= |
||
* [[Lost River]] |
* [[Lost River]] |
||
** [[Lost River|Bone Fields]] |
** [[Lost River|Bone Fields]] |
||
| Line 192: | Line 193: | ||
** [[Lost River|Mountains Corridor]]}} |
** [[Lost River|Mountains Corridor]]}} |
||
{{tr|name=Holefish|filename=Holefish Fauna.png|c2=|c3= |
{{tr|name=Holefish|filename=Holefish Fauna.png|c2= * Passive|c3= |
||
* [[Bulb Zone Caves]] |
* [[Bulb Zone Caves]] |
||
* [[Crash Zone]] |
* [[Crash Zone]] |
||
| Line 200: | Line 201: | ||
* [[Safe Shallows Caves]]}} |
* [[Safe Shallows Caves]]}} |
||
{{tr|name=Hoopfish (Subnautica)|display=Hoopfish|filename=Hoopfish Fauna.png|c2=Passive|c3= |
{{tr|name=Hoopfish (Subnautica)|display=Hoopfish|filename=Hoopfish Fauna.png|c2= * Passive|c3= |
||
* [[Bulb Zone]] |
* [[Bulb Zone]] |
||
* [[Crag Field]] |
* [[Crag Field]] |
||
| Line 214: | Line 215: | ||
* [[Underwater Islands]]}} |
* [[Underwater Islands]]}} |
||
{{tr|name=Hoverfish|filename=Hoverfish Fauna.png|c2=Passive|c3= |
{{tr|name=Hoverfish|filename=Hoverfish Fauna.png|c2= * Passive|c3= |
||
* [[Crash Zone]] |
* [[Crash Zone]] |
||
* [[Crash Zone Mesas]] |
* [[Crash Zone Mesas]] |
||
| Line 220: | Line 221: | ||
* [[Primary Containment Facility#Aquarium|Primary Containment Facility Aquarium]]}} |
* [[Primary Containment Facility#Aquarium|Primary Containment Facility Aquarium]]}} |
||
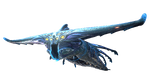
{{tr|name=Jellyray|filename=Jellyray Fauna.png|c2=Passive|c3= |
{{tr|name=Jellyray|filename=Jellyray Fauna.png|c2= * Passive|c3= |
||
* [[Deep Grand Reef]] |
* [[Deep Grand Reef]] |
||
* [[Mushroom Forest]]}} |
* [[Mushroom Forest]]}} |
||
{{tr|name=Magmarang|filename=Magmarang Fauna.png|c2=Passive|c3= |
{{tr|name=Magmarang|filename=Magmarang Fauna.png|c2= * Passive|c3= |
||
* [[Inactive Lava Zone]] |
* [[Inactive Lava Zone]] |
||
* [[Inactive Lava Zone Corridor]] |
* [[Inactive Lava Zone Corridor]] |
||
* [[Lava Lakes]]}} |
* [[Lava Lakes]]}} |
||
{{tr|name=Oculus|filename=Oculus Fauna.png|c2=Passive|c3= |
{{tr|name=Oculus|filename=Oculus Fauna.png|c2= * Passive|c3= |
||
* [[Jellyshroom Cave]] |
* [[Jellyshroom Cave]] |
||
* [[Primary Containment Facility#Aquarium|Primary Containment Facility Aquarium]]}} |
* [[Primary Containment Facility#Aquarium|Primary Containment Facility Aquarium]]}} |
||
{{tr|name=Peeper|filename=Peeper Fauna.png|c2=Passive|c3= |
{{tr|name=Peeper|filename=Peeper Fauna.png|c2= * Passive|c3= |
||
* [[Bulb Zone]] |
* [[Bulb Zone]] |
||
* [[Crash Zone]] |
* [[Crash Zone]] |
||
| Line 249: | Line 250: | ||
* [[Primary Containment Facility#Aquarium|Primary Containment Facility Aquarium]]}} |
* [[Primary Containment Facility#Aquarium|Primary Containment Facility Aquarium]]}} |
||
{{tr|name=Rabbit Ray|filename=Rabbit Ray Fauna.png|c2=Passive|c3= |
{{tr|name=Rabbit Ray|filename=Rabbit Ray Fauna.png|c2= * Passive|c3= |
||
* [[Crash Zone]] |
* [[Crash Zone]] |
||
* [[Crash Zone Mesas]] |
* [[Crash Zone Mesas]] |
||
| Line 256: | Line 257: | ||
* [[Safe Shallows]]}} |
* [[Safe Shallows]]}} |
||
{{tr|name=Red Eyeye|filename=Red Eyeye Fauna.png|c2=Passive|c3= |
{{tr|name=Red Eyeye|filename=Red Eyeye Fauna.png|c2= * Passive|c3= |
||
* [[Inactive Lava Zone]] |
* [[Inactive Lava Zone]] |
||
* [[Inactive Lava Zone Corridor]] |
* [[Inactive Lava Zone Corridor]] |
||
* [[Lava Lakes]]}} |
* [[Lava Lakes]]}} |
||
{{tr|name=Reginald|filename=Reginald Fauna.png|c2=Passive|c3= |
{{tr|name=Reginald|filename=Reginald Fauna.png|c2= * Passive|c3= |
||
* [[Crash Zone]] |
* [[Crash Zone]] |
||
* [[Crash Zone Mesas]] |
* [[Crash Zone Mesas]] |
||
| Line 279: | Line 280: | ||
* [[Sparse Reef]]}} |
* [[Sparse Reef]]}} |
||
{{tr|name=Skyray (Subnautica)|display=Skyray|filename=Skyray Fauna.png|c2=Passive|c3= |
{{tr|name=Skyray (Subnautica)|display=Skyray|filename=Skyray Fauna.png|c2= * Passive|c3= |
||
* [[Crash Zone]] |
* [[Crash Zone]] |
||
* [[Floating Island]] |
* [[Floating Island]] |
||
| Line 285: | Line 286: | ||
* [[Lifepod 5]]}} |
* [[Lifepod 5]]}} |
||
{{tr|name=Spadefish|filename=Spadefish Fauna.png|c2=Passive|c3= |
{{tr|name=Spadefish|filename=Spadefish Fauna.png|c2= * Passive|c3= |
||
* [[Deep Sparse Reef]] |
* [[Deep Sparse Reef]] |
||
* [[Dunes]] |
* [[Dunes]] |
||
| Line 297: | Line 298: | ||
* [[Underwater Islands]]}} |
* [[Underwater Islands]]}} |
||
{{tr|name=Spinefish (Subnautica)|display=Spinefish|filename=Spinefish Fauna.png|c2=Passive|c3= |
{{tr|name=Spinefish (Subnautica)|display=Spinefish|filename=Spinefish Fauna.png|c2= * Passive|c3= |
||
* [[Blood Kelp Caves]] |
* [[Blood Kelp Caves]] |
||
* [[Blood Kelp Zone]] |
* [[Blood Kelp Zone]] |
||
| Line 317: | Line 318: | ||
! class="unsortable" | Biome |
! class="unsortable" | Biome |
||
{{tr|name=Amoeboid|filename=Amoeboid Fauna.png|c2=Passive|c3= |
{{tr|name=Amoeboid|filename=Amoeboid Fauna.png|c2= * Passive|c3= |
||
* [[Disease Research Facility]] |
* [[Disease Research Facility]] |
||
* [[Lost River]] |
* [[Lost River]] |
||
| Line 327: | Line 328: | ||
* [[Lost River Laboratory Cache]]}} |
* [[Lost River Laboratory Cache]]}} |
||
{{tr|name=Ancient Floater|filename=Ancient Floater Fauna.png|c2=Passive|c3= |
{{tr|name=Ancient Floater|filename=Ancient Floater Fauna.png|c2= * Passive|c3= |
||
* [[Floating Island]] |
* [[Floating Island]] |
||
* [[Blood Kelp Zone|Northern Blood Kelp Zone]] |
* [[Blood Kelp Zone|Northern Blood Kelp Zone]] |
||
* [[Underwater Islands]]}} |
* [[Underwater Islands]]}} |
||
{{tr|name=Bleeder|filename=Bleeder Fauna.png|c2=Aggressive|c3= |
{{tr|name=Bleeder|filename=Bleeder Fauna.png|c2= * Aggressive|c3= |
||
* [[Aurora]] |
* [[Aurora]] |
||
* [[Deep Sparse Reef]] |
* [[Deep Sparse Reef]] |
||
| Line 340: | Line 341: | ||
** [[Lost River|Bone Fields]]}} |
** [[Lost River|Bone Fields]]}} |
||
{{tr|name=Blood Crawler|filename=Blood Crawler Fauna.png|c2=Aggressive|c3= |
{{tr|name=Blood Crawler|filename=Blood Crawler Fauna.png|c2= * Aggressive|c3= |
||
* [[Blood Kelp Zone]] |
* [[Blood Kelp Zone]] |
||
* [[Blood Kelp Caves]] |
* [[Blood Kelp Caves]] |
||
| Line 346: | Line 347: | ||
** [[Lost River|Ghost Forest]]}} |
** [[Lost River|Ghost Forest]]}} |
||
{{tr|name=Cave Crawler|filename=Cave Crawler Fauna.png|c2=Aggressive|c3= |
{{tr|name=Cave Crawler|filename=Cave Crawler Fauna.png|c2= * Aggressive|c3= |
||
* [[Aurora]] |
* [[Aurora]] |
||
* [[Dunes]] |
* [[Dunes]] |
||
| Line 355: | Line 356: | ||
* [[Underwater Islands Caves]]}} |
* [[Underwater Islands Caves]]}} |
||
{{tr|name=Floater|filename=Floater Fauna.png|c2=Passive|c3= |
{{tr|name=Floater|filename=Floater Fauna.png|c2= * Passive|c3= |
||
* [[Grassy Plateaus]] |
* [[Grassy Plateaus]] |
||
* [[Safe Shallows]]}} |
* [[Safe Shallows]]}} |
||
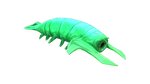
{{tr|name=Lava Larva|filename=Lava Larva Fauna.png|c2=Passive|c3= |
{{tr|name=Lava Larva|filename=Lava Larva Fauna.png|c2= * Passive|c3= |
||
* [[Inactive Lava Zone]] |
* [[Inactive Lava Zone]] |
||
* [[Inactive Lava Zone Corridor]] |
* [[Inactive Lava Zone Corridor]] |
||
* [[Lava Lakes]]}} |
* [[Lava Lakes]]}} |
||
{{tr|name=Rockgrub (Subnautica)|display=Rockgrub|filename=Rockgrub Fauna.png|c2=Passive|c3= |
{{tr|name=Rockgrub (Subnautica)|display=Rockgrub|filename=Rockgrub Fauna.png|c2= * Passive|c3= |
||
* [[Bulb Zone Caves]] |
* [[Bulb Zone Caves]] |
||
* [[Deep Sparse Reef]] |
* [[Deep Sparse Reef]] |
||
| Line 372: | Line 373: | ||
* [[Mountains Caves]]}} |
* [[Mountains Caves]]}} |
||
{{tr|name=Shuttlebug|filename=Shuttlebug Fauna.png|c2=Passive|c3= |
{{tr|name=Shuttlebug|filename=Shuttlebug Fauna.png|c2= * Passive|c3= |
||
* [[Bulb Zone]] |
* [[Bulb Zone]] |
||
* [[Crag Field]] |
* [[Crag Field]] |
||
| Line 398: | Line 399: | ||
! class="unsortable" | Biome |
! class="unsortable" | Biome |
||
{{tr|name=Ghost Leviathan|filename=Ghost Leviathan Fauna.png|c2=Aggressive|c3= |
{{tr|name=Ghost Leviathan|filename=Ghost Leviathan Fauna.png|c2= * Aggressive|c3= |
||
* [[Crater Edge]] |
* [[Crater Edge]] |
||
* [[Grand Reef]] |
* [[Grand Reef]] |
||
* [[Blood Kelp Zone|Northern Blood Kelp Zone]]}} |
* [[Blood Kelp Zone|Northern Blood Kelp Zone]]}} |
||
{{tr|name=Ghost Leviathan Juvenile|filename=Ghost Leviathan Fauna.png|c2=Aggressive|c3= |
{{tr|name=Ghost Leviathan Juvenile|filename=Ghost Leviathan Fauna.png|c2= * Aggressive|c3= |
||
* [[Lost River|Bones Field]] |
* [[Lost River|Bones Field]] |
||
* [[Lost River|Ghost Forest]] |
* [[Lost River|Ghost Forest]] |
||
* [[Lost River|Mountains Corridor]]}} |
* [[Lost River|Mountains Corridor]]}} |
||
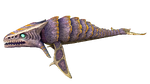
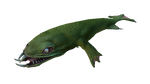
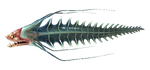
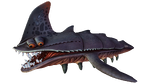
{{tr|name=Reaper Leviathan|filename=Reaper Leviathan Fauna.png|c2=Aggressive|c3= |
{{tr|name=Reaper Leviathan|filename=Reaper Leviathan Fauna.png|c2= * Aggressive|c3= |
||
* [[Crash Zone]] |
* [[Crash Zone]] |
||
* [[Crash Zone Mesas]] |
* [[Crash Zone Mesas]] |
||
| Line 414: | Line 415: | ||
* [[Mountains]]}} |
* [[Mountains]]}} |
||
{{tr|name=Reefback Leviathan|filename=Reefback Leviathan Fauna.png|c2=Passive|c3= |
{{tr|name=Reefback Leviathan|filename=Reefback Leviathan Fauna.png|c2= * Passive|c3= |
||
* [[Blood Kelp Zone]] |
* [[Blood Kelp Zone]] |
||
* [[Bulb Zone]] |
* [[Bulb Zone]] |
||
| Line 423: | Line 424: | ||
* [[Underwater Islands]]}} |
* [[Underwater Islands]]}} |
||
{{tr|name=Reefback Leviathan Juvenile|filename=Reefback Leviathan Juvenile Fauna.png|c2=Passive|c3= |
{{tr|name=Reefback Leviathan Juvenile|filename=Reefback Leviathan Juvenile Fauna.png|c2= * Passive|c3= |
||
* [[Blood Kelp Zone]] |
* [[Blood Kelp Zone]] |
||
* [[Bulb Zone]] |
* [[Bulb Zone]] |
||
| Line 432: | Line 433: | ||
* [[Underwater Islands]]}} |
* [[Underwater Islands]]}} |
||
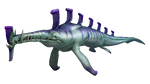
{{tr|name=Sea Dragon Leviathan|filename=Sea Dragon Leviathan Fauna.png|c2=Aggressive|c3= |
{{tr|name=Sea Dragon Leviathan|filename=Sea Dragon Leviathan Fauna.png|c2= * Aggressive|c3= |
||
* [[Inactive Lava Zone]] |
* [[Inactive Lava Zone]] |
||
* [[Lava Lakes]]}} |
* [[Lava Lakes]]}} |
||
{{tr|name=Sea Emperor Leviathan|filename=Sea Emperor Leviathan Fauna.png|c2=Passive|c3= |
{{tr|name=Sea Emperor Leviathan|filename=Sea Emperor Leviathan Fauna.png|c2= * Passive|c3= |
||
* [[Primary Containment Facility#Aquarium|Primary Containment Facility Aquarium]]}} |
* [[Primary Containment Facility#Aquarium|Primary Containment Facility Aquarium]]}} |
||
{{tr|name=Sea Emperor Leviathan Baby|filename=Sea Emperor Leviathan Baby Fauna.png|c2=Passive|c3= |
{{tr|name=Sea Emperor Leviathan Baby|filename=Sea Emperor Leviathan Baby Fauna.png|c2= * Passive|c3= |
||
* [[Primary Containment Facility#Aquarium|Primary Containment Facility Aquarium]]}} |
* [[Primary Containment Facility#Aquarium|Primary Containment Facility Aquarium]]}} |
||
{{tr|name=Sea Emperor Leviathan Juvenile|filename=Sea Emperor Leviathan Juvenile Fauna.png|c2=Passive|c3= |
{{tr|name=Sea Emperor Leviathan Juvenile|filename=Sea Emperor Leviathan Juvenile Fauna.png|c2= * Passive|c3= |
||
* [[Blood Kelp Zone|Northern Blood Kelp Zone]] |
* [[Blood Kelp Zone|Northern Blood Kelp Zone]] |
||
* [[Crag Field]] |
* [[Crag Field]] |
||
| Line 449: | Line 450: | ||
* [[Mountains]]}} |
* [[Mountains]]}} |
||
{{tr|name=Sea Treader Leviathan|filename=Sea Treader Leviathan Fauna.png|c2=Defensive|c3= |
{{tr|name=Sea Treader Leviathan|filename=Sea Treader Leviathan Fauna.png|c2= * Defensive|c3= |
||
* [[Grand Reef]] |
* [[Grand Reef]] |
||
* [[Sea Treader's Path]] |
* [[Sea Treader's Path]] |
||
Revision as of 23:46, 24 July 2021
.png)
|
Read at own risk This article contains unmarked spoilers. Players new to the game would want to avoid or be cautious toward this article. |
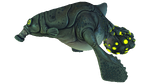
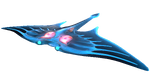
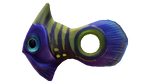
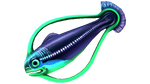
Fauna is the term for animals, in this case, the animals of Planet 4546B. Fauna in Subnautica can be found all over the planet, from the mysterious depths of the Crystal Caves to the vibrant Safe Shallows, and the fiery pits of the Lava Lakes.
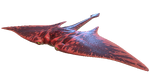
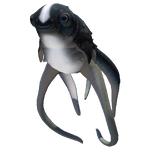
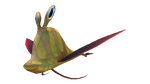
Fauna on Planet 4546B comes in all shapes, sizes, and forms. Ranging from the tiny, cave-dwelling Rockgrub, to the colossal Sea Dragon Leviathan that spews molten minerals from its mouth. Fauna on Planet 4546B is capable of enduring and adapting to various environments, although previously unable to thrive due to the presence of the Kharaa Bacterium. Certain species of small fauna can sometimes be seen forming mostly non-interactive shoals. Fauna on 4546B also has yellow blood. The fact that the appearance of some species of the planet being similar to that of planet Earth species can be explained as a simple case of convergent evolution.
The player can scan Fauna with the Scanner, the same as they would with Flora and objects, allowing them to view information about the creatures in their PDA.
In Subnautica additional scans after unlocking the Data Bank Entry for that particular species of Fauna alert the player as to whether or not the specimen is infected with Kharaa. As Kharaa has been eliminated from the wild in Below Zero this function is not present.
Reproduction
Most known fauna species on Planet 4546B are simultaneous hermaphrodites, meaning that they have a single-sex capable of playing the role of either the male or female in reproduction and every individual being able to lay eggs and fertilize them. Two parents are still required to fertilize the eggs once laid, making it sexual reproduction. At least one fauna species is exempt from this and reproduces entirely asexually, although the norm for the planet is sexual reproduction, as can be observed in all species that can be placed in an Alien Containment unit who will require two individuals of their species to produce eggs. The only species that does not reproduce is the Warper due as they are artificial fauna.
The only one of the complex fauna species on the planet known to be an exception to this rule is the Sea Emperor Leviathan species, which is entirely asexual and does not require a mate. The Sea Dragon Leviathan may share this method of reproduction as it is likely the closest living relative of the Sea Emperor Leviathan and was being studied by the Precursor Race to learn more about the Sea Emperor's reproduction.
Fauna of The Crater
Carnivores
| Fauna | Attitude | Biome |
|---|---|---|
 |
|
|
 |
|
|
 |
|
|
 |
|
|
 |
|
|
 |
|
|
 |
|
|
 |
|
|
 |
|
|
 |
|
|
 |
|
|
 |
|
|
 |
|
Herbivores
| Fauna | Attitude | Biome |
|---|---|---|
 |
|
|
 |
|
|
 |
|
|
 |
|
|
 |
|
|
 |
|
|
 |
|
|
 |
|
|
 |
|
|
 |
|
|
 |
|
|
 |
|
|
 |
|
|
 |
|
|
 |
|
|
 |
|
|
 |
|
|
 |
|
|
 |
|
|
 |
|
|
 |
|
Scavengers and Parasites
| Fauna | Attitude | Biome |
|---|---|---|
 |
|
|
 |
|
|
 |
|
|
 |
|
|
 |
|
|
 |
|
|
 |
|
|
 |
|
|
 |
|
Leviathan Class
| Fauna | Attitude | Biome |
|---|---|---|
 |
|
|
|
|
|
 |
|
|
 |
|
|
 |
|
|
 |
|
|
 |
|
|
 |
|
|
 |
|
|
 |
|
Extinct Species
| Species | Location of Remains | Age |
|---|---|---|
 |
|
Unknown |
 |
|
Unknown |
 |
~1,000,000 years | |
 |
~3,000,000 years | |
 |
~1000 years |
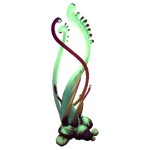
Gallery
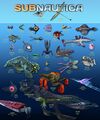
Subnautica fauna Sheet 1
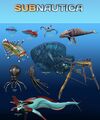
Subnautica fauna Sheet 2
Various fauna & flora renders
Various fauna renders


Fauna of Sector Zero
Carnivores
| Fauna | Attitude | Biome |
|---|---|---|
 |
Aggressive |
|
 |
Aggressive |
|
|
Defensive |
|
 |
Aggressive |
|
 |
Passive |
|
 |
Passive |
|
 |
Defensive |
|
 |
Passive |
|
 |
Aggressive |
|
 |
Aggressive |
|
 |
Passive |
|
 |
Aggressive |
|
 |
Aggressive |
|
 |
Aggressive |
Herbivores
| Fauna | Attitude | Biome |
|---|---|---|
 |
Passive |
|
 |
Passive |
|
|
Passive |
||
|
Passive |
|
|
Passive |
|
 |
Passive |
|
 |
Defensive |
|
 |
Passive |
|
 |
Passive |
|
 |
Passive |
|
|
Passive |
|
 |
Defensive |
|
 |
Passive |
|
 |
Passive |
|
|
Passive |
|
|
Passive |
|
 |
Passive |
|
 |
Passive |
|
 |
Passive |
|
 |
Passive |
|
Scavengers & Parasites
| Fauna | Attitude | Biome |
|---|---|---|
|
Passive |
Leviathans
| Fauna | Attitude | Biome |
|---|---|---|
 |
Aggressive |
|
 |
Passive |
|
|
Aggressive |
||
 |
Passive |
|
 |
Aggressive |
|
 |
Passive |
|
 |
Aggressive |
Extinct Species
| Fauna | Location of Remains | Age |
|---|---|---|
| Frozen Leviathan |
~1000 years at most |
Trivia
- As of the Dangerous Creatures update, all fauna have yellow blood. Before this update, all fauna had red blood. This is due to the ESRB giving Subnautica a higher rating than expected due to red blood.
- Scientifically speaking, the fauna of planet 4546B might have high concentrations of vanabin in their blood.
- Fauna were once intended to possess inherent attributes, that would have caused them to exhibit unique behaviors. These included, e.g., "Fertile" (occasionally lay eggs that can be hatched), "Alpha" (attacked the player if other creatures were killed by the player in the immediate vicinity), "Complex" (specimens take longer to scan), "Greater" (specimens are of larger size and weight). This, however, was scrapped upon the final release.
- In the very early stages of Subnautica, there were many unused and cut fauna.
- An unused creature named the Sandworm could only be found in the Entity Gallery. It was intended to stay in one place under the ground, and when the player or an NPC was right above it, it would spring up and would do 1 damage at a very fast rate. It only had animations for shooting out of the ground, going back into its hole, and an idle animation.
- The unused Grabcrab creature would leave its burrow and search for items to drag back to its hole. These items included small resources and even small fish. Its burrow also had the same model as the Grabcrab.
- Unused clusters of Bloom Plankton can be spawned in the game, and react to light. They will glow red if a Flare is shining on them, and white if a Flashlight or Vehicle's light is shining on them.
- In the Early Access Release trailer, the Large Bird can be seen flying among the Skyrays. They were cut entirely out of the game sometime before Early Access, making their appearance in the trailer the last time they were seen.
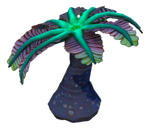
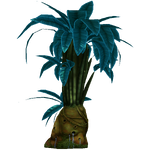
Flora of The Crater


|}