
Raw Materials (Subnautica): Difference between revisions
No edit summary Tags: Visual edit apiedit |
No edit summary Tags: Visual edit apiedit |
||
| Line 2: | Line 2: | ||
'''Raw Materials''' are precursor items for crafting processes and comprise all non-crafted materials found in Subnautica, one exception being [[Titanium]], which can also be crafted from [[Metal Salvage]]. |
'''Raw Materials''' are precursor items for crafting processes and comprise all non-crafted materials found in Subnautica, one exception being [[Titanium]], which can also be crafted from [[Metal Salvage]]. |
||
== |
==Minerals== |
||
{| style="width: 100%;" class="article-table sortable" border="0" cellpadding="1" cellspacing="1" |
{| style="width: 100%;" class="article-table sortable" border="0" cellpadding="1" cellspacing="1" |
||
|- |
|- |
||
| Line 8: | Line 8: | ||
! class="unsortable" style="width: 150px; text-align: left;" |Obtain From |
! class="unsortable" style="width: 150px; text-align: left;" |Obtain From |
||
! class="unsortable" style="width: 150px; text-align: left;" |Location |
! class="unsortable" style="width: 150px; text-align: left;" |Location |
||
|- |
|- |
||
| style="text-align:center; font-size:12px;" |[[File: |
| style="text-align:center; font-size:12px;" |[[File:Aluminum Oxide Crystal.png|100px|center|link=Aluminum Oxide Crystal]] |
||
[[Aluminum Oxide Crystal]] |
|||
[[Acid Mushroom]] |
|||
| style="text-align:left; font-size:12px;" | |
| style="text-align:left; font-size:12px;" | |
||
* Seabed |
* Seabed |
||
| style="text-align:left; font-size:12px;" | |
|||
* [[Grand Reef]] |
|||
* [[Deep Grand Reef]] |
|||
|- |
|||
| style="text-align:center; font-size:12px;" |[[File:Amino_Acid.png|100px|center|link=Amino Acid]] |
|||
[[Amino Acid]] |
|||
| style="text-align:left; font-size:12px;" | |
|||
* - |
|||
| style="text-align:left; font-size:12px;" | |
|||
* - |
|||
|- |
|||
| style="text-align:center; font-size:12px;" |[[File:Copper Ore.png|100px|center|link=Copper Ore]] |
|||
[[Copper Ore]] |
|||
| style="text-align:left; font-size:12px;" | |
|||
* [[Limestone Outcrop]] |
|||
* [[Large Resource Nodules]] |
|||
| style="text-align:left; font-size:12px;" | |
| style="text-align:left; font-size:12px;" | |
||
* [[Grassy Plateaus]] |
* [[Grassy Plateaus]] |
||
* [[Kelp Forest]] |
|||
* [[Sparse Reef]] |
|||
* [[Safe Shallows]] |
|||
* [[Underwater Islands]] |
|||
|- |
|||
| style="text-align:center; font-size:12px;" |[[File:Crash Powder.png|100px|center|link=Crash Powder]] |
|||
[[Crash Powder]] |
|||
| style="text-align:left; font-size:12px;" | |
|||
* [[Crash Plant|Crashfish Plant]] |
|||
| style="text-align:left; font-size:12px;" | |
|||
* [[Safe Shallows Caves]] |
|||
* [[Kelp Forest Caves]] |
|||
|- |
|||
| style="text-align:center; font-size:12px;" |[[File:Diamond.png|100px|center|link=Diamond]] |
|||
[[Diamond]] |
|||
| style="text-align:left; font-size:12px;" | |
|||
* Seabed |
|||
* [[Basalt Outcrop]] |
|||
* [[Obsidian Outcrop]] |
|||
* [[Large Resource Nodules]] |
|||
| style="text-align:left; font-size:12px;" | |
|||
* [[Blood Kelp Caves]] |
|||
* [[Deep Grand Reef]] |
|||
* [[Grand Reef]] |
|||
* [[Koosh Zone]] |
|||
* [[Underwater Islands]] |
|||
|- |
|||
| style="text-align:center; font-size:12px;" |[[File:Gold.png|100px|center|link=Gold]] |
|||
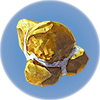
[[Gold]] |
|||
| style="text-align:left; font-size:12px;" | |
|||
* [[Basalt Outcrop]] |
|||
* [[Sandstone Outcrop]] |
|||
* [[Shale Outcrop]] |
|||
* [[Large Resource Nodules]] |
|||
| style="text-align:left; font-size:12px;" | |
|||
* [[Blood Kelp Caves]] |
|||
* [[Crash Zone]] |
|||
* [[Deep Grand Reef]] |
|||
* [[Grand Reef]] |
|||
* [[Dunes]] |
|||
* [[Grassy Plateaus]] |
|||
* [[Jelly Shroom Caves]] |
|||
* [[Koosh Zone]] |
|||
* [[Mushroom Forest]] |
* [[Mushroom Forest]] |
||
* [[Underwater Islands]] |
|||
|- |
|||
| style="text-align:center; font-size:12px;" |[[File:Gas Pod.png|100px|center|link=Gas Pod]] |
|||
[[Gas Pod]] |
|||
| style="text-align:left; font-size:12px;" | |
|||
* [[Gasopod]] |
|||
| style="text-align:left; font-size:12px;" | |
|||
* [[Safe Shallows]] |
* [[Safe Shallows]] |
||
* [[Grassy Plateaus Caves]] |
|||
|- |
|- |
||
| style="text-align:center; font-size:12px;" |[[File: |
| style="text-align:center; font-size:12px;" |[[File:Lead.png|100px|center|link=Lead]] |
||
[[Lead]] |
|||
[[Acid Mushroom Spore]] |
|||
| style="text-align:left; font-size:12px;" | |
| style="text-align:left; font-size:12px;" | |
||
* [[ |
* [[Limestone Outcrop]] |
||
* [[Large Resource Nodules]] |
|||
| style="text-align:left; font-size:12px;" | |
| style="text-align:left; font-size:12px;" | |
||
* [[Grassy Plateaus]] |
* [[Grassy Plateaus]] |
||
* [[Kelp Forest]] |
|||
* [[Safe Shallows]] |
|||
* [[Sparse Reef]] |
|||
* [[Underwater Islands]] |
|||
|- |
|||
| style="text-align:center; font-size:12px;" |[[File:Lithium.png|100px|center|link=Lithium]] |
|||
[[Lithium]] |
|||
| style="text-align:left; font-size:12px;" | |
|||
* [[Shale Outcrop]] |
|||
* Seabed |
|||
* Ground |
|||
* [[Large Resource Nodules]] |
|||
| style="text-align:left; font-size:12px;" | |
|||
* [[Crash Zone]] |
|||
* [[Dunes]] |
|||
* [[Floater Island]] |
|||
* [[Grassy Plateaus]] |
|||
* [[Jelly Shroom Caves]] |
|||
* [[Mushroom Forest]] |
* [[Mushroom Forest]] |
||
|- |
|||
| style="text-align:center; font-size:12px;" |[[File:Magnetite.png|100px|center|link=Magnetite]] |
|||
[[Magnetite]] |
|||
| style="text-align:left; font-size:12px;" | |
|||
* Seabed |
|||
* [[Large Resource Nodules]] |
|||
| style="text-align:left; font-size:12px;" | |
|||
* [[Jelly Shroom Caves]] |
|||
* [[Mountain Island]] |
|||
* [[Mountain Range Caves]] |
|||
* [[Mountain]] |
|||
|- |
|||
| style="text-align:center; font-size:12px;" |[[File:Metal Salvage.png|100px|center|link=Metal Salvage]] |
|||
[[Metal Salvage]] |
|||
| style="text-align:left; font-size:12px;" | |
|||
* Seabed |
|||
| style="text-align:left; font-size:12px;" | |
|||
* [[Aurora]] |
|||
* [[Blood Kelp Zone]] |
|||
* [[Crash Zone]] |
|||
* [[Dunes]] |
|||
* [[Grassy Plateaus]] |
|||
* [[Kelp Forest]] |
|||
* [[Safe Shallows]] |
* [[Safe Shallows]] |
||
* [[Grassy Plateaus Caves]] |
|||
|- |
|- |
||
| style="text-align:center; font-size:12px;" |[[File: |
| style="text-align:center; font-size:12px;" |[[File:Mercury Ore.png|100px|center|link=Mercury Ore]] |
||
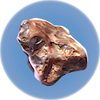
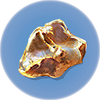
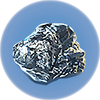
[[Mercury Ore]] |
|||
[[Aluminum Oxide Crystal]] |
|||
| style="text-align:left; font-size:12px;" | |
| style="text-align:left; font-size:12px;" | |
||
* Seabed |
* Seabed |
||
| style="text-align:left; font-size:12px;" | |
| style="text-align:left; font-size:12px;" | |
||
* [[Deep Grand Reef]] |
|||
* [[Grand Reef]] |
* [[Grand Reef]] |
||
* [[Sparse Reef]] |
|||
|- |
|||
| style="text-align:center; font-size:12px;" |[[File:Quartz.png|100px|center|link=Quartz]] |
|||
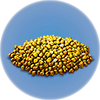
[[Quartz]] |
|||
| style="text-align:left; font-size:12px;" | |
|||
* Seabed |
|||
* [[Large Resource Nodules]] |
|||
| style="text-align:left; font-size:12px;" | |
|||
* [[Blood Kelp Caves]] |
|||
* [[Blood Kelp Zone]] |
|||
* [[Crash Zone]] |
|||
* [[Dunes]] |
|||
* [[Grand Reef]] |
|||
* [[Grassy Plateaus]] |
|||
* [[Kelp Forest]] |
|||
* [[Safe Shallows]] |
|||
* [[Sea Treader's Path]] |
|||
* [[Sea Treader's Tunnel Caves]] |
|||
|- |
|||
| style="text-align:center; font-size:12px;" |[[File:Salt Deposit.png|100px|center|link=Salt Deposit]] |
|||
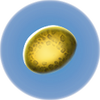
[[Salt Deposit]] |
|||
| style="text-align:left; font-size:12px;" | |
|||
* [[Large Resource Nodules]] |
|||
* [[Purple Pinecone]] |
|||
* Seabed |
|||
* [[Water Filtration Machine]] |
|||
| style="text-align:left; font-size:12px;" | |
|||
* [[Aurora]] |
|||
* [[Crash Zone]] |
|||
* [[Deep Grand Reef]] |
* [[Deep Grand Reef]] |
||
* [[Floater Island]] |
|||
* [[Grassy Plateaus]] |
|||
* [[Kelp Forest]] |
|||
* [[Koosh Zone]] |
|||
* [[Mushroom Forest]] |
|||
* [[Safe Shallows]] |
|||
* [[Sparse Reef]] |
|||
* [[Underwater Islands]] |
|||
|- |
|- |
||
| style="text-align:center; font-size:12px;" |[[File: |
| style="text-align:center; font-size:12px;" |[[File:Sea Treader Poop.png|100px|center|link=Sea Treader Manure]] |
||
[[ |
[[Sea Treader Manure]] |
||
| style="text-align:left; font-size:12px;" | |
|||
* Seabed (Periodically dropped by [[Sea Treader|Sea Treaders]]) |
|||
| style="text-align:left; font-size:12px;" | |
|||
* [[Grand Reef]] |
|||
* [[Sea Treader's Path]] |
|||
* [[Sea Treader's Tunnel Caves]] |
|||
|- |
|||
| style="text-align:center; font-size:12px;" |[[File:Silver Ore.png|100px|center|link=Silver Ore]] |
|||
[[Silver Ore]] |
|||
| style="text-align:left; font-size:12px;" | |
|||
* [[Sandstone Outcrop]] |
|||
* [[Large Resource Nodules]] |
|||
| style="text-align:left; font-size:12px;" | |
|||
* [[Dunes]] |
|||
* [[Grassy Plateaus]] |
|||
* [[Kelp Forest]] |
|||
* [[Safe Shallows Caves]] |
|||
|- |
|||
| style="text-align:center; font-size:12px;" |[[File:Stalker Tooth.png|100px|center|link=Stalker Tooth]] |
|||
[[Stalker Tooth]] |
|||
| style="text-align:left; font-size:12px;" | |
|||
* Seabed (Periodically dropped by [[Stalker|Stalkers]] under certain conditions) |
|||
| style="text-align:left; font-size:12px;" | |
|||
* [[Kelp Forest]] |
|||
|- |
|||
| style="text-align:center; font-size:12px;" |[[File:Sulphur.png|100px|center|link=Sulphur]] |
|||
[[Sulphur]] |
|||
| style="text-align:left; font-size:12px;" | |
| style="text-align:left; font-size:12px;" | |
||
* - |
* - |
||
| style="text-align:left; font-size:12px;" | |
| style="text-align:left; font-size:12px;" | |
||
* - |
* - |
||
|- |
|||
| style="text-align:center; font-size:12px;" |[[File:Uraninite_Crystal.png|100px|center|link=Uraninite Crystal]] |
|||
[[Uraninite Crystal]] |
|||
| style="text-align:left; font-size:12px;" | |
|||
* Seabed |
|||
* [[Large Resource Nodules]] |
|||
| style="text-align:left; font-size:12px;" | |
|||
* [[Blood Kelp Zone ]] |
|||
* [[Mountain]] |
|||
* [[Grand Reef]] |
|||
|} |
|||
==Corals== |
|||
{| style="width: 100%;" class="article-table sortable" border="0" cellpadding="1" cellspacing="1" |
|||
|- |
|||
! class="unsortable" style="width: 35px; text-align: center;" |Item |
|||
! class="unsortable" style="width: 150px; text-align: left;" |Obtain From |
|||
! class="unsortable" style="width: 150px; text-align: left;" |Location |
|||
|- |
|||
| style="text-align:center; font-size:12px;" |[[File:Coral Sample.png|100px|center|link=Coral Sample]] |
|||
[[Coral Sample]] |
|||
| style="text-align:left; font-size:12px;" | |
|||
* [[Coral Tube]] |
|||
* [[Slanted Shell Plate]] |
|||
| style="text-align:left; font-size:12px;" | |
|||
* [[Grassy Plateaus]] |
|||
* [[Crash Zone]] |
|||
* [[Koosh Zone]] |
|||
* [[Mountain Range Caves]] |
|||
* [[Mushroom Forest]] |
|||
* [[Safe Shallows]] |
|||
* [[Safe Shallows Caves]] |
|||
|- |
|||
| style="text-align:center; font-size:12px;" |[[File:Tree Mushroom Sample.png|100px|center|link=Fungal Sample]] |
|||
[[Fungal Sample]] |
|||
| style="text-align:left; font-size:12px;" | |
|||
* [[Tree Mushroom]] |
|||
| style="text-align:left; font-size:12px;" | |
|||
* [[Mushroom Forest]] |
|||
|- |
|||
| style="text-align:center; font-size:12px;" |[[File:Purple_Brain_Coral_Sample.png|100px|center|link=Purple Brain Coral Sample]] |
|||
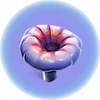
[[Purple Brain Coral Sample]] |
|||
| style="text-align:left; font-size:12px;" | |
|||
* [[Purple Brain Coral]] |
|||
| style="text-align:left; font-size:12px;" | |
|||
* [[Mountains]] |
|||
* [[Kelp Forest]] |
|||
* [[Koosh Zone]] |
|||
* [[Grassy Plateaus]] |
|||
* [[Mushroom Forest]] |
|||
* [[Safe Shallows]] |
|||
|- |
|||
| style="text-align:center; font-size:12px;" |[[File:Table Coral Sample.png|100px|center|link=Table Coral Sample]] |
|||
[[Table Coral Sample]] |
|||
| style="text-align:left; font-size:12px;" | |
|||
* [[Table Coral]] |
|||
| style="text-align:left; font-size:12px;" | |
|||
* [[Grassy Plateaus]] |
|||
* [[Kelp Forest]] |
|||
* [[Mushroom Forest]] |
|||
* [[Safe Shallows]] |
|||
|} |
|||
==Flora== |
|||
{| style="width: 100%;" class="article-table sortable" border="0" cellpadding="1" cellspacing="1" |
|||
|- |
|||
! class="unsortable" style="width: 35px; text-align: center;" |Item |
|||
! class="unsortable" style="width: 150px; text-align: left;" |Obtain From |
|||
! class="unsortable" style="width: 150px; text-align: left;" |Location |
|||
|- |
|||
| style="text-align:center; font-size:12px;" |[[File:Acid Mushroom.png|100px|center|link=Acid Mushroom]] |
|||
[[Acid Mushroom]] |
|||
| style="text-align:left; font-size:12px;" | |
|||
* Seabed |
|||
| style="text-align:left; font-size:12px;" | |
|||
* [[Grassy Plateaus]] |
|||
* [[Mushroom Forest]] |
|||
* [[Safe Shallows]] |
|||
* [[Grassy Plateaus Caves]] |
|||
|- |
|||
| style="text-align:center; font-size:12px;" |[[File:Deep Shroom.png|100px|center|link=Deep Shroom]] |
|||
[[Deep Shroom]] |
|||
| style="text-align:left; font-size:12px;" | |
|||
* Seabed |
|||
| style="text-align:left; font-size:12px;" | |
|||
* [[Blood Kelp Zone]] |
|||
* [[Sea Treader's Path]] |
|||
* [[Sea Treader's Tunnel Caves]] |
|||
|- |
|||
| style="text-align:center; font-size:12px;" |[[File:Marblemelon.png|100px|center|link=Marblemelon]] |
|||
[[Marblemelon]] |
|||
| style="text-align:left; font-size:12px;" | |
|||
* [[Marblemelon Plant]] |
|||
| style="text-align:left; font-size:12px;" | |
|||
* [[Floater Island]] |
|||
|- |
|||
| style="text-align:center; font-size:12px;" |[[File:Small Marblemelon.png|100px|center|link=Small Marblemelon]] |
|||
[[Small Marblemelon]] |
|||
| style="text-align:left; font-size:12px;" | |
|||
* [[Marblemelon Plant]] |
|||
| style="text-align:left; font-size:12px;" | |
|||
* [[Floater Island]] |
|||
|- |
|||
| style="text-align:center; font-size:12px;" |[[File:Pink Mushroom.png|100px|center|link=Pink Cap]] |
|||
[[Pink Cap]] |
|||
| style="text-align:left; font-size:12px;" | |
|||
* Ground |
|||
| style="text-align:left; font-size:12px;" | |
|||
* [[Floater Island]] |
|||
|- |
|||
| style="text-align:center; font-size:12px;" |[[File:Purple Rattle.png|100px|center|link=Speckled Rattler]] |
|||
[[Speckled Rattler]] |
|||
| style="text-align:left; font-size:12px;" | |
|||
* Ground |
|||
| style="text-align:left; font-size:12px;" | |
|||
* [[Floater Island]] |
|||
|- |
|||
| style="text-align:center; font-size:12px;" |[[File:Jelly Plant.png|100px|center|link=Spore Sack]] |
|||
[[Spore Sack]] |
|||
| style="text-align:left; font-size:12px;" | |
|||
* Seabed |
|||
| style="text-align:left; font-size:12px;" | |
|||
* [[Safe Shallows Caves]] |
|||
* [[Safe Shallows]] |
|||
* [[Crash Zone]] |
|||
* [[Jelly Shroom Caves]] |
|||
|} |
|||
==Seeds & Spore== |
|||
{| style="width: 100%;" class="article-table sortable" border="0" cellpadding="1" cellspacing="1" |
|||
|- |
|||
! class="unsortable" style="width: 35px; text-align: center;" |Item |
|||
! class="unsortable" style="width: 150px; text-align: left;" |Obtain From |
|||
! class="unsortable" style="width: 150px; text-align: left;" |Location |
|||
|- |
|||
| style="text-align:center; font-size:12px;" |[[File:Acid Mushroom Spore.png|100px|center|link=Acid Mushroom Spore]] |
|||
[[Acid Mushroom Spore]] |
|||
| style="text-align:left; font-size:12px;" | |
|||
* [[Acid Mushroom]] |
|||
| style="text-align:left; font-size:12px;" | |
|||
* [[Grassy Plateaus]] |
|||
* [[Mushroom Forest]] |
|||
* [[Safe Shallows]] |
|||
* [[Grassy Plateaus Caves]] |
|||
|- |
|- |
||
| Line 76: | Line 421: | ||
* [[Floater Island]] |
* [[Floater Island]] |
||
* [[Mountain]] |
* [[Mountain]] |
||
|- |
|- |
||
| style="text-align:center; font-size:12px;" |[[File:Purple_Branches_Seed.png|100px|center|link=Cave Bush Seed]] |
| style="text-align:center; font-size:12px;" |[[File:Purple_Branches_Seed.png|100px|center|link=Cave Bush Seed]] |
||
| Line 86: | Line 432: | ||
*[[Sea Treader's Path]] |
*[[Sea Treader's Path]] |
||
*[[Sea Treader's Tunnel Caves]] |
*[[Sea Treader's Tunnel Caves]] |
||
|- |
|- |
||
| style="text-align:center; font-size:12px;" |[[File:Purple_Vegetable_Plant_Seed.png|100px|center|link=Chinese Potato]] |
| style="text-align:center; font-size:12px;" |[[File:Purple_Vegetable_Plant_Seed.png|100px|center|link=Chinese Potato]] |
||
| Line 93: | Line 440: | ||
| style="text-align:left; font-size:12px;" | |
| style="text-align:left; font-size:12px;" | |
||
* [[Floater Island]] |
* [[Floater Island]] |
||
|- |
|||
| style="text-align:center; font-size:12px;" |[[File:Coral Sample.png|100px|center|link=Coral Sample]] |
|||
[[Coral Sample]] |
|||
| style="text-align:left; font-size:12px;" | |
|||
* [[Coral Tube]] |
|||
* [[Slanted Shell Plate]] |
|||
| style="text-align:left; font-size:12px;" | |
|||
* [[Grassy Plateaus]] |
|||
* [[Crash Zone]] |
|||
* [[Koosh Zone]] |
|||
* [[Mountain Range Caves]] |
|||
* [[Mushroom Forest]] |
|||
* [[Safe Shallows]] |
|||
* [[Safe Shallows Caves]] |
|||
|- |
|||
| style="text-align:center; font-size:12px;" |[[File:Copper Ore.png|100px|center|link=Copper Ore]] |
|||
[[Copper Ore]] |
|||
| style="text-align:left; font-size:12px;" | |
|||
* [[Limestone Outcrop]] |
|||
* [[Large Resource Nodules]] |
|||
| style="text-align:left; font-size:12px;" | |
|||
* [[Grassy Plateaus]] |
|||
* [[Kelp Forest]] |
|||
* [[Sparse Reef]] |
|||
* [[Safe Shallows]] |
|||
* [[Underwater Islands]] |
|||
|- |
|||
| style="text-align:center; font-size:12px;" |[[File:Crash Powder.png|100px|center|link=Crash Powder]] |
|||
[[Crash Powder]] |
|||
| style="text-align:left; font-size:12px;" | |
|||
* [[Crash Plant|Crashfish Plant]] |
|||
| style="text-align:left; font-size:12px;" | |
|||
* [[Safe Shallows Caves]] |
|||
* [[Kelp Forest Caves]] |
|||
|- |
|- |
||
| style="text-align:center; font-size:12px;" |[[File:Creepvine Sample.png|100px|center|link=Creepvine Sample]] |
| style="text-align:center; font-size:12px;" |[[File:Creepvine Sample.png|100px|center|link=Creepvine Sample]] |
||
| Line 134: | Line 448: | ||
| style="text-align:left; font-size:12px;" | |
| style="text-align:left; font-size:12px;" | |
||
* [[Kelp Forest]] |
* [[Kelp Forest]] |
||
|- |
|- |
||
| style="text-align:center; font-size:12px;" |[[File:Creepvine Seed Cluster.png|100px|center|link=Creepvine Seed Cluster]] |
| style="text-align:center; font-size:12px;" |[[File:Creepvine Seed Cluster.png|100px|center|link=Creepvine Seed Cluster]] |
||
| Line 141: | Line 456: | ||
| style="text-align:left; font-size:12px;" | |
| style="text-align:left; font-size:12px;" | |
||
* [[Kelp Forest]] |
* [[Kelp Forest]] |
||
|- |
|||
| style="text-align:center; font-size:12px;" |[[File:Deep Shroom.png|100px|center|link=Deep Shroom]] |
|||
[[Deep Shroom]] |
|||
| style="text-align:left; font-size:12px;" | |
|||
* Seabed |
|||
| style="text-align:left; font-size:12px;" | |
|||
* [[Blood Kelp Zone]] |
|||
* [[Sea Treader's Path]] |
|||
* [[Sea Treader's Tunnel Caves]] |
|||
|- |
|- |
||
| Line 160: | Line 466: | ||
* [[Sea Treader's Path]] |
* [[Sea Treader's Path]] |
||
* [[Sea Treader's Tunnel Caves]] |
* [[Sea Treader's Tunnel Caves]] |
||
|- |
|||
| style="text-align:center; font-size:12px;" |[[File:Diamond.png|100px|center|link=Diamond]] |
|||
[[Diamond]] |
|||
| style="text-align:left; font-size:12px;" | |
|||
* Seabed |
|||
* [[Basalt Outcrop]] |
|||
* [[Obsidian Outcrop]] |
|||
* [[Large Resource Nodules]] |
|||
| style="text-align:left; font-size:12px;" | |
|||
* [[Blood Kelp Caves]] |
|||
* [[Deep Grand Reef]] |
|||
* [[Grand Reef]] |
|||
* [[Koosh Zone]] |
|||
* [[Underwater Islands]] |
|||
|- |
|- |
||
| Line 193: | Line 484: | ||
| style="text-align:left; font-size:12px;" | |
| style="text-align:left; font-size:12px;" | |
||
* [[Floater Island]] |
* [[Floater Island]] |
||
|- |
|||
| style="text-align:center; font-size:12px;" |[[File:Tree Mushroom Sample.png|100px|center|link=Fungal Sample]] |
|||
[[Fungal Sample]] |
|||
| style="text-align:left; font-size:12px;" | |
|||
* [[Tree Mushroom]] |
|||
| style="text-align:left; font-size:12px;" | |
|||
* [[Mushroom Forest]] |
|||
|- |
|- |
||
| Line 213: | Line 496: | ||
* [[Grassy Plateaus Caves]] |
* [[Grassy Plateaus Caves]] |
||
* [[Sea Treader's Tunnel Caves]] |
* [[Sea Treader's Tunnel Caves]] |
||
|- |
|- |
||
| style="text-align:center; font-size:12px;" |[[File:Gabe's_Feather_Seed.png|100px|center|link=Gabe's Feather Seed]] |
| style="text-align:center; font-size:12px;" |[[File:Gabe's_Feather_Seed.png|100px|center|link=Gabe's Feather Seed]] |
||
| Line 230: | Line 514: | ||
| style="text-align:left; font-size:12px;" | |
| style="text-align:left; font-size:12px;" | |
||
* [[Blood Kelp Zone]] |
* [[Blood Kelp Zone]] |
||
|- |
|||
| style="text-align:center; font-size:12px;" |[[File:Gold.png|100px|center|link=Gold]] |
|||
[[Gold]] |
|||
| style="text-align:left; font-size:12px;" | |
|||
* [[Basalt Outcrop]] |
|||
* [[Sandstone Outcrop]] |
|||
* [[Shale Outcrop]] |
|||
* [[Large Resource Nodules]] |
|||
| style="text-align:left; font-size:12px;" | |
|||
* [[Blood Kelp Caves]] |
|||
* [[Crash Zone]] |
|||
* [[Deep Grand Reef]] |
|||
* [[Grand Reef]] |
|||
* [[Dunes]] |
|||
* [[Grassy Plateaus]] |
|||
* [[Jelly Shroom Caves]] |
|||
* [[Koosh Zone]] |
|||
* [[Mushroom Forest]] |
|||
* [[Underwater Islands]] |
|||
|- |
|||
| style="text-align:center; font-size:12px;" |[[File:Gas Pod.png|100px|center|link=Gas Pod]] |
|||
[[Gas Pod]] |
|||
| style="text-align:left; font-size:12px;" | |
|||
* [[Gasopod]] |
|||
| style="text-align:left; font-size:12px;" | |
|||
* [[Safe Shallows]] |
|||
|- |
|- |
||
| Line 289: | Line 546: | ||
| style="text-align:left; font-size:12px;" | |
| style="text-align:left; font-size:12px;" | |
||
* [[Koosh Zone]] |
* [[Koosh Zone]] |
||
|- |
|- |
||
| style="text-align:center; font-size:12px;" |[[File:Hanging_Fruit.png|100px|center|link=Lantern Fruit]] |
| style="text-align:center; font-size:12px;" |[[File:Hanging_Fruit.png|100px|center|link=Lantern Fruit]] |
||
| Line 296: | Line 554: | ||
| style="text-align:left; font-size:12px;" | |
| style="text-align:left; font-size:12px;" | |
||
* [[Floater Island]] |
* [[Floater Island]] |
||
|- |
|||
| style="text-align:center; font-size:12px;" |[[File:Lead.png|100px|center|link=Lead]] |
|||
[[Lead]] |
|||
| style="text-align:left; font-size:12px;" | |
|||
* [[Limestone Outcrop]] |
|||
* [[Large Resource Nodules]] |
|||
| style="text-align:left; font-size:12px;" | |
|||
* [[Grassy Plateaus]] |
|||
* [[Kelp Forest]] |
|||
* [[Safe Shallows]] |
|||
* [[Sparse Reef]] |
|||
* [[Underwater Islands]] |
|||
|- |
|||
| style="text-align:center; font-size:12px;" |[[File:Lithium.png|100px|center|link=Lithium]] |
|||
[[Lithium]] |
|||
| style="text-align:left; font-size:12px;" | |
|||
* [[Shale Outcrop]] |
|||
* Seabed |
|||
* Ground |
|||
* [[Large Resource Nodules]] |
|||
| style="text-align:left; font-size:12px;" | |
|||
* [[Crash Zone]] |
|||
* [[Dunes]] |
|||
* [[Floater Island]] |
|||
* [[Grassy Plateaus]] |
|||
* [[Jelly Shroom Caves]] |
|||
* [[Mushroom Forest]] |
|||
|- |
|||
| style="text-align:center; font-size:12px;" |[[File:Marblemelon.png|100px|center|link=Marblemelon]] |
|||
[[Marblemelon]] |
|||
| style="text-align:left; font-size:12px;" | |
|||
* [[Marblemelon Plant]] |
|||
| style="text-align:left; font-size:12px;" | |
|||
* [[Floater Island]] |
|||
|- |
|||
| style="text-align:center; font-size:12px;" |[[File:Small Marblemelon.png|100px|center|link=Small Marblemelon]] |
|||
[[Small Marblemelon]] |
|||
| style="text-align:left; font-size:12px;" | |
|||
* [[Marblemelon Plant]] |
|||
| style="text-align:left; font-size:12px;" | |
|||
* [[Floater Island]] |
|||
|- |
|- |
||
| style="text-align:center; font-size:12px;" |[[File:Marblemelon_Seed.png|100px|center|link=Marblemelon Seeds]] |
| style="text-align:center; font-size:12px;" |[[File:Marblemelon_Seed.png|100px|center|link=Marblemelon Seeds]] |
||
| Line 344: | Line 562: | ||
| style="text-align:left; font-size:12px;" | |
| style="text-align:left; font-size:12px;" | |
||
* [[Floater Island]] |
* [[Floater Island]] |
||
|- |
|||
| style="text-align:center; font-size:12px;" |[[File:Magnetite.png|100px|center|link=Magnetite]] |
|||
[[Magnetite]] |
|||
| style="text-align:left; font-size:12px;" | |
|||
* Seabed |
|||
* [[Large Resource Nodules]] |
|||
| style="text-align:left; font-size:12px;" | |
|||
* [[Jelly Shroom Caves]] |
|||
* [[Mountain Island]] |
|||
* [[Mountain Range Caves]] |
|||
* [[Mountain]] |
|||
|- |
|- |
||
| Line 364: | Line 571: | ||
* [[Grand Reef]] |
* [[Grand Reef]] |
||
* [[Sea Treader's Path]] |
* [[Sea Treader's Path]] |
||
|- |
|||
| style="text-align:center; font-size:12px;" |[[File:Metal Salvage.png|100px|center|link=Metal Salvage]] |
|||
[[Metal Salvage]] |
|||
| style="text-align:left; font-size:12px;" | |
|||
* Seabed |
|||
| style="text-align:left; font-size:12px;" | |
|||
* [[Aurora]] |
|||
* [[Blood Kelp Zone]] |
|||
* [[Crash Zone]] |
|||
* [[Dunes]] |
|||
* [[Grassy Plateaus]] |
|||
* [[Kelp Forest]] |
|||
* [[Safe Shallows]] |
|||
|- |
|||
| style="text-align:center; font-size:12px;" |[[File:Mercury Ore.png|100px|center|link=Mercury Ore]] |
|||
[[Mercury Ore]] |
|||
| style="text-align:left; font-size:12px;" | |
|||
* Seabed |
|||
| style="text-align:left; font-size:12px;" | |
|||
* [[Deep Grand Reef]] |
|||
* [[Grand Reef]] |
|||
* [[Sparse Reef]] |
|||
|- |
|- |
||
| Line 396: | Line 580: | ||
* [[Floater Island]] |
* [[Floater Island]] |
||
|- |
|||
| style="text-align:center; font-size:12px;" |[[File:Pink Mushroom.png|100px|center|link=Pink Cap]] |
|||
[[Pink Cap]] |
|||
| style="text-align:left; font-size:12px;" | |
|||
* Ground |
|||
| style="text-align:left; font-size:12px;" | |
|||
* [[Floater Island]] |
|||
|- |
|- |
||
| style="text-align:center; font-size:12px;" |[[File:Pink_Mushroom_Spore.png|100px|center|link=Pink Cap Spore]] |
| style="text-align:center; font-size:12px;" |[[File:Pink_Mushroom_Spore.png|100px|center|link=Pink Cap Spore]] |
||
| Line 410: | Line 587: | ||
| style="text-align:left; font-size:12px;" | |
| style="text-align:left; font-size:12px;" | |
||
* [[Floater Island]] |
* [[Floater Island]] |
||
|- |
|||
| style="text-align:center; font-size:12px;" |[[File:Purple_Brain_Coral_Sample.png|100px|center|link=Purple Brain Coral Sample]] |
|||
[[Purple Brain Coral Sample]] |
|||
| style="text-align:left; font-size:12px;" | |
|||
* [[Purple Brain Coral]] |
|||
| style="text-align:left; font-size:12px;" | |
|||
* [[Mountains]] |
|||
* [[Kelp Forest]] |
|||
* [[Koosh Zone]] |
|||
* [[Grassy Plateaus]] |
|||
* [[Mushroom Forest]] |
|||
* [[Safe Shallows]] |
|||
|- |
|- |
||
| Line 434: | Line 598: | ||
* [[Mushroom Forest]] |
* [[Mushroom Forest]] |
||
|- |
|||
| style="text-align:center; font-size:12px;" |[[File:Quartz.png|100px|center|link=Quartz]] |
|||
[[Quartz]] |
|||
| style="text-align:left; font-size:12px;" | |
|||
* Seabed |
|||
* [[Large Resource Nodules]] |
|||
| style="text-align:left; font-size:12px;" | |
|||
* [[Blood Kelp Caves]] |
|||
* [[Blood Kelp Zone]] |
|||
* [[Crash Zone]] |
|||
* [[Dunes]] |
|||
* [[Grand Reef]] |
|||
* [[Grassy Plateaus]] |
|||
* [[Kelp Forest]] |
|||
* [[Safe Shallows]] |
|||
* [[Sea Treader's Path]] |
|||
* [[Sea Treader's Tunnel Caves]] |
|||
|- |
|- |
||
| style="text-align:center; font-size:12px;" |[[File:Red_Cone_Plant_Seed.png|100px|center|link=Regress Shell Seed]] |
| style="text-align:center; font-size:12px;" |[[File:Red_Cone_Plant_Seed.png|100px|center|link=Regress Shell Seed]] |
||
| Line 480: | Line 627: | ||
* [[Underwater Islands]] |
* [[Underwater Islands]] |
||
* [[Sparse Reef]] |
* [[Sparse Reef]] |
||
|- |
|||
| style="text-align:center; font-size:12px;" |[[File:Salt Deposit.png|100px|center|link=Salt Deposit]] |
|||
[[Salt Deposit]] |
|||
| style="text-align:left; font-size:12px;" | |
|||
* [[Large Resource Nodules]] |
|||
* [[Purple Pinecone]] |
|||
* Seabed |
|||
* [[Water Filtration Machine]] |
|||
| style="text-align:left; font-size:12px;" | |
|||
* [[Aurora]] |
|||
* [[Crash Zone]] |
|||
* [[Deep Grand Reef]] |
|||
* [[Floater Island]] |
|||
* [[Grassy Plateaus]] |
|||
* [[Kelp Forest]] |
|||
* [[Koosh Zone]] |
|||
* [[Mushroom Forest]] |
|||
* [[Safe Shallows]] |
|||
* [[Sparse Reef]] |
|||
* [[Underwater Islands]] |
|||
|- |
|- |
||
| Line 510: | Line 636: | ||
* [[Koosh Zone]] |
* [[Koosh Zone]] |
||
|- |
|||
| style="text-align:center; font-size:12px;" |[[File:Sea Treader Poop.png|100px|center|link=Sea Treader Manure]] |
|||
[[Sea Treader Manure]] |
|||
| style="text-align:left; font-size:12px;" | |
|||
* Seabed (Periodically dropped by [[Sea Treader|Sea Treaders]]) |
|||
| style="text-align:left; font-size:12px;" | |
|||
* [[Grand Reef]] |
|||
* [[Sea Treader's Path]] |
|||
* [[Sea Treader's Tunnel Caves]] |
|||
|- |
|||
| style="text-align:center; font-size:12px;" |[[File:Silver Ore.png|100px|center|link=Silver Ore]] |
|||
[[Silver Ore]] |
|||
| style="text-align:left; font-size:12px;" | |
|||
* [[Sandstone Outcrop]] |
|||
* [[Large Resource Nodules]] |
|||
| style="text-align:left; font-size:12px;" | |
|||
* [[Dunes]] |
|||
* [[Grassy Plateaus]] |
|||
* [[Kelp Forest]] |
|||
* [[Safe Shallows Caves]] |
|||
|- |
|||
| style="text-align:center; font-size:12px;" |[[File:Purple Rattle.png|100px|center|link=Speckled Rattler]] |
|||
[[Speckled Rattler]] |
|||
| style="text-align:left; font-size:12px;" | |
|||
* Ground |
|||
| style="text-align:left; font-size:12px;" | |
|||
* [[Floater Island]] |
|||
|- |
|- |
||
| style="text-align:center; font-size:12px;" |[[File:Purple_Rattle_Spore.png|100px|center|link=Speckled Rattler Spore]] |
| style="text-align:center; font-size:12px;" |[[File:Purple_Rattle_Spore.png|100px|center|link=Speckled Rattler Spore]] |
||
| Line 546: | Line 644: | ||
* [[Floater Island]] |
* [[Floater Island]] |
||
|- |
|||
| style="text-align:center; font-size:12px;" |[[File:Jelly Plant.png|100px|center|link=Spore Sack]] |
|||
[[Spore Sack]] |
|||
| style="text-align:left; font-size:12px;" | |
|||
* Seabed |
|||
| style="text-align:left; font-size:12px;" | |
|||
* [[Safe Shallows Caves]] |
|||
* [[Safe Shallows]] |
|||
* [[Crash Zone]] |
|||
* [[Jelly Shroom Caves]] |
|||
|- |
|- |
||
| style="text-align:center; font-size:12px;" |[[File:Jelly_Plant_Seed.png|100px|center|link=Spore Sack Seed]] |
| style="text-align:center; font-size:12px;" |[[File:Jelly_Plant_Seed.png|100px|center|link=Spore Sack Seed]] |
||
| Line 587: | Line 675: | ||
* [[Underwater Islands]] |
* [[Underwater Islands]] |
||
|- |
|||
| style="text-align:center; font-size:12px;" |[[File:Stalker Tooth.png|100px|center|link=Stalker Tooth]] |
|||
[[Stalker Tooth]] |
|||
| style="text-align:left; font-size:12px;" | |
|||
* Seabed (Periodically dropped by [[Stalker|Stalkers]] under certain conditions) |
|||
| style="text-align:left; font-size:12px;" | |
|||
* [[Kelp Forest]] |
|||
|- |
|||
| style="text-align:center; font-size:12px;" |[[File:Sulphur.png|100px|center|link=Sulphur]] |
|||
[[Sulphur]] |
|||
| style="text-align:left; font-size:12px;" | |
|||
* - |
|||
| style="text-align:left; font-size:12px;" | |
|||
* - |
|||
|- |
|||
| style="text-align:center; font-size:12px;" |[[File:Table Coral Sample.png|100px|center|link=Table Coral Sample]] |
|||
[[Table Coral Sample]] |
|||
| style="text-align:left; font-size:12px;" | |
|||
* [[Table Coral]] |
|||
| style="text-align:left; font-size:12px;" | |
|||
* [[Grassy Plateaus]] |
|||
* [[Kelp Forest]] |
|||
* [[Mushroom Forest]] |
|||
* [[Safe Shallows]] |
|||
|- |
|- |
||
| style="text-align:center; font-size:12px;" |[[File:Spike_Trap_Seed.png|100px|center|link=Tiger Plant Seed]] |
| style="text-align:center; font-size:12px;" |[[File:Spike_Trap_Seed.png|100px|center|link=Tiger Plant Seed]] |
||
| Line 620: | Line 684: | ||
* [[Sparse Reef]] |
* [[Sparse Reef]] |
||
* [[Grassy Plateaus Caves]] |
* [[Grassy Plateaus Caves]] |
||
|- |
|||
| style="text-align:center; font-size:12px;" |[[File:Uraninite_Crystal.png|100px|center|link=Uraninite Crystal]] |
|||
[[Uraninite Crystal]] |
|||
| style="text-align:left; font-size:12px;" | |
|||
* Seabed |
|||
* [[Large Resource Nodules]] |
|||
| style="text-align:left; font-size:12px;" | |
|||
* [[Blood Kelp Zone ]] |
|||
* [[Mountain]] |
|||
* [[Grand Reef]] |
|||
|- |
|- |
||
Revision as of 22:15, 6 August 2016

|
This seems new This article contains information that is updated for the latest Experimental Version of Subnautica. Players using stable mode may find this information inaccurate. |
Raw Materials are precursor items for crafting processes and comprise all non-crafted materials found in Subnautica, one exception being Titanium, which can also be crafted from Metal Salvage.
Minerals
| Item | Obtain From | Location |
|---|---|---|
 |
|
|
 |
|
|
 |
||
 |
||
 |
||
 |
||
 |
||
 |
||
 |
|
|
 |
|
|
 |
|
|
 |
|
|
 |
|
|
 |
||
 |
|
|
 |
||
 |
|
|
 |
|
|
 |
|
Corals
| Item | Obtain From | Location |
|---|---|---|
 |
||
 |
||
 |
||
 |
Flora
| Item | Obtain From | Location |
|---|---|---|
 |
|
|
 |
|
|
 |
||
 |
||
 |
|
|
 |
|
|
 |
|
Seeds & Spore
| Item | Obtain From | Location |
|---|---|---|
 |
||
 |
||
 |
||
 |
||
 |
||
 |
||
 |
||
 |
||
 |
||
 |
||
 |
||
 |
||
 |
||
 |
||
 |
||
 |
||
 |
||
 |
||
 |
||
 |
||
 |
||
 |
||
 |
||
 |
||
 |
||
 |
||
 |
||
 |
||
 |
||
 |