
Fragments (Subnautica): Difference between revisions
(Scanner Room Fragment, not done editing though) Tags: Visual edit apiedit |
V goes vvryy (talk | contribs) m (2 not 1 fragments required for light stick) Tags: Visual edit mobile web edit mobile edit |
||
| (407 intermediate revisions by more than 100 users not shown) | |||
| Line 1: | Line 1: | ||
{{SubnauticaLink}} |
|||
[[File:Fragments (01).jpg|thumb|291x291px|All fragments appear as safes]] |
|||
{{Spoiler}} |
|||
Fragments are broken pieces of advanced technology that can be analyzed by the [[Scanner]] to create [[blueprints]]. They cannot be picked up. Depending on the technology being analyzed, a different number of Fragments might be needed to form the [[Blueprints|blueprint]]. Fragments that are no longer needed will be converted into [[Titanium]]. In order to attain certain [[blueprints]], like the one for the [[Floodlight]], the player has to scan the object in question, rather than a Fragment safe. |
|||
'''Fragments''' are broken pieces of advanced technology that can be analyzed by the [[Scanner (Subnautica)|Scanner]] to create [[Blueprints (Subnautica)|Blueprints]]. They are found in and around [[Wrecks]], strewn across many [[Biomes (Subnautica)|Biomes]] around the [[Aurora]], and scattered throughout the [[Degasi Seabases]]. Depending on the technology being analyzed, a different number of Fragments may be required to acquire the blueprint. Scanning a Fragment for which the [[Ryley Robinson|player]] already has a complete blueprint of will convert the Fragment into two pieces of [[Titanium (Subnautica)|Titanium]]. |
|||
__TOC__ |
|||
== |
== Currently Available Fragments == |
||
{| style="width: 100%;" class="article-table sortable" border="0" cellpadding="1" cellspacing="1" |
|||
{| class="wikitable sortable" style="margin: 1em auto 1em auto" align="left" border="0" |
|||
|- |
|- |
||
! class="unsortable" style="width: 25%; text-align: center; font-size:14px;" |Blueprint |
|||
! scope="col" |''Name'' |
|||
! class="unsortable" style="width: 20%; text-align: center; font-size:14px;" |DebugSpawn |
|||
! scope="col" |''Resulting Blueprint'' |
|||
! class="unsortable" style="width: 10%; text-align: center; font-size:14px;" | |
|||
! scope="col" |''Locations'' |
|||
<nowiki>#</nowiki> Required |
|||
! scope="col" |''Analysis Amount'' |
|||
! class="unsortable" style="width: 30%; text-align: center; font-size:14px;" |Location |
|||
! scope="col" |''Image'' |
|||
! data-sort-type="text" style="width: 15%; text-align: center; font-size:14px;" |Tab |
|||
|- |
|- |
||
| style="text-align:center; font-size:12px;" |<tabber>1=[[File:Damaged Battery Charger.png|200px|center|link=Battery Charger]][[Battery Charger (Subnautica)|Battery Charger]]|-|2=[[File:Battery Charger Fragment 2.png|200px|center|link=Battery Charger]][[Battery Charger (Subnautica)|Battery Charger]]</tabber> |
|||
|[[Bioreactor]] Fragment |
|||
| style="text-align:center; font-size:12px;" |''BatteryChargerFragment'' |
|||
|[[Blueprints|Bioreactor Blueprint]] |
|||
| style="text-align:center;" |2 |
|||
|[[Grassy Plateaus]], [[Kelp Forest]], [[Wrecks]] |
|||
| style="text-align: left; font-size:12px;" | |
|||
|2 fragments |
|||
*[[Degasi Seabases]] |
|||
|[[File:Bioreactor Fragment.png|thumb|60px]] |
|||
*[[Wrecks]] |
|||
| style="text-align: center; font-size:12px;" |[[Interior Modules]] |
|||
|- |
|- |
||
| style="text-align:center; font-size:12px;" |[[File:Beacon Fragment.png|200px|center|link=Beacon]][[Beacon (Subnautica)|Beacon]] |
|||
| |
|||
| style="text-align:center; font-size:12px;" |''BeaconFragment'' |
|||
[[Exosuit]] Fragment |
|||
| style="text-align:center;" |2 |
|||
|[[Blueprints|Exosuit Blueprint]] |
|||
| style="text-align: left; font-size:12px;" | |
|||
|[[Aurora]] (Spawnable Only) |
|||
*[[Wrecks|Small Wrecks]] |
|||
|3 fragments |
|||
*[[Wrecks]] |
|||
|[[File:Exosuit Fragment.png|thumb|60px]] |
|||
| style="text-align: center; font-size:12px;" |[[Deployables]] |
|||
|- |
|- |
||
| style="text-align:center; font-size:12px;" |<tabber>1=[[File:Bioreactor Fragment 1.png|200px|center|link=Bioreactor]][[Bioreactor (Subnautica)|Bioreactor]]|-|2=[[File:Bioreactor Fragment 2.png|200px|center|link=Bioreactor]][[Bioreactor (Subnautica)|Bioreactor]]|-|3=[[File:Bioreactor Fragment 3.png|200px|center|link=Bioreactor]][[Bioreactor (Subnautica)|Bioreactor]]|-|4=[[File:Bioreactor Fragment 4.png|200px|center|link=Bioreactor]][[Bioreactor (Subnautica)|Bioreactor]]</tabber> |
|||
|[[Cyclops]] Bridge Fragment |
|||
| style="text-align:center; font-size:12px;" |''BioreactorFragment'' |
|||
|[[Blueprints|Cyclops Bridge Blueprint]] |
|||
| style="text-align:center;" |2 |
|||
|[[Dunes]] |
|||
| style="text-align: left; font-size:12px;" | |
|||
| |
|||
*[[Grassy Plateaus]] |
|||
|[[File:Cyclops Bridge Fragment.png|thumb|60px]] |
|||
*[[Wrecks]] |
|||
| style="text-align: center; font-size:12px;" |[[Interior Pieces]] |
|||
|- |
|- |
||
| style="text-align:center; font-size:12px;" |<tabber>1=[[File:Cyclops Bridge Fragments-1.png|200px|center|link=Cyclops]][[Cyclops|Cyclops Bridge]]|-|2=[[File:Cyclops Bridge Fragments-2.png|200px|center|link=Cyclops]][[Cyclops|Cyclops Bridge]]|-|3=[[File:Cyclops Bridge Fragments-3.png|200px|center|link=Cyclops]][[Cyclops|Cyclops Bridge]]</tabber> |
|||
|[[Cyclops]] Engine Fragment |
|||
| style="text-align:center; font-size:12px;" |''CyclopsBridgeFragment'' |
|||
|[[Blueprints|Cyclops Engine Blueprint]] |
|||
| style="text-align:center;" |3 |
|||
|[[Crash Zone]], [[Grassy Plateaus]] |
|||
| style="text-align: left; font-size:12px;" | |
|||
| |
|||
*[[Crash Zone]] |
|||
|[[File:Cyclops Engine Fragment.png|thumb|60px]] |
|||
*[[Mushroom Forest]] |
|||
*[[Sea Treader's Path]] |
|||
*[[Wrecks]] |
|||
| style="text-align: center; font-size:12px;" |[[Cyclops]] |
|||
|- |
|- |
||
| style="text-align:center; font-size:12px;" |<tabber>1=[[File:Cyclops Engine Fragments-1.png|200px|center|link=Cyclops]][[Cyclops|Cyclops Engine]]|-|2=[[File:Cyclops Engine Fragments-2.png|200px|center|link=Cyclops]][[Cyclops|Cyclops Engine]]|-|3=[[File:Cyclops Engine Fragments-3.png|200px|center|link=Cyclops]][[Cyclops|Cyclops Engine]]</tabber> |
|||
|[[Cyclops]] Hull Fragment |
|||
| style="text-align:center; font-size:12px;" |''CyclopsEngineFragment'' |
|||
|[[Blueprints|Cyclops Hull Blueprint]] |
|||
| style="text-align:center;" |3 |
|||
|[[Crash Zone]], [[Grassy Plateaus]] |
|||
| style="text-align: left; font-size:12px;" | |
|||
|2 fragments |
|||
*[[Aurora]] |
|||
|[[File:Cyclops Hull Fragment.png|thumb|60px]] |
|||
*[[Crag Field]] |
|||
*[[Crash Zone]] |
|||
*[[Mountains]] |
|||
*[[Wrecks]] |
|||
| style="text-align: center; font-size:12px;" |[[Cyclops]] |
|||
|- |
|- |
||
| style="text-align:center; font-size:12px;" |<tabber>1=[[File:Cyclops Hull Fragments-1.png|200px|center|link=Cyclops]][[Cyclops|Cyclops Hull]]|-|2=[[File:Cyclops Hull Fragments-2.png|200px|center|link=Cyclops]][[Cyclops|Cyclops Hull]]|-|3=[[File:Cyclops Hull Fragments-3.png|200px|center|link=Cyclops]][[Cyclops|Cyclops Hull]]</tabber> |
|||
|[[Pressure Compensation Module|Cyclops Pressure Compensator]] Fragment |
|||
| style="text-align:center; font-size:12px;" |''CyclopsHullFragment'' |
|||
|[[Blueprints|Cyclops Pressure Compensator Blueprint]] |
|||
| style="text-align:center;" |3 |
|||
|[[Mushroom Forest]] |
|||
| style="text-align: left; font-size:12px;" | |
|||
|3 fragments |
|||
*[[Mushroom Forest]] |
|||
|[[File:Cyclops Pressure Compensator Fragment.png|thumb|60px]] |
|||
*[[Sea Treader's Path]] |
|||
*[[Wrecks]] |
|||
| style="text-align: center; font-size:12px;" |[[Cyclops]] |
|||
|- |
|- |
||
| style="text-align:center; font-size:12px;" |[[File:Grav Trap Fragment.png|200px|center|link=Grav Trap]][[Grav Trap (Subnautica)|Grav Trap]] |
|||
|[[Floodlight]] (is scanned as a whole) |
|||
| style="text-align:center; font-size:12px;" |''GravsphereFragment'' |
|||
|[[Blueprints|Floodlight Blueprint]] |
|||
| style="text-align:center;" |2 |
|||
|[[Wrecks]] |
|||
| style="text-align: left; font-size:12px;" | |
|||
|1 fragment |
|||
*[[Wrecks|Small Wrecks]] |
|||
|[[File:Floodlight.png|thumb|60px]] |
|||
*[[Wrecks]] |
|||
| style="text-align: center; font-size:12px;" |[[Deployables]] |
|||
|- |
|- |
||
| style="text-align: center; font-size:12px;" |[[File:Laser Cutter Fragment.png|200px|center|link=Laser Cutter]][[Laser Cutter (Subnautica)|Laser Cutter]] |
|||
|[[Mobile Vehicle Bay]] Fragment |
|||
| style="text-align:center; font-size:12px;" |''LaserCutterFragment'' |
|||
|[[Blueprints|Mobile Vehicle Bay Blueprint]] |
|||
| style="text-align:center;" |3 |
|||
|[[Kelp Forest]] |
|||
| style="text-align: left; font-size:12px;" | |
|||
| |
|||
*[[Grassy Plateaus]] |
|||
|[[File:Mobile Vehicle Bay Fragment.png|thumb|60px]] |
|||
*[[Wrecks]] |
|||
| style="text-align: center; font-size:12px;" |[[Tools]] |
|||
|- |
|- |
||
| style="text-align:center; font-size:12px;" |[[File:Damaged Light Stick.png|200px|center|link=Light Stick]][[Light Stick (Subnautica)|Light Stick]] |
|||
|[[Modification Station]] Fragment |
|||
| style="text-align:center; font-size:12px;" |''LEDLightFragment'' |
|||
|[[Blueprints|Workbench Blueprint]] |
|||
| style="text-align:center;" |2 |
|||
|[[Grassy Plateaus]], [[Grand Reef]], [[Underwater Islands]], [[Koosh Zone]] |
|||
| style="text-align: left; font-size:12px;" | |
|||
|3 fragments |
|||
*[[Wrecks]] |
|||
|[[File:Workbench Fragment.png|thumb|60px]] |
|||
| style="text-align: center; font-size:12px;" |[[Tools]] |
|||
<span style="font-weight:normal;"> </span> |
|||
|- |
|- |
||
| style="text-align:center; font-size:12px;" |<tabber>1=[[File:Mobile Vehicle Bay Fragments 1.png|200px|center|link=Mobile Vehicle Bay]][[Mobile Vehicle Bay (Subnautica)|Mobile Vehicle Bay]]|-|2=[[File:Mobile Vehicle Bay Fragments 2.png|200px|center|link=Mobile Vehicle Bay]][[Mobile Vehicle Bay (Subnautica)|Mobile Vehicle Bay]]|-|3=[[File:Mobile Vehicle Bay Fragments 3.png|200px|center|link=Mobile Vehicle Bay]][[Mobile Vehicle Bay (Subnautica)|Mobile Vehicle Bay]]|-|4=[[File:Mobile Vehicle Bay Fragments 4.png|200px|center|link=Mobile Vehicle Bay]][[Mobile Vehicle Bay (Subnautica)|Mobile Vehicle Bay]]|-|5=[[File:Mobile Vehicle Bay Fragments 5.png|200px|center|link=Mobile Vehicle Bay]][[Mobile Vehicle Bay (Subnautica)|Mobile Vehicle Bay]]</tabber> |
|||
|[[Moon Pool]] Fragment |
|||
| style="text-align:center; font-size:12px;" |''ConstructorFragment'' |
|||
|[[Blueprints|Moon Pool Blueprint]] |
|||
| style="text-align:center;" |3 |
|||
|[[Grand Reef]] |
|||
| style="text-align: left; font-size:12px;" | |
|||
|5 fragments |
|||
*[[Kelp Forest]] |
|||
|[[File:Moon Pool Fragment.png|thumb|60px]] |
|||
*[[Wrecks]] |
|||
| style="text-align: center; font-size:12px;" |[[Deployables]] |
|||
|- |
|- |
||
| style="text-align:center; font-size:12px;" |<tabber>1=[[File:Modification_Station Fragment 1.png|200px|center|link=Modification Station]][[Modification Station (Subnautica)|Modification Station]]|-|2=[[File:Modification_Station Fragment 2.png|200px|center|link=Modification Station]][[Modification Station (Subnautica)|Modification Station]]|-|3=[[File:Modification_Station Fragment 3.png|200px|center|link=Modification Station]][[Modification Station (Subnautica)|Modification Station]]</tabber> |
|||
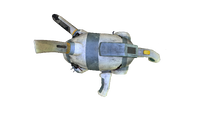
|[[Nuclear Reactor]] Fragment |
|||
| style="text-align:center; font-size:12px;" |''WorkbenchFragment'' |
|||
|[[Blueprints|Nuclear Reactor Blueprint]] |
|||
| style="text-align:center;" |3 |
|||
|[[Deep Grand Reef]] (Cavern) |
|||
| style="text-align: left; font-size:12px;" | |
|||
|4 fragments |
|||
*[[Crag Field]] |
|||
|[[File:Nuclear Reactor Fragment.png|thumb|60px]] |
|||
*[[Jellyshroom Cave]] |
|||
*[[Mushroom Forest]] |
|||
*[[Sparse Reef]] |
|||
*[[Wrecks]] |
|||
| style="text-align: center; font-size:12px;" |[[Interior Modules]] |
|||
|- |
|- |
||
| style="text-align:center; font-size:12px;" |<tabber>1=[[File:Moonpool Fragment 1.png|200px|center|link=Moonpool]][[Moonpool (Subnautica)|Moonpool]]|-|2=[[File:Moonpool Fragment 2.png|200px|center|link=Moonpool]][[Moonpool (Subnautica)|Moonpool]]|-|3=[[File:Moonpool Fragment 3.png|200px|center|link=Moonpool]][[Moonpool (Subnautica)|Moonpool]]|-|4=[[File:Moonpool Fragment 4.png|200px|center|link=Moonpool]][[Moonpool (Subnautica)|Moonpool]]|-|5=[[File:Moonpool Fragment 5.png|200px|center|link=Moonpool]][[Moonpool (Subnautica)|Moonpool]]|-|6=[[File:Moonpool Fragment 6.png|200px|center|link=Moonpool]][[Moonpool (Subnautica)|Moonpool]]</tabber> |
|||
|[[Power Transmitter]] Fragment |
|||
| style="text-align:center; font-size:12px;" |''MoonpoolFragment'' |
|||
| style="text-align:center;" |2 |
|||
| style="text-align: left; font-size:12px;" | |
|||
*[[Grand Reef]] |
|||
*[[Mushroom Forest]] |
|||
*[[Degasi Seabases]] |
|||
*[[Wrecks]] |
|||
| style="text-align: center; font-size:12px;" |[[Seabases (Subnautica)|Base Pieces]] |
|||
|[[Blueprints|Power Transmitter Blueprint]] |
|||
|[[Underwater Islands]] |
|||
| |
|||
| |
|||
|- |
|- |
||
| style="text-align:center; font-size:12px;" |<tabber>1=[[File:Nuclear Reactor Fragment 1.png|200px|center|link=Nuclear Reactor]][[Nuclear Reactor (Subnautica)|Nuclear Reactor]]|-|2=[[File:Nuclear Reactor Fragment 2.png|200px|center|link=Nuclear Reactor]][[Nuclear Reactor (Subnautica)|Nuclear Reactor]]|-|3=[[File:Nuclear Reactor Fragment 3.png|200px|center|link=Nuclear Reactor]][[Nuclear Reactor (Subnautica)|Nuclear Reactor]]|-|4=[[File:Nuclear Reactor Fragment 4.png|200px|center|link=Nuclear Reactor]][[Nuclear Reactor (Subnautica)|Nuclear Reactor]]</tabber> |
|||
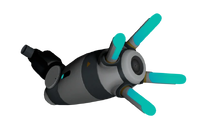
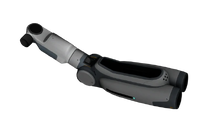
|[[Propulsion Cannon]] Fragment |
|||
| style="text-align:center; font-size:12px;" |''BaseNuclearReactorFragment'' |
|||
|[[Blueprints|Propulsion Cannon Blueprint]] |
|||
| style="text-align:center;" |3 |
|||
|[[Underwater Islands]] |
|||
| style="text-align: left; font-size:12px;" | |
|||
|3 fragments |
|||
*[[Mountains]] |
|||
|[[File:Propulsion Cannon Fragment.png|thumb|60px]] |
|||
*[[Degasi Seabases]] |
|||
*[[Wrecks]] |
|||
| style="text-align: center; font-size:12px;" |[[Interior Pieces]] |
|||
|- |
|- |
||
| style="text-align:center; font-size:12px;" |<tabber>1=[[File:Damaged Power Cell Charger.png|200px|center|link=Power Cell Charger]][[Power Cell Charger (Subnautica)|Power Cell Charger]]|-|2=[[File:Power Cell Charger Fragment 2.png|200px|center|link=Power Cell Charger]][[Power Cell Charger (Subnautica)|Power Cell Charger]]</tabber> |
|||
|Scanner Room Fragment |
|||
| style="text-align:center; font-size:12px;" |''PowerCellChargerFragment'' |
|||
| |
|||
| style="text-align:center;" |2 |
|||
| |
|||
| style="text-align: left; font-size:12px;" | |
|||
| |
|||
*[[Degasi Seabases]] |
|||
| |
|||
*[[Wrecks]] |
|||
| style="text-align: center; font-size:12px;" |[[Interior Modules]] |
|||
|- |
|- |
||
| style="text-align:center; font-size:12px;" |[[File:Power_transmitter fragment.png|200px|center|link=Power Transmitter]][[Power Transmitter (Subnautica)|Power Transmitter]] |
|||
|[[SeaGlide|Seaglide]] Fragment |
|||
| style="text-align:center; font-size:12px;" |''PowerTransmitterFragment'' |
|||
|[[Blueprints|SeaGlide Blueprint]] |
|||
| style="text-align:center;" |1 |
|||
|[[Kelp Forest]] |
|||
| style="text-align: left; font-size:12px;" | |
|||
| |
|||
*[[Crash Zone]] |
|||
| |
|||
*[[Mushroom Forest]] |
|||
*[[Wrecks]] |
|||
| style="text-align: center; font-size:12px;" |[[Exterior Modules]] |
|||
|- |
|- |
||
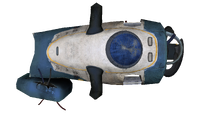
| style="text-align:center; font-size:12px;" |[[File:Unknown.png|200px|center|link=Prawn Suit]][[Prawn Suit (Subnautica)|Prawn Suit]] |
|||
|[[Seamoth]] Fragment |
|||
| style="text-align:center; font-size:12px;" |''ExosuitFragment'' |
|||
|[[Blueprints|Seamoth Blueprint]] |
|||
| style="text-align:center;" |4 |
|||
|[[Crash Zone]], [[Grassy Plateaus]], [[Safe Shallows]] |
|||
| style="text-align: left; font-size:12px;" | |
|||
|3 fragments |
|||
*[[Aurora]] |
|||
|[[File:Seamoth_Fragment.png|thumb|60px]] |
|||
*[[Wrecks]] |
|||
| style="text-align: center; font-size:12px;" | [[Vehicles]] |
|||
|- |
|- |
||
| style="text-align:center; font-size:12px;" |[[File:Unknown.png|200px|center|link=Prawn Suit]][[Prawn Suit (Subnautica)|Prawn Suit Claw Arm]] |
|||
|[[Seamoth Upgrade Console]] Fragment |
|||
| style="text-align:center; font-size:12px;" | - |
|||
|[[Blueprints|Seamoth Upgrade Console Blueprint]] |
|||
| style="text-align:center;" |2 |
|||
|[[Grassy Plateaus]], [[Mountains]] |
|||
| style="text-align: left; font-size:12px;" | |
|||
|3 fragments |
|||
*[[Wrecks]] |
|||
| |
|||
| style="text-align: center; font-size:12px;" |[[Prawn Suit (Subnautica)|Prawn Suit]] |
|||
|- |
|||
| style="text-align:center; font-size:12px;" |[[File:Prawn Suit Drill Fragment.webp|200px|center|link=Prawn Suit Drill Arm]][[Prawn Suit Drill Arm (Subnautica)|Prawn Suit Drill Arm]] |
|||
| style="text-align:center; font-size:12px;" |''ExosuitDrillArmFragment'' |
|||
| style="text-align:center;" |2 |
|||
| style="text-align: left; font-size:12px;" | |
|||
*[[Wrecks]] |
|||
| style="text-align: center; font-size:12px;" |[[Upgrade Modules]] |
|||
|- |
|||
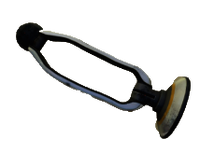
| style="text-align:center; font-size:12px;" |[[File:Unknown.png|200px|center|link=Prawn Suit Grappling Arm]][[Prawn Suit Grappling Arm (Subnautica)|Prawn Suit Grappling Arm]] |
|||
| style="text-align:center; font-size:12px;" |''ExosuitGrapplingArmFragment'' |
|||
| style="text-align:center;" |2 |
|||
| style="text-align: left; font-size:12px;" | |
|||
*[[Wrecks]] |
|||
| style="text-align: center; font-size:12px;" |[[Upgrade Modules]] |
|||
|- |
|||
| style="text-align:center; font-size:12px;" |[[File:Prawn Suit Propulsion Cannon Fragment.webp|200px|center|link=Prawn Suit Propulsion Cannon]][[Prawn Suit Propulsion Cannon (Subnautica)|Prawn Suit Propulsion Cannon]] |
|||
| style="text-align:center; font-size:12px;" |''ExosuitPropulsionArmFragment'' |
|||
| style="text-align:center;" |2 |
|||
| style="text-align: left; font-size:12px;" | |
|||
*[[Wrecks]] |
|||
| style="text-align: center; font-size:12px;" |[[Upgrade Modules]] |
|||
|- |
|||
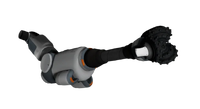
| style="text-align:center; font-size:12px;" |[[File:Prawn Suit Torpedo Arm Fragment.webp|200px|center|link=Prawn Suit Torpedo Arm]][[Prawn Suit Torpedo Arm (Subnautica)|Prawn Suit Torpedo Arm]] |
|||
| style="text-align:center; font-size:12px;" |''ExosuitTorpedoArmFragment'' |
|||
| style="text-align:center;" |2 |
|||
| style="text-align: left; font-size:12px;" | |
|||
*[[Wrecks]] |
|||
| style="text-align: center; font-size:12px;" |[[Upgrade Modules]] |
|||
|- |
|||
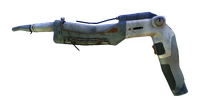
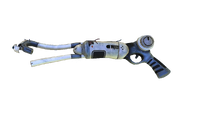
| style="text-align:center; font-size:12px;" |[[File:Damaged Propulsion Cannon.png|200px|center|link=Propulsion Cannon]][[Propulsion Cannon (Subnautica)|Propulsion Cannon]] |
|||
| style="text-align:center; font-size:12px;" |''PropulsionCannonFragment'' |
|||
| style="text-align:center;" |2 |
|||
| style="text-align: left; font-size:12px;" | |
|||
*[[Aurora]] |
|||
*[[Crash Zone]] |
|||
*[[Underwater Islands]] |
|||
*[[Wrecks]] |
|||
| style="text-align: center; font-size:12px;" |[[Tools]] |
|||
<span style="font-weight:normal;"> </span> |
|||
|- |
|- |
||
| style="text-align:center; font-size:12px;" |[[File:Purple Tablet Fragment.png|200px|center|link=Purple Tablet]][[Purple Tablet]] |
|||
|[[Solar Panel]] Fragment |
|||
| style="text-align:center; font-size:12px;" | |
|||
|[[Blueprints|Solar Panel Blueprint]] |
|||
{| class="fandom-table" |
|||
|[[Safe Shallows]], [[Kelp Forest]] |
|||
| |
|||
| |
| |
||
|precursorkey_purple |
|||
|} |
|||
| style="text-align:center;" |1 |
|||
| style="text-align: left; font-size:12px;" | |
|||
*[[Mountain Island]] |
|||
| style="text-align: center; font-size:12px;" |[[Equipment]] |
|||
<span style="font-weight:normal;"> </span> |
|||
|- |
|- |
||
| style="text-align:center; font-size:12px;" |<tabber>1=[[File:Scanner Room Fragment 1.png|200px|center|link=Scanner Room]][[Scanner Room (Subnautica)|Scanner Room]]|-|2=[[File:Scanner Room Fragment 2.png|200px|center|link=Scanner Room]][[Scanner Room (Subnautica)|Scanner Room]]|-|3=[[File:Scanner Room Fragment 3.png|200px|center|link=Scanner Room]][[Scanner Room (Subnautica)|Scanner Room]]|-|4=[[File:Scanner Room Fragment 4.png|200px|center|link=Scanner Room]][[Scanner Room (Subnautica)|Scanner Room]]</tabber> |
|||
|[[Stasis Rifle]] Fragment |
|||
| style="text-align:center; font-size:12px;" |''BaseMapRoomFragment'' |
|||
|[[Blueprints|Stasis Rifle Blueprint]] |
|||
| style="text-align:center;" |3 |
|||
| style="text-align: left; font-size:12px;" | |
|||
*[[Crag Field]] |
|||
*[[Grassy Plateaus]] |
|||
*[[Sea Treader's Path]] |
|||
*[[Wrecks]] |
|||
| style="text-align: center; font-size:12px;" |[[Seabases (Subnautica)|Base Pieces]] |
|||
|[[Mountains]] |
|||
|3 fragments |
|||
|[[File:Stasis_Rifle_Fragment.png|thumb|60px]] |
|||
|- |
|- |
||
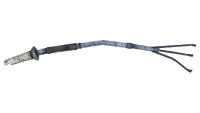
| style="text-align:center; font-size:12px;" |[[File:Damaged Seaglide.png|200px|center|link=Seaglide]][[Seaglide (Subnautica)|Seaglide]] |
|||
|[[Terraformer]] Fragment |
|||
| style="text-align:center; font-size:12px;" |''SeaglideFragment'' |
|||
|[[Blueprints|Terraformer Blueprint ]] |
|||
| style="text-align:center;" |2 |
|||
|[[Grand Reef]], [[Mountains]] |
|||
| style="text-align: left; font-size:12px;" | |
|||
|3 fragments |
|||
*[[Kelp Forest]] |
|||
|[[File:Terraformer_Fragment.png|thumb|60px]] |
|||
*[[Safe Shallows]] |
|||
*[[Wrecks|Small Wrecks]] |
|||
*[[Wrecks]] |
|||
| style="text-align: center; font-size:12px;" |[[Deployables]] |
|||
|- |
|- |
||
| style="text-align:center; font-size:12px;" |<tabber>1=[[File:Seamoth Fragment1.png|200px|center|link=Seamoth]][[Seamoth]]|-|2=[[File:Seamoth Fragment2.png|200px|center|link=Seamoth]][[Seamoth]]|-|3=[[File:Seamoth Fragment3.png|200px|center|link=Seamoth]][[Seamoth]]|-|4=[[File:Seamoth Fragment4.png|200px|center|link=Seamoth]][[Seamoth]]</tabber> |
|||
|[[Thermal Plant]] Fragment |
|||
| style="text-align:center; font-size:12px;" |''SeamothFragment'' |
|||
|[[Blueprints|Thermal Plant Blueprint]] |
|||
| style="text-align:center;" |3 |
|||
|[[Blood Kelp Caves]], [[Sparse Reef]], [[Grand Reef]] |
|||
| style="text-align: left; font-size:12px;" | |
|||
|4 fragments |
|||
*[[Aurora]] |
|||
|[[File:Thermal Plant Fragment.png|thumb|60px]] |
|||
*[[Grassy Plateaus]] |
|||
| style="text-align: center; font-size:12px;" |[[Vehicles]] |
|||
|- |
|- |
||
| style="text-align:center; font-size:12px;" |[[File:Damaged Stasis Rifle.png|200px|center|link=Stasis Rifle]][[Stasis Rifle]] |
|||
|[[Transfuser]] Fragment |
|||
| style="text-align:center; font-size:12px;" |''StasisRifleFragment'' |
|||
|[[Blueprints|Transfuser Blueprint]] |
|||
| style="text-align:center;" |2 |
|||
|[[Grand Reef]] |
|||
| style="text-align: left; font-size:12px;" | |
|||
|3 fragments |
|||
*[[Degasi Seabases]] |
|||
|[[File:Transfuser_Fragment.png|thumb|60px]] |
|||
*[[Underwater Islands]] |
|||
*[[Wrecks]] |
|||
| style="text-align: center; font-size:12px;" |[[Tools]] |
|||
|- |
|- |
||
| style="text-align:center; font-size:12px;" |<tabber>1=[[File:Thermal Plant Fragment 1.png|200px|center|link=Thermal Plant]][[Thermal Plant (Subnautica)|Thermal Plant]]|-|2=[[File:Thermal Plant Fragment 2.png|200px|center|link=Thermal Plant]][[Thermal Plant (Subnautica)|Thermal Plant]]|-|3=[[File:Thermal Plant Fragment 3.png|200px|center|link=Thermal Plant]][[Thermal Plant (Subnautica)|Thermal Plant]]</tabber> |
|||
|[[Water Filtration Machine]] Fragment |
|||
| style="text-align:center; font-size:12px;" |''ThermalPlantFragment'' |
|||
|[[Blueprints|Water Filtration Machine Blueprint]] |
|||
| style="text-align:center;" |2 |
|||
|[[Wrecks]] |
|||
| style="text-align: left; font-size:12px;" | |
|||
|1 fragment |
|||
*[[Grand Reef]] |
|||
|[[File:Water_Filtration_Machine.png|thumb|64px]] |
|||
*[[Degasi Seabases]] |
|||
*[[Wrecks]] |
|||
| style="text-align: center; font-size:12px;" |[[Exterior Modules]] |
|||
|} |
|} |
||
==Gallery== |
|||
<gallery widths="200" spacing="small"> |
|||
damaged_tech_in_game.jpg|[[Tools]] fragments render |
|||
seamoth_fragments_in_game.jpg|[[Seamoth]] fragments render |
|||
More_damaged_tech_in_game.jpg|Damaged Tools |
|||
</gallery> |
|||
==Trivia== |
==Trivia== |
||
*In the past, |
* In the past, Fragments could be picked up and had to be researched using the [[Cut Content (Subnautica)#Fragment Analyzer|Fragment Analyzer]]. This system was scrapped with the introduction of the Scanner. |
||
* By using Console Commands, it is possible to spawn in fragments which when dropped, will become a black cube. |
|||
*The [[Pressure Compensation Module|Cyclops Pressure Compensator]] Fragment safe model is a bit larger than all the other '''Fragments'''. |
|||
*In the future, '''Fragments''' will only be found in [[Wrecks]], [[Abandoned Seabases]], [[Lifepod|Destroyed lifepods]] and the [[Aurora|Aurora.]] |
|||
{{Navbox Items}} |
|||
[[Category:In Development]] |
|||
[[ |
[[de:Fragmente]] |
||
[[fr:Fragments]] |
|||
[[Category:Raw Material]] |
|||
[[es:Fragmentos]] |
|||
[[pt-br:Fragments]] |
|||
[[pl:Fragmenty]] |
|||
[[ru:Фрагменты]] |
|||
[[Category:Wrecks]] |
|||
[[Category:Gameplay]] |
|||
Latest revision as of 13:18, 23 October 2023
This article is about {{#explode:Fragments (Subnautica)|(}} in Subnautica. [[{{#explode:Fragments (Subnautica)|(}} (Below Zero)|Click here]] for information on this subject in Below Zero.
.png)
|
Read at own risk This article contains unmarked spoilers. Players new to the game would want to avoid or be cautious toward this article. |
Fragments are broken pieces of advanced technology that can be analyzed by the Scanner to create Blueprints. They are found in and around Wrecks, strewn across many Biomes around the Aurora, and scattered throughout the Degasi Seabases. Depending on the technology being analyzed, a different number of Fragments may be required to acquire the blueprint. Scanning a Fragment for which the player already has a complete blueprint of will convert the Fragment into two pieces of Titanium.
Currently Available Fragments
| Blueprint | DebugSpawn |
# Required |
Location | Tab | ||
|---|---|---|---|---|---|---|
<tabber>1=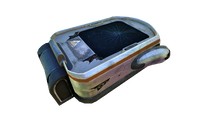  |
BatteryChargerFragment | 2 | Interior Modules
| |||
| BeaconFragment | 2 | Deployables
| ||||
<tabber>1= 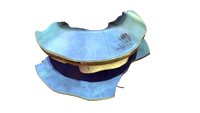   |
BioreactorFragment | 2 | Interior Pieces
| |||
<tabber>1=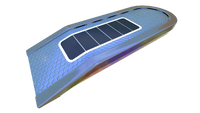   |
CyclopsBridgeFragment | 3 | Cyclops
| |||
<tabber>1= 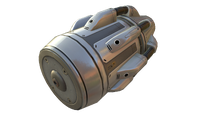  |
CyclopsEngineFragment | 3 | Cyclops | |||
<tabber>1=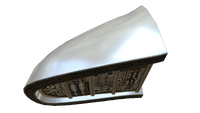   |
CyclopsHullFragment | 3 | Cyclops | |||
 |
GravsphereFragment | 2 | Deployables | |||
 |
LaserCutterFragment | 3 | Tools
| |||
 |
LEDLightFragment | 2 | Tools
| |||
<tabber>1=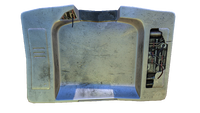 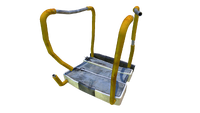 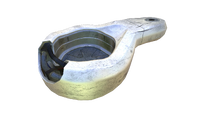   |
ConstructorFragment | 3 | Deployables
| |||
<tabber>1=  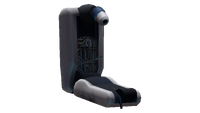 |
WorkbenchFragment | 3 | Interior Modules | |||
<tabber>1= 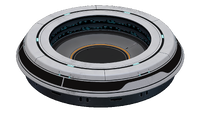 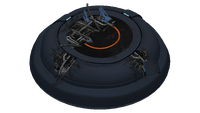 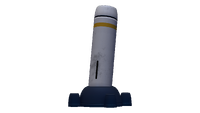  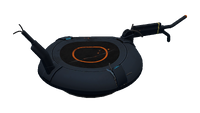 |
MoonpoolFragment | 2 | Base Pieces
| |||
<tabber>1=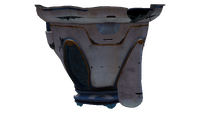 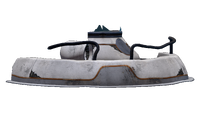 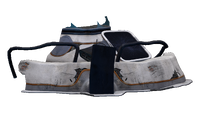 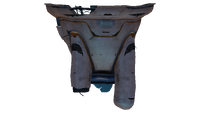 |
BaseNuclearReactorFragment | 3 | Interior Pieces
| |||
<tabber>1=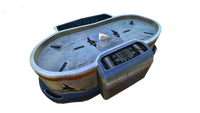  |
PowerCellChargerFragment | 2 | Interior Modules
| |||
 |
PowerTransmitterFragment | 1 | Exterior Modules
| |||
 |
ExosuitFragment | 4 | Vehicles
| |||
|
- | 2 | Prawn Suit
| |||
 |
ExosuitDrillArmFragment | 2 | Upgrade Modules
| |||
|
ExosuitGrapplingArmFragment | 2 | Upgrade Modules
| |||
 |
ExosuitPropulsionArmFragment | 2 | Upgrade Modules
| |||
 |
ExosuitTorpedoArmFragment | 2 | Upgrade Modules
| |||
 |
PropulsionCannonFragment | 2 | Tools
| |||
 |
|
1 | Equipment
| |||
<tabber>1=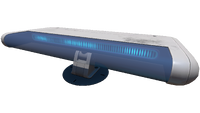  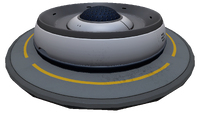 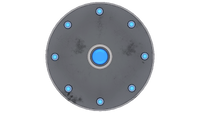 |
BaseMapRoomFragment | 3 | Base Pieces
| |||
 |
SeaglideFragment | 2 | Deployables
| |||
<tabber>1=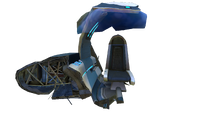   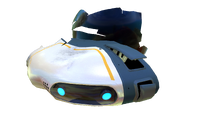 |
SeamothFragment | 3 | Vehicles
| |||
 |
StasisRifleFragment | 2 | Tools
| |||
<tabber>1=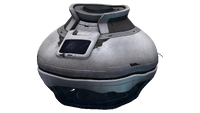 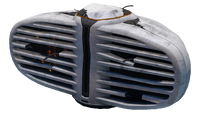 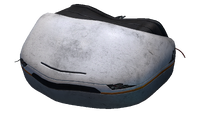 |
ThermalPlantFragment | 2 | Exterior Modules |
Gallery


Trivia
- In the past, Fragments could be picked up and had to be researched using the Fragment Analyzer. This system was scrapped with the introduction of the Scanner.
- By using Console Commands, it is possible to spawn in fragments which when dropped, will become a black cube.
Lua error in package.lua at line 80: module 'Dev:Navbox' not found.