
Lost River: Difference between revisions
Myk Streja (talk | contribs) (Moved map image to less intrusive position) |
|||
| (76 intermediate revisions by 41 users not shown) | |||
| Line 1: | Line 1: | ||
__NOTOC__ |
|||
{{Spoiler}} |
{{Spoiler}} |
||
{{Biome2 |
{{Biome2 |
||
|title1 = Lost River |
|title1 = Lost River |
||
|image1 = LRInfobox.jpg |
|image1 = LRInfobox.jpg |
||
|tab = [[Biomes]] |
|tab = [[Biomes (Subnautica)|Biomes]] |
||
|type = [[:Category:Caves|Cave]] |
|type = [[:Category:Caves|Cave]] |
||
|depth_range = * 550 - 1000 meters |
|depth_range = * 550 - 1000 meters |
||
| Line 12: | Line 10: | ||
* [[Sandstone Outcrop]] |
* [[Sandstone Outcrop]] |
||
* [[Shale Outcrop]] |
* [[Shale Outcrop]] |
||
|poi = |
|||
|poi = * [[Disease Research Facility]] |
|||
[[Inactive Lava Zone]] Entrance |
|||
<div class="mw-collapsible mw-collapsed"> |
|||
{{Clear}} |
|||
*-1280 -970 400 |
|||
* 270 -909 688 |
|||
</div> |
|||
{{Clear}} |
|||
{{Clear}} |
|||
* [[Disease Research Facility]] |
|||
* [[Lost River Laboratory Cache]] |
* [[Lost River Laboratory Cache]] |
||
* [[Alien Arch Caches|Alien Arch Cache]] |
* [[Alien Arch Caches|Alien Arch Cache]] |
||
| Line 20: | Line 27: | ||
* [[Giant Cove Tree]] |
* [[Giant Cove Tree]] |
||
|temp = *3.3°C-4.5°C |
|temp = *3.3°C-4.5°C |
||
|music=* [[Subnautica OST|'' |
|music=* [[Subnautica OST|''Lost River'']] |
||
* [[Subnautica OST|''Bone Fields'']] (Bone Fields) |
|||
* [[Subnautica OST|''Ghost Tree'']] (Tree Cove) |
* [[Subnautica OST|''Ghost Tree'']] (Tree Cove) |
||
* [[Subnautica OST|'' |
* [[Subnautica OST|''Fear the Reapers'' ]] |
||
}} |
}} |
||
{{Quote2|Terrain scans indicate this biome contains unusually high concentrations of organic and fossilized remains. |
{{Quote2|Terrain scans indicate this biome contains unusually high concentrations of organic and fossilized remains. |
||
[[File:LRIntro.ogg]]|PDA|Dialogue}} |
[[File:LRIntro.ogg]]|PDA|Dialogue}} |
||
The '''Lost River''' is a massive, frigid cave [[Biomes|biome]] located deep under the surface and is further divided into seven distinct sub-biomes. |
The '''Lost River''' is a massive, frigid cave [[Biomes (Subnautica)|biome]] located deep under the surface and is further divided into seven distinct sub-biomes. |
||
There are four entrances to the Lost River. These can be found in the [[Blood Kelp Zone|Northern Blood Kelp Zone]], the [[Deep Grand Reef]], the border between the [[Mountains]] and the [[Bulb Zone]], and the [[Blood Kelp Zone|Blood Kelp Trench]]. The [[Cyclops]] is able to enter the Lost River through all four entrances, and can traverse the whole way into the [[Inactive Lava Zone]]. The [[Seamoth]] can travel through all passages, but is unable to travel to the Lava zones. |
|||
It is the deepest biome that can be explored by the [[Seamoth]]. |
It is the deepest biome that can be explored by the [[Seamoth]], although some sections dip below its maximum depth and the green brine will also wear down its durability. |
||
== Description == |
== Description == |
||
The Lost River is a |
The Lost River is a vast and gloomy biome, possessing a distinct greenish tint in the water that is mostly illuminated by the alkaline brine pools. It has an eerie atmosphere amplified by the abundance of hostile fauna, ghostly flora, and the many hazardous environmental features. |
||
Vast amounts of green brine pools cover almost all of the lower portions of the caverns. The brine pools found throughout most of the cave system will harm the player upon direct contact, with the exception being while within the [[Prawn Suit]], or when within the harmless blue brine found within the '''Tree Cove'''. The brine pools do damage to the Seamoth as well. Fauna and flora found within the Lost River are immune to the brine, a trait carried only by them. |
|||
The [[Disease Research Facility]] is located in the Lost River, inside a cavern with its opening in the Junction and the Mountains corridor. Large alien column structures can be used as waypoints to locate the facility. |
|||
The Lost River is one of the coldest biomes implemented, with temperatures on the sea floor rarely rising above 10 degrees Celsius. Hence, thermal reactor modules do not work very well here. |
|||
Fauna and flora found within the Lost River are immune to the alkaline brine, a trait carried only by them. |
|||
[[File:Subnautica lost river biomes.png|alt=A map of the Lost River with the locations of its seven sub-biomes labeled|thumb|Lost River map, labeled by sub-biome]] |
|||
The [[Disease Research Facility]] is located in the Lost River, inside a cavern with its opening in the Junction and the Mountains corridor. |
|||
If you wish to build a Seabase in the Lost River, a [[Thermal Plant (Subnautica)|Thermal Plant]] next to a thermal vent is one of the best ways to power a base in this biome. It is advised to bring plenty of [[Titanium (Subnautica)|Titanium]] with the player, since there are few [[Titanium (Subnautica)|large Titanium deposits]] there. Any other resource can usually be acquired on the spot. Note that there are enough resources, like [[Lead (Subnautica)|lead]], in the Lost River for the player to build a [[Nuclear Reactor (Subnautica)|nuclear reactor]] and [[Reactor Rod (Subnautica)|nuclear reactor rods]]. Additionally, be conscious of the [[Hull Integrity|hull integrity]] so that the Seabase does not take any damage. |
|||
A player can attempt to park their [[Cyclops]] above a thermal vent in order to charge it with a [[Cyclops Thermal Reactor Module|Cyclops thermal reactor module]]. However, be careful so that the exit hatch is not near the vent. |
|||
The Lost River is one of the coldest biomes implemented, with temperatures on the sea floor rarely rising above 10 degrees Celsius.{{Clear}} |
|||
The Lost River is composed of seven distinct areas: |
The Lost River is composed of seven distinct areas, each holding similar resources, but some more dangerous than others: |
||
==Bone Fields== |
|||
<div class="MainPageBox"> |
|||
<div class="lostRiverTabber"><tabber> |
|||
Bone Fields= |
|||
[[File:LRBonesFields.jpg|thumb|"Bone Fields"|300px]] |
[[File:LRBonesFields.jpg|thumb|"Bone Fields"|300px]] |
||
The Bone Fields is a vast cavern within the Lost River, centered on the [[Gargantuan Fossil]] which gives the Bone Fields its name. It is connected to the [[Blood Kelp Zone|Blood Kelp Trench]] via the '''Lost River Corridor''', and to the [[Deep Grand Reef]] via the '''Ghost Canyon''', each of them having their own [[flora]] and particular landscapes. |
The Bone Fields is a vast cavern within the Lost River, centered on the [[Gargantuan Fossil]] which gives the Bone Fields its name. It is connected to the [[Blood Kelp Zone|Blood Kelp Trench]] via the '''Lost River Corridor''', and to the [[Deep Grand Reef]] via the '''Ghost Canyon''', each of them having their own [[flora]] and particular landscapes. |
||
The |
The [[Ghost Leviathan Juvenile]] in this region is facing directly to the Ghost Canyon. One should be cautious when entering through there to here. |
||
There are a few hydrothermal vents |
There are a few hydrothermal vents in this area. On these you can find [[Ruby|Rubies]], [[Lithium (Subnautica)|Lithium]], [[Table Coral|Green Table Coral]] and sometimes [[Magnetite (Subnautica)|Magnetite]]. |
||
[[Large Resource Deposits]] are present mostly under the brine lake surrounding the colossal skeleton and the caves underneath. Rarer deposits can be found in the [[Bone Fields Caves]] |
[[Large Resource Deposits]] are present mostly under the brine lake surrounding the colossal skeleton and the caves underneath. Rarer deposits can be found in the [[Bone Fields Caves]] on the ceiling, others around the cavern and deeper caverns under the brine. |
||
The caves in the brine and ceiling contain a unique, unnamed kind of [[coral]].{{Clear}} |
The caves in the brine and ceiling contain a unique, unnamed kind of [[coral]].{{Clear}} |
||
{{#tag:tabber| |
{{#tag:tabber| |
||
Resources= |
Resources= |
||
* [[Diamond]] |
* [[Diamond (Subnautica)|Diamond]] |
||
* [[Gel Sack]] |
* [[Gel Sack (Subnautica)|Gel Sack]] |
||
* [[ |
* [[Ghost Weed|Ghost Weed Seed]] |
||
* [[Gold (Subnautica)|Gold]] |
|||
* [[List of Plantable Flora|Ghost Weed Seed]] |
|||
* [[Large Resource Deposits (Subnautica)|Large Gold Deposit]] |
|||
* [[Gold]] |
|||
* [[Large Resource Deposits|Large |
* [[Large Resource Deposits (Subnautica)|Large Lithium Deposit]] |
||
* [[Large Resource Deposits|Large |
* [[Large Resource Deposits (Subnautica)|Large Nickel Deposit]] |
||
* [[Large Resource Deposits|Large |
* [[Large Resource Deposits (Subnautica)|Large Silver Deposit]] |
||
* [[Large Resource Deposits|Large |
* [[Large Resource Deposits (Subnautica)|Large Titanium Deposit]] |
||
* [[Large Resource Deposits|Large |
* [[Large Resource Deposits (Subnautica)|Large Uraninite Deposit]] |
||
* [[Lead (Subnautica)|Lead]] |
|||
* [[Large Resource Deposits|Large Uraninite Deposit]] |
|||
* [[Lithium (Subnautica)|Lithium]] |
|||
* [[Lead]] |
|||
* [[Magnetite (Subnautica)|Magnetite]] |
|||
* [[Lithium]] |
|||
* [[Magnetite]] |
|||
* [[Eggs|Mesmer Eggs]] |
* [[Eggs|Mesmer Eggs]] |
||
* [[Nickel Ore]] |
* [[Nickel Ore (Subnautica)|Nickel Ore]] |
||
* [[Quartz]] |
* [[Quartz (Subnautica)|Quartz]] |
||
* [[Ruby]] |
* [[Ruby (Subnautica)|Ruby]] |
||
* [[Silver Ore]] |
* [[Silver Ore (Subnautica)|Silver Ore]] |
||
{{!}}-{{!}} |
{{!}}-{{!}} |
||
Fauna= |
Fauna= |
||
* [[Amoeboid]] |
* [[Amoeboid]] |
||
* [[Bleeder]] |
* [[Bleeder]] |
||
* [[Ghost Leviathan Juvenile]] |
|||
* [[Ghostray]] |
|||
* [[Ghost Leviathan]] |
|||
* [[Mesmer]] |
* [[Mesmer]] |
||
* [[River Prowler]] |
* [[River Prowler]] |
||
| Line 91: | Line 100: | ||
Flora= |
Flora= |
||
* [[Crab Claw Kelp]] |
* [[Crab Claw Kelp]] |
||
* [[Gel Sack]] |
* [[Gel Sack (Subnautica)|Gel Sack]] |
||
* [[Ghost Weed]] |
* [[Ghost Weed]] |
||
{{!}}-{{!}} |
|||
Coral= |
|||
* [[Table Coral (Subnautica)|Green Table Coral]] |
|||
}}{{clear}} |
}}{{clear}} |
||
| Line 99: | Line 111: | ||
LRBF_Large_Skeleton.png|A view of the Gargantuan Fossil |
LRBF_Large_Skeleton.png|A view of the Gargantuan Fossil |
||
LRBF_Small_Skeleton.png|Smaller ribs located at the outskirts of the Bone Fields |
LRBF_Small_Skeleton.png|Smaller ribs located at the outskirts of the Bone Fields |
||
LRBF BrineCave.jpg|A small cavern beneath the brine surface |
|||
LRBF_Rock_Formations.png|Strange rock formations on the ceiling of the Bone Fields |
LRBF_Rock_Formations.png|Strange rock formations on the ceiling of the Bone Fields |
||
RockFormationsCave.jpg|The [[Bone Fields Caves]] above the Bone Fields |
RockFormationsCave.jpg|The [[Bone Fields Caves]] above the Bone Fields |
||
IMG_7494.JPG|A view of the Large Skeletal Remains |
IMG_7494.JPG|A view of the Large Skeletal Remains |
||
LRBFskeletonrear.jpg|Rear view of the skeletal remains |
LRBFskeletonrear.jpg|Rear view of the skeletal remains |
||
GL_BF.jpg|The |
GL_BF.jpg|The [[Ghost Leviathan Juvenile]] found in this section of the biome |
||
2019-01-11_00003.jpg|View of a [[Diamond]] from the [[Bone Fields Caves]] |
|||
</gallery> |
</gallery> |
||
|-| |
|||
Corridor= |
==Corridor== |
||
[[File: |
[[File:LRBFCOverview1.jpg|thumb|"Corridor"|300px]] |
||
The Lost River Corridor is the area connecting the '''Bone Fields''' to the [[Blood Kelp Zone|Blood Kelp Trench]]. It is mainly populated by [[Crabsquid]]s, with strange rock structures covered by [[Pyrocoral]] growing on the sides. |
The Lost River Corridor is the area connecting the '''Bone Fields''' to the [[Blood Kelp Zone|Blood Kelp Trench]]. It is mainly populated by [[Crabsquid]]s, with strange rock structures covered by [[Pyrocoral]] growing on the sides. |
||
A good amount of [[Limestone Outcrop]]s can be found on the seabed, with [[Shale Outcrop]]s occasionally located on the walls and ceiling of the corridor. There is a group of hydrothermal vents at the end of the corridor, marking the entrance to the Bone Fields. |
A good amount of [[Limestone Outcrop]]s can be found on the seabed, with [[Shale Outcrop]]s occasionally located on the walls and ceiling of the corridor. There is a group of hydrothermal vents at the end of the corridor, marking the entrance to the Bone Fields. |
||
[[Gel Sack]]s can also be found in abundance scattered around the edge of the brine streams. |
[[Gel Sack (Subnautica)|Gel Sack]]s can also be found in abundance scattered around the edge of the brine streams. |
||
{{Clear}} |
{{Clear}} |
||
{{Clear}} |
{{Clear}} |
||
{{#tag:tabber| |
{{#tag:tabber| |
||
Resources= |
Resources= |
||
* [[Copper Ore]] |
* [[Copper Ore (Subnautica)|Copper Ore]] |
||
* [[Diamond]] |
* [[Diamond (Subnautica)|Diamond]] |
||
* [[Gel Sack]] |
* [[Gel Sack (Subnautica)|Gel Sack]] |
||
* [[Gold (Subnautica)|Gold]] |
|||
* [[List of Plantable Flora|Gel Sack Spore]] |
|||
* [[Large Resource Deposits (Subnautica)|Large Titanium Deposit]] |
|||
* [[Gold]] |
|||
* [[Lithium (Subnautica)|Lithium]] |
|||
* [[Large Resource Deposits|Large Titanium Deposit]] |
|||
* [[Quartz (Subnautica)|Quartz]] |
|||
* [[Lithium]] |
|||
* [[ |
* [[Ruby (Subnautica)|Ruby]] |
||
* [[Titanium (Subnautica)|Titanium]] |
|||
* [[Ruby]] |
|||
* [[Titanium]] |
|||
{{!}}-{{!}} |
{{!}}-{{!}} |
||
Fauna= |
Fauna= |
||
| Line 139: | Line 148: | ||
Flora= |
Flora= |
||
* [[Brine Lily]] |
* [[Brine Lily]] |
||
* [[Gel Sack]] |
* [[Gel Sack (Subnautica)|Gel Sack]] |
||
{{!}}-{{!}} |
{{!}}-{{!}} |
||
Coral= |
Coral= |
||
| Line 147: | Line 156: | ||
=== Gallery === |
=== Gallery === |
||
<gallery widths="200" spacing="small"> |
<gallery widths="200" spacing="small"> |
||
LRBFCOverview1.jpg|Overview with a large overhanging arch |
|||
LRBFCInfobox.png|Overview |
|||
LRBFCOverview2.jpg|Ditto |
|||
Screen Shot 2017-04-08 at 19.56.33.png|Another view |
|||
LRBFCStream.jpg|One of the large '''Corridor''' streams |
|||
LRBFCGallery 1.png|The stream found here |
|||
LRBFCSingularFall.jpg|A small brine fall |
|||
LRBFCGallery 2.png|[[Brine Lily]] floating on the brine |
|||
LRBFCLily.jpg|A cluster of dormant [[Brine Lily|Brine Lilies]] floating in the brine stream |
|||
Screen Shot 2017-04-08 at 19.55.33.png|A group of [[Pyrocoral]] |
|||
LRBFCQuadFalls.jpg|Four brine falls coming together in one pool |
|||
Screen Shot 2017-04-08 at 19.55.52.png|One of the brine falls in the area |
|||
LRBFCLargeArch.jpg|A large overhanging arch of terrain over the brine falls |
|||
Screen Shot 2017-04-08 at 19.56.04.png|Three Brine falls coming together to form a lake |
|||
LRBFCStreamtomain.jpg|The brine streams in the ''Corridors'' running off into the '''Bone Fields''' |
|||
Screen Shot 2017-04-08 at 19.56.27.png|A [[Crabsquid]] in the area |
|||
LRBFCPyrocoral.jpg|Several clusters of Pyrocoral in the '''Corridor''' |
|||
LRC BKZT Entrance.png|The passage to the [[Blood Kelp Zone|Blood Kelp Trench]] |
|||
LRBFCvent.jpg|Two large thermal vents in the '''Corridor''' |
|||
LRBFCTrenchentry.jpg|The passage to the [[Blood Kelp Zone|Blood Kelp Trench]] |
|||
</gallery> |
</gallery> |
||
==Ghost Canyon== |
|||
|-| |
|||
Ghost Canyon= |
|||
[[File:LRGhostCanyon.jpg|thumb|"Ghost Canyon"|300px]] |
[[File:LRGhostCanyon.jpg|thumb|"Ghost Canyon"|300px]] |
||
The Ghost Canyon is a large passage featuring multiple caves and tunnels branching out from one huge "canyon". It is connected to the '''Bone Fields''' from the south. Numerous roots and bioluminescent-tipped branches litter the sides and bottom of the brine-filled trenches. |
The Ghost Canyon is a large passage featuring multiple caves and tunnels branching out from one huge "canyon". It is connected to the '''Bone Fields''' from the south. Numerous roots and bioluminescent-tipped branches litter the sides and bottom of the brine-filled trenches. |
||
| Line 167: | Line 175: | ||
The [[Lost River Laboratory Cache]], a small Precursor site that was set up to study an [[Ancient Skeleton]], can be found here. |
The [[Lost River Laboratory Cache]], a small Precursor site that was set up to study an [[Ancient Skeleton]], can be found here. |
||
This area serves as the entrance to the Lost River from the [[Deep Grand Reef]]. |
This area serves as the entrance to the Lost River from the [[Deep Grand Reef]] and the [[Blood Kelp Zone|Blood Kelp Trench]]. |
||
{{Clear}} |
{{Clear}} |
||
{{Clear}} |
{{Clear}} |
||
{{#tag:tabber| |
{{#tag:tabber| |
||
Resources= |
Resources= |
||
* [[Copper Ore]] |
* [[Copper Ore (Subnautica)|Copper Ore]] |
||
* [[Crystalline Sulfur]] |
* [[Crystalline Sulfur (Subnautica)|Crystalline Sulfur]] |
||
* [[Gel Sack]] |
* [[Gel Sack (Subnautica)|Gel Sack]] |
||
* [[List of Plantable Flora|Gel Sack Spore]] |
|||
* [[Large Resource Deposits|Large Nickel Deposits]] |
* [[Large Resource Deposits|Large Nickel Deposits]] |
||
* [[Large Resource Deposits|Large Titanium Deposits]] |
* [[Large Resource Deposits|Large Titanium Deposits]] |
||
* [[Nickel Ore]] |
* [[Nickel Ore (Subnautica)|Nickel Ore]] |
||
* [[Quartz]] |
* [[Quartz (Subnautica)|Quartz]] |
||
* [[Ruby]] |
* [[Ruby (Subnautica)|Ruby]] |
||
* [[Titanium]] |
* [[Titanium (Subnautica)|Titanium]] |
||
{{!}}-{{!}} |
{{!}}-{{!}} |
||
Fauna= |
Fauna= |
||
| Line 193: | Line 200: | ||
Flora= |
Flora= |
||
* [[Crab Claw Kelp]] |
* [[Crab Claw Kelp]] |
||
* [[Gel Sack]] |
* [[Gel Sack (Subnautica)|Gel Sack]] |
||
}}{{clear}} |
}}{{clear}} |
||
| Line 199: | Line 206: | ||
<gallery widths="200" spacing="small"> |
<gallery widths="200" spacing="small"> |
||
GhostCanyon1.jpg|Entrance to the Ghost Canyon from the [[Deep Grand Reef]] |
GhostCanyon1.jpg|Entrance to the Ghost Canyon from the [[Deep Grand Reef]] |
||
LRGC Deep Grand Reef Entrance.png|Another view of the entrance |
|||
CanyonOverview.jpg|Overview of the Ghost Canyon |
CanyonOverview.jpg|Overview of the Ghost Canyon |
||
LRGC Bone Fields Entrance.png|The Ghost Canyon entrance from the Bone Fields |
|||
GhostCanyon6.jpg|Entrance to the cache cave |
GhostCanyon6.jpg|Entrance to the cache cave |
||
File:C4cheSkeleton.jpg|Overview of the cache cave containing the Ancient Skeleton |
|||
CacheSkeletonSizeref2.jpg|Size comparison between the [[player]] and the skeleton outside of the cache |
|||
CacheSkeletonSizeref2.jpg|Size comparison between the [[Ryley Robinson|player]] and the skeleton outside of the cache |
|||
GhostCanyon4.jpg|Where the Ghost Canyon comes out in the Bone Fields |
GhostCanyon4.jpg|Where the Ghost Canyon comes out in the Bone Fields |
||
20170219121514 1.jpg|Some life on the sea floor |
|||
GhostCanyonRC.jpg|The brine in the area |
GhostCanyonRC.jpg|The brine in the area |
||
</gallery> |
</gallery> |
||
==Ghost Forest== |
|||
|-| |
|||
Ghost Forest= |
|||
[[File:LRGhostForest.jpg|thumb|"Ghost Forest"|300px]] |
[[File:LRGhostForest.jpg|thumb|"Ghost Forest"|300px]] |
||
The Ghost Forest is a massive cavern serving as one of the entrance areas of the Lost River (located in the [[Blood Kelp Zone|Northern Blood Kelp Zone]]). |
The Ghost Forest is a massive cavern serving as one of the entrance areas of the Lost River (located in the [[Blood Kelp Zone|Northern Blood Kelp Zone]]). |
||
| Line 217: | Line 223: | ||
The cavern is greatly populated by whitish glowing [[flora]] on the sea floor, as well as the snaking dark branches of [[Bioluminescence|bioluminescent]] Ghost Trees. It is the starting point of the brine river, and brinefalls of various sizes are present within the area. In the main cavern a smaller example of the [[Gargantuan Fossil]] skull can be found, presumably from a juvenile. |
The cavern is greatly populated by whitish glowing [[flora]] on the sea floor, as well as the snaking dark branches of [[Bioluminescence|bioluminescent]] Ghost Trees. It is the starting point of the brine river, and brinefalls of various sizes are present within the area. In the main cavern a smaller example of the [[Gargantuan Fossil]] skull can be found, presumably from a juvenile. |
||
Among the dense branches, predators such as [[River Prowler]]s and [[Blood Crawler]]s lurk. This area is also one of the three locations in the Lost River where a |
Among the dense branches, predators such as [[River Prowler]]s and [[Blood Crawler]]s lurk. This area is also one of the three locations in the Lost River where a [[Ghost Leviathan Juvenile]] resides. The Ghost Leviathan is present in the upper area of the Ghost Forest, along with the River Prowlers. The lower section is mostly safe, only containing Blood Crawlers. |
||
Most of the resources in this cavern can be found either inside the brine rivers, such as [[Large Resource Deposits]], [[Lithium]] or [[Magnetite]], or around them, like [[Gel Sack]]s, [[Quartz]] or [[Sandstone Outcrop]]s. |
Most of the resources in this cavern can be found either inside the brine rivers, such as [[Large Resource Deposits]], [[Lithium (Subnautica)|Lithium]] or [[Magnetite (Subnautica)|Magnetite]], or around them, like [[Gel Sack (Subnautica)|Gel Sack]]s, [[Quartz (Subnautica)|Quartz]] or [[Sandstone Outcrop]]s. |
||
An [[Alien Arch Caches|Alien Arch Cache]] is present in this area, serving as a warp gate to the [[Primary Containment Facility]]. It is close to the juvenile Ghost Leviathan. |
An [[Alien Arch Caches|Alien Arch Cache]] is present in this area, serving as a warp gate to the [[Primary Containment Facility]]. It is close to the juvenile Ghost Leviathan. |
||
| Line 226: | Line 232: | ||
{{#tag:tabber| |
{{#tag:tabber| |
||
Resources= |
Resources= |
||
* [[Crystalline Sulfur]] |
* [[Crystalline Sulfur (Subnautica)|Crystalline Sulfur]] |
||
* [[Diamond]] |
* [[Diamond (Subnautica)|Diamond]] |
||
* [[Gel Sack]] |
* [[Gel Sack (Subnautica)|Gel Sack]] |
||
* [[ |
* [[Ghost Weed|Ghost Weed Seed]] |
||
* [[Gold (Subnautica)|Gold]] |
|||
* [[List of Plantable Flora|Ghost Weed Seed]] |
|||
* [[Large Resource Deposits (Subnautica)|Large Lead Deposit]] |
|||
* [[Gold]] |
|||
* [[Large Resource Deposits|Large |
* [[Large Resource Deposits (Subnautica)|Large Nickel Deposit]] |
||
* [[Large Resource Deposits|Large |
* [[Large Resource Deposits (Subnautica)|Large Silver Deposit]] |
||
* [[Large Resource Deposits|Large |
* [[Large Resource Deposits (Subnautica)|Large Titanium Deposit]] |
||
* [[Lead (Subnautica)|Lead]] |
|||
* [[Large Resource Deposits|Large Titanium Deposit]] |
|||
* [[Lithium (Subnautica)|Lithium]] |
|||
* [[Lead]] |
|||
* [[Magnetite (Subnautica)|Magnetite]] |
|||
* [[Lithium]] |
|||
* [[Nickel Ore (Subnautica)|Nickel Ore]] |
|||
* [[Magnetite]] |
|||
* [[ |
* [[Quartz (Subnautica)|Quartz]] |
||
* [[ |
* [[Ruby (Subnautica)|Ruby]] |
||
* [[Silver Ore (Subnautica)|Silver Ore]] |
|||
* [[Ruby]] |
|||
* [[Silver Ore]] |
|||
{{!}}-{{!}} |
{{!}}-{{!}} |
||
Fauna= |
Fauna= |
||
| Line 248: | Line 253: | ||
* [[Blood Crawler]] |
* [[Blood Crawler]] |
||
* [[Ghostray]] |
* [[Ghostray]] |
||
* [[Ghost Leviathan]] |
* [[Ghost Leviathan Juvenile]] |
||
* [[Reginald]] |
* [[Reginald]] |
||
* [[River Prowler]] |
* [[River Prowler]] |
||
| Line 255: | Line 260: | ||
{{!}}-{{!}} |
{{!}}-{{!}} |
||
Flora= |
Flora= |
||
* [[Gel Sack]] |
* [[Gel Sack (Subnautica)|Gel Sack]] |
||
* [[Ghost Weed]] |
* [[Ghost Weed]] |
||
}} |
}} |
||
=== Gallery === |
=== Gallery === |
||
<gallery widths="200" spacing="small"> |
<gallery widths="200" spacing="small"> |
||
GF3.jpg|Overview |
GF3.jpg|Overview |
||
GF6.jpg|Brinefalls in the Ghost Forest |
GF6.jpg|Brinefalls in the Ghost Forest |
||
GF4.jpg|Ditto |
|||
GhostForest.png|Another view in the area |
|||
LRGFoverview2.jpg|Another view of the area |
LRGFoverview2.jpg|Another view of the area |
||
GF2.jpg|The miniature version of the gargantuan skull found within the area |
GF2.jpg|The miniature version of the gargantuan skull found within the area |
||
GF5.jpg|A small cave found in the Ghost Forest |
GF5.jpg|A small cave found in the Ghost Forest |
||
GTCBrinePool.jpg|A small brine pool in the Ghost Forest |
GTCBrinePool.jpg|A small brine pool in the Ghost Forest |
||
File:Screen Shot 2017-03-15 at 17.24.25.png|A single Blood Crawler creeping into a brine pool |
|||
GF9.jpg|[[Blood Crawler]]s in the Ghost Forest |
|||
GF Crawlerparty.jpg|A small group of Blood Crawlers exploring near the shoreline. |
|||
GF SpinelessEels.jpg|Spine Eels patrolling around the dense branches |
|||
GF7.jpg|The passage from the Ghost Forest to the Junction |
GF7.jpg|The passage from the Ghost Forest to the Junction |
||
ghostforest.jpg|A drop off in the Ghost Forest |
|||
LRGFshallow.jpg|The flatter areas of the Ghost Forest |
LRGFshallow.jpg|The flatter areas of the Ghost Forest |
||
GF (5).jpg|The darker areas, with the occasional Ghostray |
GF (5).jpg|The darker areas, with the occasional Ghostray |
||
GL GF.jpg|The juvenile Ghost Leviathan found here |
|||
GF (6).jpg|More brine pools |
|||
GL_GF.jpg|The juvenile Ghost Leviathan found here |
|||
</gallery> |
</gallery> |
||
|-| |
|||
Tree Cove= |
==Tree Cove== |
||
[[File:LRTreeCove.jpg|thumb|"Tree Cove"|300px]] |
[[File:LRTreeCove.jpg|thumb|"Tree Cove"|300px]] |
||
The Tree Cove is a large cavern within the Lost River. The brine river forms a large lake here, with the luminous [[Giant Cove Tree]] in its center. However, the color of the brine is a bright blue, rather than the corrosive green of the other sections of the Lost River. The blue brine does not damage the player. |
The Tree Cove is a large cavern within the Lost River. The brine river forms a large lake here, with the luminous [[Giant Cove Tree]] in its center. However, the color of the brine is a bright blue, rather than the corrosive green of the other sections of the Lost River. The blue brine does not damage the player. |
||
One end of the cavern opens to the northern passage leading to the Junction, and the other, behind the tree, spirals downwards, leading to the [[Inactive Lava Zone Corridor]]. Roots and branches grow scattered on the brine lakes and numerous [[Ghostray]]s inhabit the chamber. This part of the Lost River is the safest sub [[biome]] in ''Subnautica''. This is because the blue brine does not harm the player, there is only one fauna species (which is passive), and there is no [[flora]] which can harm the player besides [[Deep Shroom]]s.{{Clear}} |
One end of the cavern opens to the northern passage leading to the Junction, and the other, behind the tree, spirals downwards, leading to the [[Inactive Lava Zone Corridor]]. Roots and branches grow scattered on the brine lakes and numerous [[Ghostray]]s inhabit the chamber. This part of the Lost River is the safest sub [[Biomes (Subnautica)|biome]] in ''Subnautica''. This is because the blue brine does not harm the player, there is only one fauna species (which is passive), and there is no [[flora]] which can harm the player besides [[Deep Shroom]]s.{{Clear}} |
||
{{#tag:tabber| |
{{#tag:tabber| |
||
Resources= |
Resources= |
||
* [[Deep Shroom]] |
* [[Deep Shroom]] |
||
* [[ |
* [[Gel Sack (Subnautica)|Gel Sack]] |
||
* [[ |
* [[Gold (Subnautica)|Gold]] |
||
* [[Large Resource Deposits (Subnautica)|Large Gold Deposit]] |
|||
* [[List of Plantable Flora|Gel Sack Spore]] |
|||
* [[Large Resource Deposits (Subnautica)|Large Lithium Deposit]] |
|||
* [[Gold]] |
|||
* [[Large Resource Deposits|Large |
* [[Large Resource Deposits (Subnautica)|Large Titanium Deposit]] |
||
* [[Large Resource Deposits|Large |
* [[Large Resource Deposits (Subnautica)|Large Uraninite Deposit]] |
||
* [[Lead (Subnautica)|Lead]] |
|||
* [[Large Resource Deposits|Large Titanium Deposit]] |
|||
* [[Magnetite (Subnautica)|Magnetite]] |
|||
* [[Large Resource Deposits|Large Uraninite Deposit]] |
|||
* [[Nickel Ore (Subnautica)|Nickel Ore]] |
|||
* [[Lead]] |
|||
* [[Quartz (Subnautica)|Quartz]] |
|||
* [[Magnetite]] |
|||
* [[ |
* [[Ruby (Subnautica)|Ruby]] |
||
* [[Silver Ore (Subnautica)|Silver Ore]] |
|||
* [[Quartz]] |
|||
* [[Uraninite Crystal (Subnautica)|Uraninite Crystal]] |
|||
* [[Ruby]] |
|||
* [[Silver Ore]] |
|||
* [[Uraninite Crystal]] |
|||
{{!}}-{{!}} |
{{!}}-{{!}} |
||
Fauna= |
Fauna= |
||
* [[Amoeboid]] |
* [[Amoeboid]] |
||
* [[Bladderfish]] |
* [[Bladderfish (Subnautica)|Bladderfish]] |
||
* [[Ghostray]] |
* [[Ghostray]] |
||
{{!}}-{{!}} |
{{!}}-{{!}} |
||
Flora= |
Flora= |
||
* [[Deep Shroom]] |
* [[Deep Shroom]] |
||
* [[Gel Sack]] |
* [[Gel Sack (Subnautica)|Gel Sack]] |
||
* [[Giant Cove Tree]] |
* [[Giant Cove Tree]] |
||
}} |
}} |
||
=== Gallery === |
=== Gallery === |
||
<gallery widths="200" spacing="small"> |
<gallery widths="200" spacing="small"> |
||
LRTC2.jpg|Overview of the Tree Cove |
LRTC2.jpg|Overview of the '''Tree Cove''' |
||
LRTC_Giant_Cove_Tree.png|A closer view of the Giant Cove Tree |
LRTC_Giant_Cove_Tree.png|A closer view of the Giant Cove Tree |
||
LRTC_Smokers.png|Smokers within the Tree Cove |
LRTC_Smokers.png|Smokers within the Tree Cove |
||
LRTC1.jpg|A secluded brine pool with a thermal vent |
LRTC1.jpg|A secluded brine pool with a thermal vent |
||
LRTC Edge.jpg|The beginning of the downwards spiral towards the Inactive Lava Zone Corridor |
|||
LRTC PitDrop.jpg|The dropoff and edge of the Tree Cove |
|||
GhostTreeRC.jpg |
|||
GhostTreeRC Remaster.jpg |
|||
</gallery> |
</gallery> |
||
|-| |
|||
Junction= |
==Junction== |
||
[[File:LRJOverview.jpg|thumb|"Junction"|300px]] |
[[File:LRJOverview.jpg|thumb|"Junction"|300px]] |
||
The Junction is characterised by a large plateau surrounded by a ring of brine. At the top of the plateau are several hydrothermal vents, with some [[Table Coral|Green Table Coral]] and [[Ruby|Rubies]] scattered around them. The [[Sea Dragon Leviathan]] skeleton can be found here, next to the thermal vents. |
The Junction is characterised by a large plateau surrounded by a ring of brine. At the top of the plateau are several hydrothermal vents, with some [[Table Coral|Green Table Coral]] and [[Ruby|Rubies]] scattered around them. The [[Sea Dragon Leviathan]] skeleton can be found here, next to the thermal vents. |
||
Most of the [[Large Resource Deposits]] can be found under the brine, with the exception of [[Lead]], [[Quartz]] and [[Titanium]] that surround the pools along with [[Limestone Outcrop]]s and rarely [[Uraninite Crystal]]s. The small portion connecting this area with the '''Bone Fields''' contains only [[Crystalline Sulfur]] under the brine, however. |
Most of the [[Large Resource Deposits]] can be found under the brine, with the exception of [[Lead (Subnautica)|Lead]], [[Quartz (Subnautica)|Quartz]] and [[Titanium (Subnautica)|Titanium]] that surround the pools along with [[Limestone Outcrop]]s and rarely [[Uraninite Crystal (Subnautica)|Uraninite Crystal]]s. The small portion connecting this area with the '''Bone Fields''' contains only [[Crystalline Sulfur (Subnautica)|Crystalline Sulfur]] under the brine, however. |
||
There is also a naturally formed bridge that connects the plateau to the northern side of the cavern, towards the '''Ghost Forest'''. Brine falls from the north and south flow into the brine here, which contains some ghost trees and roots. The Junction connects to the Bones Fields to the south, the Ghost Forest to the north, and the '''Tree Cove''' to the west. The '''Mountains Corridor''' is to the east, where the [[Disease Research Facility]] is found. |
There is also a naturally formed bridge that connects the plateau to the northern side of the cavern, towards the '''Ghost Forest'''. Brine falls from the north and south flow into the brine here, which contains some ghost trees and roots. The Junction connects to the Bones Fields to the south, the Ghost Forest to the north, and the '''Tree Cove''' to the west. The '''Mountains Corridor''' is to the east, where the [[Disease Research Facility]] is found. |
||
| Line 331: | Line 334: | ||
{{#tag:tabber| |
{{#tag:tabber| |
||
Resources= |
Resources= |
||
* [[Copper Ore]] |
* [[Copper Ore (Subnautica)|Copper Ore]] |
||
* [[Crystalline Sulfur]] |
* [[Crystalline Sulfur (Subnautica)|Crystalline Sulfur]] |
||
* [[Diamond]] |
* [[Diamond (Subnautica)|Diamond]] |
||
* [[Gold]] |
* [[Gold (Subnautica)|Gold]] |
||
* [[Large Resource Deposits|Large Copper Deposit]] |
* [[Large Resource Deposits (Subnautica)|Large Copper Deposit]] |
||
* [[Large Resource Deposits|Large Gold Deposit]] |
* [[Large Resource Deposits (Subnautica)|Large Gold Deposit]] |
||
* [[Large Resource Deposits|Large Lead Deposit]] |
* [[Large Resource Deposits (Subnautica)|Large Lead Deposit]] |
||
* [[Large Resource Deposits|Large Nickel Deposit]] |
* [[Large Resource Deposits (Subnautica)|Large Nickel Deposit]] |
||
* [[Large Resource Deposits|Large Quartz Deposit]] |
* [[Large Resource Deposits (Subnautica)|Large Quartz Deposit]] |
||
* [[Large Resource Deposits|Large Silver Deposit]] |
* [[Large Resource Deposits (Subnautica)|Large Silver Deposit]] |
||
* [[Large Resource Deposits|Large Titanium Deposit]] |
* [[Large Resource Deposits (Subnautica)|Large Titanium Deposit]] |
||
* [[Lithium]] |
* [[Lithium (Subnautica)|Lithium]] |
||
* [[Nickel Ore]] |
* [[Nickel Ore (Subnautica)|Nickel Ore]] |
||
* [[Quartz]] |
* [[Quartz (Subnautica)|Quartz]] |
||
* [[Ruby]] |
* [[Ruby (Subnautica)|Ruby]] |
||
* [[Table Coral Sample]] |
* [[Table Coral Sample (Subnautica)|Table Coral Sample]] |
||
* [[Titanium]] |
* [[Titanium (Subnautica)|Titanium]] |
||
* [[Uraninite Crystal]] |
* [[Uraninite Crystal (Subnautica)|Uraninite Crystal]] |
||
{{!}}-{{!}} |
{{!}}-{{!}} |
||
Fauna= |
Fauna= |
||
| Line 362: | Line 365: | ||
* [[Table Coral|Green Table Coral]] |
* [[Table Coral|Green Table Coral]] |
||
}} |
}} |
||
=== Gallery === |
=== Gallery === |
||
<gallery widths="200" spacing="small"> |
<gallery widths="200" spacing="small"> |
||
| Line 367: | Line 371: | ||
LRJSmokinHot.jpg|White smokers next to the Sea Dragon Leviathan Skeleton |
LRJSmokinHot.jpg|White smokers next to the Sea Dragon Leviathan Skeleton |
||
LRJSkeleton.jpg|The [[Sea Dragon Leviathan]] skeleton in the Junction |
LRJSkeleton.jpg|The [[Sea Dragon Leviathan]] skeleton in the Junction |
||
File:SDLSkeletonJunction.jpg|Ditto, but close up. |
|||
LRJ1.jpg|Entrance to the Tree Cove from the Junction |
LRJ1.jpg|Entrance to the Tree Cove from the Junction |
||
Prec Junction.jpg|Entrance to the [[Disease Research Facility]] cave from the Junction |
|||
LJR2BF.jpg|Entrance to the Bones Field from the Junction |
|||
LRJ3.jpg|Path up to the Ghost Forest from the Junction |
LRJ3.jpg|Path up to the Ghost Forest from the Junction |
||
Prec Junction.jpg|Entrance to the [[Disease Research Facility]] cave from the Junction |
|||
LJR2BF.jpg|Entrance to the Bone Fields from the Junction |
|||
</gallery> |
</gallery> |
||
|-| |
|||
Mountains Corridor= |
==Mountains Corridor== |
||
[[File:LRMNCorridor1.jpg|thumb|"Mountains Corridor"|300px]] |
[[File:LRMNCorridor1.jpg|thumb|"Mountains Corridor"|300px]] |
||
The '''Mountains Corridor''' is a large tunnel leading from the [[Disease Research Facility]] cave to the [[Mountains]] and the [[Bulb Zone]]. In-between the DRF Cave and Mountains entrance is the large pit that drops into the [[Inactive Lava Zone]]. This cave features many glowing lights on the ceiling, as well as hydrothermal vents and [[Skeletal Remains]]. One [[Ghost Leviathan]] can be found in the tunnel, above the |
The '''Mountains Corridor''' is a large tunnel leading from the [[Disease Research Facility]] cave to the [[Mountains]] and the [[Bulb Zone]]. In-between the DRF Cave and Mountains entrance is the large pit that drops into the [[Inactive Lava Zone]]. This cave features many glowing lights on the ceiling, as well as hydrothermal vents and [[Skeletal Remains]]. One [[Ghost Leviathan Juvenile]] can be found in the tunnel, above the Inactive Lava Zone entrance.{{Clear}} |
||
{{#tag:tabber| |
{{#tag:tabber| |
||
Resources= |
Resources= |
||
* [[Acid Mushroom]] |
* [[Acid Mushroom]] |
||
* [[Crystalline Sulfur (Subnautica)|Crystalline Sulfur]] |
|||
* [[List of Plantable Flora|Acid Mushroom Spore]] |
|||
* [[Diamond (Subnautica)|Diamond]] |
|||
* [[List of Plantable Flora|Cave Bush Seed]] |
|||
* [[Gold (Subnautica)|Gold]] |
|||
* [[Crystalline Sulfur]] |
|||
* [[Ghost Weed|Ghost Weed Seed]] |
|||
* [[Diamond]] |
|||
* [[Gold]] |
|||
* [[List of Plantable Flora|Ghost Weed Seed]] |
|||
* [[Large Resource Deposits|Large Quartz Deposits]] |
* [[Large Resource Deposits|Large Quartz Deposits]] |
||
* [[Large Resource Deposits|Large Titanium Deposits]] |
* [[Large Resource Deposits|Large Titanium Deposits]] |
||
* [[Lead]] |
* [[Lead (Subnautica)|Lead]] |
||
* [[Lithium]] |
* [[Lithium (Subnautica)|Lithium]] |
||
* [[Quartz]] |
* [[Quartz (Subnautica)|Quartz]] |
||
* [[Ruby (Subnautica)|Ruby]] |
|||
* [[List of Plantable Flora|Rouge Cradle Seed]] |
|||
* [[Silver Ore (Subnautica)|Silver Ore]] |
|||
* [[Ruby]] |
|||
* [[Table Coral Sample (Subnautica)|Table Coral Sample]] |
|||
* [[Silver Ore]] |
|||
* [[Uraninite Crystal (Subnautica)|Uraninite Crystal]] |
|||
* [[List of Plantable Flora|Spotted Dockleaf Seed]] |
|||
* [[Table Coral Sample]] |
|||
* [[Uraninite Crystal]] |
|||
* [[List of Plantable Flora|Veined Nettle Seed]] |
|||
* [[List of Plantable Flora|Violet Beau Seed]] |
|||
{{!}}-{{!}} |
{{!}}-{{!}} |
||
Fauna= |
Fauna= |
||
* [[Amoeboid]] |
* [[Amoeboid]] |
||
* [[Ghostray]] |
* [[Ghostray]] |
||
* [[Ghost Leviathan]] |
* [[Ghost Leviathan Juvenile]] |
||
* [[Reginald]] |
* [[Reginald]] |
||
* [[River Prowler]] |
* [[River Prowler]] |
||
| Line 419: | Line 418: | ||
* [[Jordi's Tung]] |
* [[Jordi's Tung]] |
||
* [[Pyrocoral]] |
* [[Pyrocoral]] |
||
* [[Table Coral]] |
* [[Table Coral (Subnautica)|Table Coral]] |
||
}} |
}} |
||
=== Gallery === |
=== Gallery === |
||
<gallery widths="200" spacing="small"> |
<gallery widths="200" spacing="small"> |
||
LRMNCorridor1.jpg| |
LRMNCorridor1.jpg|An overview of the Lost River '''Mountains Corridor''' leading to the Disease Research Facility |
||
LRMCMountainTunnelOverview.jpg|The '''Mountains Corridor''' tunnel leading away from the Disease Research Facility. |
|||
LRMNCorridor2.jpg|A thermal vent cluster |
|||
LRMCVents.jpg|A thermal vent cluster |
|||
LRMNCorridor3.jpg|A Reaper Leviathan skeleton in the '''Mountains Corridor''' |
|||
LR_M_4_(Reaper_Fossil_1).jpg|One of the [[Reaper Leviathan Skeletons|Reaper Leviathan Skeleton]] in the '''Mountains Corridor''' |
|||
LRMNCorridor4.jpg|A Reaper Leviathan skeleton with another island nearby |
LRMNCorridor4.jpg|A Reaper Leviathan skeleton with another island nearby |
||
LR_M_5_(Pyrocoal).jpg|Pyrocoral in the area |
|||
LRMCBrinepool.jpg|One of the many brine streams in the '''Mountains Corridor''' |
|||
LRMCGhostleviathan.png|The Ghost Leviathan Juvenile patrolling above the Inactive Lava Zone entrance |
|||
</gallery> |
</gallery> |
||
</tabber></div> |
|||
</div> |
|||
== Lost River Concept Art == |
== Lost River Concept Art == |
||
| Line 438: | Line 439: | ||
File:Pat-presley-lostriver-ghostcanyon.jpg|Ghost Canyon |
File:Pat-presley-lostriver-ghostcanyon.jpg|Ghost Canyon |
||
Lost River Concept Art 4.jpg|Tree Cove |
Lost River Concept Art 4.jpg|Tree Cove |
||
Pat-presley-lostriver-ventfield-v03-lorez.jpg|Lost River "Vent Field" - by Pat Presley (Unused) |
|||
20150927_SN_LostRiver_Large.jpg|Concept Art of the skeleton in the Bones Field |
20150927_SN_LostRiver_Large.jpg|Concept Art of the skeleton in the Bones Field |
||
</gallery> |
|||
==Models== |
|||
<gallery> |
|||
LostRiverTreeModel.jpeg|Model from [https://sketchfab.com/3d-models/lost-river-giant-tree-8fa54ad2ac324c36a48f17a2e194f38c Sketchfab] |
|||
Sketchfab] |
|||
HighpolyLostRiverTree.jpeg|Highpoly model from [https://sketchfab.com/3d-models/lost-river-tree-giant-highpoly-f4a1fa7c90cf4c079a53572daa36fd24 Sketchfab] |
|||
HighpolyLostRiverTree2.jpeg|Another Highpoly model from [https://sketchfab.com/3d-models/lost-river-tree-giant-highpoly-2bedd8dc99b749709ede68a03ac7e223 Sketchfab] |
|||
</gallery> |
</gallery> |
||
== Trivia == |
== Trivia == |
||
* Like other segmented biomes (such as the [[Inactive Lava Zone]]), the Lost River's technical data divides it into the LostRiver_TreeCove, LostRiver_BonesField, LostRiver_Canyon, LostRiver_Junction, LostRiver_GhostTree and LostRiver_Corridor for both corridors. This aids the AI in deciding music tracks, random events, and creature behavior. |
* Like other segmented biomes (such as the [[Inactive Lava Zone]]), the Lost River's technical data divides it into the LostRiver_TreeCove, LostRiver_BonesField, LostRiver_Canyon, LostRiver_Junction, LostRiver_GhostTree and LostRiver_Corridor for both corridors. This aids the AI in deciding music tracks, random events, and creature behavior. |
||
* The damage from the brine may be possible implementation/reference to the "Pillars of Silence" concept art, where enormous jets of acid dot an alien seabed. |
* The damage from the brine may be a possible implementation/reference to the "Pillars of Silence" concept art, where enormous jets of acid dot an alien seabed. |
||
* The brine used to be able to harm the [[Blood Crawler]], [[Gel Sack]], |
* The brine used to be able to harm the [[Blood Crawler]], [[Gel Sack (Subnautica)|Gel Sack]], and [[Ghost Weed]] due to an oversight of not having the immunity to it. |
||
* The Ghost Forest was originally known as the "Ghost Trees Chamber" before the [[Update History|Bones Update]].<ref>http://unknownworlds.com/subnautica/bones-update/ ''Dated October 27, 2016.''</ref> |
* The Ghost Forest was originally known as the "Ghost Trees Chamber" before the [[Update History|Bones Update]].<ref>http://unknownworlds.com/subnautica/bones-update/ ''Dated October 27, 2016.''</ref> |
||
| Line 451: | Line 461: | ||
{{Navbox Biomes}} |
{{Navbox Biomes}} |
||
[[ |
[[de:Lost_River]] |
||
[[es:Río_Perdido]] |
|||
[[pl:Zaginiona Rzeka]] |
|||
[[fr:Rivière perdue]] |
[[fr:Rivière perdue]] |
||
[[pt-br:Lost_River]] |
|||
[[ru:Затерянная река|ru:Затерянная ре]] |
|||
[[ru:Затерянная река]] |
|||
[[Category:Alien Arch]] |
[[Category:Alien Arch]] |
||
[[Category:Biomes]] |
[[Category:Biomes]] |
||
Latest revision as of 23:25, 22 March 2025
.png)
|
Read at own risk This article contains unmarked spoilers. Players new to the game would want to avoid or be cautious toward this article. |
<infobox layout="stacked">
 <title source="title1">
   <default>Lost River</default>
 </title>
 <image source="image1">
</image> <label>Tab</label> <label>Type</label> <label>Biome</label> <label>Depth Range</label> <label>Temperature Range</label> <label>Biome ID</label> <label>Harvesting Nodes</label> <label>goto ID</label> <label>Coordinates</label> <label>Base ID</label> <group> <label>Point of Interest</label> <label>Music</label> </group> </infobox>
Terrain scans indicate this biome contains unusually high concentrations of organic and fossilized remains. File:LRIntro.ogg
― PDA, Dialogue
The Lost River is a massive, frigid cave biome located deep under the surface and is further divided into seven distinct sub-biomes.
There are four entrances to the Lost River. These can be found in the Northern Blood Kelp Zone, the Deep Grand Reef, the border between the Mountains and the Bulb Zone, and the Blood Kelp Trench. The Cyclops is able to enter the Lost River through all four entrances, and can traverse the whole way into the Inactive Lava Zone. The Seamoth can travel through all passages, but is unable to travel to the Lava zones.
It is the deepest biome that can be explored by the Seamoth, although some sections dip below its maximum depth and the green brine will also wear down its durability.
Description
The Lost River is a vast and gloomy biome, possessing a distinct greenish tint in the water that is mostly illuminated by the alkaline brine pools. It has an eerie atmosphere amplified by the abundance of hostile fauna, ghostly flora, and the many hazardous environmental features.
Vast amounts of green brine pools cover almost all of the lower portions of the caverns. The brine pools found throughout most of the cave system will harm the player upon direct contact, with the exception being while within the Prawn Suit, or when within the harmless blue brine found within the Tree Cove. The brine pools do damage to the Seamoth as well. Fauna and flora found within the Lost River are immune to the brine, a trait carried only by them.
The Disease Research Facility is located in the Lost River, inside a cavern with its opening in the Junction and the Mountains corridor. Large alien column structures can be used as waypoints to locate the facility.
The Lost River is one of the coldest biomes implemented, with temperatures on the sea floor rarely rising above 10 degrees Celsius. Hence, thermal reactor modules do not work very well here.

If you wish to build a Seabase in the Lost River, a Thermal Plant next to a thermal vent is one of the best ways to power a base in this biome. It is advised to bring plenty of Titanium with the player, since there are few large Titanium deposits there. Any other resource can usually be acquired on the spot. Note that there are enough resources, like lead, in the Lost River for the player to build a nuclear reactor and nuclear reactor rods. Additionally, be conscious of the hull integrity so that the Seabase does not take any damage.
A player can attempt to park their Cyclops above a thermal vent in order to charge it with a Cyclops thermal reactor module. However, be careful so that the exit hatch is not near the vent.
The Lost River is composed of seven distinct areas, each holding similar resources, but some more dangerous than others:
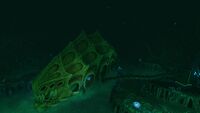
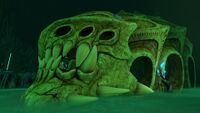
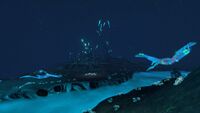
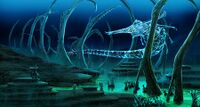
Bone Fields

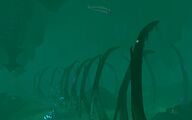
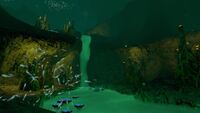
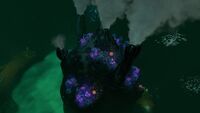
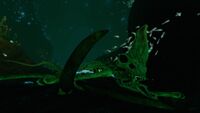
The Bone Fields is a vast cavern within the Lost River, centered on the Gargantuan Fossil which gives the Bone Fields its name. It is connected to the Blood Kelp Trench via the Lost River Corridor, and to the Deep Grand Reef via the Ghost Canyon, each of them having their own flora and particular landscapes.
The Ghost Leviathan Juvenile in this region is facing directly to the Ghost Canyon. One should be cautious when entering through there to here.
There are a few hydrothermal vents in this area. On these you can find Rubies, Lithium, Green Table Coral and sometimes Magnetite.
Large Resource Deposits are present mostly under the brine lake surrounding the colossal skeleton and the caves underneath. Rarer deposits can be found in the Bone Fields Caves on the ceiling, others around the cavern and deeper caverns under the brine.
The caves in the brine and ceiling contain a unique, unnamed kind of coral.
<tabber>
Resources=
- Diamond
- Gel Sack
- Ghost Weed Seed
- Gold
- Large Gold Deposit
- Large Lithium Deposit
- Large Nickel Deposit
- Large Silver Deposit
- Large Titanium Deposit
- Large Uraninite Deposit
- Lead
- Lithium
- Magnetite
- Mesmer Eggs
- Nickel Ore
- Quartz
- Ruby
- Silver Ore
|-| Fauna=
|-| Flora=
|-| Coral=
</tabber>
Gallery
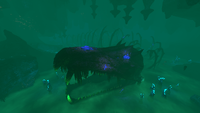
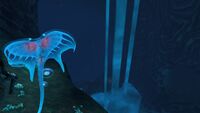
A view of the Gargantuan Fossil
Smaller ribs located at the outskirts of the Bone Fields

A small cavern beneath the brine surface
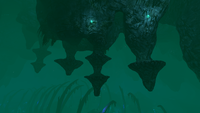
Strange rock formations on the ceiling of the Bone Fields
The Bone Fields Caves above the Bone Fields
A view of the Large Skeletal Remains

Rear view of the skeletal remains
The Ghost Leviathan Juvenile found in this section of the biome


Corridor

The Lost River Corridor is the area connecting the Bone Fields to the Blood Kelp Trench. It is mainly populated by Crabsquids, with strange rock structures covered by Pyrocoral growing on the sides.
A good amount of Limestone Outcrops can be found on the seabed, with Shale Outcrops occasionally located on the walls and ceiling of the corridor. There is a group of hydrothermal vents at the end of the corridor, marking the entrance to the Bone Fields.
Gel Sacks can also be found in abundance scattered around the edge of the brine streams.
<tabber>
Resources=
|-| Fauna=
|-| Flora=
|-| Coral=
</tabber>
Gallery
Overview with a large overhanging arch
Ditto

One of the large Corridor streams
A small brine fall
A cluster of dormant Brine Lilies floating in the brine stream
Four brine falls coming together in one pool

A large overhanging arch of terrain over the brine falls
The brine streams in the Corridors running off into the Bone Fields
Several clusters of Pyrocoral in the Corridor

Two large thermal vents in the Corridor
The passage to the Blood Kelp Trench


Ghost Canyon

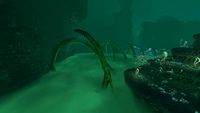
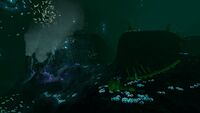
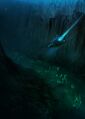
The Ghost Canyon is a large passage featuring multiple caves and tunnels branching out from one huge "canyon". It is connected to the Bone Fields from the south. Numerous roots and bioluminescent-tipped branches litter the sides and bottom of the brine-filled trenches.
The Lost River Laboratory Cache, a small Precursor site that was set up to study an Ancient Skeleton, can be found here.
This area serves as the entrance to the Lost River from the Deep Grand Reef and the Blood Kelp Trench.
<tabber>
Resources=
- Copper Ore
- Crystalline Sulfur
- Gel Sack
- Large Nickel Deposits
- Large Titanium Deposits
- Nickel Ore
- Quartz
- Ruby
- Titanium
|-| Fauna=
|-| Flora=
</tabber>
Gallery
Entrance to the Ghost Canyon from the Deep Grand Reef
Another view of the entrance
Overview of the Ghost Canyon
The Ghost Canyon entrance from the Bone Fields
Entrance to the cache cave
Overview of the cache cave containing the Ancient Skeleton
Size comparison between the player and the skeleton outside of the cache
Where the Ghost Canyon comes out in the Bone Fields
Some life on the sea floor
The brine in the area


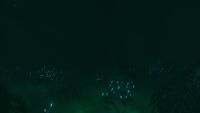
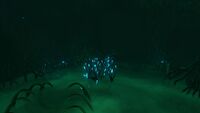
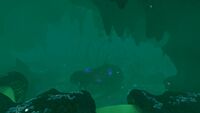
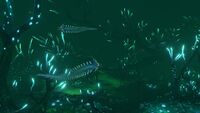
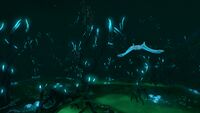
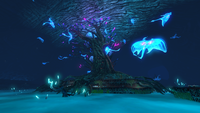
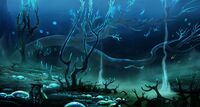
Ghost Forest

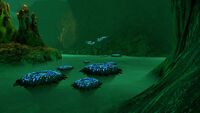
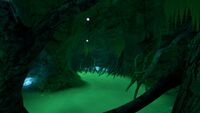
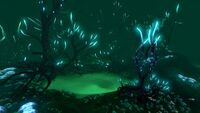
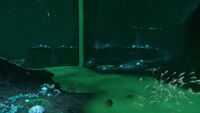
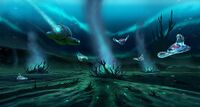
The Ghost Forest is a massive cavern serving as one of the entrance areas of the Lost River (located in the Northern Blood Kelp Zone).
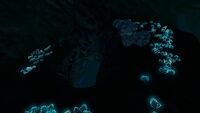
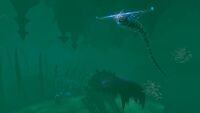
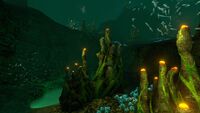
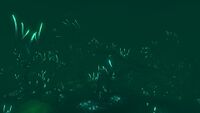
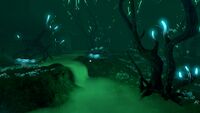
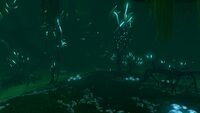
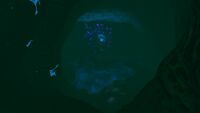
The cavern is greatly populated by whitish glowing flora on the sea floor, as well as the snaking dark branches of bioluminescent Ghost Trees. It is the starting point of the brine river, and brinefalls of various sizes are present within the area. In the main cavern a smaller example of the Gargantuan Fossil skull can be found, presumably from a juvenile.
Among the dense branches, predators such as River Prowlers and Blood Crawlers lurk. This area is also one of the three locations in the Lost River where a Ghost Leviathan Juvenile resides. The Ghost Leviathan is present in the upper area of the Ghost Forest, along with the River Prowlers. The lower section is mostly safe, only containing Blood Crawlers.
Most of the resources in this cavern can be found either inside the brine rivers, such as Large Resource Deposits, Lithium or Magnetite, or around them, like Gel Sacks, Quartz or Sandstone Outcrops.
An Alien Arch Cache is present in this area, serving as a warp gate to the Primary Containment Facility. It is close to the juvenile Ghost Leviathan.
There is a near-vertical drop-off down a narrow tunnel just large enough for the Cyclops at the back end of the cavern that leads down to the Junction.
<tabber>
Resources=
- Crystalline Sulfur
- Diamond
- Gel Sack
- Ghost Weed Seed
- Gold
- Large Lead Deposit
- Large Nickel Deposit
- Large Silver Deposit
- Large Titanium Deposit
- Lead
- Lithium
- Magnetite
- Nickel Ore
- Quartz
- Ruby
- Silver Ore
|-| Fauna=
- Amoeboid
- Blood Crawler
- Ghostray
- Ghost Leviathan Juvenile
- Reginald
- River Prowler
- Shoal of Fish
- Spinefish
|-| Flora=
</tabber>
Gallery
Overview
Brinefalls in the Ghost Forest
Another view of the area
The miniature version of the gargantuan skull found within the area
A small cave found in the Ghost Forest
A small brine pool in the Ghost Forest
A single Blood Crawler creeping into a brine pool
A small group of Blood Crawlers exploring near the shoreline.
Spine Eels patrolling around the dense branches

The passage from the Ghost Forest to the Junction
The flatter areas of the Ghost Forest
The darker areas, with the occasional Ghostray

The juvenile Ghost Leviathan found here


.jpg)

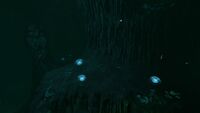
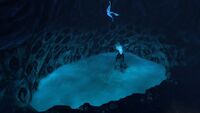
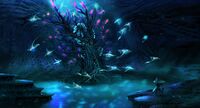
Tree Cove

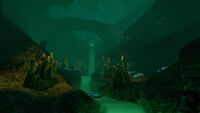
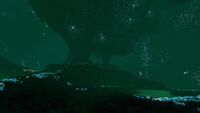
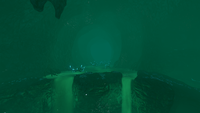
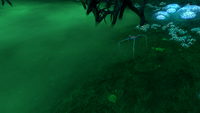
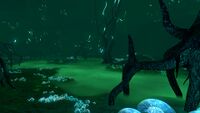
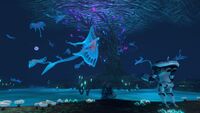
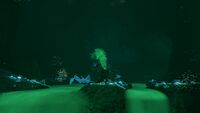
The Tree Cove is a large cavern within the Lost River. The brine river forms a large lake here, with the luminous Giant Cove Tree in its center. However, the color of the brine is a bright blue, rather than the corrosive green of the other sections of the Lost River. The blue brine does not damage the player.
One end of the cavern opens to the northern passage leading to the Junction, and the other, behind the tree, spirals downwards, leading to the Inactive Lava Zone Corridor. Roots and branches grow scattered on the brine lakes and numerous Ghostrays inhabit the chamber. This part of the Lost River is the safest sub biome in Subnautica. This is because the blue brine does not harm the player, there is only one fauna species (which is passive), and there is no flora which can harm the player besides Deep Shrooms.
<tabber>
Resources=
- Deep Shroom
- Gel Sack
- Gold
- Large Gold Deposit
- Large Lithium Deposit
- Large Titanium Deposit
- Large Uraninite Deposit
- Lead
- Magnetite
- Nickel Ore
- Quartz
- Ruby
- Silver Ore
- Uraninite Crystal
|-| Fauna=
|-| Flora=
</tabber>
Gallery
Overview of the Tree Cove
A closer view of the Giant Cove Tree
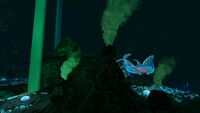
Smokers within the Tree Cove
A secluded brine pool with a thermal vent
The beginning of the downwards spiral towards the Inactive Lava Zone Corridor
The dropoff and edge of the Tree Cove


Junction

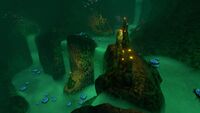
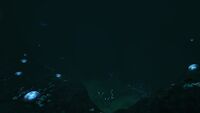
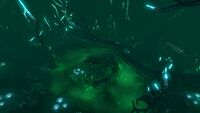
The Junction is characterised by a large plateau surrounded by a ring of brine. At the top of the plateau are several hydrothermal vents, with some Green Table Coral and Rubies scattered around them. The Sea Dragon Leviathan skeleton can be found here, next to the thermal vents.
Most of the Large Resource Deposits can be found under the brine, with the exception of Lead, Quartz and Titanium that surround the pools along with Limestone Outcrops and rarely Uraninite Crystals. The small portion connecting this area with the Bone Fields contains only Crystalline Sulfur under the brine, however.
There is also a naturally formed bridge that connects the plateau to the northern side of the cavern, towards the Ghost Forest. Brine falls from the north and south flow into the brine here, which contains some ghost trees and roots. The Junction connects to the Bones Fields to the south, the Ghost Forest to the north, and the Tree Cove to the west. The Mountains Corridor is to the east, where the Disease Research Facility is found.
<tabber>
Resources=
- Copper Ore
- Crystalline Sulfur
- Diamond
- Gold
- Large Copper Deposit
- Large Gold Deposit
- Large Lead Deposit
- Large Nickel Deposit
- Large Quartz Deposit
- Large Silver Deposit
- Large Titanium Deposit
- Lithium
- Nickel Ore
- Quartz
- Ruby
- Table Coral Sample
- Titanium
- Uraninite Crystal
|-| Fauna=
|-| Coral=
</tabber>
Gallery
Overview
White smokers next to the Sea Dragon Leviathan Skeleton

The Sea Dragon Leviathan skeleton in the Junction

Ditto, but close up.
Entrance to the Tree Cove from the Junction

Path up to the Ghost Forest from the Junction

Entrance to the Disease Research Facility cave from the Junction
Entrance to the Bone Fields from the Junction


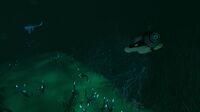
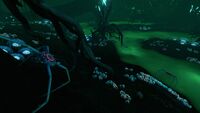
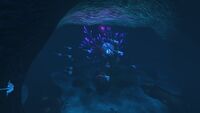
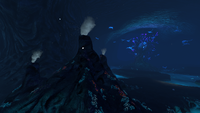
Mountains Corridor

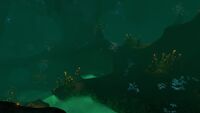
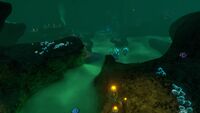
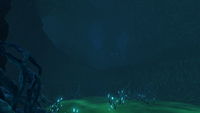
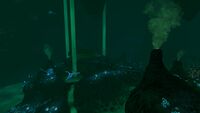
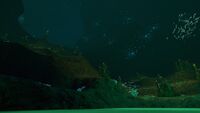
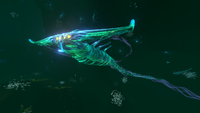
The Mountains Corridor is a large tunnel leading from the Disease Research Facility cave to the Mountains and the Bulb Zone. In-between the DRF Cave and Mountains entrance is the large pit that drops into the Inactive Lava Zone. This cave features many glowing lights on the ceiling, as well as hydrothermal vents and Skeletal Remains. One Ghost Leviathan Juvenile can be found in the tunnel, above the Inactive Lava Zone entrance.
<tabber>
Resources=
- Acid Mushroom
- Crystalline Sulfur
- Diamond
- Gold
- Ghost Weed Seed
- Large Quartz Deposits
- Large Titanium Deposits
- Lead
- Lithium
- Quartz
- Ruby
- Silver Ore
- Table Coral Sample
- Uraninite Crystal
|-| Fauna=
|-| Flora=
|-| Coral=
</tabber>
Gallery

An overview of the Lost River Mountains Corridor leading to the Disease Research Facility
The Mountains Corridor tunnel leading away from the Disease Research Facility.
A thermal vent cluster
One of the Reaper Leviathan Skeleton in the Mountains Corridor
A Reaper Leviathan skeleton with another island nearby

Pyrocoral in the area
One of the many brine streams in the Mountains Corridor
The Ghost Leviathan Juvenile patrolling above the Inactive Lava Zone entrance


.jpg)

.jpg)


Lost River Concept Art
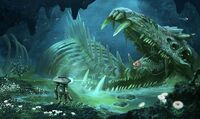
Concept art of the Bones Field featuring the Ghost Leviathan
Ghost Forest

Bones Field Corridor
Ghost Canyon
Tree Cove
Lost River "Vent Field" - by Pat Presley (Unused)
Concept Art of the skeleton in the Bones Field


Models


Trivia
- Like other segmented biomes (such as the Inactive Lava Zone), the Lost River's technical data divides it into the LostRiver_TreeCove, LostRiver_BonesField, LostRiver_Canyon, LostRiver_Junction, LostRiver_GhostTree and LostRiver_Corridor for both corridors. This aids the AI in deciding music tracks, random events, and creature behavior.
- The damage from the brine may be a possible implementation/reference to the "Pillars of Silence" concept art, where enormous jets of acid dot an alien seabed.
- The brine used to be able to harm the Blood Crawler, Gel Sack, and Ghost Weed due to an oversight of not having the immunity to it.
- The Ghost Forest was originally known as the "Ghost Trees Chamber" before the Bones Update.[1]
References
- ↑ http://unknownworlds.com/subnautica/bones-update/ Dated October 27, 2016.
Lua error in package.lua at line 80: module 'Dev:Navbox' not found.