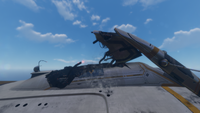
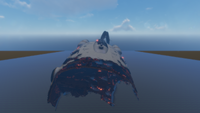
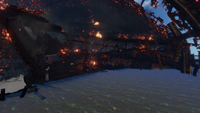
Aurora: Difference between revisions
(→Data Downloads Checklist: spelling) |
m (Added radio link) |
||
| (234 intermediate revisions by 76 users not shown) | |||
| Line 1: | Line 1: | ||
{{FVideo}} |
|||
{{Spoiler}} |
{{Spoiler}} |
||
{{SimilarName|the |
{{SimilarName|the 'Aurora'|the [[Wrecks]], [[Degasi]] or [[Sunbeam]]}} |
||
{{SubnauticaLinkThe|Aurora}} |
|||
{{Flora |
{{Flora |
||
|title1 = Aurora |
|title1 = Aurora |
||
|image1 = Poster Aurora Full.png |
|image1 = Poster Aurora Full.png |
||
|category = Alterra Capital Ship |
|category = Alterra Long-Range Capital Ship |
||
|biome = [[Crash Zone]] |
|biome = [[Crash Zone]] |
||
|debugspawn = Aurora |
|||
|spawn = sub aurora |
|||
|music=* [[Subnautica OST|''Dark Matter Reactor'']] |
|||
}}{{Quote2|The Aurora suffered orbital hull failure. Cause: unknown. Zero human life signs detected. |
|||
* [[Subnautica OST|''Blueprint'']] (Prawn Bay) |
|||
* [[Subnautica OST|''Bring a Medpack'']] |
|||
* [[Subnautica OST|''Cycle of Life'']] (Drive Core is repaired) |
|||
|exclude_category = yes |
|||
}} |
|||
{{Quote2|The Aurora suffered orbital hull failure. Cause: unknown. Zero human life signs detected. |
|||
[[File:Lifepod1.ogg]]|PDA|Dialogue}} |
[[File:Lifepod1.ogg]]|PDA|Dialogue}} |
||
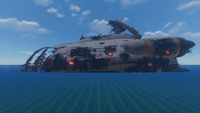
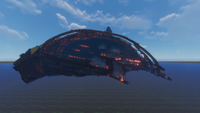
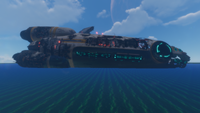
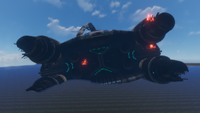
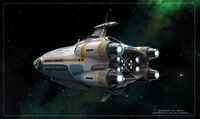
The '''Aurora''' is a spacecraft sent to the Ariadne Arm by the [[Alterra Corporation]] in order to build a phasegate. However, its secondary mission, unknown to most of the crew, was to search for and, if possible, rescue the survivors of the [[Degasi]] crew. |
|||
The '''''Aurora''''' was a brand-new Alterra Long-Range Capital Ship (and possibly the first of its class) sent to the Ariadne Arm by the [[Alterra Corporation]] to build a phasegate. Its auxiliary mission, unknown to most of the crew, was an agreement made with the Mongolian Independent States to search for and possibly rescue the survivors of the ''[[Degasi]]'' crew. It was thought that the ship's advanced scanning suite, superior to any ship that had previously made a search effort, would have better luck in finding the crew, or finally confirm whatever fate had befallen them. |
|||
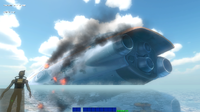
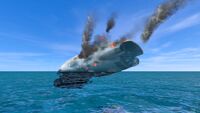
During a gravity slingshot maneuver around [[Planet 4546B]], the Aurora was struck by a mysterious energy pulse, resulting in catastrophic hull failure, leading to its crash landing on the surface of the planet. It is later revealed that it was the [[Quarantine Enforcement Platform]] that shot it down. Many [[Destroyed Lifepods|Lifepods]] were destroyed by the energy pulse and the ones that did launch were all compromised with the exception of two: [[Lifepod 5]], which contained [[Ryley Robinson]], and Lifepod 4, though its flotation devices seemingly failed or was possibly overturned by a [[Reaper Leviathan]]. |
|||
During a gravity slingshot maneuver around [[Planet 4546B]], the [[Quarantine Enforcement Platform]] struck the ''Aurora'' with an energy pulse on the starboard (right) side, resulting in catastrophic hull failure and leading to it crash landing on the surface of the planet. All the starboard [[Destroyed Lifepods|Lifepods]] were damaged, if not outright destroyed by the energy pulse; most of the port side Lifepods that did launch (pods 1 to 25), after landing, were either compromised or otherwise perished to the hostile ecosystem. The only exception is [[Lifepod 5]], which contained [[Ryley Robinson]]. Moments after Lifepod 5 launched, Ryley heard the enforcement platform fire and witnessed a second energy pulse strike the already crippled ship. |
|||
Upon crashing, the Aurora plowed into the terrain, unearthing it and leaving small sand hills around the ship, resulting in huge quantities of [[Metal Salvage]] and [[Vac-pack]]s being dispersed within the vicinity of the ship, providing useful materials such as [[Food & Water|food & water]], [[Battery|batteries]], and [[Titanium|titanium]]. Multiple [[Reaper Leviathan]]s patrol the crash site. |
|||
Upon crashing, the ''Aurora'' plowed into the terrain, unearthing it and leaving small sand hills around the ship. The crash and subsequent explosion resulted in huge quantities of [[Metal Salvage (Subnautica)|Metal Salvage]] and [[Supply Crate]]s being dispersed within the vicinity of the ship, providing useful materials such as [[Food & Water]], [[Battery (Subnautica)|batteries]], and [[Titanium (Subnautica)|Titanium]]. Nine [[Reaper Leviathan]]s patrol the crash site. |
|||
By the time the Player awakens and begins his exploration of the area, all of the other Lifepods have been destroyed and their occupants have vanished. After the Aurora's Drive Core explodes, the ship's wreckage is surrounded by [[Radiation]] and is unapproachable without a [[Radiation Suit]]. While quite dangerous and far out, it is possible for the player to visit the Aurora early in-game before it explodes, although several [[tools]] are needed to properly explore the ship. |
|||
By the time the player awakens and begins his exploration of the area, all of the other Lifepods have been destroyed and their occupants have vanished. The ''Aurora'''s Drive Core explodes a few days later, blowing a massive hole in the bow of the ship and consequently inundating the crash site with [[Radiation]]. Entering without a [[Radiation Suit]] is impossible until the Drive Room is repaired; furthermore, multiple [[tools]] are needed to thoroughly explore the ship's many sections. The ''Aurora's'' interior is inaccessible until post-detonation. |
|||
The Aurora is located on the far eastern edge of the map, with its bow facing north and its stern facing south. It is visible from the surface nearly anywhere on the map, making it a useful landmark, especially if the player lacks a [[compass]]. |
|||
The ''Aurora'' is located on the far eastern edge of the map, with its bow facing north and its stern facing south. It is visible from the surface nearly anywhere on the map, making it a useful landmark, especially if the player lacks a [[Compass (Subnautica)|compass]]. The ship is approximately 1,280 meters long from nose to thrusters. Including parts normally hidden by the terrain, it stands to be about 500 meters tall. |
|||
==Mission== |
|||
Of all crew members on board the ''Aurora'', the only known survivor was Ryley Robinson, who later managed to escape the planet. Alterra later admitted the ship's loss and informed about the rescue of its "survivors", but censored any details about how the ship had crashed and why. |
|||
<div class="mw-collapsible mw-collapsed"> |
|||
== |
==Mission== |
||
===Primary Mission=== |
|||
{{Caption|<poem>PHASEGATE ANNOUNCED FOR THE ARIADNE ARM: ALTERRA LAUNCHES THE AURORA |
|||
{{Databank |
|||
|name=Alterra Launches the Aurora |
|||
|image= |
|||
|description= |
|||
PHASEGATE ANNOUNCED FOR THE ARIADNE ARM: ALTERRA LAUNCHES THE AURORA |
|||
The furthest reaches of inhabited space are due to expand, as Alterra Corp launches a newly-constructed capital ship, carrying a phasegate bound for the Ariadne Arm. |
The furthest reaches of inhabited space are due to expand, as Alterra Corp launches a newly-constructed capital ship, carrying a phasegate bound for the Ariadne Arm. |
||
| Line 32: | Line 40: | ||
The Aurora will travel from spacedock on the edge of Alterra space, making hundreds of consecutive phasegate jumps through nine different trans-gov authorities, and arrive on the far side of the Ariadne Arm in three months' time. From there the command crew will pilot the ship beyond the final phasegate, arriving in the next solar system approximately 18 months later. |
The Aurora will travel from spacedock on the edge of Alterra space, making hundreds of consecutive phasegate jumps through nine different trans-gov authorities, and arrive on the far side of the Ariadne Arm in three months' time. From there the command crew will pilot the ship beyond the final phasegate, arriving in the next solar system approximately 18 months later. |
||
There the elite team of engineers will begin a 6 |
There the elite team of engineers will begin a 6 month construction project on the new phasegate, a multi-trillion credit investment. In the absence of existing infrastructure in the region, the vessel is equipped with advanced thermal and nuclear power facilities. |
||
Alterra Corp. currently operates 9% of all phasegates in the galaxy. If the Aurora's mission is successful Alterra will have outmaneuvered a cabal of Mongolian corporations, operating a range of outposts and mines in the region. |
Alterra Corp. currently operates 9% of all phasegates in the galaxy. If the Aurora's mission is successful Alterra will have outmaneuvered a cabal of Mongolian corporations, operating a range of outposts and mines in the region. |
||
|source=Pick up [[#Databank Checklist|Abandoned PDA]] in the Aurora. |
|||
}} |
|||
=== |
===Auxiliary Mission=== |
||
{{Databank |
|||
{{Caption|<poem> - Mission: Search & Rescue |
|||
|name=Aurora Auxiliary Mission Orders |
|||
- Target: Crew of the Mongolian vessel 'Degasi' |
|||
|image= |
|||
- Last known position: Vicinity of planet 4546B, Ariadne Arm |
|||
|description= |
|||
- Contact: Mongolian Emissary Jochi Khasar, Aurora Passenger Quarters |
|||
- Mission: Search & Rescue<br /> |
|||
- Target: Crew of the Mongolian vessel 'Degasi'<br /> |
|||
- Last known position: Vicinity of planet 4546B, Ariadne Arm<br /> |
|||
- Contact: Mongolian Emissary Jochi Khasar, Aurora Passenger Quarters |
|||
Mission brief: |
Mission brief:<br /> |
||
A Mongolian vessel, the 'Degasi', disappeared almost a decade ago, carrying with it a high ranking Mongolian chief. Corporate insurance has purchased passage aboard the Aurora for Emissary Khasar, and your orders are to make every reasonable effort to locate and retrieve the Degasi crewmembers, without compromising the primary mission. Confirming the fate of the crew will aid Alterra's diplomatic efforts with the Mongolian councils. |
A Mongolian vessel, the 'Degasi', disappeared almost a decade ago, carrying with it a high ranking Mongolian chief. Corporate insurance has purchased passage aboard the Aurora for Emissary Khasar, and your orders are to make every reasonable effort to locate and retrieve the Degasi crewmembers, without compromising the primary mission. Confirming the fate of the crew will aid Alterra's diplomatic efforts with the Mongolian councils. |
||
Mission Details: |
Mission Details:<br /> |
||
- Aurora is due to perform a slingshot maneuver around 4546B (category 3 ocean planet) approximately 13 months post-launch<br /> |
|||
- This will bring the ship within range of the Degasi's last known position<br /> |
|||
- Additional aquatic and all-terrain vehicles have been included in the Aurora's cargo package for this mission<br /> |
|||
- Degasi crew manifesto has been distributed to senior employees in a separate message |
|||
|source=Pick up [[#Databank Checklist|Abandoned PDA]] in the Aurora. |
|||
}} |
|||
Degasi crew manifesto has been distributed to senior officers in a separate data package. |
|||
Mission classification: Aurora crew should not be informed of this mission until such time as their co-operation in locating or retrieving Degasi crew is required. It should be stressed that humanitarian auxiliary missions fall outside normal remuneration structures. |
|||
</div> |
|||
==Crash== |
|||
<div class="mw-collapsible mw-collapsed"> |
|||
[[File:HabitatUpdateCode.png|thumb|The hex code which is hidden on the update page]] |
|||
Some more information on what happened just before the crash was released on August 6th, 2015, hidden within the [http://unknownworlds.com/subnautica/habitat-update/ update post] of the Habitat Update. |
|||
Clicking on the "LOG" buttons placed all over the page results in displaying a window with what appeared to be short snippets of a conversation between two employees at the Colonial Headquarters, with a few nods to the Natural Selection game series. The last of these logs, however, only shows a code consisting of hex values. Converting them into ASCII characters and deciphering the result using the Cesar Cipher with a shift of 13 reveals the hidden message: |
|||
===Colonial Headquarters - 15 minutes prior to Aurora impact.=== |
|||
{{Caption|<poem>Controller: Sit rep! |
|||
Analyst: Ma'am, the Aurora's gone dark. Last known position on collision course with planet 4546B. |
|||
Controller: Did the life pods launch? |
|||
Analyst: None registered so far, Ma'am. And there's something else. |
|||
Controller: Say it. |
|||
Analyst: When the Aurora left dock, her emergency equipment was still on factory settings. |
|||
Controller: You're telling me we have a bird in the soup, and their Survival PDAs are running VANILLA?! |
|||
Analyst: That's the situation, Ma'am... Ma'am, what should we do? |
|||
Controller: Bring me every star chart, tech geek and concentration enhancer in the building... |
|||
Analyst: Yes Ma'am! |
|||
Controller: ...and god DAMN it you build me an update package, and you find me a way to flash them Version 1.1! |
|||
Analyst: Ma'am, there's not enough bandwidth to send everything, but I think I can optimize the automated habitat terraforming algorithms to fit them in. |
|||
Controller: You mean to say we have survivors out there with rock-faces jutting into their habitats? Make it so! |
|||
Controller: The moment we're done here I want to know who let that ship leave dock without a single room in the constructor database! |
|||
Controller: Listen up, I want this package streamlined! You don't need a focus-group approved surface texture when you're fighting for your life on an alien world. If the power systems are beta, pack them up and move on! |
|||
Controller: Tell me about this planet the Aurora was orbiting. |
|||
Analyst: Unexplored. Capable of supporting life. Ocean planet. O<sub>2</sub> atmos- |
|||
Controller: Backtrack. Ocean planet? |
|||
Analyst: Affirmative. Does it mean something? |
|||
Controller: It means we're in more trouble than we thought. Get me the fluid dynamics team! |
|||
Analyst: Update package away, Ma'am. |
|||
Controller: Well done everyone. Now get back to work. |
|||
Analyst: Ma'am, the team needs to rest. |
|||
Controller: Listen up! Anyone who wants to tell me they've got it bad, stop and ask whether you'd rather have been on the Aurora. They're alone right now. They're scared. They're beset on all sides by alien nightmares - and it's only going to get worse. If you still think you should be resting rather than working on a way to keep those people safe, you bring it to me and you'll be reassigned. I'm sure the TSF could use some more bodies in the Kharaa conflict.</poem>}} |
|||
===The Impact=== |
|||
{{Caption|<poem>"Attention. Hull failure imminent. All personnel abandon ship. |
|||
Launch in 3...2...1..." |
|||
[[File:AuroraIntroAbandonShip.ogg]]</poem>}}</div> |
|||
==PDA Speech== |
==PDA Speech== |
||
The [[PDA]] reports Aurora's state and information about the environment to the player as they survive. During the exploration of the Aurora, it will explain the state of the ship around you. |
|||
<div class="mw-collapsible mw-collapsed"> |
|||
===Intro=== |
|||
The [[PDA]] reports the Aurora's state to the Player and information about the environment to the player as they explore. |
|||
{| class="article-table sortable" style="width: 100%;" cellspacing="1" cellpadding="1" border="0" |
|||
|- |
|||
===Situational Assessment=== |
|||
! class="unsortable" style="width: 20%; text-align: center;" | |
|||
'''"The Aurora suffered orbital hull failure. Cause: unknown. Zero human life signs detected."''' |
|||
! class="unsortable" style="width: 20%; text-align: center;" |Trigger |
|||
! class="unsortable" style="width: 60%; text-align: center;" |Dialogue |
|||
[[File:Goal_Lifepod2_2.ogg]] |
|||
|- |
|||
| style="text-align:center; font-size:12px;" |[[File:Log-128.png]] |
|||
===First Aurora Report=== |
|||
| style="text-align:center; font-size:12px;" |Starting The Game |
|||
'''"Detecting increased local radiation levels. Trend is consistent with damage of the Aurora's drive core, sustained during planet-fall."''' |
|||
| style="text-align:left; font-size:12px;" |''"Attention. Hull failure imminent. All personnel abandon ship.<br />Launch in 3...2...1..."'' |
|||
[[File:AuroraIntroAbandonShip.ogg]] |
|||
|} |
|||
===Situational Assessment Dialogue=== |
|||
{| class="article-table sortable" style="width: 100%;" cellspacing="1" cellpadding="1" border="0" |
|||
|- |
|||
! class="unsortable" style="width: 20%; text-align: center;" | |
|||
! class="unsortable" style="width: 20%; text-align: center;" |Trigger |
|||
! class="unsortable" style="width: 60%; text-align: center;" |Dialogue |
|||
|- |
|||
| style="text-align:center; font-size:12px;" |[[File:Log-128.png]] |
|||
| style="text-align:center; font-size:12px;" |Exiting [[Lifepod 5]] |
|||
| style="text-align:left; font-size:12px;" |''"The Aurora suffered orbital hull failure. Cause: unknown. Zero human life signs detected."'' |
|||
[[File:Lifepod1.ogg]] |
|||
|- |
|||
| style="text-align:center; font-size:12px;" |[[File:Log-128.png]] |
|||
| style="text-align:center; font-size:12px;" |Day 1 |
|||
| style="text-align:left; font-size:12px;" |''"Detecting increased local radiation levels.<br />Trend is consistent with damage to the Aurora's drive core, sustained during planetfall."'' |
|||
[[File:Story_AuroraWarning1_2.ogg]] |
[[File:Story_AuroraWarning1_2.ogg]] |
||
|- |
|||
| style="text-align:center; font-size:12px;" |[[File:Log-128.png]] |
|||
===Second Aurora Report=== |
|||
| style="text-align:center; font-size:12px;" |Day 2 |
|||
'''"Caution. Continued degradation of the Aurora's drive core may cause a quantum detonation. Continuing to monitor."''' |
|||
| style="text-align:left; font-size:12px;" |''"Caution. Continued degradation of the Aurora's drive core may result in a quantum detonation.<br />Continuing to monitor."'' |
|||
[[File:Story_AuroraWarning2_2.ogg]] |
[[File:Story_AuroraWarning2_2.ogg]] |
||
|- |
|||
| style="text-align:center; font-size:12px;" |[[File:Log-128.png]] |
|||
===Third Aurora Report=== |
|||
| style="text-align:center; font-size:12px;" |Day 3 |
|||
'''Warning. Local radiation readings suggest the Aurora's drive core has reached critical state. Quantum detonation will occur within two hours."''' |
|||
| style="text-align:left; font-size:12px;" |''"Warning. Local radiation readings suggest the Aurora's drive core has reached critical state.<br />Quantum detonation will occur within 2 hours."'' |
|||
[[File:Story_AuroraWarning3_4_effect.ogg]] |
[[File:Story_AuroraWarning3_4_effect.ogg]] |
||
|- |
|||
| style="text-align:center; font-size:12px;" |[[File:Log-128.png]] |
|||
| style="text-align:center; font-size:12px;" |Day 4 |
|||
| style="text-align:left; font-size:12px;" |''"Emergency: A quantum detonation has occurred in the Aurora's drive core.<br />The reactor will reach a super critical state in T- 10, 9, 8, 7, 6, 5, 4 [repeated], 3 [repeated], 2 [repeated to fade], 1 [not said]–"'' |
|||
<br />[[File:QuantumDetonation.wav]] |
|||
|} |
|||
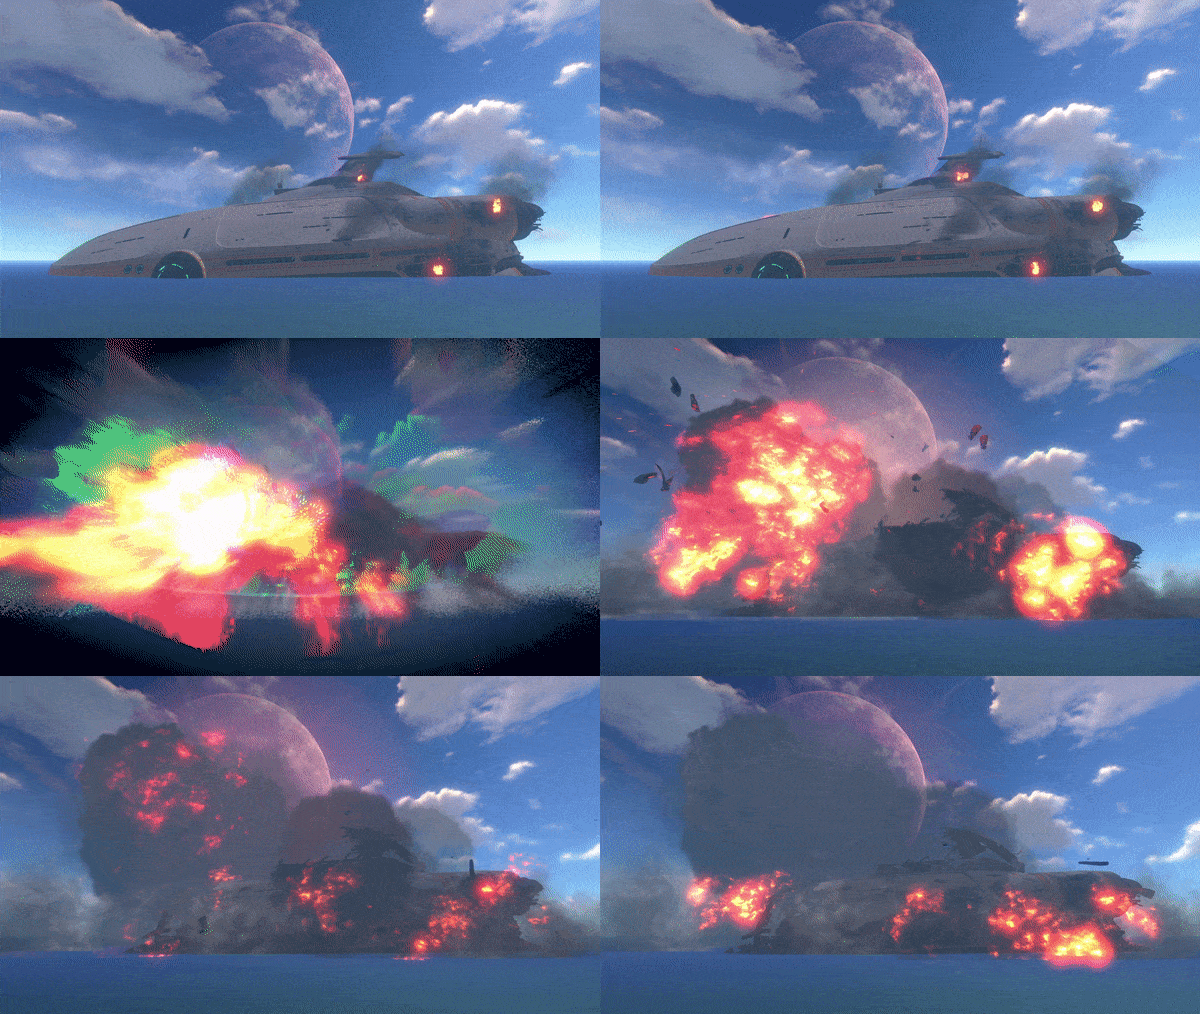
[[File:Aurora_Explode.gif|center|The Aurora exploding]] |
|||
=== |
===Exploration Dialogue=== |
||
{| class="article-table sortable" style="width: 100%;" cellspacing="1" cellpadding="1" border="0" |
|||
'''"Emergency: A quantum detonation has occurred in the Aurora's drive core.''' |
|||
|- |
|||
The reactor will reach a super critical state in T- 10, 9, 8, 7, 6, 5, 4 [repeated], 3 [repeated], 2 [repeated to fade], 1 [not said]- (Large Explosion) |
|||
! class="unsortable" style="width: 20%; text-align: center;" | |
|||
! class="unsortable" style="width: 20%; text-align: center;" | |
|||
! class="unsortable" style="width: 60%; text-align: center;" | |
|||
|- |
|||
| style="text-align:center; font-size:12px;" |[[File:Log-128.png]] |
|||
| style="text-align:center; font-size:12px;" |Entering the [[Crash Zone]] |
|||
| style="text-align:left; font-size:12px;" |''"Lifeform readings in this region are sparse.<br />The Aurora's radioactive fallout will have devastating effects on the alien ecosystem if not contained within the next 24 hours."'' |
|||
[[File:AuroraIntro.ogg]] |
|||
|- |
|||
| style="text-align:center; font-size:12px;" |[[File:Log-128.png]] |
|||
| style="text-align:center; font-size:12px;" |[[Aurora]] Entry |
|||
| style="text-align:left; font-size:12px;" |''"Warning: ship's structural integrity is low. Fire suppression equipment and laser cutters may be required. Exploration is conducted at your own risk."'' |
|||
[[File:AuroraVO1.ogg]] |
|||
|- |
|||
| style="text-align:center; font-size:12px;" |[[File:Log-128.png]] |
|||
| style="text-align:center; font-size:12px;" |[[Aurora]], further in |
|||
| style="text-align:left; font-size:12px;" |''"Caution: scans show the digestive tracts of nearby lifeforms contain human tissues."'' |
|||
[[File:AuroraVO2.ogg]] |
|||
|- |
|||
| style="text-align:center; font-size:12px;" |[[File:Log-128.png]] |
|||
| style="text-align:center; font-size:12px;" |[[Aurora]] Interior |
|||
| style="text-align:left; font-size:12px;" |''"Aurora systems are running on local reserve power. Unable to remotely download black box data."'' |
|||
[[File:AuroraVO3.ogg]] |
|||
|- |
|||
| style="text-align:center; font-size:12px;" |[[File:Log-128.png]] |
|||
| style="text-align:center; font-size:12px;" |[[Aurora]] Hallway |
|||
| style="text-align:left; font-size:12px;" |''"Scans of damage to the Aurora do not match any known offensive technologies."'' |
|||
[[File:AuroraVO4.ogg]] |
|||
|- |
|||
| style="text-align:center; font-size:12px;" |[[File:Log-128.png]] |
|||
| style="text-align:center; font-size:12px;" |[[Aurora]] Prawn Bay |
|||
| style="text-align:left; font-size:12px;" |''"Picking up a faint blackbox signature, originating on the other side of the hull breach in this room."'' |
|||
[[File:Goal_LocationAuroraExoRoom.ogg]] |
|||
|- |
|||
| style="text-align:center; font-size:12px;" |[[File:Log-128.png]] |
|||
| style="text-align:center; font-size:12px;" |[[Aurora]] Drive Entry |
|||
| style="text-align:left; font-size:12px;" |''"The drive core shielding sustained internal damage during collision.<br />Do not attempt repair without appropriate qualifications."'' |
|||
[[File:AuroraVO5.ogg]] |
|||
|- |
|||
| style="text-align:center; font-size:12px;" |[[File:Log-128.png]] |
|||
| style="text-align:center; font-size:12px;" |[[Aurora]] Drive Interior |
|||
| style="text-align:left; font-size:12px;" |''"Warning: local radiation at maximum tolerable level."'' |
|||
[[File:AuroraVO6.ogg]] |
|||
|} |
|||
==Exploration== |
|||
[[File:Story_AuroraWarning4_2.ogg]] |
|||
The PDA updates the player on the condition of the ''Aurora''<nowiki/>'s drive core degradation throughout the course of several in-game days, up until its eventual explosion. |
|||
The explosion is focused towards the front section of the ship. The player can be killed by the explosion if it is in the crash zone biome when the event occurs. Only after the explosion is the player able to venture inside the ''Aurora'', but if they are not equipped with a radiation suit they will suffer damage over time. All three parts of the suit must be equipped to completely negate the radiation damage. Upon entering the ''Aurora'', the player is forewarned by the PDA that nearby creatures contain traces of human tissue in their digestive tracts, indicating that some or all of the bodies have been devoured by [[Bleeder|Bleeders]] and [[Cave Crawler|Cave Crawlers]]. Also, fire and falling debris can injure the player, and the ship periodically shakes, causing disorientation. Reaper Leviathans that spawn around the ''Aurora'', Cave Crawlers that swarm the ship's entry, and Bleeders in the flooded areas all present additional threats. |
|||
[[File:Ship_explode_(2).ogg]] |
|||
For avoiding the Reapers, there is usually one patrolling between the basin west of the ''Aurora'', and the deep chasm beneath its bow. A [[Seamoth]] can safely sneak past by approaching from the [[Safe Shallows]] nearest to the ''Aurora'' and hugging the ship's side, until reaching a gap large enough for the Seamoth to squeeze through. It is recommended to disembark in shallow water so that the ramp beneath you will protect you from a Reaper attack, though the Reaper doesn't normally swim that close to the entrance. |
|||
[[File:Aurora_Explode.gif|thumb|220px|The Aurora exploding]] |
|||
The following equipment is recommended and/or required for exploring the Aurora: |
|||
* [[Radiation Suit]] is required to approach the ''Aurora'' after the drive core explodes without taking damage from [[radiation]]. |
|||
* [[Stasis Rifle]], recommended for self-defense against [[Cave Crawler]]s, [[Bleeder]]s, and possibly [[Reaper Leviathan]]s. |
|||
* [[Repair Tool (Subnautica)|Repair Tool]] is required for repairing the Drive Room and mending broken doors (nearby panels labelled as "Damaged Wiring"). |
|||
* [[Propulsion Cannon (Subnautica)|Propulsion Cannon]] / [[Repulsion Cannon]], for removing crate barriers at both the main hallway and Laboratory entrance. The former can remove the Bleeders from the player's arms. |
|||
* [[Fire Extinguisher]], for various fires (some can be found on site) |
|||
* [[Laser Cutter (Subnautica)|Laser Cutter]], required to open "Sealed Doors" in order to enter various rooms, including the Prawn Bay and Aurora Black Box Terminal. |
|||
* [[Seaglide (Subnautica)|Seaglide]] for quick navigation through the submerged sections. |
|||
* [[Survival Knife (Subnautica)|Survival Knife]] / [[Thermoblade (Subnautica)|Thermoblade]] to kill the [[Bleeder]]s. |
|||
* [[Grav Trap (Subnautica)|Grav Trap]] can be used quickly to contain the Bleeders in the Drive Room. |
|||
* [[Vehicles|Vehicle]], preferably a [[Seamoth]] to travel to the ''Aurora''. |
|||
It's not possible to build a [[Seabases (Subnautica)|Seabase]] inside the ''Aurora''; [[Seabases (Subnautica)#Base Pieces|Base Pieces]] cannot be placed anywhere inside the ship, even if there is room. By extension, no interior modules can be placed either. It is possible to place [[Exterior Modules]] in the ''Aurora'', notably the [[Exterior Growbed (Subnautica)|Exterior Growbed]]. |
|||
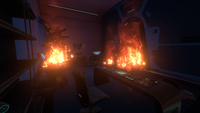
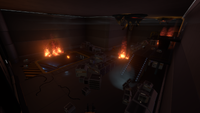
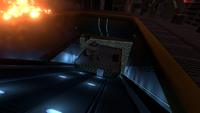
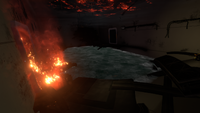
There are two routes to the inside of the ship. The first route is on the right side of the shore area of the torn upfront section and constitutes a doorway behind a [[Floodlight (Subnautica)|Floodlight]] blocked off by various crates. Behind the crates are a Fire Extinguisher and a fire to put out, after which the player will find themselves in the Laboratory. The second route requires going up a ramp in the torn upfront section of the ''Aurora''. On the way up, the player can find several Supply Crates with crafted items inside of them. The doorway leading to the T-section is partially blocked off by a fire. Fortunately, a Fire Extinguisher can be found on the floor several meters away from the doorway. When the player enters, there will be a sign to the left that reads "Airlock". |
|||
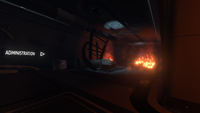
To the right of the T-section, there is a door that is blocked off by a fire. The left corridor leads to "Cargo Bay 3". The right door leads to "Administration". These rooms are indicated by signs on the ''Aurora'' itself. |
|||
===Administration Office=== |
|||
The Administration Office has a Data Terminal with a downloadable log titled "[[Databank (Subnautica)#Alterra Launches the Aurora|Alterra Launches the Aurora]]". The office also contains shelves, a [[Desk (Subnautica)|Desk]], and a [[Prawn Suit Poster - Land]] which can be taken. It also contains an Abandoned PDA with a Data Download under the headline "[[Databank (Subnautica)#Notes to self|Notes to self]]", which will give the player the code "1454". You can also collect batteries on the shelf behind the main desk. |
|||
===Cargo Bay=== |
|||
</div> |
|||
The flooring of the hallway leading to "Cargo Bay 3" is collapsed, forcing the player to head down into the exposed hallway below. |
|||
The player can find an Abandoned PDA named "[[Databank (Subnautica)#Aurora Engineering Drone - Log|Aurora Engineering Drone - Log]]" next to a single Propulsion Cannon Fragment, right at the start of the ramp leading to the hallway. The blockage can be gotten around by dropping down from above from the collapsed hallway floor or by using the Propulsion Cannon or Repulsion Cannon to move the [[Cargo Crate|Cargo Crates]] out of the way. Alternatively, the player can jump and sprint from the slope to the first large Cargo Crate, and then from there to the top of the pile. Note that in doing so, there is a fire that cannot be put out; it must simply be avoided. |
|||
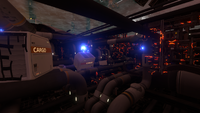
At the end of the hallway is a locked door with a keypad that can be interacted with. Entering the code from the previously mentioned Data Download into the keypad will open the door. The code is 1454. Alternatively, you can unlock the door without using a code from the other side. The cargo bay is a large area full of Cargo Crates, Supply Crates, forklifts, and a few other miscellaneous things. Very rarely, up to three [[Cyclops|Cyclops Engine Fragments]] can appear inside some of the large Cargo Crates. |
|||
Even though the number of this cargo bay is unknown, the number on the large blast doors suggest it could be Cargo Bay 4. |
|||
==Aurora Exploration== |
|||
Over the course of several in-game days, the PDA informs the Player on the condition of the degradation of The Aurora's engine, until its eventual explosion. |
|||
There is an inclined cargo elevator in the cargo bay, which is stuck halfway. Close to it, there's an Abandoned PDA named "[[Databank (Subnautica)#Trans-Gov Profile: Alterra Corp.|Trans-Gov Profile: Alterra Corp.]]". |
|||
The explosion is focused towards the front section of the ship. The player can be killed by the explosion if in the crash zone biome when the event occurs. |
|||
Following the cargo elevator downwards reveals a flooded quad-junction hallway which gives access to the Seamoth Bay, Drive Room and Locker Room. |
|||
Only after the explosion is the Player able to explore inside the Aurora, but only if equipped with a radiation suit. All three parts to the suit must be equipped in order to negate the radiation damage. Upon entry, the PDA warns that creatures around the Aurora contain traces of human tissue inside their digestive systems, indicating all bodies were consumed by [[Bleeder]]s and [[Cave Crawler]]s. Also, fire and falling debris can injure the Player, and periodic shaking of the hull occurs. Further dangers are posed by the Reaper Leviathans that spawn around the ship, Cave Crawlers that litter the entrance area of the ship, and Bleeders in the underwater sections within the Aurora. |
|||
===Seamoth Bay=== |
|||
For avoiding the Reapers, there is usually one patrolling between the basin West of the Aurora, and the deep chasm beneath its bow. A [[Seamoth]] can safely sneak past by approaching from the [[Safe Shallows]] nearest to the Aurora and hugging the Aurora's side, until reaching a gap large enough for the Seamoth to squeeze through. It is recommended to disembark in shallow water so that the ramp beneath you will protect you from Reaper attack, though the Reaper doesn't normally swim that close to the entrance. |
|||
The door to this room is initially locked, but there is a damaged panel which the Repair Tool can repair. When this panel is repaired, the door is unlocked, and the player can enter. The Seamoth Bay contains two pieces of a damaged Seamoth, which can be scanned. It also houses a [[Seamoth Depth Module MK1]] [[Upgrade Modules|Upgrade Module]] and an Abandoned PDA called "[[Databank (Subnautica)#VR Suite Log|VR Suite Log]]". |
|||
===Drive Room=== |
|||
The following equipment is recommended for exploring the Aurora: |
|||
The Drive Room contains the ship's drive core which is comprised of four large reactors. They are connected by catwalks, though some are underwater and heavily damaged. The reactors are covered in breaches, and the player's objective is to repair all eleven of them using the Repair Tool. However, the flooded part of the drive core, where most repairs need to be done, is full of Bleeders. Repairing the breaches removes the radiation entirely after three in-game days. |
|||
* [[Radiation Suit]] (required to approach the Aurora) |
|||
* A weapon for self-defense against Cave Crawlers (Such as a [[Stasis Rifle]], Propulsion Cannon, or Repulsion Cannon) |
|||
* [[Repair Tool]], for repairing the Drive Room and mending broken doors. |
|||
* [[Propulsion Cannon]], for removing crate barriers at both the main hallway and Laboratory entrance, and to remove the Bleeders from the player's arms. A [[Repulsion Cannon]] is also a viable tool for removing crates and barriers. |
|||
* [[Fire Extinguisher]], for various fires (some can be found on site) |
|||
* [[Laser Cutter]], for entering various rooms including the Prawn Suit Bay and Aurora Black Box Terminal. |
|||
* A [[Seaglide]] for quick navigation through the submerged sections. |
|||
* A [[Knife|survival knife]] / [[thermoblade]] to kill the [[bleeder]]s. |
|||
There are two routes to the inside of the ship. The first is on the right side of the shore area of the torn up front section and constitutes an entryway behind a [[Floodlight]] blocked off by various crates. Behind the crates are a Fire Extinguisher and a fire to put out, after which the Player will find themselves in the Laboratory. The second requires going up a ramp in the torn up front section of the Aurora, the Player can enter a corridor that leads inside the ship. On the way up, the user can find several Vac-packs with crafted items inside of them. The door leading to the T-section is partially blocked off by fire. Fortunately, there are a few Fire Extinguishers lying around, which can come in handy. When the Player enters, there will be a sign to the left that says Airlock. |
|||
To the right of the T-section, there is a door which is blocked off by fire. The left corridor leads to the "Cargo Bay 3". The right door leads to "Administration". These rooms are indicated by signs on the Aurora itself. |
|||
===Administration Office=== |
|||
The administration office has a Data Terminal with a downloadable log titled "[[Data Downloads#Alterra Launches the Aurora|Alterra Launches the Aurora]]". The office also contains shelves, a [[Desk]], and a [[Prawn Suit]] [[Posters|poster]] which can be taken. It also contains an Abandoned PDA with a Data Download under the headline "[[Data Downloads#Notes to self|Notes to self]]", which will give the player the code "1454". |
|||
When entering the Drive Room, the PDA warns the player that radiation is at its maximum tolerable level (which would be the Radiation Suit's guaranteed maximum rating, radiation fluxes of 400 sieverts per hour.) |
|||
===Cargo Bay 3=== |
|||
Down the left corridor, there is rubble blocking the entrance to Cargo Bay 3. These can be gotten around dropping down from above or by using the Propulsion Cannon or [[Repulsion Cannon]] to move these out of the way. Alternatively, the player can jump and sprint from the slope to the first large cargo container, and then from there to the top of the pile. Note that in doing so, there is a fire that cannot be put out; it must simply be avoided. There is then a locked door with a keypad that can be interacted with. Entering the code from the previously mentioned Data Download into the keypad will open the door. The Cargo Bay is a large area full of cargo containers, Vac-packs, forklifts, and a few other miscellaneous things. |
|||
The [[Cyclops Engine Efficiency Module]] for the [[Cyclops]] can also be found in the Drive Room, sticking out from the upgrade console at the center of the room. Many [[Bleeder]]s can be found in the water around the reactors. |
|||
There is a cargo elevator in the cargo bay, which is stuck halfway. |
|||
Following the ramp down reveals an underwater section which leads to a T-corridor. To the left, there will be a Sealed Door. To the right, there is a room called the "Seamoth Bay". |
|||
===Seamoth Bay=== |
|||
The door to this room is locked, but there is a damaged panel which the Repair Tool can repair. When this panel is repaired, the door is unlocked, and the player can enter. The Seamoth Bay contains two pieces of a damaged Seamoth, which can be scanned. It also has a [[Seamoth Depth Module MK1]] [[Upgrade Modules|Upgrade Module]]. |
|||
===Locker Room=== |
===Locker Room=== |
||
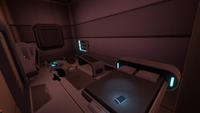
Cutting through the Sealed Door will lead the player into a locker room. Some of the lockers are open and have loot inside, like batteries, first-aid kits, and water. There is an Abandoned PDA with a Data Download titled "[[ |
Cutting through the Sealed Door in the quad-junction hallway will lead the player into a locker room. Some of the lockers are open and have loot inside, like batteries, first-aid kits, and water. There is an Abandoned PDA with a Data Download titled "[[Databank (Subnautica)#Sweet Offer|Sweet Offer]]". It will give the player the code "1869", required for Cabin 1 in the Living Quarters. |
||
===Prawn |
===Prawn Bay=== |
||
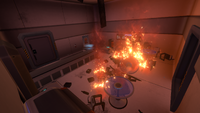
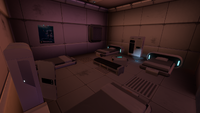
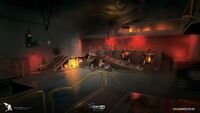
Leaving the locker room, there will be a sign labeled "Prawn Bay". This is the location where the Prawn Suit Fragments will be found. The door to this room is locked, and like before, has a panel that needs to be repaired. Once the door is unlocked the player can proceed into the room. This room has multiple Prawn Suits hanging from the ceiling, presumably waiting to be deployed. To the right is a pile of rubble with broken Prawn Suit Fragments and other miscellaneous things piled on top of each other. The fragments may require nearby fires to be put out |
Leaving the locker room, there will be a sign labeled "Prawn Bay". This is the location where the [[Prawn Suit (Subnautica)|Prawn Suit Fragments]] will be found. The door to this room is locked, and like before, has a panel that needs to be repaired. Once the door is unlocked the player can proceed into the room. This room has multiple damaged Prawn Suits hanging from the ceiling, presumably waiting to be deployed. To the right is a pile of rubble with broken Prawn Suit Fragments and other miscellaneous things piled on top of each other. The fragments may require nearby fires to be put out to be scanned. Among the rubble is a [[Storage Module (Subnautica)|Storage Module]], located on an upgrade console. Next to that is a ramp blocked off by fire and rubble. Once those are cleared, there is a door that leads to the "Living Quarters". |
||
In the water is a large system of pipes and wires. In the system of wires is a hole |
In the water is a large system of pipes and wires. In the system of wires is a hole where one can swim through to enter the room containing ''Aurora''<nowiki/>'s black box data. Heading north through a doorway will lead to the Laboratory, however, one must use a Laser Cutter to open a sealed door to enter. |
||
===Laboratory=== |
===Laboratory=== |
||
Coming from the Aurora entrance: Remove the crates blocking the doorway, then follow the hallway until there is a fire. On the right lies a fire extinguisher which is useful for putting out the aforementioned fire. Continue until a submerged room is reached. |
Coming from the ''Aurora'' entrance: Remove the crates blocking the doorway using the [[Propulsion Cannon (Subnautica)|Propulsion Cannon]], then follow the hallway until there is a fire. On the right lies a fire extinguisher which is useful for putting out the aforementioned fire. Continue until a submerged room is reached. |
||
Coming through the Prawn Suit Bay: Go underwater at the far |
Coming through the Prawn Suit Bay: Go underwater at the far left corner from the entrance to the Bay to find a tunnel leading to the lab. A room before the actual laboratory contains a Data Terminal with a Data Download titled "[[Databank (Subnautica)#Aurora Black Box Data|Aurora Black Box Data]]". There also is a Supply Crate containing a Battery in front of a sealed door that requires the Laser Cutter. Behind it is the actual laboratory. |
||
A nearby Abandoned PDA has a Data Download titled "[[ |
A nearby Abandoned PDA has a Data Download titled "[[Databank (Subnautica)#Lab Access|Lab Access]]" containing the code, 6483, for the two nearby doors. These grant access to the storage room, where three [[Lab Container|Large Sample Flasks]] can be found, one Cylindrical Sample Flask, a [[Lab Equipment|Microscope]], and a Sample Analyzer. The two Supply Crates contain [[Disinfected Water (Subnautica)|Disinfected Water]] and there's a Data Terminal that states it de-corrupted the player's PDA and unlocks the Repulsion Cannon. On a [[Counter (Subnautica)|Counter]] close to the terminal, there's also an Abandoned PDA named "[[Databank (Subnautica)#What Can We Learn From the Hive Mind of Strader VI?|What Can We Learn From the Hive Mind of Strader VI?]]". |
||
===Living Quarters=== |
===Living Quarters=== |
||
The Living Quarters are various rooms that provided living conditions for the various crew and passengers on the ship. If the player goes right, there is a room filled with Filtered Water and Nutrient Blocks. If the player goes left, there is a |
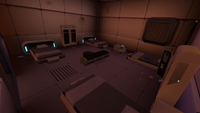
The Living Quarters are various rooms that provided living conditions for the various crew and passengers on the ship. If the player goes right, there is a Supply room filled with [[Filtered Water (Subnautica)|Filtered Water]] and [[Nutrient Block (Subnautica)|Nutrient Blocks]]. If the player goes left, there is a Canteen. Bar tables and chairs are lying on the ground, along with a few handy Supply Crates, a vending machine against the wall, a bar with single wall shelves, a fire extinguisher is on the wall behind the bar as well as a [[Keep Calm Poster]], which can be taken. Sitting atop the bar is the Abandoned PDA named "[[Databank (Subnautica)#Today's%20Menu|Today's Menu]]." |
||
At the front end of the corridor, there are cabins for the people on board. There are beds, posters, [[Carry-all]]s, and some [[Supply Crate (Subnautica)|Supply Crate]]s. |
|||
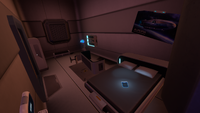
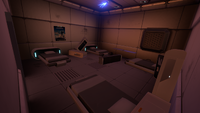
At the front end of the corridor, there are sleeping quarters for the people on board. There are beds, a "Natural Selection 2" poster, and a few lockers. To the left, there is another corridor, with 2 locked doors. One of the doors is unlocked by the code "1869", which is found in the Abandoned PDA named "Sweet Offer". In this room, a [[Cap]] and an [[Arcade Gorge Toy]] can be found. There is a locked door at the end of the hallway which can be unlocked with the code "2679", which is received later in the game on the radio. Inside the room, there is [[Aurora Miniature]], an Aurora Poster, and a Data Terminal that contains a Data Download titled "[[Data Downloads#Alterra HQ - Last Recorded Transmissions|Alterra HQ - Last Recorded Transmissions]]", and unlocks the [[Neptune Escape Rocket]]. |
|||
Backtrack to the T-corridor from earlier, and this time, go straight. This will lead to the Drive Room. |
|||
===Drive Room=== |
|||
Inside the Drive Room are four large generators. They are connected by catwalks, though some are underwater and heavily damaged. The generators are covered in breaches, and the Player's objective is to repair them using the Repair Tool, however, it should be noted that the flooded part of the drive core, where most repairs need to be done, is full of Bleeders. Repairing the breaches removes the radiation entirely after three in-game days. |
|||
To the left, you can find Cabins 1 through 3 and the Captain's Quarters. Cabin 1 is locked by a code, which is "1869", found in the Abandoned PDA named "Sweet Offer". In this room, a [[Caps|Blue Cap]], [[Arcade Gorge Toy]], and an Abandoned PDA, "[[Databank (Subnautica)#Responsible Autonomous Relationships|Responsible Autonomous Relationships]]", can be found. Cabin 3 contains a [[Prawn Suit Poster - Land]]. Another locked door at the end of the hallway, Captain's Quarters, can be unlocked with the code "2679", which is received later in the game on the [[Radio]]. Inside the room, there is an [[Aurora Miniature]], an Aurora Poster, an Abandoned PDA titled "[[Databank (Subnautica)#Captain's Log|Captain's Log]]" on the bed, and a Data Terminal that contains a Data Download titled "[[Databank (Subnautica)#Alterra HQ - Last Recorded Transmissions|Alterra HQ - Last Recorded Transmissions]]", that unlocks the [[Neptune Escape Rocket]]. |
|||
When entering the generator room, the PDA warns the player that radiation is at its maximum tolerable level. |
|||
To the right, you can find Cabins 4 through 7. Cabin 4 contains an Abandoned PDA named "[[Databank (Subnautica)#Relationship%20Contract%20Legal%20Recording|Relationship Contract Legal Recording]]" and the [[Prawn Suit Poster - Sea]]. Facing this room there is Cabin 7 and the doorway is blocked by fire, which you will need to put out to go through. There, you will find another Abandoned PDA, "[[Databank (Subnautica)#Alterra%20Alms%20Pamphlet|Alterra Alms Pamphlet]]". Cabin 6 has a [[Natural Selection 2 Poster]]. |
|||
The [[Cyclops Engine Efficiency Module]] for the [[Cyclops]] can also be found in the Drive Room, sticking out from the upgrade console at the center of the room. Bleeders can also be found in the water around the generators. |
|||
===Mentioned Areas=== |
===Mentioned Areas=== |
||
The Aurora had a virtual cinema/theater, an |
The ''Aurora'' had a virtual cinema/theater, an anti-gravity gym, VR suites, a robotics bay, several airlocks, a scanner room, several leisure decks, and several canteens/cafés. It is possible that these areas were destroyed either when the ''Aurora'' crashed or during the drive core detonation, or simply inaccessible in ''Aurora''<nowiki/>'s current state. |
||
<tabber> |
|||
==Resources== |
|||
Data Terminals= |
|||
* [[Prawn Suit]] Fragments |
|||
* [[Neptune Escape Rocket]] |
|||
* [[Repulsion Cannon]] |
|||
|-| |
|||
Fauna= |
|||
* [[Bleeder]] |
|||
* [[Cave Crawler]] |
|||
* [[Reaper Leviathan]] |
|||
|-| |
|||
Fragments= |
|||
* [[Cyclops|Cyclops Engine Fragment]] |
|||
* [[Prawn Suit|Prawn Suit Fragment]] |
|||
* [[Propulsion Cannon|Propulsion Cannon Fragment]] |
|||
* [[Seamoth|Seamoth Fragment]] |
|||
|-| |
|||
Scannables= |
|||
* [[Bar Table (Subnautica)|Bar Table]] |
|||
* [[Beds (Subnautica)|Basic Double Bed]] |
|||
* [[Bench (Subnautica)|Bench]] |
|||
* [[Chairs (Subnautica)|Command Chair]] |
|||
* [[Counter (Subnautica)|Counter]] |
|||
* [[Desk (Subnautica)|Desk]] |
|||
* [[Floodlight (Subnautica)|Floodlight]] |
|||
* [[Beds (Subnautica)|Single Bed]] |
|||
* [[Single Wall Shelf]] |
|||
* [[Chairs (Subnautica)|Swivel Chair]] |
|||
* [[Trash Can (Subnautica)|Trash Can]] |
|||
* [[Vending Machine]] |
|||
* [[Wall Shelves (Subnautica)|Wall Shelves]] |
|||
|-| |
|||
Other= |
|||
* [[Databank (Subnautica)#Data Downloads|Abandoned PDA]] |
|||
* [[Arcade Gorge Toy]] |
|||
* [[Aurora Miniature]] |
|||
* [[Aurora Poster]] |
|||
* [[Caps|Blue Cap]] |
|||
* [[Carry-all]] |
|||
* [[Lab Container|Cylindrical Sample Flask]] |
|||
* [[Cyclops Engine Efficiency Module]] |
* [[Cyclops Engine Efficiency Module]] |
||
* [[Fire Extinguisher]] |
|||
* [[Filtered Water]] |
|||
* [[Flashlight (Subnautica)|Flashlight]] |
|||
* [[Keep Calm Poster]] |
|||
* [[Lab Container|Large Sample Flask]] |
|||
* [[Lab Equipment|Microscope]] |
|||
* [[Natural Selection 2 Poster]] |
|||
* [[Nutrient Block]] |
|||
* [[Prawn Suit Poster - Land]] |
|||
* [[Prawn Suit Poster - Sea]] |
|||
* [[Lab Equipment|Sample Analyzer]] |
|||
* [[Seamoth Depth Module MK1]] |
* [[Seamoth Depth Module MK1]] |
||
* [[Metal Salvage]] |
|||
* [[Storage Module]] |
* [[Storage Module]] |
||
* [[ |
* [[Supply Crate]] |
||
** [[Battery (Subnautica)|Battery]] |
|||
* [[Vac-pack]]s: |
|||
** [[Battery]] |
|||
** [[Disinfected Water]] |
** [[Disinfected Water]] |
||
** [[First Aid Kit]] |
** [[First Aid Kit (Subnautica)|First Aid Kit]] |
||
** [[Nutrient Block]] |
** [[Nutrient Block]] |
||
** [[Power Cell]] |
** [[Power Cell]] |
||
</tabber> |
|||
==Fauna== |
|||
* [[Bleeder]] |
|||
* [[Cave Crawler]] |
|||
* [[Reaper Leviathan]] |
|||
* [[Skyray]] |
|||
==Data Bank Entries== |
==Data Bank Entries== |
||
| Line 246: | Line 315: | ||
Crew: Command Team (23), Engineering Team (85), Support Crew (40), Passengers (9) |
Crew: Command Team (23), Engineering Team (85), Support Crew (40), Passengers (9) |
||
Status: |
Status:<br /> |
||
- Sustained heavy damage in orbit of planet 4546B<br /> |
|||
- Cause unknown<br /> |
|||
- Evacuation data unavailable |
|||
Engineering section: |
Engineering section:<br /> |
||
- Dark-matter ion drive core V8<br /> |
|||
- Manned robotics suite<br /> |
|||
- Advanced scanner suite<br /> |
|||
- Long-range communications relay<br /> |
|||
- 0.25 cubic kilometers storage for phasegate apparatus |
|||
Habitation section: |
Habitation section:<br /> |
||
- Accommodation for 150 people<br /> |
|||
- Multiple canteens serving healthy fresh and rehydrated food<br /> |
|||
- Leisure facilities including VR suite and virtual cinema |
|||
|} |
|} |
||
|-| |
|-| |
||
| Line 270: | Line 339: | ||
|- |
|- |
||
| style="text-align:left; font-size:12px;" | |
| style="text-align:left; font-size:12px;" | |
||
The Aurora's drive core is shielded by a thick metal shell, which breached in multiple locations shortly after the crash. Once breached it will continue to leak radiation into the surrounding environment until the breaches are sealed. After that point |
The Aurora's drive core is shielded by a thick metal shell, which breached in multiple locations shortly after the crash. Once breached it will continue to leak radiation into the surrounding environment until the breaches are sealed. After that point the radiation in the environment will dissipate over time. This procedure should only be attempted with appropriate radiation protection and a fully charged repair tool. |
||
|} |
|} |
||
</tabber> |
</tabber> |
||
| Line 282: | Line 351: | ||
|Administration Office |
|Administration Office |
||
| |
| |
||
* [[ |
* [[Databank (Subnautica)#Aurora Engineering Drone - Log|Aurora Engineering Drone - Log]] |
||
* [[ |
* [[Databank (Subnautica)#Alterra Launches the Aurora|Alterra Launches the Aurora]] |
||
* [[ |
* [[Databank (Subnautica)#Notes to self|Notes to self]] |
||
| |
| |
||
* 977 41 84 |
* 977 41 84 |
||
* 946 43 115 |
* 946 43 115 |
||
* 952 42 114 |
* 952 42 114 |
||
|- |
|||
|Cargo Bay |
|||
| |
|||
* [[Databank (Subnautica)#Trans-Gov Profile: Alterra Corp.|Trans-Gov Profile: Alterra Corp.]] |
|||
| |
|||
* 955 13 3 |
|||
|- |
|||
|Seamoth Bay |
|||
| |
|||
* [[Databank (Subnautica)#VR Suite Log|VR Suite Log]] |
|||
| |
|||
* 907 0 15 |
|||
|- |
|- |
||
|Locker Room |
|Locker Room |
||
| |
| |
||
* [[ |
* [[Databank (Subnautica)#Aurora Auxiliary Mission Orders|Aurora Auxiliary Mission Orders]] |
||
* [[ |
* [[Databank (Subnautica)#Sweet Offer|Sweet Offer]] |
||
| |
| |
||
* 952 -3 -23 |
* 952 -3 -23 |
||
| Line 300: | Line 381: | ||
|Laboratory |
|Laboratory |
||
| |
| |
||
* [[ |
* [[Databank (Subnautica)#Aurora Black Box Data|Aurora Black Box Data]] |
||
* [[ |
* [[Databank (Subnautica)#Lab Access|Lab Access]] |
||
* [[Databank (Subnautica)#What Can We Learn From the Hive Mind of Strader VI?|What Can We Learn From the Hive Mind of Strader VI?]] |
|||
| |
| |
||
* 1041 -10 -3 |
* 1041 -10 -3 |
||
* 1034 -8 17 |
* 1034 -8 17 |
||
* 1032 -6 33 |
|||
|- |
|- |
||
|Living Quarters |
|Living Quarters |
||
| |
| |
||
* [[Databank (Subnautica)#Alterra Alms Pamphlet|Alterra Alms Pamphlet]] |
|||
* [[Data Downloads#Surveillance Log, Leisure Deck B|Surveillance Log, Leisure Deck B]] |
|||
* [[Databank (Subnautica)#Relationship Contract Legal Recording|Relationship Contract Legal Recording]] |
|||
* [[Data Downloads#Trans-Gov Profile: Alterra Corp.|Trans-Gov Profile: Alterra Corp.]] |
|||
* [[Databank (Subnautica)#Responsible Autonomous Relationships|Responsible Autonomous Relationships]] |
|||
* [[Data Downloads#Relationship Contract Legal Recording|Relationship Contract Legal Recording]] |
|||
* [[Databank (Subnautica)#Today's Menu|Today's Menu]] |
|||
* [[Data Downloads#Responsible Autonomous Relationships|Responsible Autonomous Relationships]] |
|||
* Today's Menu |
|||
| |
| |
||
* 986 10 -49 |
|||
* 967 12 -47 |
* 967 12 -47 |
||
* 951 13 -51 |
* 951 13 -51 |
||
* 965 12 -61 |
* 965 12 -61 |
||
* 986 10 -49 |
|||
|- |
|- |
||
|[[Captain Hollister|Captain |
|[[Captain Hollister|Captain's Quarters]] |
||
| |
| |
||
* [[ |
* [[Databank (Subnautica)#Alterra HQ - Last Recorded Transmissions|Alterra HQ - Last Recorded Transmissions]] |
||
* [[Databank (Subnautica)#Captain's Log|Captain's Log]] |
|||
* Today's Menu (Unimplemented/Placeholder PDA) |
|||
| |
| |
||
* 975 12 -77 |
* 975 12 -77 |
||
* 972 12 -69 |
* 972 12 -69 |
||
|} |
|} |
||
{{Clear}} |
|||
==Achievement== |
|||
{{Main|Achievements}} |
|||
{{:Achievements/Extinction Event Avoided|}} |
|||
{{Clear}} |
|||
==Gallery== |
==Gallery== |
||
<tabber> |
<tabber> |
||
Exterior= |
|||
Screenshots= |
|||
<gallery widths="200" spacing="small"> |
<gallery widths="200" spacing="small"> |
||
AuroraPortPre.png|The Aurora's Port Side, Pre-Explosion |
|||
20161126063101_1.jpg|Overview |
|||
AuroraBowPre.png|The Aurora's Bow, Pre-Explosion |
|||
AuroraStarboardPre.png|The Aurora's Starboard Side, Pre-Explosion |
|||
AuroraSternPre.png|The Aurora's Stern, Pre-Explosion |
|||
2015-04-11 00151.jpg|Rear view |
|||
AuroraBridgePre.png|The Aurora's Bridge, Pre-Explosion |
|||
Screen Shot 2017-03-04 at 11.58.52.png|The top of the Aurora |
|||
AuroraTopPre.png|A top view of the Aurora, Pre-Explosion |
|||
20161126063105_1.jpg|The Aurora at night. |
|||
AuroraPortPost.png|The Aurora's Port Side, Post-Explosion |
|||
2015-05-05_00138.jpg|Closeup of the exposed hull on the port side |
|||
AuroraBowPost.png|The Aurora's Bow, Post-Explosion |
|||
Exploding_Aurora.jpg|Climax of the explosion. |
|||
AuroraStarboardPost.png|The Aurora's Starboard Side, Post-Explosion |
|||
20160807185939_1.jpg|Blackbox Room |
|||
AuroraSternPost.png|The Aurora's Stern, Post-Explosion |
|||
aurora.png|The Aurora crashing into 4546B after being shot down by the Quarantine Enforcement Platform seen in the Cinematic Trailer |
|||
AuroraBridgePost.png|The Aurora's Bridge, Post-Explosion |
|||
AuroraTopPost.png|A top view of the Aurora, Post-Explosion |
|||
Aurora broke.jpg|Inside the destroyed Aurora. |
|||
Aurora.back.jpeg|A view of the spaceship's rear side. |
|||
20160611181400 1.jpg|Front view, post-explosion |
|||
20160611181046 1.jpg|Front view. pre-explosion |
|||
20160611181430 1.jpg|Top piece of Aurora, post-explosion |
|||
20160611181120 1.jpg|Top piece of Aurora, pre-explosion |
|||
AuroraEye.jpg|One of the protrusions on the side of the Aurora, at night |
|||
AuroraRear.jpg|Rear view of the Aurora |
|||
20160611181014 1.jpg|A small piece of land next to the Aurora |
|||
20160611181410 1.jpg|Another side view of Aurora, post-explosion |
|||
20160814130833_1.jpg|Cargo Bay 3 |
|||
20160804192659 1.jpg|Locker Room |
|||
20160814131748_1.jpg|Prawn Bay |
|||
20160804192709_1.jpg|One of the Living Quarters |
|||
20160807185934_1.jpg|Data Coil |
|||
20160807185937_1.jpg|The laboratories |
|||
20160916204139_1.jpg|The view from the cargo lift. |
|||
20160916204147_1.jpg|The corridor to the locker room. |
|||
QIRYQNr.png|Poster of the Aurora |
|||
</gallery> |
</gallery> |
||
|-| |
|||
Interior= |
|||
{{#tag:tabber| |
|||
Entrance= |
|||
<gallery widths="200" spacing="small"> |
|||
Interior1.png|Exploded hull of the Aurora |
|||
Interior2.png|Entrance Hallway |
|||
Interior3.png|Administration Hallway |
|||
Interior4.png|Administration Office |
|||
Interior5.png|Collapsed Hallway, blocked by [[Cargo Crate]]s |
|||
</gallery> |
|||
{{!}}-{{!}} |
|||
Cargo Bay= |
|||
<gallery widths="200" spacing="small"> |
|||
Interior6.png|Cargo Bay Hallway |
|||
Interior7.png|Main Cargo Bay |
|||
Interior8.png|Cargo Bay Elevator |
|||
Interior9.png|Lower Cargo Bay |
|||
</gallery> |
|||
{{!}}-{{!}} |
|||
Quad-Junction Hallway= |
|||
<gallery widths="200" spacing="small"> |
|||
Interior10.png|Main Quad-Junction Hallway |
|||
Interior11.png|[[Seamoth]] Bay |
|||
Interior12.png|Drive Room Hallway |
|||
Interior13.png|Drive Room |
|||
Interior14.png|Locker Room |
|||
</gallery> |
|||
{{!}}-{{!}} |
|||
Prawn Bay= |
|||
<gallery widths="200" spacing="small"> |
|||
Interior15.png|Main [[Prawn Suit (Subnautica)|Prawn]] Bay |
|||
Interior16.png|Canteen |
|||
Interior17.png|Cabin One |
|||
Interior18.png|Captain's Quarters |
|||
Interior19.png|Cabin Three |
|||
Interior20.png|Cabin Four |
|||
Interior21.png|Cabin Six |
|||
Interior22.png|Cabin Seven |
|||
Interior23.png|Prawn Bay Hull Breach |
|||
</gallery> |
|||
{{!}}-{{!}} |
|||
Exit Area= |
|||
<gallery widths="200" spacing="small"> |
|||
Interior24.png|Upper Blackbox Room |
|||
Interior25.png|Lower Blackbox Room |
|||
Interior26.png|Large Data Coil |
|||
Interior27.png|Labratory |
|||
Interior28.png|Collapsed Hallway |
|||
Interior29.png|Exit Hallway |
|||
</gallery> |
|||
}} |
|||
|-| |
|-| |
||
Concept Art= |
Concept Art= |
||
<gallery widths="200" spacing="small"> |
<gallery widths="200" spacing="small"> |
||
Concept-art-crashed-ship-by-cory-strader-the-art-of-subnautica.jpg|Early Aurora Concept |
|||
Starship_FinalRender01b.jpg|Aurora #1 |
|||
16230787 1714224468869173 3121092389712691200 n.jpg|Aurora Designs A |
|||
78959613857237.5632a8c45f19b.jpg|Aurora #2 |
|||
78959613857237.5632a8c45f19b.jpg|Aurora Designs B |
|||
7cb45013857237.5632a8c455f99.jpg|Aurora Designs C |
|||
Starship FinalRender01b.jpg|Concept featuring the final design of the Aurora |
|||
CrashedShip PowerGeneratorRoom LowRes.jpg|Early Drive Room Concept |
|||
Fox3D Prawn Bay Concept Art.jpg|Early Prawn Bay Concept |
|||
</gallery> |
|||
|-| |
|||
Models= |
|||
<gallery> |
|||
NoTouchieDoorModel.jpeg|Door model from [https://sketchfab.com/3d-models/doors-d9661e5406724b19a1ed20353dcba8db Sketchfab] |
|||
SingleLockerModel.jpeg|A singular locker model from [https://sketchfab.com/3d-models/locker-single-ad4a70f934394aeebb1bc7e5d90eaf08 Sketchfab] |
|||
LockerRowModel.jpeg|A locker row model from [https://sketchfab.com/3d-models/comb-locker-low-8aba759d484d42a586fbb85191cc051a Sketchfab] |
|||
NoSignalMonitorModels.jpeg|Multiple inactive monitor models from [https://sketchfab.com/3d-models/wall-monitor-01-125919f809234336a043191d1b84c038 Sketchfab] |
|||
BigDoorModel.jpeg|Large mechanical door model from [https://sketchfab.com/3d-models/big-cargo-doors-2ef69bd0da824836b4e89cede391065c Sketchfab] |
|||
CargoElevatorModel.jpeg|The cargo bay elevator from [https://sketchfab.com/3d-models/elevator-59832a7ce068449585cd92e474ca5ed6 Sketchfab] |
|||
Damaged Aurora Fragments.jpeg|Model of damaged Aurora parts from [https://sketchfab.com/3d-models/starship-exploded-exterrior-damage-tile-02-glow-ebbbffb8472b42af961bfe2590cf1f87 Sketchfab] |
|||
Not Burned Aurora Fragments.jpeg|More damaged Aurora parts models from [https://sketchfab.com/3d-models/starship-exploded-exterrior-damage-tile-02-d3b3f863e87a4055bf3141276dee0d67 Sketchfab] |
|||
Large Aurora Fragments.jpeg|Model of large damaged Aurora parts from [https://sketchfab.com/3d-models/starship-exploded-interrior-damage-tile-06-b54ea432434449d28ca47a5ed9f101ac Sketchfab] |
|||
</gallery> |
|||
|-| |
|||
Other= |
|||
<gallery widths="200" spacing="small"> |
|||
StarshipLowRes.png|Prototype Aurora |
|||
Pre-alpha Aurora.jpeg|Prototype Aurora viewed in early development build "Australis" |
|||
CrashShipCrop1.png|Full prototype Aurora image |
|||
StarshipAugust14th.jpg|"Jiaolong" build Aurora |
|||
Aurora_and_Lifepod-Fox3D.png|Fox3D art including [[Lifepod 5]] |
|||
Cyclops Aurora Fox3D.png|Fox3D art including the [[Cyclops]] |
|||
Aurora_Loading_Screen.jpeg|Loading Screen, featuring the Aurora plummeting towards 4546B |
|||
Aurora.png|The Aurora crashing into 4546B in the Cinematic Trailer |
|||
Aurora Explode.gif|The Aurora exploding, with a hefty shock wave |
|||
</gallery> |
</gallery> |
||
</tabber> |
</tabber> |
||
==Trivia== |
==Trivia== |
||
* In the prototype builds of the game, the ''Aurora'' was a flat, 2D image cut out from the Early Aurora Concept. It featured a much sleeker design with a smaller bridge at the top and front-facing windows. |
|||
* On a phone number pad, the third letter for each number of the code to the captain’s quarters door “2679” spells out “Cory”. This is in reference to Subnautica’s art director Cory Strader. |
|||
** Later into development, specifically in the early development build "Jiaolong", the ''Aurora'' changed to a different 2D image which featured the final design. It was in a unique position, similar to the prototype Aurora. |
|||
*** The next time the ''Aurora'' was seen, it was a 3D model, seen during the [[Update History (Subnautica)#Early%20Access%20Release|Early Access]] launch of the game. Two models, a non-damaged ''Aurora'' and a damaged ''Aurora'', were both uploaded to the Trello. The non-damaged model never appears in game. |
|||
* The original plot for the game involved the ''Aurora'' being a Habitation Vessel that was sent on a terraforming mission to 4546B before the arrival of colony ships. |
|||
** In later builds, the ''Aurora'' was referred to as being a Mining Vessel that was on a three year exploratory mining operation. |
|||
*** The ''Aurora'' was changed again to be Long-Distance Vessel, and later a Long-Range Capital Ship, that was on a mission to build a phasegate. This remained the final plot of the ''Aurora'' in the [[Update History#Official Release|Official Release]] of the game. |
|||
* During the introductory sequence of the game, the player looks up out of [[Lifepod 5|Lifepod 5's]] top hatch to see the ''Aurora'', just in time for a large explosion to emit from the side. This instance of the ''Aurora'' is not a 3D model but is a very large version of the [[Aurora Poster]]. |
|||
* During the dialogue leading up to the explosion of the ''Aurora'', it is said on Day 3 that the ''Aurora''<nowiki/>'s Drive Core will cause a Quantum Detonation in two hours. However, this time is incorrect, as the trigger is a full day later. It is unknown why the trigger was kept at a full day whilst the dialogue was changed to reflect a two-hour timer. Since Subnautica days are 20 minutes in real time, the event is not 2 hours away in real time nor game time. |
|||
* The ''Aurora'' is considered a separate [[Biomes (Subnautica)|biome]]. |
|||
* It is unknown what the [[Crash Zone]] looked like before the ''Aurora'' crashed. |
|||
** However, in the cinematic trailer, [[Bart Torgal]] can be seen building a seabase in a biome similar to the Safe Shallows, which is later destroyed when the Aurora crashes. This implies that the Crash Zone may have been a biome similar to the Safe Shallows, or a continuation of the Safe Shallows. |
|||
* In almost all open lockers within the ''Aurora'', a small picture of an unknown woman can be found. The image is taken directly from the Player [[Concept Art]]. |
|||
** Two unused variations exist, one of them showing another unnamed woman, and one showing the character that would eventually become [[Robin Ayou]]. |
|||
* The Drive Core's reactors resemble some Cyclops parts, most noticeably the Decoy Loading Tube. The tops of the reactors also resemble giant Cyclops engines. |
|||
* ''Aurora'' was the name of one of the two ships tasked with the Imperial Trans-Antarctic expedition. |
|||
[[de:Aurora]] |
|||
[[fr:Aurora]] |
|||
[[pt-br:Aurora]] |
|||
[[pl:Aurora]] |
|||
[[ru:Аврора]] |
|||
[[es:Aurora]] |
|||
[[Category:Aurora]] |
[[Category:Aurora]] |
||
[[Category:Explorable Structures]] |
[[Category:Explorable Structures]] |
||
Latest revision as of 16:41, 13 February 2025

|
Read at own risk This article contains unmarked spoilers. Players new to the game would want to avoid or be cautious toward this article. |
<infobox> <title source="title1"><default>Aurora</default></title>
<image source="image1"></image> <label>Category</label> <label>Category</label> <label>Description</label> <label>Inhabit</label> <label>Loot</label> <label>Attitude</label> <label>Damage</label> <label>Obtain From</label> <label>Biome</label> <label>Active During</label> <label>Reap</label> <label>Music</label> <group> <image source="image2"></image> <label>Tab</label> <label>Description</label> <label>Size</label> <label>Bioreactor</label> <label>Drops</label>
<label>Debug Spawn</label> <format> * {{#explode:Aurora||1}} </format> <label>Debug Spawn</label> <format> * {{#explode:Aurora||1}} </format></group> <group layout="horizontal"> <header>Sustenance</header> <label>Food</label> <label>H2O</label> </group> <group collapse="open" class="tab-seeds"> <header>Seeds</header> <image source="image3"></image> <label>Tab</label> <label>Description</label> <label>Size</label> <label>Bioreactor</label> <label>Item ID</label> </group> </infobox>
The Aurora suffered orbital hull failure. Cause: unknown. Zero human life signs detected. File:Lifepod1.ogg
― PDA, Dialogue
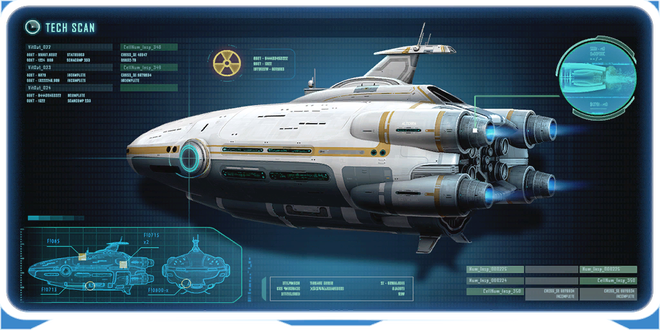
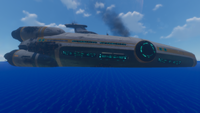
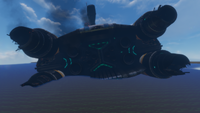
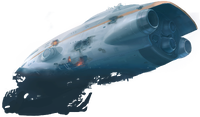
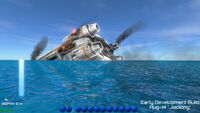
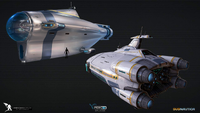
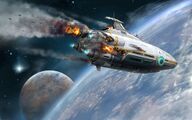
The Aurora was a brand-new Alterra Long-Range Capital Ship (and possibly the first of its class) sent to the Ariadne Arm by the Alterra Corporation to build a phasegate. Its auxiliary mission, unknown to most of the crew, was an agreement made with the Mongolian Independent States to search for and possibly rescue the survivors of the Degasi crew. It was thought that the ship's advanced scanning suite, superior to any ship that had previously made a search effort, would have better luck in finding the crew, or finally confirm whatever fate had befallen them.
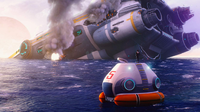
During a gravity slingshot maneuver around Planet 4546B, the Quarantine Enforcement Platform struck the Aurora with an energy pulse on the starboard (right) side, resulting in catastrophic hull failure and leading to it crash landing on the surface of the planet. All the starboard Lifepods were damaged, if not outright destroyed by the energy pulse; most of the port side Lifepods that did launch (pods 1 to 25), after landing, were either compromised or otherwise perished to the hostile ecosystem. The only exception is Lifepod 5, which contained Ryley Robinson. Moments after Lifepod 5 launched, Ryley heard the enforcement platform fire and witnessed a second energy pulse strike the already crippled ship.
Upon crashing, the Aurora plowed into the terrain, unearthing it and leaving small sand hills around the ship. The crash and subsequent explosion resulted in huge quantities of Metal Salvage and Supply Crates being dispersed within the vicinity of the ship, providing useful materials such as Food & Water, batteries, and Titanium. Nine Reaper Leviathans patrol the crash site.
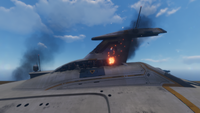
By the time the player awakens and begins his exploration of the area, all of the other Lifepods have been destroyed and their occupants have vanished. The Aurora's Drive Core explodes a few days later, blowing a massive hole in the bow of the ship and consequently inundating the crash site with Radiation. Entering without a Radiation Suit is impossible until the Drive Room is repaired; furthermore, multiple tools are needed to thoroughly explore the ship's many sections. The Aurora's interior is inaccessible until post-detonation.
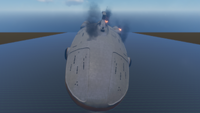
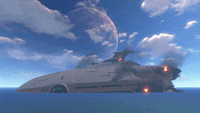
The Aurora is located on the far eastern edge of the map, with its bow facing north and its stern facing south. It is visible from the surface nearly anywhere on the map, making it a useful landmark, especially if the player lacks a compass. The ship is approximately 1,280 meters long from nose to thrusters. Including parts normally hidden by the terrain, it stands to be about 500 meters tall.
Of all crew members on board the Aurora, the only known survivor was Ryley Robinson, who later managed to escape the planet. Alterra later admitted the ship's loss and informed about the rescue of its "survivors", but censored any details about how the ship had crashed and why.
Mission
Primary Mission
| Alterra Launches the Aurora |
| <poem>PHASEGATE ANNOUNCED FOR THE ARIADNE ARM: ALTERRA LAUNCHES THE AURORA
The furthest reaches of inhabited space are due to expand, as Alterra Corp launches a newly-constructed capital ship, carrying a phasegate bound for the Ariadne Arm. The Aurora will travel from spacedock on the edge of Alterra space, making hundreds of consecutive phasegate jumps through nine different trans-gov authorities, and arrive on the far side of the Ariadne Arm in three months' time. From there the command crew will pilot the ship beyond the final phasegate, arriving in the next solar system approximately 18 months later. There the elite team of engineers will begin a 6 month construction project on the new phasegate, a multi-trillion credit investment. In the absence of existing infrastructure in the region, the vessel is equipped with advanced thermal and nuclear power facilities. Alterra Corp. currently operates 9% of all phasegates in the galaxy. If the Aurora's mission is successful Alterra will have outmaneuvered a cabal of Mongolian corporations, operating a range of outposts and mines in the region.</poem> |
| Source: Pick up Abandoned PDA in the Aurora. |
Auxiliary Mission
| Aurora Auxiliary Mission Orders |
| <poem>- Mission: Search & Rescue - Target: Crew of the Mongolian vessel 'Degasi' Mission brief: Mission Details: |
| Source: Pick up Abandoned PDA in the Aurora. |
PDA Speech
The PDA reports Aurora's state and information about the environment to the player as they survive. During the exploration of the Aurora, it will explain the state of the ship around you.
Intro
| Trigger | Dialogue | |
|---|---|---|
| Starting The Game | "Attention. Hull failure imminent. All personnel abandon ship. Launch in 3...2...1..." |
Situational Assessment Dialogue
| Trigger | Dialogue | |
|---|---|---|
| Exiting Lifepod 5 | "The Aurora suffered orbital hull failure. Cause: unknown. Zero human life signs detected." | |
| Day 1 | "Detecting increased local radiation levels. Trend is consistent with damage to the Aurora's drive core, sustained during planetfall." | |
| Day 2 | "Caution. Continued degradation of the Aurora's drive core may result in a quantum detonation. Continuing to monitor." | |
| Day 3 | "Warning. Local radiation readings suggest the Aurora's drive core has reached critical state. Quantum detonation will occur within 2 hours." | |
| Day 4 | "Emergency: A quantum detonation has occurred in the Aurora's drive core. The reactor will reach a super critical state in T- 10, 9, 8, 7, 6, 5, 4 [repeated], 3 [repeated], 2 [repeated to fade], 1 [not said]–" |
Exploration Dialogue
| Entering the Crash Zone | "Lifeform readings in this region are sparse. The Aurora's radioactive fallout will have devastating effects on the alien ecosystem if not contained within the next 24 hours." | |
| Aurora Entry | "Warning: ship's structural integrity is low. Fire suppression equipment and laser cutters may be required. Exploration is conducted at your own risk." | |
| Aurora, further in | "Caution: scans show the digestive tracts of nearby lifeforms contain human tissues." | |
| Aurora Interior | "Aurora systems are running on local reserve power. Unable to remotely download black box data." | |
| Aurora Hallway | "Scans of damage to the Aurora do not match any known offensive technologies." | |
| Aurora Prawn Bay | "Picking up a faint blackbox signature, originating on the other side of the hull breach in this room." | |
| Aurora Drive Entry | "The drive core shielding sustained internal damage during collision. Do not attempt repair without appropriate qualifications." | |
| Aurora Drive Interior | "Warning: local radiation at maximum tolerable level." |
Exploration
The PDA updates the player on the condition of the Aurora's drive core degradation throughout the course of several in-game days, up until its eventual explosion.
The explosion is focused towards the front section of the ship. The player can be killed by the explosion if it is in the crash zone biome when the event occurs. Only after the explosion is the player able to venture inside the Aurora, but if they are not equipped with a radiation suit they will suffer damage over time. All three parts of the suit must be equipped to completely negate the radiation damage. Upon entering the Aurora, the player is forewarned by the PDA that nearby creatures contain traces of human tissue in their digestive tracts, indicating that some or all of the bodies have been devoured by Bleeders and Cave Crawlers. Also, fire and falling debris can injure the player, and the ship periodically shakes, causing disorientation. Reaper Leviathans that spawn around the Aurora, Cave Crawlers that swarm the ship's entry, and Bleeders in the flooded areas all present additional threats.
For avoiding the Reapers, there is usually one patrolling between the basin west of the Aurora, and the deep chasm beneath its bow. A Seamoth can safely sneak past by approaching from the Safe Shallows nearest to the Aurora and hugging the ship's side, until reaching a gap large enough for the Seamoth to squeeze through. It is recommended to disembark in shallow water so that the ramp beneath you will protect you from a Reaper attack, though the Reaper doesn't normally swim that close to the entrance.
The following equipment is recommended and/or required for exploring the Aurora:
- Radiation Suit is required to approach the Aurora after the drive core explodes without taking damage from radiation.
- Stasis Rifle, recommended for self-defense against Cave Crawlers, Bleeders, and possibly Reaper Leviathans.
- Repair Tool is required for repairing the Drive Room and mending broken doors (nearby panels labelled as "Damaged Wiring").
- Propulsion Cannon / Repulsion Cannon, for removing crate barriers at both the main hallway and Laboratory entrance. The former can remove the Bleeders from the player's arms.
- Fire Extinguisher, for various fires (some can be found on site)
- Laser Cutter, required to open "Sealed Doors" in order to enter various rooms, including the Prawn Bay and Aurora Black Box Terminal.
- Seaglide for quick navigation through the submerged sections.
- Survival Knife / Thermoblade to kill the Bleeders.
- Grav Trap can be used quickly to contain the Bleeders in the Drive Room.
- Vehicle, preferably a Seamoth to travel to the Aurora.
It's not possible to build a Seabase inside the Aurora; Base Pieces cannot be placed anywhere inside the ship, even if there is room. By extension, no interior modules can be placed either. It is possible to place Exterior Modules in the Aurora, notably the Exterior Growbed.
There are two routes to the inside of the ship. The first route is on the right side of the shore area of the torn upfront section and constitutes a doorway behind a Floodlight blocked off by various crates. Behind the crates are a Fire Extinguisher and a fire to put out, after which the player will find themselves in the Laboratory. The second route requires going up a ramp in the torn upfront section of the Aurora. On the way up, the player can find several Supply Crates with crafted items inside of them. The doorway leading to the T-section is partially blocked off by a fire. Fortunately, a Fire Extinguisher can be found on the floor several meters away from the doorway. When the player enters, there will be a sign to the left that reads "Airlock".
To the right of the T-section, there is a door that is blocked off by a fire. The left corridor leads to "Cargo Bay 3". The right door leads to "Administration". These rooms are indicated by signs on the Aurora itself.
Administration Office
The Administration Office has a Data Terminal with a downloadable log titled "Alterra Launches the Aurora". The office also contains shelves, a Desk, and a Prawn Suit Poster - Land which can be taken. It also contains an Abandoned PDA with a Data Download under the headline "Notes to self", which will give the player the code "1454". You can also collect batteries on the shelf behind the main desk.
Cargo Bay
The flooring of the hallway leading to "Cargo Bay 3" is collapsed, forcing the player to head down into the exposed hallway below. The player can find an Abandoned PDA named "Aurora Engineering Drone - Log" next to a single Propulsion Cannon Fragment, right at the start of the ramp leading to the hallway. The blockage can be gotten around by dropping down from above from the collapsed hallway floor or by using the Propulsion Cannon or Repulsion Cannon to move the Cargo Crates out of the way. Alternatively, the player can jump and sprint from the slope to the first large Cargo Crate, and then from there to the top of the pile. Note that in doing so, there is a fire that cannot be put out; it must simply be avoided.
At the end of the hallway is a locked door with a keypad that can be interacted with. Entering the code from the previously mentioned Data Download into the keypad will open the door. The code is 1454. Alternatively, you can unlock the door without using a code from the other side. The cargo bay is a large area full of Cargo Crates, Supply Crates, forklifts, and a few other miscellaneous things. Very rarely, up to three Cyclops Engine Fragments can appear inside some of the large Cargo Crates.
Even though the number of this cargo bay is unknown, the number on the large blast doors suggest it could be Cargo Bay 4.
There is an inclined cargo elevator in the cargo bay, which is stuck halfway. Close to it, there's an Abandoned PDA named "Trans-Gov Profile: Alterra Corp.".
Following the cargo elevator downwards reveals a flooded quad-junction hallway which gives access to the Seamoth Bay, Drive Room and Locker Room.
Seamoth Bay
The door to this room is initially locked, but there is a damaged panel which the Repair Tool can repair. When this panel is repaired, the door is unlocked, and the player can enter. The Seamoth Bay contains two pieces of a damaged Seamoth, which can be scanned. It also houses a Seamoth Depth Module MK1 Upgrade Module and an Abandoned PDA called "VR Suite Log".
Drive Room
The Drive Room contains the ship's drive core which is comprised of four large reactors. They are connected by catwalks, though some are underwater and heavily damaged. The reactors are covered in breaches, and the player's objective is to repair all eleven of them using the Repair Tool. However, the flooded part of the drive core, where most repairs need to be done, is full of Bleeders. Repairing the breaches removes the radiation entirely after three in-game days.
When entering the Drive Room, the PDA warns the player that radiation is at its maximum tolerable level (which would be the Radiation Suit's guaranteed maximum rating, radiation fluxes of 400 sieverts per hour.)
The Cyclops Engine Efficiency Module for the Cyclops can also be found in the Drive Room, sticking out from the upgrade console at the center of the room. Many Bleeders can be found in the water around the reactors.
Locker Room
Cutting through the Sealed Door in the quad-junction hallway will lead the player into a locker room. Some of the lockers are open and have loot inside, like batteries, first-aid kits, and water. There is an Abandoned PDA with a Data Download titled "Sweet Offer". It will give the player the code "1869", required for Cabin 1 in the Living Quarters.
Prawn Bay
Leaving the locker room, there will be a sign labeled "Prawn Bay". This is the location where the Prawn Suit Fragments will be found. The door to this room is locked, and like before, has a panel that needs to be repaired. Once the door is unlocked the player can proceed into the room. This room has multiple damaged Prawn Suits hanging from the ceiling, presumably waiting to be deployed. To the right is a pile of rubble with broken Prawn Suit Fragments and other miscellaneous things piled on top of each other. The fragments may require nearby fires to be put out to be scanned. Among the rubble is a Storage Module, located on an upgrade console. Next to that is a ramp blocked off by fire and rubble. Once those are cleared, there is a door that leads to the "Living Quarters".
In the water is a large system of pipes and wires. In the system of wires is a hole where one can swim through to enter the room containing Aurora's black box data. Heading north through a doorway will lead to the Laboratory, however, one must use a Laser Cutter to open a sealed door to enter.
Laboratory
Coming from the Aurora entrance: Remove the crates blocking the doorway using the Propulsion Cannon, then follow the hallway until there is a fire. On the right lies a fire extinguisher which is useful for putting out the aforementioned fire. Continue until a submerged room is reached.
Coming through the Prawn Suit Bay: Go underwater at the far left corner from the entrance to the Bay to find a tunnel leading to the lab. A room before the actual laboratory contains a Data Terminal with a Data Download titled "Aurora Black Box Data". There also is a Supply Crate containing a Battery in front of a sealed door that requires the Laser Cutter. Behind it is the actual laboratory.
A nearby Abandoned PDA has a Data Download titled "Lab Access" containing the code, 6483, for the two nearby doors. These grant access to the storage room, where three Large Sample Flasks can be found, one Cylindrical Sample Flask, a Microscope, and a Sample Analyzer. The two Supply Crates contain Disinfected Water and there's a Data Terminal that states it de-corrupted the player's PDA and unlocks the Repulsion Cannon. On a Counter close to the terminal, there's also an Abandoned PDA named "What Can We Learn From the Hive Mind of Strader VI?".
Living Quarters
The Living Quarters are various rooms that provided living conditions for the various crew and passengers on the ship. If the player goes right, there is a Supply room filled with Filtered Water and Nutrient Blocks. If the player goes left, there is a Canteen. Bar tables and chairs are lying on the ground, along with a few handy Supply Crates, a vending machine against the wall, a bar with single wall shelves, a fire extinguisher is on the wall behind the bar as well as a Keep Calm Poster, which can be taken. Sitting atop the bar is the Abandoned PDA named "Today's Menu."
At the front end of the corridor, there are cabins for the people on board. There are beds, posters, Carry-alls, and some Supply Crates.
To the left, you can find Cabins 1 through 3 and the Captain's Quarters. Cabin 1 is locked by a code, which is "1869", found in the Abandoned PDA named "Sweet Offer". In this room, a Blue Cap, Arcade Gorge Toy, and an Abandoned PDA, "Responsible Autonomous Relationships", can be found. Cabin 3 contains a Prawn Suit Poster - Land. Another locked door at the end of the hallway, Captain's Quarters, can be unlocked with the code "2679", which is received later in the game on the Radio. Inside the room, there is an Aurora Miniature, an Aurora Poster, an Abandoned PDA titled "Captain's Log" on the bed, and a Data Terminal that contains a Data Download titled "Alterra HQ - Last Recorded Transmissions", that unlocks the Neptune Escape Rocket.
To the right, you can find Cabins 4 through 7. Cabin 4 contains an Abandoned PDA named "Relationship Contract Legal Recording" and the Prawn Suit Poster - Sea. Facing this room there is Cabin 7 and the doorway is blocked by fire, which you will need to put out to go through. There, you will find another Abandoned PDA, "Alterra Alms Pamphlet". Cabin 6 has a Natural Selection 2 Poster.
Mentioned Areas
The Aurora had a virtual cinema/theater, an anti-gravity gym, VR suites, a robotics bay, several airlocks, a scanner room, several leisure decks, and several canteens/cafés. It is possible that these areas were destroyed either when the Aurora crashed or during the drive core detonation, or simply inaccessible in Aurora's current state.
<tabber> Data Terminals=
|-| Fauna=
|-| Fragments=
|-| Scannables=
- Bar Table
- Basic Double Bed
- Bench
- Command Chair
- Counter
- Desk
- Floodlight
- Single Bed
- Single Wall Shelf
- Swivel Chair
- Trash Can
- Vending Machine
- Wall Shelves
|-| Other=
- Abandoned PDA
- Arcade Gorge Toy
- Aurora Miniature
- Aurora Poster
- Blue Cap
- Carry-all
- Cylindrical Sample Flask
- Cyclops Engine Efficiency Module
- Fire Extinguisher
- Filtered Water
- Flashlight
- Keep Calm Poster
- Large Sample Flask
- Microscope
- Natural Selection 2 Poster
- Nutrient Block
- Prawn Suit Poster - Land
- Prawn Suit Poster - Sea
- Sample Analyzer
- Seamoth Depth Module MK1
- Storage Module
- Supply Crate
</tabber>
Data Bank Entries
<tabber> Aurora Ship Status=
|
Ship Class: Alterra Long-Range Capital Ship Status: Engineering section: Habitation section: |
|-| Drive Core Shielding Breach=
|
The Aurora's drive core is shielded by a thick metal shell, which breached in multiple locations shortly after the crash. Once breached it will continue to leak radiation into the surrounding environment until the breaches are sealed. After that point the radiation in the environment will dissipate over time. This procedure should only be attempted with appropriate radiation protection and a fully charged repair tool. |
</tabber>
Data Downloads Checklist
| Ship Section | Name of Data Bank Entry | Coordinates |
|---|---|---|
| Administration Office |
| |
| Cargo Bay |
| |
| Seamoth Bay |
| |
| Locker Room |
| |
| Laboratory |
| |
| Living Quarters |
| |
| Captain's Quarters |
|
Achievement
| Spoiler alert: The following section contains story related material.
| |

|
Extinction Event Avoided Repair the Aurora's Drive Core
|
Gallery
<tabber> Exterior=
|-| Interior= <tabber> Entrance=
Collapsed Hallway, blocked by Cargo Crates
|-| Cargo Bay=
|-| Quad-Junction Hallway=
Seamoth Bay
|-| Prawn Bay=
Main Prawn Bay
|-| Exit Area=
</tabber> |-| Concept Art=
|-| Models=
Door model from Sketchfab
A singular locker model from Sketchfab
A locker row model from Sketchfab
Multiple inactive monitor models from Sketchfab
Large mechanical door model from Sketchfab
The cargo bay elevator from Sketchfab
Model of damaged Aurora parts from Sketchfab
More damaged Aurora parts models from Sketchfab
Model of large damaged Aurora parts from Sketchfab
|-| Other=
</tabber>
Trivia
- In the prototype builds of the game, the Aurora was a flat, 2D image cut out from the Early Aurora Concept. It featured a much sleeker design with a smaller bridge at the top and front-facing windows.
- Later into development, specifically in the early development build "Jiaolong", the Aurora changed to a different 2D image which featured the final design. It was in a unique position, similar to the prototype Aurora.
- The next time the Aurora was seen, it was a 3D model, seen during the Early Access launch of the game. Two models, a non-damaged Aurora and a damaged Aurora, were both uploaded to the Trello. The non-damaged model never appears in game.
- Later into development, specifically in the early development build "Jiaolong", the Aurora changed to a different 2D image which featured the final design. It was in a unique position, similar to the prototype Aurora.
- The original plot for the game involved the Aurora being a Habitation Vessel that was sent on a terraforming mission to 4546B before the arrival of colony ships.
- In later builds, the Aurora was referred to as being a Mining Vessel that was on a three year exploratory mining operation.
- The Aurora was changed again to be Long-Distance Vessel, and later a Long-Range Capital Ship, that was on a mission to build a phasegate. This remained the final plot of the Aurora in the Official Release of the game.
- In later builds, the Aurora was referred to as being a Mining Vessel that was on a three year exploratory mining operation.
- During the introductory sequence of the game, the player looks up out of Lifepod 5's top hatch to see the Aurora, just in time for a large explosion to emit from the side. This instance of the Aurora is not a 3D model but is a very large version of the Aurora Poster.
- During the dialogue leading up to the explosion of the Aurora, it is said on Day 3 that the Aurora's Drive Core will cause a Quantum Detonation in two hours. However, this time is incorrect, as the trigger is a full day later. It is unknown why the trigger was kept at a full day whilst the dialogue was changed to reflect a two-hour timer. Since Subnautica days are 20 minutes in real time, the event is not 2 hours away in real time nor game time.
- The Aurora is considered a separate biome.
- It is unknown what the Crash Zone looked like before the Aurora crashed.
- However, in the cinematic trailer, Bart Torgal can be seen building a seabase in a biome similar to the Safe Shallows, which is later destroyed when the Aurora crashes. This implies that the Crash Zone may have been a biome similar to the Safe Shallows, or a continuation of the Safe Shallows.
- In almost all open lockers within the Aurora, a small picture of an unknown woman can be found. The image is taken directly from the Player Concept Art.
- Two unused variations exist, one of them showing another unnamed woman, and one showing the character that would eventually become Robin Ayou.
- The Drive Core's reactors resemble some Cyclops parts, most noticeably the Decoy Loading Tube. The tops of the reactors also resemble giant Cyclops engines.
- Aurora was the name of one of the two ships tasked with the Imperial Trans-Antarctic expedition.

