
User:Yayieali/Code Test: Difference between revisions
No edit summary Tags: Visual edit apiedit |
No edit summary Tags: Visual edit apiedit |
||
| Line 1: | Line 1: | ||
| ⚫ | |||
[[File:Lava Boomerang Cooked.png|thumb|128x128px]] |
|||
| ⚫ | |||
[[File:Lava Boomerang Cured.png|thumb|128x128px]] |
|||
| ⚫ | |||
[[File:Lava Boomerang Raw.png|thumb|128x128px]] |
|||
| ⚫ | |||
[[File:Lava Eyeye Cooked.png|thumb|128x128px]] |
|||
{{Recipe|item1=Quartz|item2=Computer Chip|machine=Fabricator|result=Seamoth Solar Charge}} |
|||
[[File:Lava Eyeye Cured.png|thumb|128x128px]] |
|||
{{Recipe|item1=Polyaniline|machine=Fabricator|result=Seamoth Perimeter Defense System}} |
|||
[[File:Lava Eyeye Raw.png|thumb|128x128px]] |
|||
{{Recipe|item1=Magnetite|item2=Computer Chip|machine=Fabricator|result=Seamoth Torpedo System}} |
|||
{{Recipe|item1=Polyaniline|item2=Magnetite|machine=Fabricator|result=Seamoth Sonar}} |
|||
{{Recipe|item1=Magnetite|item2=Advanced Wiring Kit|item3=Titanium|machine=Fabricator|result=Prawn Suit Thermal Reactor}} |
|||
{{Recipe|item1=Aluminum Oxide Crystal|item2=Plasteel Ingot|machine=Fabricator|result=Prawn Suit Jump Jet Upgrade}} |
|||
{{Recipe|item1=Computer Chip|item2=Titanium|count2 = 2|machine=Fabricator|result=Prawn Suit Propulsion Cannon}} |
|||
{{Recipe|item1=Advanced Wiring Kit|count1 = 2|item2=Titanium|machine=Fabricator|result=Prawn Suit Grappling Arm}} |
|||
{{Recipe|item1=Computer Chip|item2=Titanium|count2 = 2|machine=Fabricator|result=Prawn Suit Drill Arm}} |
|||
{{Recipe|item1=Magnetite|item2=Computer Chip|count2 = 2|machine=Fabricator|result=Prawn Suit Torpedo Arm}} |
|||
| ⚫ | |||
| ⚫ | |||
<hr> |
|||
| ⚫ | |||
| ⚫ | |||
{| style="width: 100%;" class="article-table sortable" border="0" cellpadding="1" cellspacing="1" |
|||
|- |
|||
! class="unsortable" style="width: auto; text-align: center;" |Wrecks |
|||
! class="unsortable" style="width: auto; text-align: center;" |Location |
|||
! class="unsortable" style="width: 10%; text-align: center;" |Coordinates |
|||
! class="unsortable" style="width: 40%; text-align: left;" |Unique Items |
|||
|- |
|||
| style="text-align:center; font-size:12px;" | |
|||
<gallery position="center" columns="1" spacing="small" orientation="square" captionalign="center" captionsize="medium" bordersize="small"> |
|||
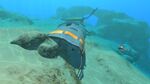
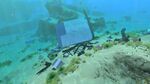
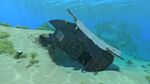
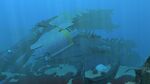
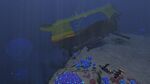
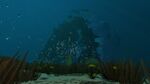
SafeShallowsWreck-1.jpg|[[Safe Shallows]] Large Wreck 1 |
|||
</gallery> |
|||
| style="text-align:center; font-size:12px;" |Safe Shallows |
|||
| style="text-align:center; font-size:12px;" | -40 -14 -400 |
|||
| style="text-align:left; font-size:12px;" | |
|||
*[[Chair]] |
|||
*[[Desk]] |
|||
*[[Data Downloads|Abandoned PDA]] |
|||
*[[Fragments|Seaglide Fragments]] |
|||
|} |
|||
<gallery captionalign="center" captionsize="small" bordersize="small" widths="150"> |
<gallery captionalign="center" captionsize="small" bordersize="small" widths="150"> |
||
Revision as of 14:59, 7 August 2016


Safe Shallows Small Wreck 7
Safe Shallows Small Wreck 6
Safe Shallows Small Wreck 5
Safe Shallows Small Wreck 4
Safe Shallows Small Wreck 3
Safe Shallows Small Wreck 2
Safe Shallows Small Wreck 1
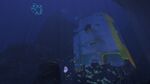
Safe Shallows Large Wreck 2
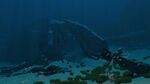
Safe Shallows Large Wreck 1
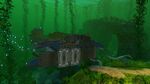
Kelp Forest Large Wreck 4
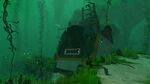
Kelp Forest Large Wreck 3
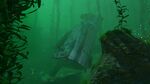
Kelp Forest Large Wreck 2

Kelp Forest Large Wreck 1
Grassy Plateaus Large Wreck 4
Grassy Plateaus Large Wreck 5
Grassy Plateaus Large Wreck 3

Grassy Plateaus Large Wreck 2
Grassy Plateaus Large Wreck 1
Koosh Zone Large Wreck 1
Mushroom Forest Large Wreck 1
Underwater Islands Large Wreck 1
Dunes Large Wreck 1
Sea Treader's Path Large Wreck 1
Mountains Large Wreck 1

Blood Kelp Zone Large Wreck 1
Grand Reef Large Wreck 1
Grand Reef Large Wreck 2


|
This is a disambiguation page, intended to distinguish between articles of similar subject or title. If an internal link referred you to this page, you may wish to change the link to point directly to the intended article. |