
Wrecks

|
Featured Video The featured video shown above is installed by FANDOM and not by the administrators of the Subnautica Wiki, and cannot be removed. It most likely contradicts in-game information and lore, and thus should not be taken as canon information. |
.png)
|
Read at own risk This article contains unmarked spoilers. Players new to the game would want to avoid or be cautious toward this article. |
<infobox layout="stacked">
 <title source="title1">
   <default>Wrecks</default>
 </title>
 <image source="image1">
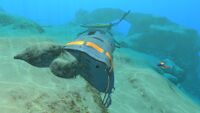
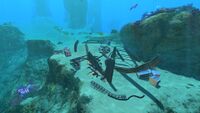
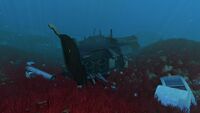
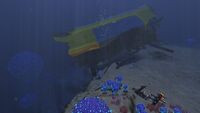
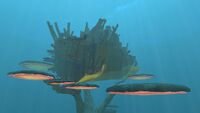
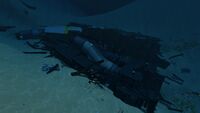
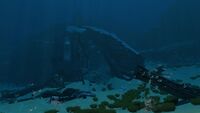
</image> <label>Tab</label> <label>Type</label> <label>Biome</label> <label>Depth Range</label> <label>Temperature Range</label> <label>Biome ID</label> <label>Harvesting Nodes</label> <label>goto ID</label> <label>Coordinates</label> <label>Base ID</label> <group> <label>Point of Interest</label> <label>Music</label> </group> </infobox> The Wrecks are explorable pieces of debris from the Aurora.[1] They have a wide range of sizes. Large Wrecks contain valuable technology in the form of fragments and sometimes Data Boxes, while Small Wrecks may contain only Vac-packs, or a limited amount of fragments.
Large Wrecks
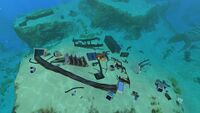
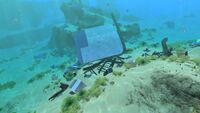
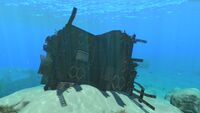
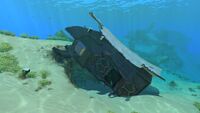
There are twenty-three Large Wrecks spread throughout the ocean at the beginning of the game. Each of them are surrounded by their local flora and fauna and possess their own unique challenges. Many of them include sections that are only accessible with the Laser Cutter or a Repair Tool. While each contains a unique set of fragments, there are common items found in many Wrecks, for example chairs and desks.
Large Wreck List
Blood Kelp Trench=

|-| Bulb Zone=
| Image | Items | Coordinates |
|---|---|---|
|
940 -198 593
(wreck3) | |
| 1309 -215 570 |


|-| Dunes=
| Image | Items | Coordinates |
|---|---|---|
|
-1448 -332 732
(wreck6) | |
| -1632 -334 83 | ||
| -1210 -217 7 |


|-| Grand Reef=


|-| Grassy Plateaus=


|-| Kelp Forest=
| Image | Items | Coordinates |
|---|---|---|
| -320 -57 252
(wreck18) | ||
| 65 -25 385
(wreck17) |


|-| Mountains=
| Image | Items | Coordinates |
|---|---|---|
|
701 -346 1224
(wreck5) | |
| 1057 -254 1359
(wreck19) |


|-| Mushroom Forest=
| Image | Items | Coordinates |
|---|---|---|
|
-644 -95 751
(wreck9) |

|-| Safe Shallows=
| Image | Items | Coordinates |
|---|---|---|
| -40 -14 -400
(wreck15) | ||
| 366 -6 -203
(wreck16) |


|-| Sea Treader's Path=

|-| Sparse Reef=
| Image | Items | Coordinates |
|---|---|---|
| -787 -208 -713
(wreck20) |

|-| Underwater Islands=

Small Wrecks
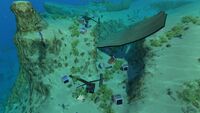
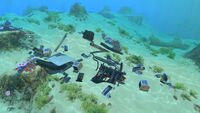
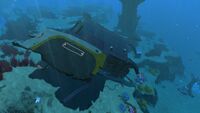
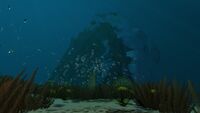
Small Wrecks can be found surrounding the Large Wrecks and inside the Crash Zone. They can contain useful items and fragments.
Safe Shallows=
| Image | Items | Coordinates |
|---|---|---|
| 20 -10 300 | ||
| 90 -20 120 | ||
| 65 -10 -85 | ||
| -160 -20 -225 | ||
| 175 -23 -253 | ||
| 310 -23 -119 |


|-| Crash Zone=
| Image | Items | Coordinates |
|---|---|---|
| 394 -10 -380 | ||
| 484 -22 -118 | ||
|
696 -32 37 | |
| 749 -58 120 |


|-| Grassy Plateaus=
| Image | Items | Coordinates |
|---|---|---|
| 165 -86 -520 | ||
| 322 -90 222 | ||
| 270 -85 70 | ||
| -370 -100 475 | ||
| -284 -93 606 | ||
| -520 -90 -215 |


Gallery
<tabber> In Game View=
Safe Shallows Small Wreck 7
Safe Shallows Small Wreck 6
Safe Shallows Small Wreck 5

Safe Shallows Small Wreck 4
Safe Shallows Small Wreck 3
Safe Shallows Small Wreck 2
Safe Shallows Small Wreck 1
Safe Shallows Large Wreck 2
Safe Shallows Large Wreck 1
Kelp Forest Large Wreck 4
Kelp Forest Large Wreck 3

Kelp Forest Large Wreck 2
Kelp Forest Large Wreck 1
Grassy Plateaus Large Wreck 4
Grassy Plateaus Large Wreck 5
Grassy Plateaus Large Wreck 3
Grassy Plateaus Large Wreck 2
Grassy Plateaus Large Wreck 1
Bulb Zone Large Wreck 1
Mushroom Forest Large Wreck 1

Underwater Islands Large Wreck 1
Dunes Large Wreck 1
Sea Treader's Path Large Wreck 1
Mountains Large Wreck 1
Blood Kelp Zone Large Wreck 1

Grand Reef Large Wreck 1
Grand Reef Large Wreck 2


|-| Sketchfab Models=
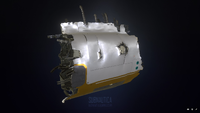
Large Explorable Wreck Model from Sketchfab
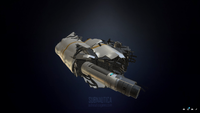
Another Large Explorable Wreck Model from Sketchfab

Small Explorable Wreck's Model from Sketchfab


|-| Concept Art=
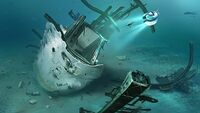
Large Explorable Wreck's Concept art
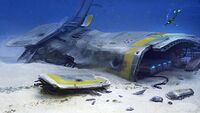
Small Explorable Wreck's Concept Art
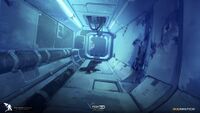
The destroyed interior of a Wreck Concept Art


</tabber>