Biomes (Subnautica): Difference between revisions
(Updated a few biomes. Added thermal vents to Dunes and Underwater Islands) |
(→Surface Biomes: updating) |
||
| Line 22: | Line 22: | ||
* [[Shale Outcrop]] |
* [[Shale Outcrop]] |
||
| style="text-align:left; font-size:12px;" | |
| style="text-align:left; font-size:12px;" | |
||
* [[Wrecks|Large Wreck]] |
* [[Wrecks|Large Wreck]] (Trench) |
||
* [[Destroyed Lifepods|Destroyed Lifepod]] |
* [[Destroyed Lifepods|Destroyed Lifepod]] (Northern) |
||
* [[Alien Caches|Blood Kelp Sanctuary]] (Northern) |
* [[Alien Caches|Blood Kelp Sanctuary]] (Northern) |
||
|- |
|- |
||
| Line 33: | Line 33: | ||
* [[Shale Outcrop]] |
* [[Shale Outcrop]] |
||
| style="text-align:left; font-size:12px;" | |
| style="text-align:left; font-size:12px;" | |
||
* [[Wrecks|Large |
* [[Wrecks|Large Wrecks]] (2) |
||
* [[Destroyed Lifepods|Destroyed Lifepod]] |
* [[Destroyed Lifepods|Destroyed Lifepod]] |
||
* [[Lava Geyser]]s (3) |
* [[Lava Geyser]]s (3) |
||
* [[Alien Caches|Bulb Zone Arch Cache]] |
* [[Alien Caches|Bulb Zone Arch Cache]] |
||
|- |
|- |
||
| style="text-align:center; font-size:12px;" |[[File:Crag Field Biome.png|200px|center|link=Crag Field]][[Crag Field]] |
| style="text-align:center; font-size:12px;" |[[File:Crag Field Biome.png|200px|center|link=Crag Field]][[Crag Field]] |
||
| Line 42: | Line 42: | ||
* 125 - 460 meters |
* 125 - 460 meters |
||
| style="text-align:center; font-size:12px;" | |
| style="text-align:center; font-size:12px;" | |
||
| ⚫ | |||
* [[Limestone Outcrop]] |
* [[Limestone Outcrop]] |
||
* [[Sandstone Outcrop]] |
|||
| ⚫ | |||
| style="text-align:left; font-size:12px;" | |
| style="text-align:left; font-size:12px;" | |
||
* [[Alien Caches|Crag Field Arch Cache]] |
* [[Alien Caches|Crag Field Arch Cache]] |
||
* [[Destroyed Lifepods|Destroyed Lifepod]] |
* [[Destroyed Lifepods|Destroyed Lifepod]] |
||
|- |
|- |
||
| Line 54: | Line 55: | ||
* [[Limestone Outcrop]] |
* [[Limestone Outcrop]] |
||
* [[Sandstone Outcrop]] |
* [[Sandstone Outcrop]] |
||
| ⚫ | |||
| style="text-align:left; font-size:12px;" | |
| style="text-align:left; font-size:12px;" | |
||
* [[Aurora]] |
* [[Aurora]] |
||
* [[Destroyed Lifepods|Destroyed Lifepod]] |
* [[Destroyed Lifepods|Destroyed Lifepod]] |
||
|- |
|- |
||
| style="text-align:center; font-size:12px;" |[[File:Void Infobox.png|200px|center|link=Crater Edge]][[Crater Edge]] |
| style="text-align:center; font-size:12px;" |[[File:Void Infobox.png|200px|center|link=Crater Edge]][[Crater Edge]] |
||
| Line 74: | Line 74: | ||
* [[Sandstone Outcrop]] |
* [[Sandstone Outcrop]] |
||
| style="text-align:left; font-size:12px;" | |
| style="text-align:left; font-size:12px;" | |
||
* [[Wrecks|Large |
* [[Wrecks|Large Wrecks]] (3) |
||
* Thermal Vents (9) |
* Thermal Vents (9) |
||
* Meteor Crater |
* Meteor Crater |
||
* Giant Sinkhole |
* Giant Sinkhole |
||
* [[Alien Caches|Dunes Sanctuary]] |
* [[Alien Caches|Dunes Sanctuary]] |
||
* [[Alien Vents#Entrance_Points|Alien Vent Entrance Point]] |
* [[Alien Vents#Entrance_Points|Alien Vent Entrance Point]] |
||
|- |
|- |
||
| Line 85: | Line 85: | ||
* 150 - 480 meters |
* 150 - 480 meters |
||
| style="text-align:center; font-size:12px;" | |
| style="text-align:center; font-size:12px;" | |
||
* [[Limestone Outcrop]] |
|||
* [[Sandstone Outcrop]] |
|||
* [[Shale Outcrop]] |
* [[Shale Outcrop]] |
||
| style="text-align:left; font-size:12px;" | |
| style="text-align:left; font-size:12px;" | |
||
| Line 109: | Line 111: | ||
* [[Sandstone Outcrop]] |
* [[Sandstone Outcrop]] |
||
| style="text-align:left; font-size:12px;" | |
| style="text-align:left; font-size:12px;" | |
||
* [[Wrecks|Large Wrecks]] ( |
* [[Wrecks|Large Wrecks]] (2) |
||
* [[Destroyed Lifepods|Destroyed Lifepod]] |
* [[Destroyed Lifepods|Destroyed Lifepod]] |
||
|- |
|- |
||
| style="text-align:center; font-size:12px;" |[[File:Mountains Biome.png|200px|center|link=Mountains]][[Mountains]] |
| style="text-align:center; font-size:12px;" |[[File:Mountains Biome.png|200px|center|link=Mountains]][[Mountains]] |
||
| Line 119: | Line 121: | ||
* [[Shale Outcrop]] |
* [[Shale Outcrop]] |
||
| style="text-align:left; font-size:12px;" | |
| style="text-align:left; font-size:12px;" | |
||
* [[Wrecks|Large |
* [[Wrecks|Large Wrecks]] (2) |
||
* Thermal Vents (10) |
* Thermal Vents (10) |
||
* [[Alien Arches|Alien Arch Platform]] |
* [[Alien Arches|Alien Arch Platform]] |
||
* [[Alien Vents#Entrance_Points|Alien Vent Entrance Point]] |
* [[Alien Vents#Entrance_Points|Alien Vent Entrance Point]] |
||
|- |
|- |
||
| Line 134: | Line 136: | ||
* [[Shale Outcrop]] |
* [[Shale Outcrop]] |
||
| style="text-align:left; font-size:12px;" | |
| style="text-align:left; font-size:12px;" | |
||
* [[Wrecks|Large Wreck]] ( |
* [[Wrecks|Large Wreck]] (Northwestern) |
||
* [[Destroyed Lifepods|Destroyed Lifepod]] ( |
* [[Destroyed Lifepods|Destroyed Lifepod]] (Northwestern) |
||
* [[Alien Arches|Mushroom Forest Arch Cache]] (Northwestern) |
* [[Alien Arches|Mushroom Forest Arch Cache]] (Northwestern) |
||
* [[Alien Vents#Entrance_Points|Alien Vent Entrance Point]] (Northeastern) |
* [[Alien Vents#Entrance_Points|Alien Vent Entrance Point]] (Northeastern) |
||
| Line 149: | Line 151: | ||
* [[Wrecks|Small Wrecks]] (7) |
* [[Wrecks|Small Wrecks]] (7) |
||
* [[Lava Geyser]]s (2) |
* [[Lava Geyser]]s (2) |
||
* [[Destroyed Lifepods|Destroyed Lifepod]] |
* [[Destroyed Lifepods|Destroyed Lifepod]] |
||
|- |
|- |
||
| style="text-align:center; font-size:12px;" |[[File:Sea Treader's Path Biome.png|200px|center|link=Sea Treader's Path]][[Sea Treader's Path]] |
| style="text-align:center; font-size:12px;" |[[File:Sea Treader's Path Biome.png|200px|center|link=Sea Treader's Path]][[Sea Treader's Path]] |
||
| Line 155: | Line 157: | ||
* 170 - 360 meters |
* 170 - 360 meters |
||
| style="text-align:center; font-size:12px;" | |
| style="text-align:center; font-size:12px;" | |
||
* [[Limestone Outcrop]] |
|||
* [[Sandstone Outcrop]] |
|||
* [[Shale Outcrop]] |
* [[Shale Outcrop]] |
||
| style="text-align:left; font-size:12px;" | |
| style="text-align:left; font-size:12px;" | |
||
* [[Wrecks|Large Wreck]] |
* [[Wrecks|Large Wreck]] |
||
|- |
|- |
||
| style="text-align:center; font-size:12px;" |[[File:Sparse Reef Biome.png|200px|center|link=Sparse Reef]][[Sparse Reef]] |
| style="text-align:center; font-size:12px;" |[[File:Sparse Reef Biome.png|200px|center|link=Sparse Reef]][[Sparse Reef]] |
||
| Line 176: | Line 180: | ||
* [[Shale Outcrop]] |
* [[Shale Outcrop]] |
||
| style="text-align:left; font-size:12px;" | |
| style="text-align:left; font-size:12px;" | |
||
* [[Wrecks|Large Wreck]] |
* [[Wrecks|Large Wreck]] |
||
* Thermal Vents (1) |
* Thermal Vents (1) |
||
* [[Lava Geyser]]s (8) |
* [[Lava Geyser]]s (8) |
||
Revision as of 22:09, 26 January 2019

|
Read at own risk This article contains unmarked spoilers. Players new to the game would want to avoid or be cautious toward this article. |
| This article is about Biomes (Subnautica) in Subnautica. For the related article on the Below Zero Wiki, see Biomes. |
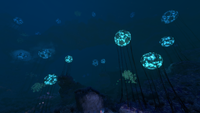
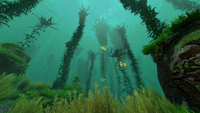
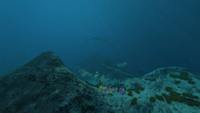
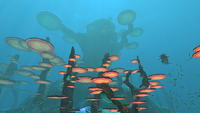
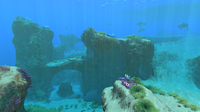
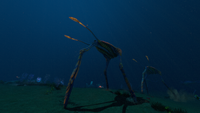
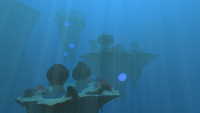
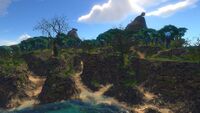
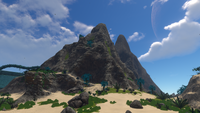
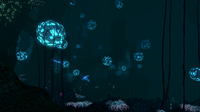
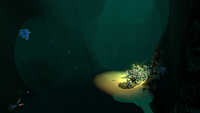
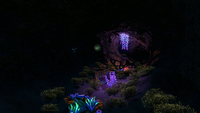
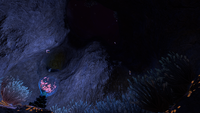
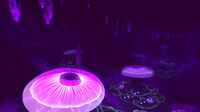
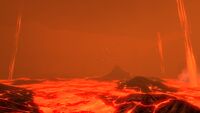
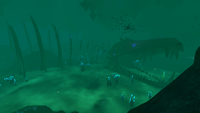
Subnautica features a wide range of Biomes to explore and coexist with. They all represent miniature ecosystems from the real world.
There is a very diverse range of Biomes, from the vibrant Kelp Forest to the sizzling depths of the enigmatic Lava Lakes. Each Biome contains its own set of Flora and Fauna to discover and resources to harvest.
Biomes
Surface Biomes
| Biome | Depth Range | Harvesting Nodes | Points of Interest |
|---|---|---|---|
| Blood Kelp Zone |
|
| |
| Bulb Zone |
|
||
| Crag Field |
|
||
| Crash Zone |
|
||
| Crater Edge |
|
None |
None |
| Dunes |
|
| |
| Grand Reef |
|
| |
| Grassy Plateaus |
|
| |
| Kelp Forest |
|
||
| Mountains |
|
| |
| Mushroom Forest |
|
| |
| Safe Shallows |
|
| |
| Sea Treader's Path |
|
||
| Sparse Reef |
|
||
| Underwater Islands |
|
|
Islands
| Biome | Depth Range | Harvesting Nodes | Points of Interest |
|---|---|---|---|
| Floating Island |
|
- |
|
| Mountain Island |
|
Cave Biomes
| Biome | Depth Range | Harvesting Nodes | Points of Interest |
|---|---|---|---|
| Blood Kelp Caves |
|
- | |
| Bone Fields Caves |
|
- |
- |
| Bulb Zone Caves |
|
| |
| Deep Grand Reef |
|
| |
| Deep Sparse Reef |
|
||
| Dunes Caves |
|
- | |
| Grand Reef Caves |
|
- | |
| Grassy Plateaus Caves |
|
- | |
| Inactive Lava Zone |
|
None | |
| Jellyshroom Cave |
|
| |
| Kelp Forest Caves |
|
- | |
| Lava Lakes |
|
None | |
| Lost River |
|
||
| Mountain Range Caves |
|
| |
| Mushroom Forest Caves |
|
- | |
| Safe Shallows Caves |
|
- | |
| Sea Treader's Tunnel Caves |
|
- | |
| Underwater Islands Caves |
|
- |
Mini-Biomes
| Biome | Depth Range | Harvesting Nodes | Points of Interest |
|---|---|---|---|
| Crash Zone Mesas |
|
- | |
| Lava Geyser |
|
- | |
| Lava Castle |
|
None | |
| Inactive Lava Zone Corridor |
|
None | - |
Gallery
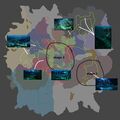
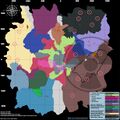
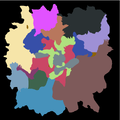
The Lost River's early map
(Outdated) Latest Subnautica map (17/12/2016)
(Outdated) Latest clean Subnautica map (17/12/2016)
(Outdated) Latest Subnautica map with ILZ - made by pie1055
Trivia
- Early development footages of biome generation can be seen on a playlist from Russel Maekim's YouTube channel.
- The game considers the inside of an Observatory, Lifepod, Scanner Room, Alien Containment, and inside the aquarium in the Primary Containment Facility to be separate biomes.
- Early surface biome concepts were divided into Kelp Forest, Dense Kelp Forest, Sunny Kelp Forest, Coral Reef, Danger Reef, Safe Shallows, Grand Reefs, and Floating Islands.
- Early lava zone biome concepts were divided into Lava Zone, Lava Bridges, Inactive Lava Zones and Thermal Vents.
- The Lava lakes and the Crater Edge are the only biomes that do not contain any Flora.
Lua error in package.lua at line 80: module 'Dev:Navbox' not found.


