
Biomes (Subnautica): Difference between revisions
(stop.) Tag: rte-wysiwyg |
UnderseaDee (talk | contribs) (Updated the page and made it more like other similar pages) Tag: rte-source |
||
| Line 3: | Line 3: | ||
==Biomes== |
==Biomes== |
||
===Surface Biomes=== |
===Surface Biomes=== |
||
{| style="width: 100%;" class="article-table sortable" border="0" cellpadding="1" cellspacing="1" |
|||
* [[Blood Kelp Zone]] (150m - 675m) |
|||
|- |
|||
* [[Crash Zone]] (0m - 300m) |
|||
! class="unsortable" style="width: 25%; text-align: center;" |Biome |
|||
* [[Dunes]] (65m - 400m) |
|||
! class="unsortable" style="width: 20%; text-align: center;" |Depth Range |
|||
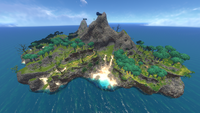
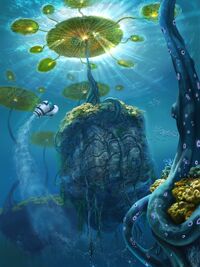
* [[Floating Island]] (Surface) |
|||
! class="unsortable" style="width: 20%; text-align: center;" |Harvesting Nodes |
|||
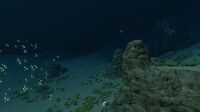
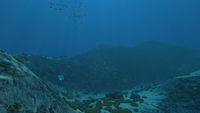
* [[Grand Reef]] (180m - 450m) |
|||
! class="unsortable" style="width: 25%; text-align: center;" |Points of Interest |
|||
* [[Grassy Plateaus]] (50m - 170m) |
|||
|- |
|||
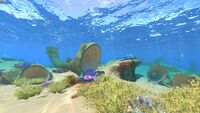
* [[Kelp Forest]] (1m - 160m) |
|||
| style="text-align:center; font-size:12px;" |[[File:Blood Kelp Trench.png|200px|center|link=Blood Kelp Zone]][[Blood Kelp Zone]] |
|||
* [[Koosh Zone]] (140m - 480m) |
|||
| style="text-align:center; font-size:12px;" | |
|||
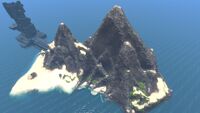
* [[Mountain Island]] (Surface) |
|||
* 150 - 675 meters (Trench) |
|||
* [[Mountains]] (0m - 500m) |
|||
* 200 - 580 meters (Northern) |
|||
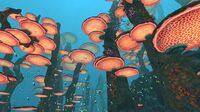
* [[Mushroom Forest]] (75m - 250m) |
|||
| style="text-align:center; font-size:12px;" | |
|||
* [[Safe Shallows]] (1m - 80m) |
|||
* [[Basalt Outcrop]] |
|||
* [[Sea Treader's Path]] (170m - 360m) |
|||
| style="text-align:left; font-size:12px;" | |
|||
* [[Sparse Reef]] (40m - 310m) |
|||
* [[ |
* [[Wrecks|Large Wreck]] (1) (Trench) |
||
* [[Destroyed Lifepods|Destroyed Lifepod]] (1) (Northern) |
|||
* [[Precursor Caches|Blood Kelp Sanctuary]] (Northern) |
|||
|- |
|||
| style="text-align:center; font-size:12px;" |[[File:CrashZone 1a.jpg|200px|center|link=Crash Zone]][[Crash Zone]] |
|||
| style="text-align:center; font-size:12px;" | |
|||
* 0 - 370 meters |
|||
| style="text-align:center; font-size:12px;" | |
|||
* [[Limestone Outcrop]] |
|||
* [[Sandstone Outcrop]] |
|||
* [[Shale Outcrop]] |
|||
| style="text-align:left; font-size:12px;" | |
|||
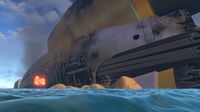
* [[Aurora]] |
|||
* [[Destroyed Lifepods|Destroyed Lifepod]] (1) |
|||
* [[:Precursor Teleporters|Precursor Teleporter]] (1) (unimplemented) |
|||
|- |
|||
| style="text-align:center; font-size:12px;" |[[File:2016-02-07 00016.jpg|200px|center|link=Dunes]][[Dunes]] |
|||
| style="text-align:center; font-size:12px;" | |
|||
* 65 - 400 meters |
|||
| style="text-align:center; font-size:12px;" | |
|||
* [[Limestone Outcrop]] |
|||
* [[Sandstone Outcrop]] |
|||
| style="text-align:left; font-size:12px;" | |
|||
* [[Wrecks|Large Wreck]] (1) |
|||
* Meteor Crater |
|||
* [[Precursor Caches|Dunes Sanctuary]] |
|||
|- |
|||
| style="text-align:center; font-size:12px;" |[[File:Floating Island Overview.png|200px|center|link=Floating Island]][[Floating Island]] |
|||
| style="text-align:center; font-size:12px;" | |
|||
* Above sea level |
|||
| style="text-align:center; font-size:12px;" | |
|||
- |
|||
| style="text-align:left; font-size:12px;" | |
|||
* [[Abandoned Seabases]] (3) |
|||
* [[Precursor Teleporters|Precursor Teleporter]] (1) |
|||
|- |
|||
| style="text-align:center; font-size:12px;" |[[File:GR Overview.png|200px|center|link=Grand Reef]][[Grand Reef]] |
|||
| style="text-align:center; font-size:12px;" | |
|||
* 150 - 480 meters |
|||
| style="text-align:center; font-size:12px;" | |
|||
* [[Basalt Outcrop]] |
|||
| style="text-align:left; font-size:12px;" | |
|||
* [[Wrecks|Large Wrecks]] (2) |
|||
* Thermal Vents (5) |
|||
|- |
|||
| style="text-align:center; font-size:12px;" |[[File:2016-03-06 00021.jpg|200px|center|link=Grassy Plateaus]][[Grassy Plateaus]] |
|||
| style="text-align:center; font-size:12px;" | |
|||
* 50 - 170 meters |
|||
| style="text-align:center; font-size:12px;" | |
|||
* [[Limestone Outcrop]] |
|||
* [[Sandstone Outcrop]] |
|||
| style="text-align:left; font-size:12px;" | |
|||
* [[Wrecks|Large Wrecks]] (5) |
|||
* [[Wrecks|Small Wrecks]] (6) |
|||
|- |
|||
| style="text-align:center; font-size:12px;" |[[File:2016-01-25 00016.jpg|200px|center|link=Kelp Forest ]][[Kelp Forest ]] |
|||
| style="text-align:center; font-size:12px;" | |
|||
* 1 - 160 meters |
|||
| style="text-align:center; font-size:12px;" | |
|||
* [[Limestone Outcrop]] |
|||
* [[Sandstone Outcrop]] |
|||
| style="text-align:left; font-size:12px;" | |
|||
* [[Wrecks|Large Wrecks]] (4) |
|||
* [[Destroyed Lifepods|Destroyed Lifepod]] (1) |
|||
|- |
|||
| style="text-align:center; font-size:12px;" |[[File:Kooshzone1.jpg|200px|center|link=Koosh Zone]][[Koosh Zone]] |
|||
| style="text-align:center; font-size:12px;" | |
|||
* 140 - 480 meters |
|||
| style="text-align:center; font-size:12px;" | |
|||
* [[Shale Outcrop]] |
|||
| style="text-align:left; font-size:12px;" | |
|||
* [[Wrecks|Large Wreck]] (1) |
|||
* [[Destroyed Lifepods|Destroyed Lifepod]] (1) |
|||
* [[Lava Geyser|Lava Geysers]] (3) |
|||
|- |
|||
| style="text-align:center; font-size:12px;" |[[File:MntnDew.jpg|200px|center|link=Mountain Island]][[Mountain Island]] |
|||
| style="text-align:center; font-size:12px;" | |
|||
* Above sea level |
|||
| style="text-align:center; font-size:12px;" | |
|||
* [[Basalt Outcrop]] |
|||
| style="text-align:left; font-size:12px;" | |
|||
* [[Quarantine Enforcement Platform]] |
|||
* [[Precursor Teleporters]] (2) |
|||
|- |
|||
| style="text-align:center; font-size:12px;" |[[File:Mountains Overview.png|200px|center|link=Mountains]][[Mountains]] |
|||
| style="text-align:center; font-size:12px;" | |
|||
* 0 - 500 meters |
|||
| style="text-align:center; font-size:12px;" | |
|||
* [[Basalt Outcrop]] |
|||
| style="text-align:left; font-size:12px;" | |
|||
* [[Wrecks|Large Wreck]] (1) |
|||
* Thermal Vents (10) |
|||
|- |
|||
| style="text-align:center; font-size:12px;" |[[File:2016-02-08 00008.jpg|200px|center|link=Mushroom Forest]][[Mushroom Forest]] |
|||
| style="text-align:center; font-size:12px;" | |
|||
* 75 - 250 meters |
|||
| style="text-align:center; font-size:12px;" | |
|||
* [[Basalt Outcrop]] |
|||
* [[Limestone Outcrop]] |
|||
* [[Sandstone Outcrop]] |
|||
* [[Shale Outcrop]] |
|||
| style="text-align:left; font-size:12px;" | |
|||
* [[Wrecks|Large Wreck]] (1) |
|||
* [[Destroyed Lifepods|Destroyed Lifepod]] (1) |
|||
|- |
|||
| style="text-align:center; font-size:12px;" |[[File:Safe Shallows.jpg|200px|center|link=Safe Shallows]][[Safe Shallows]] |
|||
| style="text-align:center; font-size:12px;" | |
|||
* 0 - 80 meters |
|||
| style="text-align:center; font-size:12px;" | |
|||
* [[Limestone Outcrop]] |
|||
* [[Sandstone Outcrop]] |
|||
| style="text-align:left; font-size:12px;" | |
|||
* [[Wrecks|Large Wrecks]] (2) |
|||
* [[Wrecks|Small Wrecks]] (7) |
|||
* [[Lava Geyser|Lava Geysers]] (2) |
|||
* [[Destroyed Lifepods|Destroyed Lifepod]] (1) |
|||
|- |
|||
| style="text-align:center; font-size:12px;" |[[File:SeaTreaderPath StartingPoint.png|200px|center|link=Sea Treader's Path]][[Sea Treader's Path]] |
|||
| style="text-align:center; font-size:12px;" | |
|||
* 170 - 360 meters |
|||
| style="text-align:center; font-size:12px;" | |
|||
* [[Basalt Outcrop]] |
|||
| style="text-align:left; font-size:12px;" | |
|||
* [[Wrecks|Large Wreck]] (1) |
|||
|- |
|||
| style="text-align:center; font-size:12px;" |[[File:2016-02-08 00017.jpg|200px|center|link=Sparse Reef]][[Sparse Reef]] |
|||
| style="text-align:center; font-size:12px;" | |
|||
* 40 - 310 meters |
|||
| style="text-align:center; font-size:12px;" | |
|||
* [[Limestone Outcrop]] |
|||
| style="text-align:left; font-size:12px;" | |
|||
* [[Precursor Caches|Sparse Reef Sanctuary]] |
|||
|- |
|||
| style="text-align:center; font-size:12px;" |[[File:UI Overview.png|200px|center|link=Underwater Islands]][[Underwater Islands]] |
|||
| style="text-align:center; font-size:12px;" | |
|||
* 35 - 500 meters |
|||
| style="text-align:center; font-size:12px;" | |
|||
* [[Basalt Outcrop]] |
|||
* [[Limestone Outcrop]] |
|||
| style="text-align:left; font-size:12px;" | |
|||
* [[Wrecks|Large Wreck]] (1) |
|||
* [[Lava Geyser|Lava Geysers]] (8) |
|||
|} |
|||
{{Clear}} |
|||
===Cave Biomes=== |
===Cave Biomes=== |
||
{| style="width: 100%;" class="article-table sortable" border="0" cellpadding="1" cellspacing="1" |
|||
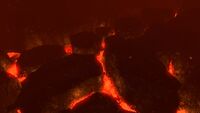
* [[Active Lava Zone]] (1300m - 1700m) |
|||
|- |
|||
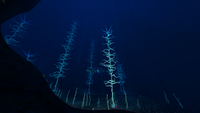
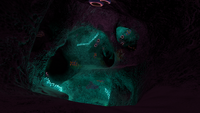
* [[Blood Kelp Caves]] (430m - 675m) |
|||
! class="unsortable" style="width: 25%; text-align: center;" |Biome |
|||
* [[Deep Grand Reef]] (425m - 600m) |
|||
! class="unsortable" style="width: 25%; text-align: center;" |Depth Range |
|||
* [[Grassy Plateaus Caves]] (120m - 175m) |
|||
! class="unsortable" style="width: 25%; text-align: center;" |Harvesting Nodes |
|||
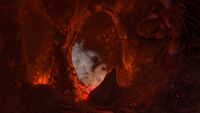
* [[Inactive Lava Zone]] (600m - 1500m) |
|||
! class="unsortable" style="width: 25%; text-align: center;" |Points of Interest |
|||
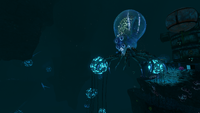
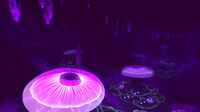
* [[Jelly Shroom Caves]] (180m - 300m) |
|||
|- |
|||
* [[Kelp Forest Caves]] (90m - 170m) |
|||
| style="text-align:center; font-size:12px;" |[[File:ALZ1.jpg|200px|center|link=Active Lava Zone]][[Active Lava Zone]] |
|||
* [[Koosh Zone Caves]] (220m - 315m) |
|||
| style="text-align:center; font-size:12px;" | |
|||
* [[Lava Castle]] (1100m - 1300m) |
|||
* 1300 - 1700 meters |
|||
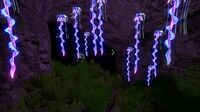
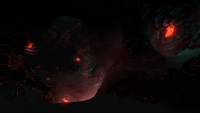
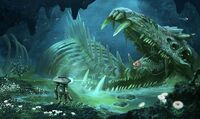
* [[Lost River]] (700m - 1000m) |
|||
| style="text-align:center; font-size:12px;" | |
|||
* [[Mountain Range Caves]] (0m - 380m) |
|||
* [[Basalt Outcrop]] |
|||
* [[Mushroom Forest Caves]] (170m - 250m) |
|||
| style="text-align:left; font-size:12px;" | |
|||
* [[Safe Shallows Caves]] (10m - 75m) |
|||
* [[ |
* [[Primary Containment Facility]] (unimplemented) |
||
|- |
|||
| style="text-align:center; font-size:12px;" |[[File:Blood Kelp Caves.png|200px|center|link=Blood Kelp Caves]][[Blood Kelp Caves]] |
|||
| style="text-align:center; font-size:12px;" | |
|||
* 430 - 675 meters |
|||
| style="text-align:center; font-size:12px;" | |
|||
* [[Basalt Outcrop]] |
|||
| style="text-align:left; font-size:12px;" | |
|||
- |
|||
|- |
|||
| style="text-align:center; font-size:12px;" |[[File:DGR Crabsquid.png|200px|center|link=Deep Grand Reef]][[Deep Grand Reef]] |
|||
| style="text-align:center; font-size:12px;" | |
|||
* 425 - 630 meters |
|||
| style="text-align:center; font-size:12px;" | |
|||
* [[Basalt Outcrop]] |
|||
| style="text-align:left; font-size:12px;" | |
|||
*[[Abandoned Seabases|Abandoned Seabase]] (1) |
|||
|- |
|||
| style="text-align:center; font-size:12px;" |[[File:Spike Plant Caves (01).jpg|200px|center|link=Grassy Plateaus Caves]][[Grassy Plateaus Caves]] |
|||
| style="text-align:center; font-size:12px;" | |
|||
* 120 - 175 meters |
|||
| style="text-align:center; font-size:12px;" | |
|||
* [[Shale Outcrop]] |
|||
| style="text-align:left; font-size:12px;" | |
|||
- |
|||
|- |
|||
| style="text-align:center; font-size:12px;" |[[File:20160711163129 1.jpg|200px|center|link=Inactive Lava Zone]][[Inactive Lava Zone]] |
|||
| style="text-align:center; font-size:12px;" | |
|||
* 900 - 1300 meters |
|||
| style="text-align:center; font-size:12px;" | |
|||
* [[Obsidian Outcrop]] |
|||
| style="text-align:left; font-size:12px;" | |
|||
* [[Lava Castle]] |
|||
* [[Precursor Thermal Power Generator]] |
|||
|- |
|||
| style="text-align:center; font-size:12px;" |[[File:2016-02-07 00009.jpg|200px|center|link=Jelly Shroom Caves]][[Jelly Shroom Caves]] |
|||
| style="text-align:center; font-size:12px;" | |
|||
* 180 - 300 meters |
|||
| style="text-align:center; font-size:12px;" | |
|||
* [[Sandstone Outcrop]] |
|||
* [[Shale Outcrop]] |
|||
| style="text-align:left; font-size:12px;" | |
|||
* [[Abandoned Seabases|Abandoned Seabase]] (1) |
|||
|- |
|||
| style="text-align:center; font-size:12px;" |[[File:2016-01-17 00006.jpg|200px|center|link=Kelp Forest Caves]][[Kelp Forest Caves]] |
|||
| style="text-align:center; font-size:12px;" | |
|||
* 90 - 170 meters |
|||
| style="text-align:center; font-size:12px;" | |
|||
* [[Limestone Outcrop]] |
|||
* [[Sandstone Outcrop]] |
|||
| style="text-align:left; font-size:12px;" | |
|||
- |
|||
|- |
|||
| style="text-align:center; font-size:12px;" |[[File:Koosh Caves.png|200px|center|link=Koosh Zone Caves]][[Koosh Zone Caves]] |
|||
| style="text-align:center; font-size:12px;" | |
|||
* 220 - 315 meters |
|||
| style="text-align:center; font-size:12px;" | |
|||
- |
|||
| style="text-align:left; font-size:12px;" | |
|||
- |
|||
|- |
|||
| style="text-align:center; font-size:12px;" |[[File:LavaCastleInt1.jpg|200px|center|link=Lava Castle]][[Lava Castle]] |
|||
| style="text-align:center; font-size:12px;" | |
|||
* 1100 - 1300 meters |
|||
| style="text-align:center; font-size:12px;" | |
|||
* [[Obsidian Outcrop]] |
|||
| style="text-align:left; font-size:12px;" | |
|||
* [[Precursor Thermal Power Generator]] |
|||
|- |
|||
| style="text-align:center; font-size:12px;" |[[File:20150927 SN LostRiver Large.jpg|200px|center|link=Lost River]][[Lost River]] |
|||
| style="text-align:center; font-size:12px;" | |
|||
* 550 - 1000 meters |
|||
| style="text-align:center; font-size:12px;" | |
|||
- |
|||
| style="text-align:left; font-size:12px;" | |
|||
* [[Precursor Caches|Lost River Laboratory]] (unimplemented) |
|||
* [[Disease Research Facility]] |
|||
* Giant Lost River Skeleton |
|||
* [[Giant Cove Tree]] |
|||
|- |
|||
| style="text-align:center; font-size:12px;" |[[File:Mountain Caves Thermal Vent.png|200px|center|link=Mountain Range Caves]][[Mountain Range Caves]] |
|||
| style="text-align:center; font-size:12px;" | |
|||
* 0 - 380 meters |
|||
| style="text-align:center; font-size:12px;" | |
|||
* [[Basalt Outcrop]] |
|||
| style="text-align:left; font-size:12px;" | |
|||
* [[:Precursor Teleporters|Precursor Teleporter]] (1) |
|||
|- |
|||
| style="text-align:center; font-size:12px;" |[[File:Mushroom Caves.png|200px|center|link=Mushroom Forest Caves]][[Mushroom Forest Caves]] |
|||
| style="text-align:center; font-size:12px;" | |
|||
* 170 - 250 meters |
|||
| style="text-align:center; font-size:12px;" | |
|||
- |
|||
| style="text-align:left; font-size:12px;" | |
|||
- |
|||
|- |
|||
| style="text-align:center; font-size:12px;" |[[File:Safe Shallows Cave Tube.png|200px|center|link=Safe Shallows Caves]][[Safe Shallows Caves]] |
|||
| style="text-align:center; font-size:12px;" | |
|||
* 10 - 75 meters |
|||
| style="text-align:center; font-size:12px;" | |
|||
* [[Limestone Outcrop]] |
|||
* [[Sandstone Outcrop]] |
|||
| style="text-align:left; font-size:12px;" | |
|||
- |
|||
|- |
|||
| style="text-align:center; font-size:12px;" |[[File:2016-02-08 00003.jpg|200px|center|link=Sea Treader's Tunnel Caves]][[Sea Treader's Tunnel Caves]] |
|||
| style="text-align:center; font-size:12px;" | |
|||
* 200 - 340 meters |
|||
| style="text-align:center; font-size:12px;" | |
|||
* [[Basalt Outcrop]] |
|||
| style="text-align:left; font-size:12px;" | |
|||
- |
|||
|} |
|||
{{Clear}} |
|||
===Mini-Biomes=== |
===Mini-Biomes=== |
||
{| style="width: 100%;" class="article-table sortable" border="0" cellpadding="1" cellspacing="1" |
|||
* [[Lava Geyser]] (variable depth) |
|||
|- |
|||
! class="unsortable" style="width: 25%; text-align: center;" |Biome |
|||
! class="unsortable" style="width: 25%; text-align: center;" |Depth Range |
|||
! class="unsortable" style="width: 25%; text-align: center;" |Harvesting Nodes |
|||
! class="unsortable" style="width: 25%; text-align: center;" |Points of Interest |
|||
|- |
|||
| style="text-align:center; font-size:12px;" |[[File:Lava Geyser.png|200px|center|link=Lava Geyser]][[Lava Geyser]] |
|||
| style="text-align:center; font-size:12px;" | |
|||
Varies |
|||
| style="text-align:center; font-size:12px;" | |
|||
- |
|||
| style="text-align:left; font-size:12px;" | |
|||
- |
|||
|} |
|||
{{Clear}} |
|||
===Possible Biomes=== |
===Possible Biomes=== |
||
{| style="width: 100%;" class="article-table sortable" border="0" cellpadding="1" cellspacing="1" |
|||
* [[Arctic Biome]] |
|||
|- |
|||
* [[Lilypad Islands]] |
|||
! class="unsortable" style="width: 25%; text-align: center;" |Biome |
|||
* [[Twisty Bridges]] |
|||
! class="unsortable" style="width: 25%; text-align: center;" |Depth Range |
|||
! class="unsortable" style="width: 25%; text-align: center;" |Harvesting Nodes |
|||
! class="unsortable" style="width: 25%; text-align: center;" |Points of Interest |
|||
|- |
|||
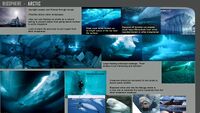
| style="text-align:center; font-size:12px;" |[[File:BiosphereSheet Arctic page01.jpg|200px|center|link=Arctic Biome]][[Arctic Biome]] |
|||
| style="text-align:center; font-size:12px;" | |
|||
''Unknown'' |
|||
| style="text-align:center; font-size:12px;" | |
|||
''Unknown'' |
|||
| style="text-align:left; font-size:12px;" | |
|||
''Unknown'' |
|||
|- |
|||
| style="text-align:center; font-size:12px;" |[[File:LilypadWaterIslands LowRes.jpg|200px|center|link=Lilypad Islands]][[Lilypad Islands]] |
|||
| style="text-align:center; font-size:12px;" | |
|||
''Unknown'' |
|||
| style="text-align:center; font-size:12px;" | |
|||
''Unknown'' |
|||
| style="text-align:left; font-size:12px;" | |
|||
''Unknown'' |
|||
|- |
|||
| style="text-align:center; font-size:12px;" |[[File:TwistyBridges01.jpg|200px|center|link=Twisty Bridges]][[Twisty Bridges]] |
|||
| style="text-align:center; font-size:12px;" | |
|||
''Unknown'' |
|||
| style="text-align:center; font-size:12px;" | |
|||
''Unknown'' |
|||
| style="text-align:left; font-size:12px;" | |
|||
''Unknown'' |
|||
|} |
|||
{{Clear}} |
|||
==Gallery== |
==Gallery== |
||
Revision as of 23:17, 4 February 2017
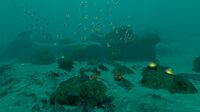
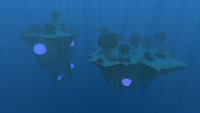
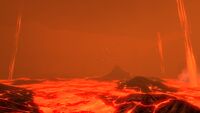
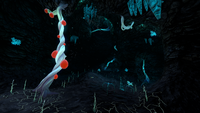
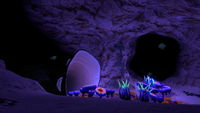
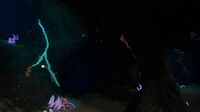
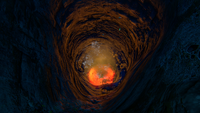
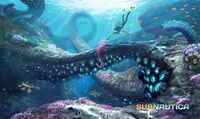
Subnautica features a wide range of biomes to explore and coexist with, representing miniature ecosystems.
Biomes
Surface Biomes
| Biome | Depth Range | Harvesting Nodes | Points of Interest |
|---|---|---|---|
 |
|
| |
 |
|
| |
 |
|
| |
 |
|
- |
|
 |
|
| |
 |
|
| |
 |
|
| |
 |
|
| |
 |
|
||
 |
|
| |
 |
|
| |
 |
|
| |
 |
|
| |
 |
|
||
 |
|
|
Cave Biomes
| Biome | Depth Range | Harvesting Nodes | Points of Interest |
|---|---|---|---|
 |
|
| |
 |
|
- | |
 |
|
||
 |
|
- | |
 |
|
||
 |
|
||
 |
|
- | |
 |
|
- |
- |
 |
|
||
 |
|
- |
|
 |
|
||
 |
|
- |
- |
 |
|
- | |
 |
|
- |
Mini-Biomes
| Biome | Depth Range | Harvesting Nodes | Points of Interest |
|---|---|---|---|
 |
Varies |
- |
- |
Possible Biomes
| Biome | Depth Range | Harvesting Nodes | Points of Interest |
|---|---|---|---|
 |
Unknown |
Unknown |
Unknown |
 |
Unknown |
Unknown |
Unknown |
 |
Unknown |
Unknown |
Unknown |
Gallery
Arctic biome's reference sheet, made by the developers
Early development biome's reference sheet
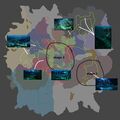
Lost River's early map
Ditto, with more details

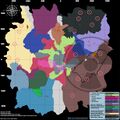
Latest Subnautica map

Latest Subnautica map with ILZ - made by pie1055


Trivia
- Developers' footages of biome generation can be seen on a playlist from Russel Maekim's YouTube channel. He also sometimes livestreams his work on Twitch.
- The game considers the inside of an Observatory, Lifepod, and Scanner Room to be separate biomes. This is also true for the Aurora and for some of the large wrecks in the Koosh Zone and Grassy Plateaus (respectively labelled crashedShip and wreck).
- Early biome-concepts included Crystal and Arctic biomes. Considering the Arctic has since gained a development work-sheet, it might be added in future updates after the release of the official game.
- Early surface biome concepts were divided into Kelp Forest, Dense Kelp Forest, Sunny Kelp Forest, Coral Reef, Danger Reef, Safe Shallows, Grand Reefs, and Floating Island. Four of these have since been fully developped/implemented (the Safe Shallows, the Kelp Forest, Floating Island, Grand Reef and the Deep Grand Reef).
- Early lavazone biome concepts were divided into Lava Zone, Lava Bridges, Inactive Lava Zones and Thermal Vents. These were all implemented in some form, though the thermal vents have been reduced to geological features rather than a full biome.
Lua error in package.lua at line 80: module 'Dev:Navbox' not found.