
Fauna: Difference between revisions
(Adding categories) Tag: categoryselect |
No edit summary Tags: Visual edit apiedit |
||
| Line 4: | Line 4: | ||
== Current List of Fauna In-game == |
== Current List of Fauna In-game == |
||
{| style="width: 100%;" class="article-table sortable" border="0" cellpadding="1" cellspacing="1" |
|||
Please see [[:Template:FaunaRow]] for instructions on how to manipulate this table. |
|||
{| class="wikitable sortable" |
|||
|+ |
|||
|- |
|- |
||
! class="unsortable" style="width: 35px; text-align: center;" |Fauna |
|||
! Image !! Name !! Attitude !! Biome !! DNA !! |
|||
! class="unsortable" style="width: 150px; text-align: center;" |Attitude |
|||
Comment |
|||
! class="unsortable" style="width: 150px; text-align: left;" |Biome |
|||
! class="unsortable" style="width: 150px; text-align: center;" |DNA |
|||
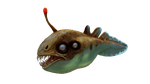
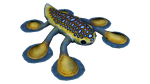
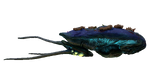
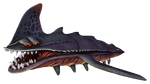
{{FaunaRow | image= Shocker Fauna.png | name=Ampeel | attitude=Aggressive | biome= [[Blood Kelp Zone]], [[Blood Kelp Caves]], [[Koosh Zone]]| dna= | comment=Shocks}} |
|||
! class="unsortable" style="width: 150px; text-align: left;" |Comment |
|||
|- |
|||
{{FaunaRow | image= Airsack Fauna.png | name= Bladderfish | attitude=Passive | biome= [[Grassy Plateaus]], [[Kelp Forest]], [[Mushroom Forest]], [[Safe Shallows]], [[Underwater Islands]], [[Grand Reef]] | dna=Air Bladder | comment= [[Food]] }} |
|||
| style="text-align:center; font-size:12px;" |[[File:Shocker_Fauna.png|150px|center|link=Ampeel]] |
|||
[[Ampeel]] |
|||
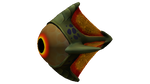
{{FaunaRow | image= Biter Fish Fauna.png | name=Biter | attitude=Aggressive | biome= [[Grassy Plateaus]], [[Jelly Shroom Caves]], [[Mountain Island]], [[Mountains]], [[Mountain Range Caves]] | dna= | comment=}} |
|||
| style="text-align:center; font-size:12px;" |[[:Category:Attitude: Aggressive|Aggressive]] |
|||
| style="text-align:left; font-size:12px;" | |
|||
* [[Blood Kelp Zone]] |
|||
* [[Blood Kelp Caves]] |
|||
* [[Koosh Zone]] |
|||
| style="text-align:center; font-size:12px;" |- |
|||
| style="text-align:left; font-size:12px;" | |
|||
* Shocks |
|||
|- |
|||
| style="text-align:center; font-size:12px;" |[[File:Airsack_Fauna.png|150px|center|link=Bladderfish]] |
|||
[[Bladderfish]] |
|||
| style="text-align:center; font-size:12px;" |[[:Category:Attitude: Passive|Passive]] |
|||
| style="text-align:left; font-size:12px;" | |
|||
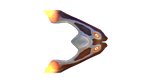
{{FaunaRow | image= Bleeder Fauna.png | name=Bleeder | attitude=Aggressive | biome= [[Aurora]], [[Kelp Forest]], [[Sparse Reef]], [[Spike Plant Caves]]| dna= | comment=Sucks Blood}} |
|||
* [[Grassy Plateaus]] |
|||
* [[Kelp Forest]] |
|||
{{FaunaRow | image= Blood Biter Fauna.png | name= Blighter | attitude=Aggressive | biome= [[Blood Kelp Zone]], [[Blood Kelp Caves]], [[Lost River]] | dna= | comment=}} |
|||
* [[Mushroom Forest]] |
|||
* [[Safe Shallows]] |
|||
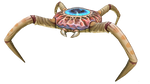
{{FaunaRow | image= Blood Crawler Fauna.png | name= Blood Crawler | attitude=Aggressive | biome= [[Blood Kelp Zone]], [[Blood Kelp Caves]] | dna= | comment=}} |
|||
* [[Underwater Islands]] |
|||
* [[Grand Reef]] |
|||
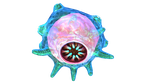
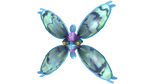
{{FaunaRow | image=BlueBarnacles_backgroundless.png| name= Blue Barnacles| attitude=Unknown | biome=[[Twisty Bridges]] | dna= | comment=}} |
|||
| style="text-align:center; font-size:12px;" |Air Bladder |
|||
| style="text-align:left; font-size:12px;" | |
|||
{{FaunaRow | image= Bone Shark Fauna.png | name=Boneshark | attitude=Aggressive | biome=[[Koosh Zone]], [[Mushroom Forest]], [[Underwater Islands]], [[Wrecks]] | dna= | comment=}} |
|||
* [[Food]] |
|||
|- |
|||
{{FaunaRow | image= Boomerang Fauna.png | name=Boomerang | attitude=Passive | biome= [[Crash Zone]], [[Deep Grand Reef]], [[Grand Reef]], [[Grassy Plateaus]],[[Kelp Forest Caves]], [[Koosh Zone]], [[Mountain Range Caves]], [[Safe Shallows]], [[Underwater Islands]] | dna= | comment=[[Food]]}} |
|||
| style="text-align:center; font-size:12px;" |[[File:Biter Fish Fauna.png|150px|center|link=Biter]] |
|||
[[Biter]] |
|||
{{FaunaRow | image= Cave Crawler Fauna.png | name=Cave Crawler | attitude=Aggressive | biome=[[Aurora]], [[Dunes]], [[Mountain Island]], [[Mountain Range Caves]], [[Underwater Islands]] | dna= | comment=}} |
|||
| style="text-align:center; font-size:12px;" |[[:Category:Attitude: Aggressive|Aggressive]] |
|||
| style="text-align:left; font-size:12px;" | |
|||
{{FaunaRow | image= Crab Snake Fauna.png | name= Crabsnake | attitude=Aggressive | biome= [[Jelly Shroom Caves]] | dna= |comment=}} |
|||
* [[Grassy Plateaus]] |
|||
* [[Jelly Shroom Caves]] |
|||
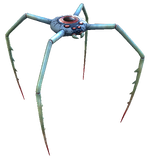
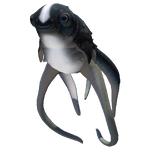
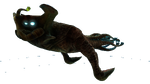
{{FaunaRow | image= Crabsquid_backgroundless.png | name= Crabsquid| attitude=Aggressive | biome=[[Blood Kelp Zone]], [[Deep Grand Reef]] | dna= | comment=}} |
|||
* [[Mountain Island]] |
|||
* [[Mountains]] |
|||
{{FaunaRow | image= Crash Fauna.png | name=Crashfish | attitude=Defensive | biome=[[Safe Shallows Caves]], [[Safe Shallows]] | dna= | comment=Explodes}} |
|||
* [[Mountain Range Caves]] |
|||
| style="text-align:center; font-size:12px;" |- |
|||
{{FaunaRow | image= Cute Fish Fauna.png| name= Cute Fish| attitude= Passive| biome=Unknown | dna= | comment= Serves as a pet for those who bought [[Subnautica]] before V1.0}} |
|||
| style="text-align:left; font-size:12px;" | |
|||
* - |
|||
{{FaunaRow | image= Eyeye Fauna.png | name=Eyeye | attitude=Passive | biome= [[Crash Zone]], [[Dunes]], [[Grand Reef]], [[Jelly Shroom Caves]], [[Kelp Forest]], [[Koosh Zone]], [[Koosh Zone Caves]] | dna= | comment=[[Food]]}} |
|||
|- |
|||
| style="text-align:center; font-size:12px;" |[[File:Bleeder Fauna.png|150px|center|link=Bleeder]] |
|||
{{FaunaRow | image= Floater Fauna.png | name=Floater | attitude=Passive | biome=[[Grassy Plateaus]], [[Safe Shallows]], [[Floater Island]], [[Underwater Islands]], [[Blood Kelp Zone]] | dna= | comment=Buoyancy}} |
|||
[[Bleeder]] |
|||
| style="text-align:center; font-size:12px;" |[[:Category:Attitude: Aggressive|Aggressive]] |
|||
{{FaunaRow | image= Garryfish Fauna.png | name=Garryfish | attitude=Passive | biome=[[Dunes]], [[Safe Shallows Caves]], [[Safe Shallows]], [[Underwater Islands]] | dna= | comment=[[Food]]}} |
|||
| style="text-align:left; font-size:12px;" | |
|||
* [[Aurora]] |
|||
{{FaunaRow | image= Gasopod Fauna.png | name= Gasopod | attitude=Defensive| biome=[[Safe Shallows]] | dna= | comment= Dangerous gas}} |
|||
* [[Kelp Forest]] |
|||
* [[Sparse Reef]] |
|||
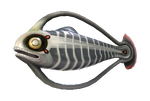
{{FaunaRow | image= Holefish Fauna.png | name= Holefish | attitude=Passive | biome= [[Crash Zone]], [[Koosh Zone Caves]], [[Mushroom Forest Caves]], [[Safe Shallows]] | dna= | comment=[[Food]]}} |
|||
* [[Grassy Plateaus Caves]] |
|||
| style="text-align:center; font-size:12px;" |- |
|||
{{FaunaRow | image= Hoopfish Fauna.png | name= Hoopfish | attitude=Passive | biome=[[Grand Reef]], [[Kelp Forest Caves]], [[Koosh Zone]], [[Safe Shallows]], [[Underwater Islands]] | dna= | comment=[[Food]]}} |
|||
| style="text-align:left; font-size:12px;" | |
|||
* Sucks blood |
|||
{{FaunaRow | image= Hoverfish Fauna.png | name= Hoverfish | attitude=Passive | biome= [[Crash Zone]], [[Grassy Plateaus]], [[Kelp Forest]] | dna=[[Inertialess]] | comment=[[Food]]}} |
|||
|- |
|||
| style="text-align:center; font-size:12px;" |[[File:Blood Biter Fauna.png|150px|center|link=Blighter]] |
|||
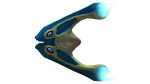
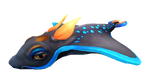
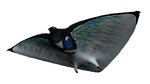
{{FaunaRow | image= Jellyray Fauna.png | name= Jellyray | attitude=Passive | biome= [[Deep Grand Reef]], [[Mushroom Forest]] | dna= | comment=}} |
|||
[[Blighter]] |
|||
| style="text-align:center; font-size:12px;" |[[:Category:Attitude: Aggressive|Aggressive]] |
|||
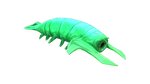
{{FaunaRow | image= Lava Larva Fauna.png| name= Lava Larva| attitude= Passive| biome= [[Inactive Lava Zone]]| dna=[[Heat Resistance]]| comment=Drains energy from vehicles.}} |
|||
| style="text-align:left; font-size:12px;" | |
|||
* [[Blood Kelp Zone]] |
|||
{{FaunaRow | image= LavaLizardTest.png| name= Lava Lizard| attitude= Aggressive| biome= [[Inactive Lava Zone]]| dna=Sonar | comment=}} |
|||
* [[Blood Kelp Caves]] |
|||
* [[Lost River]] |
|||
{{FaunaRow | image= Mesmer Fauna.png | name= Mesmer | attitude=Defensive | biome=[[Grassy Plateaus]], [[Kelp Forest Caves]], [[Koosh Zone]], [[Mushroom Forest]] | dna= | comment=Hypnosis attack}} |
|||
| style="text-align:center; font-size:12px;" |- |
|||
| style="text-align:left; font-size:12px;" | |
|||
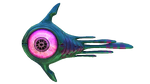
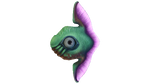
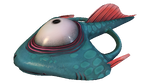
{{FaunaRow | image= Oculus Fauna.png | name=Oculus | attitude=Passive | biome=[[Jelly Shroom Caves]] | dna=[[Light Sensitivity]] | comment=[[Food]]}} |
|||
* - |
|||
|- |
|||
{{FaunaRow | image= Peeper Fauna.png | name=Peeper | attitude=Passive | biome= [[Crash Zone]], [[Kelp Forest]], [[Safe Shallows]] | dna=[[Speed]] | comment=[[Food]]}} |
|||
| style="text-align:center; font-size:12px;" |[[File:Blood Crawler Fauna.png|150px|center|link=Blood Crawler]] |
|||
[[Blood Crawler]] |
|||
{{FaunaRow | image= Rabbitray Fauna.png | name=Rabbit Ray | attitude=Passive | biome= [[Crash Zone]], [[Kelp Forest]], [[Safe Shallows]] | dna=[[Friendliness]] | comment=}} |
|||
| style="text-align:center; font-size:12px;" |[[:Category:Attitude: Aggressive|Aggressive]] |
|||
| style="text-align:left; font-size:12px;" | |
|||
{{FaunaRow | image= Reaper Leviathan Fauna.png | name= Reaper Leviathan | attitude=Aggressive| biome= [[Aurora]], [[Crash Zone]], [[Dunes]], [[Mountain Island]], [[Mountains]] | dna= | comment= Extremely lethal }} |
|||
* [[Blood Kelp Zone]] |
|||
* [[Blood Kelp Caves]] |
|||
{{FaunaRow | image= Reefback Fauna.png | name=Reefback | attitude=Passive | biome=[[Grassy Plateaus]] | dna=[[Growth]] | comment=}} |
|||
| style="text-align:center; font-size:12px;" |- |
|||
| style="text-align:left; font-size:12px;" | |
|||
{{FaunaRow | image= Reginald Fauna.png | name=Reginald | attitude=Passive | biome= [[Crash Zone]], [[Grand Reef]], [[Grassy Plateaus]], [[Mountains]], [[Mountain Range Caves]], [[Sparse Reef]], [[Spike Plant Caves]] | dna= | comment=[[Food]]}} |
|||
* - |
|||
|- |
|||
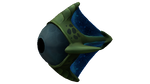
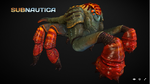
{{FaunaRow | image= Life-form_rock_puncher.png | name= Rock Puncher | attitude=Unknown | biome=Unknown | dna= | comment=}} |
|||
| style="text-align:center; font-size:12px;" |[[File:BlueBarnacles_backgroundless.png|150px|center|link=Blue Barnacles]] |
|||
[[Blue Barnacles]] |
|||
{{FaunaRow | image= Rockgrub Fauna.png | name= Rockgrub | attitude=Passive | biome= [[Caves]], [[Dunes]], [[Koosh Zone Caves]], [[Sparse Reef]] | dna= | comment=}} |
|||
| style="text-align:center; font-size:12px;" |- |
|||
| style="text-align:left; font-size:12px;" | |
|||
{{FaunaRow | image= Sandshark Fauna.png | name=Sand Shark | attitude=Aggressive | biome=[[Caves]], [[Crash Zone]], [[Dunes]], [[Grassy Plateaus]] | dna= | comment=}} |
|||
* [[Twisty Bridges]] |
|||
| style="text-align:center; font-size:12px;" |- |
|||
{{FaunaRow | image= Sea Dragon Leviathan Fauna.png| name=Sea Dragon Leviathan| attitude=Aggressive| biome= [[Inactive Lava Zone]], [[Active Lava Zone]]| dna= | comment=}} |
|||
| style="text-align:left; font-size:12px;" | |
|||
* - |
|||
{{FaunaRow | image= Sea Emperor_backgroundless.png| name=Sea Emperor| attitude=Unknown | biome=Unknown | dna= | comment=}} |
|||
|- |
|||
| style="text-align:center; font-size:12px;" |[[File:Bone Shark Fauna.png|150px|center|link=Boneshark]] |
|||
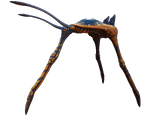
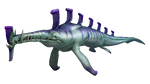
{{FaunaRow | image= Sea Treader Fauna.png | name=Sea Treader| attitude=Defensive | biome=[[Grand Reef]], [[Sea Treader's Path]] | dna= | comment=}} |
|||
[[Boneshark]] |
|||
| style="text-align:center; font-size:12px;" |[[:Category:Attitude: Aggressive|Aggressive]] |
|||
{{FaunaRow | image= Shoal of Fish Fauna.png | name=Shoal of Fish | attitude=Passive | biome=[[Biomes|All]] | dna= | comment=Uninteractable}} |
|||
| style="text-align:left; font-size:12px;" | |
|||
* [[Koosh Zone]] |
|||
{{FaunaRow | image= Skyray Fauna.png | name=Skyray | attitude=Passive | biome= [[Aurora]], [[Crash Zone]], [[Floater Island]], [[Mountain Island]], [[Safe Shallows]] | dna= | comment=}} |
|||
* [[Mushroom Forest]] |
|||
* [[Underwater Islands]] |
|||
{{FaunaRow | image= Spadefish Fauna.png | name=Spadefish | attitude=Passive | biome=[[Dunes]], [[Grassy Plateaus]], [[Mushroom Forest Caves]], [[Mushroom Forest]], [[Sparse Reef]], [[Underwater Islands]], [[Sea Treader's Path]], [[Wrecks]], [[Grand Reef]], [[Sea Treader's Tunnel Caves]] | dna=[[Protection]] | comment=[[Food]]}} |
|||
| style="text-align:center; font-size:12px;" |- |
|||
| style="text-align:left; font-size:12px;" | |
|||
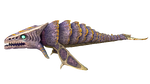
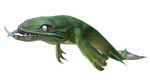
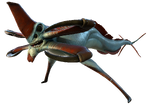
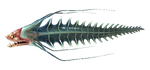
{{FaunaRow | image= Spine_Eel_Fauna.png | name=Spine Eel | attitude=Agressive | biome=[[Lost River]] | dna= | comment=}} |
|||
* - |
|||
|- |
|||
{{FaunaRow | image= Blood Hoopfish Fauna.png| name= Spinefish| attitude=Passive| biome= [[Blood Kelp Zone]], [[Blood Kelp Caves]], [[Lost River]]| dna= |comment = Food}} |
|||
| style="text-align:center; font-size:12px;" |[[File:Boomerang Fauna.png|150px|center|link=Boomerang]] |
|||
[[Boomerang]] |
|||
{{FaunaRow | image= Stalker Fauna.png | name=Stalker | attitude=Aggressive | biome= [[Crash Zone]], [[Kelp Forest]] | dna=[[DNA|Sonar]] | comment=Drops [[Stalker Tooth]]}} |
|||
| style="text-align:center; font-size:12px;" |[[:Category:Attitude: Passive|Passive]] |
|||
| style="text-align:left; font-size:12px;" | |
|||
{{FaunaRow | image= Warper Fauna.png| name=Warper| attitude=Defensive| biome=Unknown | dna= | comment=Teleports}} |
|||
* [[Crash Zone]] |
|||
* [[Deep Grand Reef]] |
|||
* [[Grand Reef]] |
|||
* [[Grassy Plateaus]] |
|||
* [[Kelp Forest Caves]] |
|||
* [[Koosh Zone]] |
|||
* [[Mountain Range Caves]] |
|||
* [[Safe Shallows]] |
|||
* [[Underwater Islands]] |
|||
| style="text-align:center; font-size:12px;" |- |
|||
| style="text-align:left; font-size:12px;" | |
|||
* [[Food]] |
|||
|- |
|||
| style="text-align:center; font-size:12px;" |[[File:Cave Crawler Fauna.png|150px|center|link=Cave Crawler]] |
|||
[[Cave Crawler]] |
|||
| style="text-align:center; font-size:12px;" |[[:Category:Attitude: Aggressive|Aggressive]] |
|||
| style="text-align:left; font-size:12px;" | |
|||
* [[Aurora]] |
|||
* [[Dunes]] |
|||
* [[Mountain Island]] |
|||
* [[Mountain Range Caves]] |
|||
* [[Underwater Islands|Underwater Island]] |
|||
| style="text-align:center; font-size:12px;" |- |
|||
| style="text-align:left; font-size:12px;" | |
|||
* - |
|||
|- |
|||
| style="text-align:center; font-size:12px;" |[[File:Crab Snake Fauna.png|150px|center|link=Crabsnake]] |
|||
[[Crabsnake]] |
|||
| style="text-align:center; font-size:12px;" |[[:Category:Attitude: Aggressive|Aggressive]] |
|||
| style="text-align:left; font-size:12px;" | |
|||
* [[Jelly Shroom Caves]] |
|||
| style="text-align:center; font-size:12px;" |- |
|||
| style="text-align:left; font-size:12px;" | |
|||
* - |
|||
|- |
|||
| style="text-align:center; font-size:12px;" |[[File:Crabsquid_backgroundless.png|150px|center|link=Crabsquid]] |
|||
[[Crabsquid]] |
|||
| style="text-align:center; font-size:12px;" |[[:Category:Attitude: Aggressive|Aggressive]] |
|||
| style="text-align:left; font-size:12px;" | |
|||
* [[Blood Kelp Zone]] |
|||
* [[Deep Grand Reef]] |
|||
| style="text-align:center; font-size:12px;" |- |
|||
| style="text-align:left; font-size:12px;" | |
|||
* - |
|||
|- |
|||
| style="text-align:center; font-size:12px;" |[[File:Crash Fauna.png|150px|center|link=Crashfish]] |
|||
[[Crashfish]] |
|||
| style="text-align:center; font-size:12px;" |[[:Category:Attitude: Defensive|Defensive]] |
|||
| style="text-align:left; font-size:12px;" | |
|||
* [[Safe Shallows Caves]] |
|||
* [[Safe Shallows]] |
|||
| style="text-align:center; font-size:12px;" |- |
|||
| style="text-align:left; font-size:12px;" | |
|||
* Explodes |
|||
|- |
|||
| style="text-align:center; font-size:12px;" |[[File:Cute Fish Fauna.png|150px|center|link=Cute Fish]] |
|||
[[Cute Fish]] |
|||
| style="text-align:center; font-size:12px;" |[[:Category:Attitude: Passive|Passive]] |
|||
| style="text-align:left; font-size:12px;" | |
|||
* - |
|||
| style="text-align:center; font-size:12px;" |- |
|||
| style="text-align:left; font-size:12px;" | |
|||
* Serves as a pet for those who bought [[Subnautica]] before V.10 |
|||
|- |
|||
| style="text-align:center; font-size:12px;" |[[File:Eyeye Fauna.png|150px|center|link=Eyeye]] |
|||
[[Eyeye]] |
|||
| style="text-align:center; font-size:12px;" |[[:Category:Attitude: Passive|Passive]] |
|||
| style="text-align:left; font-size:12px;" | |
|||
* [[Crash Zone]] |
|||
* [[Dunes]] |
|||
* [[Grand Reef]] |
|||
* [[Jelly Shroom Caves]] |
|||
* [[Kelp Forest]] |
|||
* [[Koosh Zone]] |
|||
* [[Koosh Zone Caves]] |
|||
| style="text-align:center; font-size:12px;" |- |
|||
| style="text-align:left; font-size:12px;" | |
|||
* [[Food]] |
|||
|- |
|||
| style="text-align:center; font-size:12px;" |[[File:Floater Fauna.png|150px|center|link=Floater]] |
|||
[[Floater]] |
|||
| style="text-align:center; font-size:12px;" |[[:Category:Attitude: Passive|Passive]] |
|||
| style="text-align:left; font-size:12px;" | |
|||
* [[Grassy Plateaus]] |
|||
* [[Safe Shallows]] |
|||
* [[Floater Island]] |
|||
* [[Underwater Islands]] |
|||
* [[Blood Kelp Zone]] |
|||
| style="text-align:center; font-size:12px;" |- |
|||
| style="text-align:left; font-size:12px;" | |
|||
* Buoyancy |
|||
|- |
|||
| style="text-align:center; font-size:12px;" |[[File:Garryfish Fauna.png|150px|center|link=Garryfish]] |
|||
[[Garryfish]] |
|||
| style="text-align:center; font-size:12px;" |[[:Category:Attitude: Passive|Passive]] |
|||
| style="text-align:left; font-size:12px;" | |
|||
* [[Dunes]] |
|||
* [[Safe Shallows Caves]] |
|||
* [[Safe Shallows]] |
|||
* [[Underwater Islands]] |
|||
| style="text-align:center; font-size:12px;" |- |
|||
| style="text-align:left; font-size:12px;" | |
|||
* [[Food]] |
|||
|- |
|||
| style="text-align:center; font-size:12px;" |[[File:Gasopod Fauna.png|150px|center|link=Gasopod]] |
|||
[[Gasopod]] |
|||
| style="text-align:center; font-size:12px;" |[[:Category:Attitude: Defensive|Defensive]] |
|||
| style="text-align:left; font-size:12px;" | |
|||
* [[Safe Shallows]] |
|||
| style="text-align:center; font-size:12px;" |- |
|||
| style="text-align:left; font-size:12px;" | |
|||
* [[Gas Pod]] |
|||
|- |
|||
| style="text-align:center; font-size:12px;" |[[File:Holefish Fauna.png|150px|center|link=Holefish]] |
|||
[[Holefish]] |
|||
| style="text-align:center; font-size:12px;" |[[:Category:Attitude: Passive|Passive]] |
|||
| style="text-align:left; font-size:12px;" | |
|||
* [[Crash Zone]] |
|||
* [[Koosh Zone Caves]] |
|||
* [[Mushroom Forest Caves]] |
|||
* [[Safe Shallows]] |
|||
| style="text-align:center; font-size:12px;" |- |
|||
| style="text-align:left; font-size:12px;" | |
|||
* [[Food]] |
|||
|- |
|||
| style="text-align:center; font-size:12px;" |[[File:Hoopfish Fauna.png|150px|center|link=Hoopfish]] |
|||
[[Hoopfish]] |
|||
| style="text-align:center; font-size:12px;" |[[:Category:Attitude: Passive|Passive]] |
|||
| style="text-align:left; font-size:12px;" | |
|||
* [[Grand Reef]] |
|||
* [[Kelp Forest Caves]] |
|||
* [[Koosh Zone]] |
|||
* [[Safe Shallows]] |
|||
* [[Underwater Islands]] |
|||
| style="text-align:center; font-size:12px;" |- |
|||
| style="text-align:left; font-size:12px;" | |
|||
* [[Food]] |
|||
|- |
|||
| style="text-align:center; font-size:12px;" |[[File:Hoverfish Fauna.png|150px|center|link=Hoverfish]] |
|||
[[Hoverfish]] |
|||
| style="text-align:center; font-size:12px;" |[[:Category:Attitude: Passive|Passive]] |
|||
| style="text-align:left; font-size:12px;" | |
|||
* [[Crash Zone]] |
|||
* [[Grassy Plateaus]] |
|||
* [[Kelp Forest]] |
|||
| style="text-align:center; font-size:12px;" |[[DNA|Danger Patterning]] |
|||
| style="text-align:left; font-size:12px;" | |
|||
* [[Food]] |
|||
|- |
|||
| style="text-align:center; font-size:12px;" |[[File:Jellyray Fauna.png|150px|center|link=Jellyray]] |
|||
[[Jellyray]] |
|||
| style="text-align:center; font-size:12px;" |[[:Category:Attitude: Passive|Passive]] |
|||
| style="text-align:left; font-size:12px;" | |
|||
* [[Deep Grand Reef]] |
|||
* [[Mushroom Forest]] |
|||
| style="text-align:center; font-size:12px;" |- |
|||
| style="text-align:left; font-size:12px;" | |
|||
* - |
|||
|- |
|||
| style="text-align:center; font-size:12px;" |[[File:Lavaboomerang.png|150px|center|link=Lava Boomerang]] |
|||
[[Lava Boomerang]] |
|||
| style="text-align:center; font-size:12px;" |[[:Category:Attitude: Passive|Passive]] |
|||
| style="text-align:left; font-size:12px;" | |
|||
* [[Inactive Lava Zone]] |
|||
| style="text-align:center; font-size:12px;" |- |
|||
| style="text-align:left; font-size:12px;" | |
|||
* [[Food]] |
|||
|- |
|||
| style="text-align:center; font-size:12px;" |[[File:Lava Eyeye.PNG|150px|center|link=Lava Eyeye]] |
|||
[[Lava Eyeye]] |
|||
| style="text-align:center; font-size:12px;" |[[:Category:Attitude: Passive|Passive]] |
|||
| style="text-align:left; font-size:12px;" | |
|||
* [[Inactive Lava Zone]] |
|||
| style="text-align:center; font-size:12px;" |- |
|||
| style="text-align:left; font-size:12px;" | |
|||
* [[Food]] |
|||
|- |
|||
| style="text-align:center; font-size:12px;" |[[File:Lava Larva Fauna.png|150px|center|link=Lava Larva]] |
|||
[[Lava Larva]] |
|||
| style="text-align:center; font-size:12px;" |[[:Category:Attitude: Passive|Passive]] |
|||
| style="text-align:left; font-size:12px;" | |
|||
* [[Inactive Lava Zone]] |
|||
| style="text-align:center; font-size:12px;" | |
|||
| style="text-align:left; font-size:12px;" | |
|||
* Drain energy from vehicles. |
|||
|- |
|||
| style="text-align:center; font-size:12px;" |[[File:LavaLizardTest.png|150px|center|link=Lava Lizard]] |
|||
[[Lava Lizard]] |
|||
| style="text-align:center; font-size:12px;" |[[:Category:Attitude: Aggressive|Aggressive]] |
|||
| style="text-align:left; font-size:12px;" | |
|||
* [[Inactive Lava Zone]] |
|||
| style="text-align:center; font-size:12px;" |[[Heat Resistance]] |
|||
| style="text-align:left; font-size:12px;" | |
|||
* - |
|||
|- |
|||
| style="text-align:center; font-size:12px;" |[[File:Mesmer Fauna.png|150px|center|link=Mesmer]] |
|||
[[Mesmer]] |
|||
| style="text-align:center; font-size:12px;" |[[:Category:Attitude: Defensive|Defensive]] |
|||
| style="text-align:left; font-size:12px;" | |
|||
* [[Grassy Plateaus]] |
|||
* [[Kelp Forest Caves]] |
|||
* [[Koosh Zone]] |
|||
* [[Mushroom Forest]] |
|||
| style="text-align:center; font-size:12px;" |- |
|||
| style="text-align:left; font-size:12px;" | |
|||
* Hypnosis |
|||
|- |
|||
| style="text-align:center; font-size:12px;" |[[File:Oculus Fauna.png|150px|center|link=Oculus]] |
|||
[[Oculus]] |
|||
| style="text-align:center; font-size:12px;" |[[:Category:Attitude: Passive|Passive]] |
|||
| style="text-align:left; font-size:12px;" | |
|||
* [[Jelly Shroom Caves]] |
|||
| style="text-align:center; font-size:12px;" |[[DNA|Light Sensitivity]] |
|||
| style="text-align:left; font-size:12px;" | |
|||
* [[Food]] |
|||
|- |
|||
| style="text-align:center; font-size:12px;" |[[File:Peeper Fauna.png|150px|center|link=Peeper]] |
|||
[[Peeper]] |
|||
| style="text-align:center; font-size:12px;" |[[:Category:Attitude: Passive|Passive]] |
|||
| style="text-align:left; font-size:12px;" | |
|||
* [[Crash Zone]] |
|||
* [[Kelp Forest]] |
|||
* [[Safe Shallows]] |
|||
| style="text-align:center; font-size:12px;" |[[DNA|Speed]] |
|||
| style="text-align:left; font-size:12px;" | |
|||
* [[Food]] |
|||
|- |
|||
| style="text-align:center; font-size:12px;" |[[File:Rabbitray Fauna.png|150px|center|link=Rabbit Ray]] |
|||
[[Rabbit Ray]] |
|||
| style="text-align:center; font-size:12px;" |[[:Category:Attitude: Passive|Passive]] |
|||
| style="text-align:left; font-size:12px;" | |
|||
* [[Crash Zone]] |
|||
* [[Kelp Forest]] |
|||
* [[Safe Shallows]] |
|||
| style="text-align:center; font-size:12px;" |[[DNA|Friendliness]] |
|||
| style="text-align:left; font-size:12px;" | |
|||
* - |
|||
|- |
|||
| style="text-align:center; font-size:12px;" |[[File:Reaper Leviathan Fauna.png|150px|center|link=Reaper Leviathan]] |
|||
[[Reaper Leviathan]] |
|||
| style="text-align:center; font-size:12px;" |[[:Category:Attitude: Aggressive|Aggressive]] |
|||
| style="text-align:left; font-size:12px;" | |
|||
* [[Aurora]] |
|||
* [[Crash Zone]] |
|||
* [[Dunes]] |
|||
* [[Mountain Island]] |
|||
* [[Mountain]] |
|||
| style="text-align:center; font-size:12px;" |- |
|||
| style="text-align:left; font-size:12px;" | |
|||
* Extremely lethal |
|||
|- |
|||
| style="text-align:center; font-size:12px;" |[[File:Reefback Fauna.png|150px|center|link=Reefback]] |
|||
[[Reefback]] |
|||
| style="text-align:center; font-size:12px;" |[[:Category:Attitude: Passive|Passive]] |
|||
| style="text-align:left; font-size:12px;" | |
|||
* [[Grassy Plateaus]] |
|||
| style="text-align:center; font-size:12px;" |[[DNA|Growth]] |
|||
| style="text-align:left; font-size:12px;" | |
|||
* - |
|||
|- |
|||
| style="text-align:center; font-size:12px;" |[[File:Reginald Fauna.png|150px|center|link=Reginald]] |
|||
[[Reginald]] |
|||
| style="text-align:center; font-size:12px;" |[[:Category:Attitude: Passive|Passive]] |
|||
| style="text-align:left; font-size:12px;" | |
|||
* [[Crash Zone]] |
|||
* [[Grand Reef]] |
|||
* [[Grassy Plateaus]] |
|||
* [[Mountains]] |
|||
* [[Mountain Range Caves]] |
|||
* [[Sparse Reef]] |
|||
* [[Grassy Plateaus Caves]] |
|||
| style="text-align:center; font-size:12px;" |- |
|||
| style="text-align:left; font-size:12px;" | |
|||
* [[Food]] |
|||
|- |
|||
| style="text-align:center; font-size:12px;" |[[File:Life-form_rock_puncher.png|150px|center|link=Rock Puncher]] |
|||
[[Rock Puncher]] |
|||
| style="text-align:center; font-size:12px;" |- |
|||
| style="text-align:left; font-size:12px;" | |
|||
* - |
|||
| style="text-align:center; font-size:12px;" |- |
|||
| style="text-align:left; font-size:12px;" | |
|||
* - |
|||
|- |
|||
| style="text-align:center; font-size:12px;" |[[File:Rockgrub Fauna.png|150px|center|link=Rockgrub]] |
|||
[[Rockgrub]] |
|||
| style="text-align:center; font-size:12px;" |[[:Category:Attitude: Passive|Passive]] |
|||
| style="text-align:left; font-size:12px;" | |
|||
* [[Caves]] |
|||
* [[Dunes]] |
|||
* [[Koosh Zone Caves]] |
|||
* [[Sparse Reef]] |
|||
| style="text-align:center; font-size:12px;" |- |
|||
| style="text-align:left; font-size:12px;" | |
|||
* - |
|||
|- |
|||
| style="text-align:center; font-size:12px;" |[[File:Sandshark Fauna.png|150px|center|link=Sand Shark]] |
|||
[[Sand Shark]] |
|||
| style="text-align:center; font-size:12px;" |[[:Category:Attitude: Aggressive|Aggressive]] |
|||
| style="text-align:left; font-size:12px;" | |
|||
* [[Caves]] |
|||
* [[Crash Zone]] |
|||
* [[Dunes]] |
|||
* [[Grassy Plateaus]] |
|||
| style="text-align:center; font-size:12px;" |- |
|||
| style="text-align:left; font-size:12px;" | |
|||
* - |
|||
|- |
|||
| style="text-align:center; font-size:12px;" |[[File:Sea_Dragon_Leviathan_Fauna.png|150px|center|link=Sea Dragon Leviathan]] |
|||
[[Sea Dragon Leviathan]] |
|||
| style="text-align:center; font-size:12px;" |[[:Category:Attitude: Aggressive|Aggressive]] |
|||
| style="text-align:left; font-size:12px;" | |
|||
* [[Inactive Lava Zone]] |
|||
* [[Active Lava Zone]] |
|||
| style="text-align:center; font-size:12px;" |- |
|||
| style="text-align:left; font-size:12px;" | |
|||
* - |
|||
|- |
|||
| style="text-align:center; font-size:12px;" |[[File:Sea_Emperor_backgroundless.png|150px|center|link=Sea Emperor]] |
|||
[[Sea Emperor]] |
|||
| style="text-align:center; font-size:12px;" |- |
|||
| style="text-align:left; font-size:12px;" | |
|||
* - |
|||
| style="text-align:center; font-size:12px;" |- |
|||
| style="text-align:left; font-size:12px;" | |
|||
* - |
|||
|- |
|||
| style="text-align:center; font-size:12px;" |[[File:Sea Treader Fauna.png|150px|center|link=Sea Treader]] |
|||
[[Sea Treader]] |
|||
| style="text-align:center; font-size:12px;" |[[:Category:Attitude: Defensive|Defensive]] |
|||
| style="text-align:left; font-size:12px;" | |
|||
* [[Grand Reef]] |
|||
* [[Sea Treader's Path]] |
|||
| style="text-align:center; font-size:12px;" |- |
|||
| style="text-align:left; font-size:12px;" | |
|||
* - |
|||
|- |
|||
| style="text-align:center; font-size:12px;" |[[File:Shoal of Fish Fauna.png|150px|center|link=Shoal of Fish]] |
|||
[[Shoal of Fish]] |
|||
| style="text-align:center; font-size:12px;" |[[:Category:Attitude: Passive|Passive]] |
|||
| style="text-align:left; font-size:12px;" | |
|||
* [[Biomes|All Biomes]] |
|||
| style="text-align:center; font-size:12px;" |- |
|||
| style="text-align:left; font-size:12px;" | |
|||
* Non Interactable |
|||
|- |
|||
| style="text-align:center; font-size:12px;" |[[File:Skyray Fauna.png|150px|center|link=Skyray]] |
|||
[[Skyray]] |
|||
| style="text-align:center; font-size:12px;" |[[:Category:Attitude: Passive|Passive]] |
|||
| style="text-align:left; font-size:12px;" | |
|||
* [[Aurora]] |
|||
* [[Crash Zone]] |
|||
* [[Floater Island]] |
|||
* [[Mountain Island]] |
|||
* [[Safe Shallows]] |
|||
| style="text-align:center; font-size:12px;" |- |
|||
| style="text-align:left; font-size:12px;" | |
|||
* - |
|||
|- |
|||
| style="text-align:center; font-size:12px;" |[[File:Spadefish Fauna.png|150px|center|link=Spadefish]] |
|||
[[Spadefish]] |
|||
| style="text-align:center; font-size:12px;" |[[:Category:Attitude: Passive|Passive]] |
|||
| style="text-align:left; font-size:12px;" | |
|||
* [[Dunes]] |
|||
* [[Grassy Plateaus]] |
|||
* [[Mushroom Forest Caves]] |
|||
* [[Mushroom Forest]] |
|||
* [[Sparse Reef]] |
|||
* [[Underwater Islands]] |
|||
* [[Sea Treader's Path]] |
|||
* [[Grand Reef]] |
|||
* [[Sea Treader's Tunnel Caves]] |
|||
| style="text-align:center; font-size:12px;" |[[DNA|Protection]] |
|||
| style="text-align:left; font-size:12px;" | |
|||
* [[Food]] |
|||
|- |
|||
| style="text-align:center; font-size:12px;" |[[File:Spine Eel Fauna.png|150px|center|link=Spine Eel]] |
|||
[[Spine Eel]] |
|||
| style="text-align:center; font-size:12px;" | |
|||
| style="text-align:left; font-size:12px;" | |
|||
* [[Lost River]] |
|||
| style="text-align:center; font-size:12px;" |- |
|||
| style="text-align:left; font-size:12px;" | |
|||
* - |
|||
|- |
|||
| style="text-align:center; font-size:12px;" |[[File:Blood Hoopfish Fauna.png|150px|center|link=Spinefish]] |
|||
[[Spinefish]] |
|||
| style="text-align:center; font-size:12px;" |[[:Category:Attitude: Passive|Passive]] |
|||
| style="text-align:left; font-size:12px;" | |
|||
* [[Blood Kelp Zone]] |
|||
* [[Blood Kelp Caves]] |
|||
* [[Lost River]] |
|||
| style="text-align:center; font-size:12px;" |- |
|||
| style="text-align:left; font-size:12px;" | |
|||
* [[Food]] |
|||
|- |
|||
| style="text-align:center; font-size:12px;" |[[File:Stalker Fauna.png|150px|center|link=Stalker]] |
|||
[[Stalker]] |
|||
| style="text-align:center; font-size:12px;" |[[:Category:Attitude: Aggressive|Aggressive]] |
|||
| style="text-align:left; font-size:12px;" | |
|||
* [[Crash Zone]] |
|||
* [[Kelp Forest]] |
|||
| style="text-align:center; font-size:12px;" |[[DNA|Sonar]] |
|||
| style="text-align:left; font-size:12px;" | |
|||
* Drops [[Stalker Tooth]] |
|||
|- |
|||
| style="text-align:center; font-size:12px;" |[[File:Warper Fauna.png|150px|center|link=Warper]] |
|||
[[Warper]] |
|||
| style="text-align:center; font-size:12px;" |[[:Category:Attitude: Defensive|Defensive]] |
|||
| style="text-align:left; font-size:12px;" | |
|||
* - |
|||
| style="text-align:center; font-size:12px;" |- |
|||
| style="text-align:left; font-size:12px;" | |
|||
* Teleports |
|||
|} |
|} |
||
Revision as of 04:46, 4 August 2016
Fauna are life forms found all over the world of Subnautica, from the deepest depths to the dense forests of kelp.
There are a large variety of fauna, ranging from eels that use bio electricity to incapacitate predators and hunt to heavily armoured predators that hide in the sand, waiting to ambush any creatures that come across it.
Current List of Fauna In-game
| Fauna | Attitude | Biome | DNA | Comment |
|---|---|---|---|---|
 |
Aggressive | - |
| |
 |
Passive | Air Bladder | ||
 |
Aggressive | - |
| |
 |
Aggressive | - |
| |
 |
Aggressive | - |
| |
 |
Aggressive | - |
| |
| - | - |
| ||
 |
Aggressive | - |
| |
 |
Passive | - | ||
 |
Aggressive | - |
| |
 |
Aggressive | - |
| |
 |
Aggressive | - |
| |
| Defensive | - |
| ||
 |
Passive |
|
- |
|
 |
Passive | - | ||
 |
Passive | - |
| |
 |
Passive | - | ||
 |
Defensive | - | ||
 |
Passive | - | ||
 |
Passive | - | ||
 |
Passive | Danger Patterning | ||
 |
Passive | - |
| |
 |
Passive | - | ||
 |
Passive | - | ||
 |
Passive |
| ||
 |
Aggressive | Heat Resistance |
| |
 |
Defensive | - |
| |
 |
Passive | Light Sensitivity | ||
 |
Passive | Speed | ||
 |
Passive | Friendliness |
| |
 |
Aggressive | - |
| |
 |
Passive | Growth |
| |
 |
Passive | - | ||
 |
- |
|
- |
|
 |
Passive | - |
| |
 |
Aggressive | - |
| |
 |
Aggressive | - |
| |
 |
- |
|
- |
|
 |
Defensive | - |
| |
 |
Passive | - |
| |
 |
Passive | - |
| |
 |
Passive | Protection | ||
 |
- |
| ||
 |
Passive | - | ||
 |
Aggressive | Sonar |
| |
 |
Defensive |
|
- |
|
Gallery

Subnautica Fauna Sheet 1
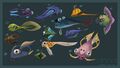
Various Fauna Concept Art


Lua error in package.lua at line 80: module 'Dev:Navbox' not found.