
Biomes (Subnautica): Difference between revisions
GemmaBeepo (talk | contribs) |
UnderseaDee (talk | contribs) No edit summary Tag: rte-source |
||
| Line 14: | Line 14: | ||
! class="unsortable" style="width: 25%; text-align: center;" |Points of Interest |
! class="unsortable" style="width: 25%; text-align: center;" |Points of Interest |
||
|- |
|- |
||
| style="text-align:center; font-size:12px;" |[[File: |
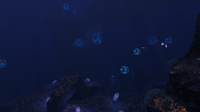
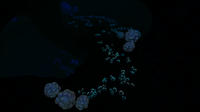
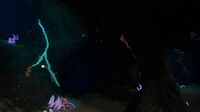
| style="text-align:center; font-size:12px;" |[[File:BloodKelpTrenchInfoboxTrue.jpg|200px|center|link=Blood Kelp Zone]][[Blood Kelp Zone]] |
||
| style="text-align:center; font-size:12px;" | |
| style="text-align:center; font-size:12px;" | |
||
* 150 - 675 meters (Trench) |
* 150 - 675 meters (Trench) |
||
| Line 25: | Line 25: | ||
* [[Precursor Caches|Blood Kelp Sanctuary]] (Northern) |
* [[Precursor Caches|Blood Kelp Sanctuary]] (Northern) |
||
|- |
|- |
||
| style="text-align:center; font-size:12px;" |[[File: |
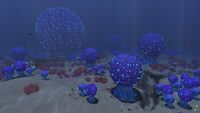
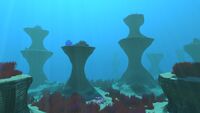
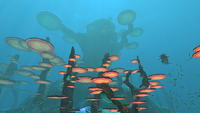
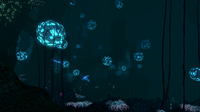
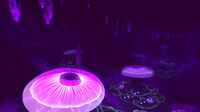
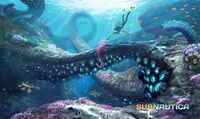
| style="text-align:center; font-size:12px;" |[[File:KooshZoneInfobox.jpg|200px|center|link=Bulb Zone]][[Bulb Zone]] |
||
| style="text-align:center; font-size:12px;" | |
| style="text-align:center; font-size:12px;" | |
||
* 140 - 480 meters |
* 140 - 480 meters |
||
| Line 37: | Line 37: | ||
* [[Precursor Caches|Bulb Zone Warp Gate Cache]] (1) |
* [[Precursor Caches|Bulb Zone Warp Gate Cache]] (1) |
||
|- |
|- |
||
| style="text-align:center; font-size:12px;" |[[File: |
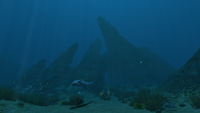
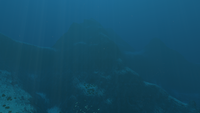
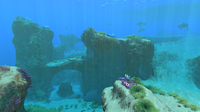
| style="text-align:center; font-size:12px;" |[[File:Crag Field Updated 1.png|200px|center|link=Crag Field]][[Crag Field]] |
||
| style="text-align:center; font-size:12px;" | |
| style="text-align:center; font-size:12px;" | |
||
* 125 - 460 meters |
* 125 - 460 meters |
||
| Line 58: | Line 58: | ||
* [[Destroyed Lifepods|Destroyed Lifepod]] (1) |
* [[Destroyed Lifepods|Destroyed Lifepod]] (1) |
||
|- |
|- |
||
| style="text-align:center; font-size:12px;" |[[File: |
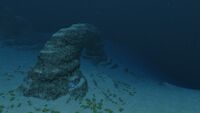
| style="text-align:center; font-size:12px;" |[[File:DunesHeader1.jpg|200px|center|link=Dunes]][[Dunes]] |
||
| style="text-align:center; font-size:12px;" | |
| style="text-align:center; font-size:12px;" | |
||
* 65 - 400 meters |
* 65 - 400 meters |
||
| Line 92: | Line 92: | ||
* [[Destroyed Lifepods]] (2) |
* [[Destroyed Lifepods]] (2) |
||
|- |
|- |
||
| style="text-align:center; font-size:12px;" |[[File: |
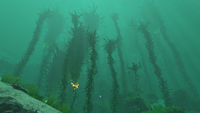
| style="text-align:center; font-size:12px;" |[[File:Kelp Forest Infobox.png|200px|center|link=Kelp Forest ]][[Kelp Forest]] |
||
| style="text-align:center; font-size:12px;" | |
| style="text-align:center; font-size:12px;" | |
||
* 0 - 160 meters |
* 0 - 160 meters |
||
| Line 114: | Line 114: | ||
* [[Alien Pipe System#Entrance_Points|Alien Pipe Entrance Point]] |
* [[Alien Pipe System#Entrance_Points|Alien Pipe Entrance Point]] |
||
|- |
|- |
||
| style="text-align:center; font-size:12px;" |[[File: |
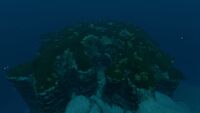
| style="text-align:center; font-size:12px;" |[[File:NWMF Infobox.png|200px|center|link=Mushroom Forest]][[Mushroom Forest]] |
||
| style="text-align:center; font-size:12px;" | |
| style="text-align:center; font-size:12px;" | |
||
* 75 - 250 meters (Northwestern) |
* 75 - 250 meters (Northwestern) |
||
| Line 142: | Line 142: | ||
* [[Destroyed Lifepods|Destroyed Lifepod]] (1) |
* [[Destroyed Lifepods|Destroyed Lifepod]] (1) |
||
|- |
|- |
||
| style="text-align:center; font-size:12px;" |[[File: |
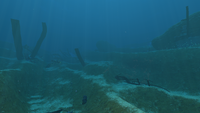
| style="text-align:center; font-size:12px;" |[[File:STP Infobox.png|200px|center|link=Sea Treader's Path]][[Sea Treader's Path]] |
||
| style="text-align:center; font-size:12px;" | |
| style="text-align:center; font-size:12px;" | |
||
* 170 - 360 meters |
* 170 - 360 meters |
||
| Line 178: | Line 178: | ||
! class="unsortable" style="width: 25%; text-align: center;" |Points of Interest |
! class="unsortable" style="width: 25%; text-align: center;" |Points of Interest |
||
|- |
|- |
||
| style="text-align:center; font-size:12px;" |[[File: |
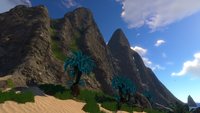
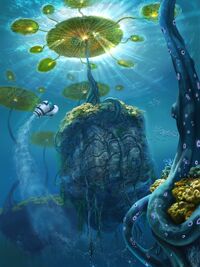
| style="text-align:center; font-size:12px;" |[[File:FloatingIsland1.jpg|200px|center|link=Floating Island]][[Floating Island]] |
||
| style="text-align:center; font-size:12px;" | |
| style="text-align:center; font-size:12px;" | |
||
* Above sea level |
* Above sea level |
||
| Line 215: | Line 215: | ||
|- |
|- |
||
| style="text-align:center; font-size:12px;" | |
| style="text-align:center; font-size:12px;" | |
||
[[File: |
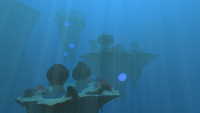
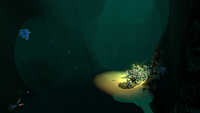
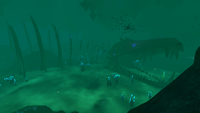
[[File:Lost RIverCavesInfobox.png|200px|center|link=Bone Fields Caves]][[Bone Fields Caves]] |
||
| style="text-align:center; font-size:12px;" | |
| style="text-align:center; font-size:12px;" | |
||
* 610 - 710 meters |
* 610 - 710 meters |
||
| Line 275: | Line 275: | ||
- |
- |
||
|- |
|- |
||
| style="text-align:center; font-size:12px;" |[[File: |
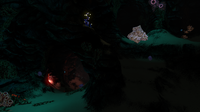
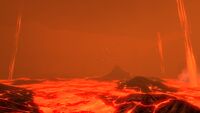
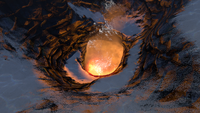
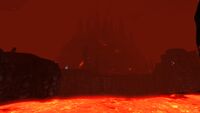
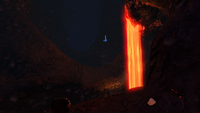
| style="text-align:center; font-size:12px;" |[[File:Lava_9.gif|200px|center|link=Inactive Lava Zone]][[Inactive Lava Zone]] |
||
| style="text-align:center; font-size:12px;" | |
| style="text-align:center; font-size:12px;" | |
||
* 900 - 1300 meters |
* 900 - 1300 meters |
||
| Line 328: | Line 328: | ||
* Thermal Vents (?) |
* Thermal Vents (?) |
||
|- |
|- |
||
| style="text-align:center; font-size:12px;" |[[File: |
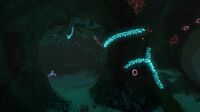
| style="text-align:center; font-size:12px;" |[[File:2016-02-11_00031.jpg|200px|center|link=Mushroom Forest Caves]][[Mushroom Forest Caves]] |
||
| style="text-align:center; font-size:12px;" | |
| style="text-align:center; font-size:12px;" | |
||
* 170 - 250 meters |
* 170 - 250 meters |
||
Revision as of 18:33, 5 July 2017
.png)
|
Read at own risk This article contains unmarked spoilers. Players new to the game would want to avoid or be cautious toward this article. |

|
This seems new This article contains information that is updated for the latest Experimental Version of Subnautica. Players using stable mode may find this information inaccurate. |
Subnautica features a wide range of Biomes to explore and coexist with, which represent miniature ecosystems in the real world.
There is a very diverse range of Biomes, from the vibrant Kelp Forest to the sizzling depths of the enigmatic Lava Lakes housing some of the most dangerous Fauna.
Biomes
Surface Biomes


Islands
| Biome | Depth Range | Harvesting Nodes | Points of Interest |
|---|---|---|---|
 |
|
- |
|
 |
|
Cave Biomes
| Biome | Depth Range | Harvesting Nodes | Points of Interest |
|---|---|---|---|
 |
|
- | |
 |
|
- |
- |
 |
|
| |
 |
|
| |
 |
|
||
 |
|
- | |
 |
|
- | |
 |
|
- | |
 |
|
||
 |
|
| |
 |
|
- | |
 |
|
||
 |
|
- |
|
 |
|
| |
 |
|
- | |
 |
|
- | |
 |
|
- | |
 |
|
- |
Mini-Biomes
| Biome | Depth Range | Harvesting Nodes | Points of Interest |
|---|---|---|---|
 |
150 - 330 meters |
- | |
 |
Varies |
- | |
 |
|
||
 |
|
- |
Possible Biomes
| Biome | Depth Range | Harvesting Nodes | Points of Interest |
|---|---|---|---|
 |
Unknown |
Unknown |
Unknown |
 |
Unknown |
Unknown |
Unknown |
 |
Unknown |
Unknown |
Unknown |
Gallery
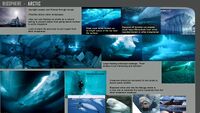
Arctic biome's reference sheet, made by the developers
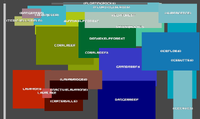
Early development biomes' reference sheet
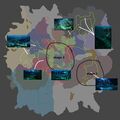
The Lost River's early map
(Outdated) Ditto, with more details

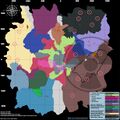
(Outdated) Latest Subnautica map (17/12/2016)

(Outdated) Latest Clean Subnautica map (25/02/2017)

Latest Clean Subnautica Map (19/05/2017)

(Outdated) Latest Subnautica map with ILZ - made by pie1055


Trivia
- Developers' footages of biome generation can be seen on a playlist from Russel Maekim's YouTube channel.
- The game considers the inside of an Observatory, Lifepod, and Scanner Room to be separate biomes. This is also true for the Aurora and for some of the large wrecks in the Bulb Zone and Grassy Plateaus (respectively labelled crashedShip and wreck).
- Early biome-concepts included Crystal and Arctic biomes. Considering the Arctic has since gained a development work-sheet, it might be added in future updates after the release of the official game.
- Early surface biome concepts were divided into Kelp Forest, Dense Kelp Forest, Sunny Kelp Forest, Coral Reef, Danger Reef, Safe Shallows, Grand Reefs, and Floating Island. Four of these have since been fully developped/implemented (the Safe Shallows, the Kelp Forest, Floating Island, Grand Reef and the Deep Grand Reef).
- Early lava zone biome concepts were divided into Lava Zone, Lava Bridges, Inactive Lava Zones and Thermal Vents. These were all implemented in some form, though the Thermal Vents have been reduced to geological features rather than a full biome.
Lua error in package.lua at line 80: module 'Dev:Navbox' not found.