
Wrecks: Difference between revisions
Mesmerized (talk | contribs) m (→Large Wreck List: small addition of data box found in experimental) Tags: Visual edit apiedit |
(Added links to Data Downloads + Posters; Cleanup) Tag: sourceedit |
||
| Line 6: | Line 6: | ||
==Large Wrecks== |
==Large Wrecks== |
||
There are 20 '''Large Wrecks'' |
There are 20 '''Large Wrecks''' spread throughout the ocean after the Aurora explodes. Each of them are surrounded by their local [[Flora]] and [[Fauna]] and possess their own unique challenges. Many of them include sections that are only accessible with the [[Laser Cutter]]. While each contains a unique set of fragments, there are common items found in many '''Wrecks''', for example, chairs and desks. |
||
==Large Wreck List== |
==Large Wreck List== |
||
| Line 16: | Line 16: | ||
! data-sort-type="text" style="width: 10%; text-align: center;" |Coordinates |
! data-sort-type="text" style="width: 10%; text-align: center;" |Coordinates |
||
|- |
|- |
||
|[[File:SafeShallowsWreck-1.jpg|thumb |
|[[File:SafeShallowsWreck-1.jpg|thumb]] |
||
| style="text-align:center; font-size:12px;" |[[Safe Shallows]] |
| style="text-align:center; font-size:12px;" |[[Safe Shallows]] |
||
| style="text-align:left; font-size:12px;" | |
| style="text-align:left; font-size:12px;" | |
||
| Line 24: | Line 24: | ||
*[[Chair|Chair 3]] |
*[[Chair|Chair 3]] |
||
*[[Desk]] |
*[[Desk]] |
||
*[[Data_Downloads#Search_.26_Rescue:_Paul_Torgal|Abandoned PDA - Search & Rescue: Paul Torgal]] (-44 -29 -404) |
|||
*[[Data Downloads|Abandoned PDA]] |
|||
*Search & Rescue: Paul Torgal (-44 -29 -404) |
|||
| style="text-align:center; font-size:13px;" | -40 -14 -400 |
| style="text-align:center; font-size:13px;" | -40 -14 -400 |
||
|- |
|- |
||
|[[File:SafeShallowsWreck-2.jpg|thumb |
|[[File:SafeShallowsWreck-2.jpg|thumb]] |
||
| style="text-align:center; font-size:12px;" |[[Safe Shallows]] |
| style="text-align:center; font-size:12px;" |[[Safe Shallows]] |
||
| style="text-align:left; font-size:12px;" | |
| style="text-align:left; font-size:12px;" | |
||
| Line 39: | Line 38: | ||
| style="text-align:center; font-size:13px;" | 366 -6 -203 |
| style="text-align:center; font-size:13px;" | 366 -6 -203 |
||
|- |
|- |
||
|[[File:KelpForestWreck-1.jpg|thumb |
|[[File:KelpForestWreck-1.jpg|thumb]] |
||
| style="text-align:center; font-size:12px;" |[[Kelp Forest]] |
| style="text-align:center; font-size:12px;" |[[Kelp Forest]] |
||
| style="text-align:left; font-size:12px;" | |
| style="text-align:left; font-size:12px;" | |
||
| Line 50: | Line 49: | ||
| style="text-align:center; font-size:13px;" | 320 -40 -336 |
| style="text-align:center; font-size:13px;" | 320 -40 -336 |
||
|- |
|- |
||
|[[File:KelpForestWreck-2.jpg|thumb |
|[[File:KelpForestWreck-2.jpg|thumb]] |
||
| style="text-align:center; font-size:12px;" |[[Kelp Forest]] |
| style="text-align:center; font-size:12px;" |[[Kelp Forest]] |
||
| style="text-align:left; font-size:12px;" | |
| style="text-align:left; font-size:12px;" | |
||
| Line 61: | Line 60: | ||
| style="text-align:center; font-size:13px;" | -413 -43 310 |
| style="text-align:center; font-size:13px;" | -413 -43 310 |
||
|- |
|- |
||
|[[File:KelpForestWreck-3.jpg|thumb |
|[[File:KelpForestWreck-3.jpg|thumb]] |
||
| style="text-align:center; font-size:12px;" |[[Kelp Forest]] |
| style="text-align:center; font-size:12px;" |[[Kelp Forest]] |
||
| style="text-align:left; font-size:12px;" | |
| style="text-align:left; font-size:12px;" | |
||
| Line 70: | Line 69: | ||
| style="text-align:center; font-size:13px;" | -320 -57 252 |
| style="text-align:center; font-size:13px;" | -320 -57 252 |
||
|- |
|- |
||
|[[File:KelpForestWreck-4.jpg|thumb |
|[[File:KelpForestWreck-4.jpg|thumb]] |
||
| style="text-align:center; font-size:12px;" |[[Kelp Forest]] |
| style="text-align:center; font-size:12px;" |[[Kelp Forest]] |
||
| style="text-align:left; font-size:12px;" | |
| style="text-align:left; font-size:12px;" | |
||
| Line 78: | Line 77: | ||
*[[Desk]] |
*[[Desk]] |
||
*[[Floodlight]] |
*[[Floodlight]] |
||
*[[Data_Downloads#Search_.26_Rescue:_Bart_Torgal|Abandoned PDA - Search & Rescue: Bart Torgal]] (62 -38 383) |
|||
*[[Data Downloads|Abandoned PDA]] |
|||
*Search & Rescue: Bart Torgal (62 -38 383) |
|||
| style="text-align:center; font-size:13px;" | 65 -25 385 |
| style="text-align:center; font-size:13px;" | 65 -25 385 |
||
|- |
|- |
||
|[[File:Grassy_Plateaus_Wreck_no1.jpg|thumb |
|[[File:Grassy_Plateaus_Wreck_no1.jpg|thumb]] |
||
| style="text-align:center; font-size:12px;" |[[Grassy Plateaus]] |
| style="text-align:center; font-size:12px;" |[[Grassy Plateaus]] |
||
| style="text-align:left; font-size:12px;" | |
| style="text-align:left; font-size:12px;" | |
||
| Line 95: | Line 93: | ||
*[[Floodlight]] |
*[[Floodlight]] |
||
*[[Propulsion Cannon]] |
*[[Propulsion Cannon]] |
||
| ⚫ | |||
*[[Data Downloads|Abandoned PDA]] |
|||
| ⚫ | |||
| style="text-align:center; font-size:13px;" | -25 -88 -615 |
| style="text-align:center; font-size:13px;" | -25 -88 -615 |
||
|- |
|- |
||
|[[File:GrassyPlateausWreck-2.jpg|thumb |
|[[File:GrassyPlateausWreck-2.jpg|thumb]] |
||
| style="text-align:center; font-size:12px;" |[[Grassy Plateaus]] |
| style="text-align:center; font-size:12px;" |[[Grassy Plateaus]] |
||
| style="text-align:left; font-size:12px;" | |
| style="text-align:left; font-size:12px;" | |
||
| Line 115: | Line 112: | ||
*[[Plant Pot|Plant Pot 3]] |
*[[Plant Pot|Plant Pot 3]] |
||
*[[Plant Shelf]] |
*[[Plant Shelf]] |
||
*[[Poster]] |
*[[Poster| Poster - Natural Selection II]] |
||
| ⚫ | |||
| style="text-align:center; font-size:13px;" | 320 -66 431 |
| style="text-align:center; font-size:13px;" | 320 -66 431 |
||
|- |
|- |
||
|[[File:GrassyPlateausWreck-3.jpg|thumb |
|[[File:GrassyPlateausWreck-3.jpg|thumb]] |
||
| style="text-align:center; font-size:12px;" |[[Grassy Plateaus]] |
| style="text-align:center; font-size:12px;" |[[Grassy Plateaus]] |
||
| style="text-align:left; font-size:12px;" | |
| style="text-align:left; font-size:12px;" | |
||
| Line 131: | Line 127: | ||
| style="text-align:center; font-size:13px;" | -390 -120 648 |
| style="text-align:center; font-size:13px;" | -390 -120 648 |
||
|- |
|- |
||
|[[File:GrassyPlateausWreck-4.jpg|thumb |
|[[File:GrassyPlateausWreck-4.jpg|thumb]] |
||
| style="text-align:center; font-size:12px;" |[[Grassy Plateaus]] |
| style="text-align:center; font-size:12px;" |[[Grassy Plateaus]] |
||
| style="text-align:left; font-size:12px;" | |
| style="text-align:left; font-size:12px;" | |
||
| Line 146: | Line 142: | ||
*[[Picture Frame]] |
*[[Picture Frame]] |
||
*[[Floodlight]] |
*[[Floodlight]] |
||
| ⚫ | |||
*[[Data Downloads|Abandoned PDA]] x2 |
|||
| ⚫ | |||
| ⚫ | |||
| ⚫ | |||
| ⚫ | |||
| ⚫ | |||
*Natural Selection II |
|||
| style="text-align:center; font-size:13px;" | -635 -50 -2 |
| style="text-align:center; font-size:13px;" | -635 -50 -2 |
||
|- |
|- |
||
|[[File:GrassyPlateausWreck-5.jpg|thumb |
|[[File:GrassyPlateausWreck-5.jpg|thumb]] |
||
| style="text-align:center; font-size:12px;" |[[Grassy Plateaus]] |
| style="text-align:center; font-size:12px;" |[[Grassy Plateaus]] |
||
| style="text-align:left; font-size:12px;" | |
| style="text-align:left; font-size:12px;" | |
||
| Line 165: | Line 159: | ||
| style="text-align:center; font-size:13px;" | -432 -90 -268 |
| style="text-align:center; font-size:13px;" | -432 -90 -268 |
||
|- |
|- |
||
|[[File:KooshZoneWreck-1.jpg|thumb |
|[[File:KooshZoneWreck-1.jpg|thumb]] |
||
| style="text-align:center; font-size:12px;" |[[Koosh Zone]] |
| style="text-align:center; font-size:12px;" |[[Koosh Zone]] |
||
| style="text-align:left; font-size:12px;" | |
| style="text-align:left; font-size:12px;" | |
||
| Line 180: | Line 174: | ||
*[[Chair|Chair 3]] |
*[[Chair|Chair 3]] |
||
*[[Bench]] |
*[[Bench]] |
||
*[[ |
*[[Data_Downloads#The_Charter|Abandoned PDA - The Charter]] (912 -202 610) |
||
*The Charter (912 -202 610) |
|||
| style="text-align:center; font-size:13px;" | 940 -198 593 |
| style="text-align:center; font-size:13px;" | 940 -198 593 |
||
|- |
|- |
||
|[[File:UnderwaterIslandWreck-1.jpg|thumb |
|[[File:UnderwaterIslandWreck-1.jpg|thumb]] |
||
| style="text-align:center; font-size:12px;" |[[Underwater Islands]] |
| style="text-align:center; font-size:12px;" |[[Underwater Islands]] |
||
| style="text-align:left; font-size:12px;" | |
| style="text-align:left; font-size:12px;" | |
||
| Line 194: | Line 187: | ||
*[[Prawn Suit|Prawn Suit Claw Arm Fragments]] |
*[[Prawn Suit|Prawn Suit Claw Arm Fragments]] |
||
*[[Prawn Suit Torpedo Arm|Prawn Suit Torpedo Arm Fragments]] |
*[[Prawn Suit Torpedo Arm|Prawn Suit Torpedo Arm Fragments]] |
||
*[[Prawn Suit Propulsion Cannon]] |
*[[Prawn Suit Propulsion Cannon|Prawn Suit Propulsion Cannon Fragments]] |
||
*[[Propulsion Cannon|Propulsion Cannon Fragments]] |
*[[Propulsion Cannon|Propulsion Cannon Fragments]] |
||
*[[Chair|Chair 1]] |
*[[Chair|Chair 1]] |
||
| Line 207: | Line 200: | ||
| style="text-align:center; font-size:13px;" | -102 -179 860 |
| style="text-align:center; font-size:13px;" | -102 -179 860 |
||
|- |
|- |
||
|[[File:MountainsWreck-1.jpg|thumb |
|[[File:MountainsWreck-1.jpg|thumb]] |
||
| style="text-align:center; font-size:12px;" |[[Mountains]] |
| style="text-align:center; font-size:12px;" |[[Mountains]] |
||
| style="text-align:left; font-size:12px;" | |
| style="text-align:left; font-size:12px;" | |
||
| Line 217: | Line 210: | ||
*[[Prawn Suit|Prawn Suit Claw Arm Fragments]] |
*[[Prawn Suit|Prawn Suit Claw Arm Fragments]] |
||
*[[Prawn Suit Torpedo Arm|Prawn Suit Torpedo Arm Fragments]] |
*[[Prawn Suit Torpedo Arm|Prawn Suit Torpedo Arm Fragments]] |
||
*[[Prawn Suit Propulsion Cannon]] |
*[[Prawn Suit Propulsion Cannon|Prawn Suit Propulsion Cannon Fragments]] |
||
*[[Floodlight]] |
*[[Floodlight]] |
||
*[[Picture Frame]] |
*[[Picture Frame]] |
||
| Line 225: | Line 218: | ||
*[[Single Wall Shelf]] |
*[[Single Wall Shelf]] |
||
*[[Wall Shelves]] |
*[[Wall Shelves]] |
||
*[[ |
*[[Data_Downloads#VR_Suite_Log|Abandoned PDA - VR Suite Log]] (698 -354 1195) |
||
*VR Suite Log (698 -354 1195) |
|||
| style="text-align:center; font-size:13px;" | 701 -346 1224 |
| style="text-align:center; font-size:13px;" | 701 -346 1224 |
||
|- |
|- |
||
|[[File:2017-04-08 00001.jpg|thumb |
|[[File:2017-04-08 00001.jpg|thumb]] |
||
| style="text-align:center; font-size:12px;" |[[Mountains]] |
| style="text-align:center; font-size:12px;" |[[Mountains]] |
||
| style="text-align:left; font-size:12px;" | |
| style="text-align:left; font-size:12px;" | |
||
| Line 235: | Line 227: | ||
*[[Stillsuit|Stillsuit Fragments]] |
*[[Stillsuit|Stillsuit Fragments]] |
||
*[[Moonpool|Moonpool Fragments]] |
*[[Moonpool|Moonpool Fragments]] |
||
| ⚫ | |||
*[[Desk]] |
|||
| ⚫ | |||
*[[Reinforced Dive Suit|Reinforced Dive Suit Fragments]] |
*[[Reinforced Dive Suit|Reinforced Dive Suit Fragments]] |
||
*[[Modification Station|Modification Station Fragments]] |
*[[Modification Station|Modification Station Fragments]] |
||
| Line 243: | Line 232: | ||
*[[Prawn Suit Grappling Arm|Prawn Suit Grappling Arm Fragments]] |
*[[Prawn Suit Grappling Arm|Prawn Suit Grappling Arm Fragments]] |
||
*[[Prawn Suit Torpedo Arm|Prawn Suit Torpedo Arm Fragments]] |
*[[Prawn Suit Torpedo Arm|Prawn Suit Torpedo Arm Fragments]] |
||
| ⚫ | |||
| ⚫ | |||
| ⚫ | |||
*[[Data Boxes|Data Box]] |
*[[Data Boxes|Data Box]] |
||
| style="text-align:center; font-size:13px;" | 1071 -282 1345 |
| style="text-align:center; font-size:13px;" | 1071 -282 1345 |
||
|- |
|- |
||
|[[File:MushroomForestWreck-1.jpg|thumb |
|[[File:MushroomForestWreck-1.jpg|thumb]] |
||
| style="text-align:center; font-size:12px;" |[[Mushroom Forest]] |
| style="text-align:center; font-size:12px;" |[[Mushroom Forest]] |
||
| style="text-align:left; font-size:12px;" | |
| style="text-align:left; font-size:12px;" | |
||
| Line 266: | Line 258: | ||
| style="text-align:center; font-size:13px;" | -652 -125 769 |
| style="text-align:center; font-size:13px;" | -652 -125 769 |
||
|- |
|- |
||
|[[File:DunesWreck-1.jpg|thumb |
|[[File:DunesWreck-1.jpg|thumb]] |
||
| style="text-align:center; font-size:12px;" |[[Dunes]] |
| style="text-align:center; font-size:12px;" |[[Dunes]] |
||
| style="text-align:left; font-size:12px;" | |
| style="text-align:left; font-size:12px;" | |
||
| Line 278: | Line 270: | ||
*[[Chair|Chair 1]] |
*[[Chair|Chair 1]] |
||
*[[Chair|Chair 3]] |
*[[Chair|Chair 3]] |
||
*[[Data Boxes|Data Box]] (-1394.9, -328.9, 733.8) |
|||
*[[Desk]] |
*[[Desk]] |
||
*[[Floodlight]] |
*[[Floodlight]] |
||
*[[Data |
*[[Data Boxes|Data Box]] (-1394.9, -328.9, 733.8) |
||
*Profitability Projections (-1397 -330 729) |
*[[Data_Downloads#Profitability_Projections|Abandoned PDA -Profitability Projections]] (-1397 -330 729) |
||
| style="text-align:center; font-size:13px;" | -1448 -332 732 |
| style="text-align:center; font-size:13px;" | -1448 -332 732 |
||
|- |
|- |
||
|[[File:SeaTreadersWreck-1.jpg|thumb |
|[[File:SeaTreadersWreck-1.jpg|thumb]] |
||
| style="text-align:center; font-size:12px;" |[[Sea Treader's Path]] |
| style="text-align:center; font-size:12px;" |[[Sea Treader's Path]] |
||
| style="text-align:left; font-size:12px;" | |
| style="text-align:left; font-size:12px;" | |
||
| Line 302: | Line 293: | ||
*[[Plant Pot 2]] |
*[[Plant Pot 2]] |
||
*[[Plant Shelf]] |
*[[Plant Shelf]] |
||
*[[Data |
*[[Data Boxes|Data Box]] |
||
| ⚫ | |||
*[[Data Box]] |
|||
| ⚫ | |||
| style="text-align:center; font-size:13px;" | -1131 -166 -729 |
| style="text-align:center; font-size:13px;" | -1131 -166 -729 |
||
|- |
|- |
||
|[[File:BloodKelpWreck-1.jpg|thumb |
|[[File:BloodKelpWreck-1.jpg|thumb]] |
||
| style="text-align:center; font-size:12px;" |[[Blood Kelp Zone]] |
| style="text-align:center; font-size:12px;" |[[Blood Kelp Zone]] |
||
| style="text-align:left; font-size:12px;" | |
| style="text-align:left; font-size:12px;" | |
||
| Line 322: | Line 312: | ||
*[[Desk]] |
*[[Desk]] |
||
*[[Floodlight]] |
*[[Floodlight]] |
||
| ⚫ | |||
*[[Data Downloads|Abandoned PDA]] |
|||
| ⚫ | |||
| style="text-align:center; font-size:13px;" | -1208 -332 -390 |
| style="text-align:center; font-size:13px;" | -1208 -332 -390 |
||
|- |
|- |
||
|[[File:GrandReefWreck-1.jpg |
|[[File:GrandReefWreck-1.jpg|thumb]] |
||
| style="text-align:center; font-size:12px;" |[[Grand Reef]] |
| style="text-align:center; font-size:12px;" |[[Grand Reef]] |
||
| style="text-align:left; font-size:12px;" | |
| style="text-align:left; font-size:12px;" | |
||
| Line 338: | Line 327: | ||
*[[Chair|Chair 1]] |
*[[Chair|Chair 1]] |
||
*[[Desk]] |
*[[Desk]] |
||
*[[ |
*[[Data_Downloads#Torgal_Corp.|Abandoned PDA - |
||
Torgal Corp.]] (-273 -254 -788) |
|||
| style="text-align:center; font-size:13px;" | -284 -250 -850 |
| style="text-align:center; font-size:13px;" | -284 -250 -850 |
||
|- |
|- |
||
|[[File:GrandReefWreck-2.jpg|thumb |
|[[File:GrandReefWreck-2.jpg|thumb]] |
||
| style="text-align:center; font-size:12px;" |[[Grand Reef]] |
| style="text-align:center; font-size:12px;" |[[Grand Reef]] |
||
| style="text-align:left; font-size:12px;" | |
| style="text-align:left; font-size:12px;" | |
||
| Line 356: | Line 345: | ||
*[[Chair 3]] |
*[[Chair 3]] |
||
*[[Desk]] |
*[[Desk]] |
||
* [[Data_Downloads#Surveillance_Log.2C_Leisure_Deck_.232|Abandoned PDA - Surveillance Log, Leisure Deck #2]] (-888 -446 -1422) |
|||
* [[Data Downloads|Abandoned PDA]] x2 |
|||
* Surveillance Log, Leisure Deck # |
* [[Data_Downloads#Surveillance_Log.2C_Leisure_Deck_.233|Abandoned PDA - Surveillance Log, Leisure Deck #3]] (-890 -439 -1430) |
||
* Surveillance Log, Leisure Deck #3 (-890 -439 -1430) |
|||
| style="text-align:center; font-size:13px;" | -865 -430 -1420 |
| style="text-align:center; font-size:13px;" | -865 -430 -1420 |
||
|} |
|} |
||
| Line 372: | Line 360: | ||
! data-sort-type="text" style="width: 10%; text-align: center;" |Coordinates |
! data-sort-type="text" style="width: 10%; text-align: center;" |Coordinates |
||
|- |
|- |
||
|[[File:SafeShallowsSmallWreck-1.jpg |
|[[File:SafeShallowsSmallWreck-1.jpg]] |
||
| style="text-align:center; font-size:12px;" |[[Safe Shallows]] |
| style="text-align:center; font-size:12px;" |[[Safe Shallows]] |
||
| style="text-align:left; font-size:12px;" | |
| style="text-align:left; font-size:12px;" | |
||
| Line 378: | Line 366: | ||
| style="text-align:center; font-size:13px;" | 20 -10 300 |
| style="text-align:center; font-size:13px;" | 20 -10 300 |
||
|- |
|- |
||
|[[File:SafeShallowsSmallWreck-2.jpg|thumb |
|[[File:SafeShallowsSmallWreck-2.jpg|thumb]] |
||
| style="text-align:center; font-size:12px;" |[[Safe Shallows]] |
| style="text-align:center; font-size:12px;" |[[Safe Shallows]] |
||
| style="text-align:left; font-size:12px;" | |
| style="text-align:left; font-size:12px;" | |
||
| style="text-align:center; font-size:13px;" | 90 -20 120 |
| style="text-align:center; font-size:13px;" | 90 -20 120 |
||
|- |
|- |
||
|[[File:SafeShallowsSmallWreck-3.jpg|thumb |
|[[File:SafeShallowsSmallWreck-3.jpg|thumb]] |
||
| style="text-align:center; font-size:12px;" |[[Safe Shallows]] |
| style="text-align:center; font-size:12px;" |[[Safe Shallows]] |
||
| style="text-align:left; font-size:12px;" | |
| style="text-align:left; font-size:12px;" | |
||
| Line 390: | Line 378: | ||
| style="text-align:center; font-size:13px;" | 65 -10 -85 |
| style="text-align:center; font-size:13px;" | 65 -10 -85 |
||
|- |
|- |
||
|[[File:SafeShallowsSmallWreck-4.jpg|thumb |
|[[File:SafeShallowsSmallWreck-4.jpg|thumb]] |
||
| style="text-align:center; font-size:12px;" |[[Safe Shallows]] |
| style="text-align:center; font-size:12px;" |[[Safe Shallows]] |
||
| style="text-align:left; font-size:12px;" | |
| style="text-align:left; font-size:12px;" | |
||
| Line 396: | Line 384: | ||
| style="text-align:center; font-size:13px;" | -160 -20 -225 |
| style="text-align:center; font-size:13px;" | -160 -20 -225 |
||
|- |
|- |
||
|[[File:SafeShallowsSmallWreck-5.jpg|thumb |
|[[File:SafeShallowsSmallWreck-5.jpg|thumb]] |
||
| style="text-align:center; font-size:12px;" |[[Safe Shallows]] |
| style="text-align:center; font-size:12px;" |[[Safe Shallows]] |
||
| style="text-align:left; font-size:12px;" | |
| style="text-align:left; font-size:12px;" | |
||
| Line 405: | Line 393: | ||
| style="text-align:center; font-size:13px;" | 175 -23 -253 |
| style="text-align:center; font-size:13px;" | 175 -23 -253 |
||
|- |
|- |
||
|[[File:SafeShallowsSmallWreck-6.jpg|thumb |
|[[File:SafeShallowsSmallWreck-6.jpg|thumb]] |
||
| style="text-align:center; font-size:12px;" |[[Safe Shallows]] |
| style="text-align:center; font-size:12px;" |[[Safe Shallows]] |
||
| style="text-align:left; font-size:12px;" | |
| style="text-align:left; font-size:12px;" | |
||
| Line 411: | Line 399: | ||
| style="text-align:center; font-size:13px;" | 310 -23 -119 |
| style="text-align:center; font-size:13px;" | 310 -23 -119 |
||
|- |
|- |
||
|[[File:GrassyPlateausSmallWreck-1.jpg|thumb |
|[[File:GrassyPlateausSmallWreck-1.jpg|thumb]] |
||
| style="text-align:center; font-size:12px;" |[[Grassy Plateaus]] |
| style="text-align:center; font-size:12px;" |[[Grassy Plateaus]] |
||
| style="text-align:left; font-size:12px;" | |
| style="text-align:left; font-size:12px;" | |
||
| style="text-align:center; font-size:13px;" | 165 -86 -520 |
| style="text-align:center; font-size:13px;" | 165 -86 -520 |
||
|- |
|- |
||
|[[File:GrassyPlateausSmallWreck-2.jpg|thumb |
|[[File:GrassyPlateausSmallWreck-2.jpg|thumb]] |
||
| style="text-align:center; font-size:12px;" |[[Grassy Plateaus]] |
| style="text-align:center; font-size:12px;" |[[Grassy Plateaus]] |
||
| style="text-align:left; font-size:12px;" | |
| style="text-align:left; font-size:12px;" | |
||
| Line 424: | Line 411: | ||
| style="text-align:center; font-size:13px;" | 322 -90 222 |
| style="text-align:center; font-size:13px;" | 322 -90 222 |
||
|- |
|- |
||
|[[File:GrassyPlateausSmallWreck-3.jpg|thumb |
|[[File:GrassyPlateausSmallWreck-3.jpg|thumb]] |
||
| style="text-align:center; font-size:12px;" |[[Grassy Plateaus]] |
| style="text-align:center; font-size:12px;" |[[Grassy Plateaus]] |
||
| style="text-align:left; font-size:12px;" | |
| style="text-align:left; font-size:12px;" | |
||
| Line 432: | Line 419: | ||
| style="text-align:center; font-size:13px;" | 270 -85 70 |
| style="text-align:center; font-size:13px;" | 270 -85 70 |
||
|- |
|- |
||
|[[File:GrassyPlateausSmallWreck-4.jpg|thumb |
|[[File:GrassyPlateausSmallWreck-4.jpg|thumb]] |
||
| style="text-align:center; font-size:12px;" |[[Grassy Plateaus]] |
| style="text-align:center; font-size:12px;" |[[Grassy Plateaus]] |
||
| style="text-align:left; font-size:12px;" | |
| style="text-align:left; font-size:12px;" | |
||
| Line 438: | Line 425: | ||
| style="text-align:center; font-size:13px;" | -370 -100 475 |
| style="text-align:center; font-size:13px;" | -370 -100 475 |
||
|- |
|- |
||
|[[File:GrassyPlateausSmallWreck-5.jpg|thumb |
|[[File:GrassyPlateausSmallWreck-5.jpg|thumb]] |
||
| style="text-align:center; font-size:12px;" |[[Grassy Plateaus]] |
| style="text-align:center; font-size:12px;" |[[Grassy Plateaus]] |
||
| style="text-align:left; font-size:12px;" | |
| style="text-align:left; font-size:12px;" | |
||
| style="text-align:center; font-size:13px;" | -284 -93 606 |
| style="text-align:center; font-size:13px;" | -284 -93 606 |
||
|- |
|- |
||
|[[File:GrassyPlateausSmallWreck-6.jpg|thumb |
|[[File:GrassyPlateausSmallWreck-6.jpg|thumb]] |
||
| style="text-align:center; font-size:12px;" |[[Grassy Plateaus]] |
| style="text-align:center; font-size:12px;" |[[Grassy Plateaus]] |
||
| style="text-align:left; font-size:12px;" | |
| style="text-align:left; font-size:12px;" | |
||
Revision as of 09:54, 9 April 2017

|
This seems new This article contains information that is updated for the latest Experimental Version of Subnautica. Players using stable mode may find this information inaccurate. |
Template:Infobox Biome The Wrecks are explorable pieces of debris from the Aurora. They have wide range of sizes. Large Wrecks contain valuable technology in the form of Fragments while Small Wrecks contain only Supply Crates.
Large Wrecks
There are 20 Large Wrecks spread throughout the ocean after the Aurora explodes. Each of them are surrounded by their local Flora and Fauna and possess their own unique challenges. Many of them include sections that are only accessible with the Laser Cutter. While each contains a unique set of fragments, there are common items found in many Wrecks, for example, chairs and desks.
Large Wreck List


Small Wrecks
Small Wrecks can be found surrounding the Large Wrecks and inside the Crash Zone. They can contain useful items and fragments.
| Image | Biome | Items | Coordinates |
|---|---|---|---|

|
Safe Shallows | 20 -10 300 | |
| Safe Shallows | 90 -20 120 | ||
| Safe Shallows | 65 -10 -85 | ||
| Safe Shallows | -160 -20 -225 | ||
| Safe Shallows | 175 -23 -253 | ||
| Safe Shallows | 310 -23 -119 | ||
| Grassy Plateaus | 165 -86 -520 | ||
| Grassy Plateaus | 322 -90 222 | ||
| Grassy Plateaus | 270 -85 70 | ||
| Grassy Plateaus | -370 -100 475 | ||
| Grassy Plateaus | -284 -93 606 | ||
| Grassy Plateaus | -520 -90 -215 |


Gallery
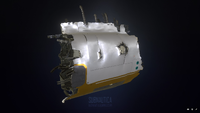
Large Explorable Wreck Model from Sketchfab
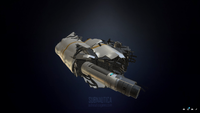
Another Large Explorable Wreck Model from Sketchfab

Small Explorable Wreck's Model from Sketchfab
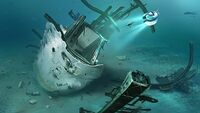
Large Explorable Wreck's Concept Art
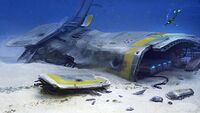
Small Explorable Wreck's Concept Art

Small Wreckage, found in the Crash Zone


.jpg)
For a more complete gallery, see Wrecks/Gallery.