
Fauna: Difference between revisions
(Undo revision 145115 by 107.77.173.9 (talk)) Tag: rte-wysiwyg |
No edit summary Tag: apiedit |
||
| Line 7: | Line 7: | ||
== Future Plans == |
== Future Plans == |
||
* In future updates, DNA can be extracted from various fauna, using the [[transfuser]], in order to create diverse serums, each with unique effects and implementations in various upgrades. |
* In future updates, DNA can be extracted from various fauna, using the [[transfuser]], in order to create diverse serums, each with unique effects and implementations in various upgrades. |
||
== Current list of fauna in-game == |
|||
===Carnivores=== |
|||
{| style="width: 100%;" class="article-table sortable" border="0" cellpadding="1" cellspacing="1" |
|||
|- |
|||
! class="unsortable" style="width: 25%; text-align: center;" |Fauna |
|||
! class="unsortable" style="width: 25%; text-align: center;" |Attitude |
|||
! class="unsortable" style="width: 25%; text-align: center;" |DNA |
|||
! class="unsortable" style="width: 25%; text-align: center;" |Biome |
|||
|- |
|||
| style="text-align:center; font-size:12px;" |[[File:Shocker_Fauna.png|200px|center|link=Ampeel]][[Ampeel]] |
|||
| style="text-align:center; font-size:12px;" |[[:Category:Attitude: Aggressive|Aggressive]] |
|||
| style="text-align:center; font-size:12px;" | - |
|||
| style="text-align:left; font-size:12px;" | |
|||
* [[Blood Kelp Zone]] |
|||
* [[Blood Kelp Caves]] |
|||
* [[Koosh Zone]] |
|||
|- |
|||
| style="text-align:center; font-size:12px;" |[[File:Biter Fish Fauna.png|200px|center|link=Biter]][[Biter]] |
|||
| style="text-align:center; font-size:12px;" |[[:Category:Attitude: Aggressive|Aggressive]] |
|||
| style="text-align:center; font-size:12px;" | - |
|||
| style="text-align:left; font-size:12px;" | |
|||
* [[Grassy Plateaus]] |
|||
* [[Jelly Shroom Caves]] |
|||
* [[Mountain Island]] |
|||
* [[Mountains]] |
|||
* [[Mountain Range Caves]] |
|||
|- |
|||
| style="text-align:center; font-size:12px;" |[[File:Blood Biter Fauna.png|200px|center|link=Blighter]][[Blighter]] |
|||
| style="text-align:center; font-size:12px;" |[[:Category:Attitude: Aggressive|Aggressive]] |
|||
| style="text-align:center; font-size:12px;" | - |
|||
| style="text-align:left; font-size:12px;" | |
|||
* [[Blood Kelp Zone]] |
|||
* [[Blood Kelp Caves]] |
|||
* [[Lost River]] |
|||
|- |
|||
| style="text-align:center; font-size:12px;" |[[File:Bone Shark Fauna.png|200px|center|link=Boneshark]][[Boneshark]] |
|||
| style="text-align:center; font-size:12px;" |[[:Category:Attitude: Aggressive|Aggressive]] |
|||
| style="text-align:center; font-size:12px;" | - |
|||
| style="text-align:left; font-size:12px;" | |
|||
* [[Koosh Zone]] |
|||
* [[Mushroom Forest]] |
|||
* [[Underwater Islands]] |
|||
|- |
|||
| style="text-align:center; font-size:12px;" |[[File:Crab Snake Fauna.png|200px|center|link=Crabsnake]][[Crabsnake]] |
|||
| style="text-align:center; font-size:12px;" |[[:Category:Attitude: Aggressive|Aggressive]] |
|||
| style="text-align:center; font-size:12px;" | - |
|||
| style="text-align:left; font-size:12px;" | |
|||
* [[Jelly Shroom Caves]] |
|||
|- |
|||
| style="text-align:center; font-size:12px;" |[[File:Crabsquid_backgroundless.png|200px|center|link=Crabsquid]][[Crabsquid]] |
|||
| style="text-align:center; font-size:12px;" |[[:Category:Attitude: Aggressive|Aggressive]] |
|||
| style="text-align:center; font-size:12px;" | - |
|||
| style="text-align:left; font-size:12px;" | |
|||
* [[Lost River]] |
|||
* [[Blood Kelp Zone]] |
|||
* [[Deep Grand Reef]] |
|||
|- |
|||
| style="text-align:center; font-size:12px;" |[[File:Crash Fauna.png|200px|center|link=Crashfish]][[Crashfish]] |
|||
| style="text-align:center; font-size:12px;" |[[:Category:Attitude: Defensive|Defensive]] |
|||
| style="text-align:center; font-size:12px;" | - |
|||
| style="text-align:left; font-size:12px;" | |
|||
* [[Safe Shallows Caves]] |
|||
* [[Safe Shallows]] |
|||
* [[Kelp Forest Caves]] |
|||
|- |
|||
| style="text-align:center; font-size:12px;" |[[File:LavaLizardTest.png|200px|center|link=Lava Lizard]][[Lava Lizard]] |
|||
| style="text-align:center; font-size:12px;" |[[:Category:Attitude: Aggressive|Aggressive]] |
|||
| style="text-align:center; font-size:12px;" | - |
|||
| style="text-align:left; font-size:12px;" | |
|||
* [[Inactive Lava Zone]] |
|||
* [[Active Lava Zone]] |
|||
|- |
|||
| style="text-align:center; font-size:12px;" |[[File:Mesmer Fauna.png|200px|center|link=Mesmer]][[Mesmer]] |
|||
| style="text-align:center; font-size:12px;" |[[:Category:Attitude: Defensive|Defensive]] |
|||
| style="text-align:center; font-size:12px;" | - |
|||
| style="text-align:left; font-size:12px;" | |
|||
* [[Grassy Plateaus]] |
|||
* [[Kelp Forest Caves]] |
|||
* [[Koosh Zone]] |
|||
* [[Mushroom Forest]] |
|||
* [[Lost River]] |
|||
|- |
|||
| style="text-align:center; font-size:12px;" |[[File:Reaper Leviathan Fauna.png|200px|center|link=Reaper Leviathan]][[Reaper Leviathan]] |
|||
| style="text-align:center; font-size:12px;" |[[:Category:Attitude: Aggressive|Aggressive]] |
|||
| style="text-align:center; font-size:12px;" | - |
|||
| style="text-align:left; font-size:12px;" | |
|||
* [[Aurora]] |
|||
* [[Crash Zone]] |
|||
* [[Dunes]] |
|||
* [[Mountain Island]] |
|||
* [[Mountain]] |
|||
|- |
|||
| style="text-align:center; font-size:12px;" |[[File:Spine Eel Fauna.png|200px|link=River Prowler]][[River Prowler]] |
|||
| style="text-align:center; font-size:12px;" | [[:Category:Attitude: Aggressive| Aggressive]] |
|||
| style="text-align:center; font-size:12px;" | - |
|||
| style="text-align:left; font-size:12px;" | |
|||
* [[Lost River]] |
|||
|- |
|||
| style="text-align:center; font-size:12px;" |[[File:Sea_Dragon_Leviathan_Fauna.png|200px|center|link=Sea Dragon Leviathan]][[Sea Dragon Leviathan]] |
|||
| style="text-align:center; font-size:12px;" | [[:Category:Attitude: Aggressive|Aggressive]] |
|||
| style="text-align:center; font-size:12px;" | - |
|||
| style="text-align:left; font-size:12px;" | |
|||
* [[Inactive Lava Zone]] |
|||
* [[Active Lava Zone]] |
|||
|- |
|||
| style="text-align:center; font-size:12px;" |[[File:Sandshark Fauna.png|200px|center|link=Sand Shark]][[Sand Shark]] |
|||
| style="text-align:center; font-size:12px;" |[[:Category:Attitude: Aggressive|Aggressive]] |
|||
| style="text-align:center; font-size:12px;" | - |
|||
| style="text-align:left; font-size:12px;" | |
|||
* [[Caves]] |
|||
* [[Crash Zone]] |
|||
* [[Dunes]] |
|||
* [[Grassy Plateaus]] |
|||
|- |
|||
| style="text-align:center; font-size:12px;" |[[File:Stalker Fauna.png|200px|center|link=Stalker]][[Stalker]] |
|||
| style="text-align:center; font-size:12px;" |[[:Category:Attitude: Aggressive|Aggressive]] |
|||
| style="text-align:center; font-size:12px;" | - |
|||
| style="text-align:left; font-size:12px;" | |
|||
* [[Crash Zone]] |
|||
* [[Kelp Forest]] |
|||
|- |
|||
| style="text-align:center; font-size:12px;" |[[File:Warper Fauna.png|200px|center|link=Warper]][[Warper]] |
|||
| style="text-align:center; font-size:12px;" | |
|||
Variable |
|||
| style="text-align:center; font-size:12px;" | - |
|||
| style="text-align:left; font-size:12px;" | |
|||
* [[Active Lava Zone]] |
|||
* [[Inactive Lava Zone]] |
|||
* [[Lost River]] |
|||
* [[Mountain Island]] |
|||
* [[Grand Reef]] |
|||
* [[Deep Grand Reef]] |
|||
* [[Dunes]] |
|||
* [[Precursor Bases]] |
|||
|} |
|||
{{Clear}} |
|||
===Herbivores=== |
|||
{| class="article-table sortable" style="width: 100%;" cellspacing="1" cellpadding="1" border="0" |
|||
|- |
|||
! class="unsortable" style="width: 25%; text-align: center;" |Fauna |
|||
! class="unsortable" style="width: 25%; text-align: center;" |Attitude |
|||
! class="unsortable" style="width: 25%; text-align: center;" |DNA |
|||
! class="unsortable" style="width: 25%; text-align: center;" |Biome |
|||
|- |
|||
| style="text-align:center; font-size:12px;" |[[File:Airsack_Fauna.png|200px|center|link=Bladderfish]][[Bladderfish]] |
|||
| style="text-align:center; font-size:12px;" |[[:Category:Attitude: Passive|Passive]] |
|||
| style="text-align:center; font-size:12px;" | - |
|||
| style="text-align:left; font-size:12px;" | |
|||
* [[Grassy Plateaus]] |
|||
* [[Kelp Forest]] |
|||
* [[Mushroom Forest]] |
|||
* [[Safe Shallows]] |
|||
* [[Underwater Islands]] |
|||
* [[Grand Reef]] |
|||
|- |
|||
| style="text-align:center; font-size:12px;" |[[File:Boomerang Fauna.png|200px|center|link=Boomerang]][[Boomerang]] |
|||
| style="text-align:center; font-size:12px;" |[[:Category:Attitude: Passive|Passive]] |
|||
| style="text-align:center; font-size:12px;" | - |
|||
| style="text-align:left; font-size:12px;" | |
|||
* [[Crash Zone]] |
|||
* [[Deep Grand Reef]] |
|||
* [[Grand Reef]] |
|||
* [[Grassy Plateaus]] |
|||
* [[Kelp Forest Caves]] |
|||
* [[Koosh Zone]] |
|||
* [[Mountain Range Caves]] |
|||
* [[Safe Shallows]] |
|||
* [[Underwater Islands]] |
|||
|- |
|||
| style="text-align:center; font-size:12px;" |[[File:Red Ghost Ray Fauna.png|200px|center|link=Crimson Ray]][[Crimson Ray]] |
|||
| style="text-align:center; font-size:12px;" |[[:Category:Attitude: Passive|Passive]] |
|||
| style="text-align:center; font-size:12px;" | - |
|||
| style="text-align:left; font-size:12px;" | |
|||
* [[Active Lava Zone]] |
|||
* [[Inactive Lava Zone]] |
|||
|- |
|||
| style="text-align:center; font-size:12px;" |[[File:Eyeye Fauna.png|200px|center|link=Eyeye]][[Eyeye]] |
|||
| style="text-align:center; font-size:12px;" |[[:Category:Attitude: Passive|Passive]] |
|||
| style="text-align:center; font-size:12px;" | - |
|||
| style="text-align:left; font-size:12px;" | |
|||
* [[Crash Zone]] |
|||
* [[Dunes]] |
|||
* [[Grand Reef]] |
|||
* [[Jelly Shroom Caves]] |
|||
* [[Kelp Forest]] |
|||
* [[Koosh Zone]] |
|||
* [[Koosh Zone Caves]] |
|||
|- |
|||
| style="text-align:center; font-size:12px;" |[[File:Garryfish Fauna.png|200px|center|link=Garryfish]][[Garryfish]] |
|||
| style="text-align:center; font-size:12px;" |[[:Category:Attitude: Passive|Passive]] |
|||
| style="text-align:center; font-size:12px;" | - |
|||
| style="text-align:left; font-size:12px;" | |
|||
* [[Dunes]] |
|||
* [[Safe Shallows Caves]] |
|||
* [[Safe Shallows]] |
|||
* [[Underwater Islands]] |
|||
|- |
|||
| style="text-align:center; font-size:12px;" |[[File:Gasopod Fauna.png|200px|center|link=Gasopod]][[Gasopod]] |
|||
| style="text-align:center; font-size:12px;" |[[:Category:Attitude: Defensive|Defensive]] |
|||
| style="text-align:center; font-size:12px;" | - |
|||
| style="text-align:left; font-size:12px;" | |
|||
* [[Safe Shallows]] |
|||
|- |
|||
| style="text-align:center; font-size:12px;" |[[File:Ghost_Ray_Fauna.png|200px|center|link=Ghostray]][[Ghostray]] |
|||
| style="text-align:center; font-size:12px;" |[[:Category:Attitude: Passive|Passive]] |
|||
| style="text-align:center; font-size:12px;" | - |
|||
| style="text-align:left; font-size:12px;" | |
|||
* [[Lost River]] |
|||
|- |
|||
| style="text-align:center; font-size:12px;" |[[File:Holefish Fauna.png|200px|center|link=Holefish]][[Holefish]] |
|||
| style="text-align:center; font-size:12px;" |[[:Category:Attitude: Passive|Passive]] |
|||
| style="text-align:center; font-size:12px;" | - |
|||
| style="text-align:left; font-size:12px;" | |
|||
* [[Crash Zone]] |
|||
* [[Koosh Zone Caves]] |
|||
* [[Mushroom Forest Caves]] |
|||
* [[Safe Shallows]] |
|||
|- |
|||
| style="text-align:center; font-size:12px;" |[[File:Hoopfish Fauna.png|200px|center|link=Hoopfish]][[Hoopfish]] |
|||
| style="text-align:center; font-size:12px;" |[[:Category:Attitude: Passive|Passive]] |
|||
| style="text-align:center; font-size:12px;" | - |
|||
| style="text-align:left; font-size:12px;" | |
|||
* [[Grand Reef]] |
|||
* [[Kelp Forest Caves]] |
|||
* [[Koosh Zone]] |
|||
* [[Safe Shallows]] |
|||
* [[Underwater Islands]] |
|||
|- |
|||
| style="text-align:center; font-size:12px;" |[[File:Hoverfish Fauna.png|200px|center|link=Hoverfish]][[Hoverfish]] |
|||
| style="text-align:center; font-size:12px;" |[[:Category:Attitude: Passive|Passive]] |
|||
| style="text-align:center; font-size:12px;" | - |
|||
| style="text-align:left; font-size:12px;" | |
|||
* [[Crash Zone]] |
|||
* [[Grassy Plateaus]] |
|||
* [[Kelp Forest]] |
|||
|- |
|||
| style="text-align:center; font-size:12px;" |[[File:Jellyray Fauna.png|200px|center|link=Jellyray]][[Jellyray]] |
|||
| style="text-align:center; font-size:12px;" |[[:Category:Attitude: Passive|Passive]] |
|||
| style="text-align:center; font-size:12px;" | - |
|||
| style="text-align:left; font-size:12px;" | |
|||
* [[Deep Grand Reef]] |
|||
* [[Mushroom Forest]] |
|||
|- |
|||
| style="text-align:center; font-size:12px;" |[[File:Lavaboomerang.png|200px|center|link=Lava Boomerang]][[Lava Boomerang]] |
|||
| style="text-align:center; font-size:12px;" |[[:Category:Attitude: Passive|Passive]] |
|||
| style="text-align:center; font-size:12px;" | - |
|||
| style="text-align:left; font-size:12px;" | |
|||
* [[Inactive Lava Zone]] |
|||
|- |
|||
| style="text-align:center; font-size:12px;" |[[File:Lava Eyeye.PNG|200px|center|link=Lava Eyeye]][[Lava Eyeye]] |
|||
| style="text-align:center; font-size:12px;" |[[:Category:Attitude: Passive|Passive]] |
|||
| style="text-align:center; font-size:12px;" | - |
|||
| style="text-align:left; font-size:12px;" | |
|||
* [[Inactive Lava Zone]] |
|||
|- |
|||
| style="text-align:center; font-size:12px;" |[[File:Oculus Fauna.png|200px|center|link=Oculus]][[Oculus]] |
|||
| style="text-align:center; font-size:12px;" |[[:Category:Attitude: Passive|Passive]] |
|||
| style="text-align:center; font-size:12px;" | - |
|||
| style="text-align:left; font-size:12px;" | |
|||
* [[Jelly Shroom Caves]] |
|||
|- |
|||
| style="text-align:center; font-size:12px;" |[[File:Peeper Fauna.png|200px|center|link=Peeper]][[Peeper]] |
|||
| style="text-align:center; font-size:12px;" |[[:Category:Attitude: Passive|Passive]] |
|||
| style="text-align:center; font-size:12px;" | - |
|||
| style="text-align:left; font-size:12px;" | |
|||
* [[Crash Zone]] |
|||
* [[Kelp Forest]] |
|||
* [[Safe Shallows]] |
|||
|- |
|||
| style="text-align:center; font-size:12px;" |[[File:Rabbitray Fauna.png|200px|center|link=Rabbit Ray]][[Rabbit Ray]] |
|||
| style="text-align:center; font-size:12px;" |[[:Category:Attitude: Passive|Passive]] |
|||
| style="text-align:center; font-size:12px;" | - |
|||
| style="text-align:left; font-size:12px;" | |
|||
* [[Crash Zone]] |
|||
* [[Kelp Forest]] |
|||
* [[Safe Shallows]] |
|||
|- |
|||
| style="text-align:center; font-size:12px;" |[[File:Reefback Fauna.png|200px|center|link=Reefback]][[Reefback]] |
|||
| style="text-align:center; font-size:12px;" |[[:Category:Attitude: Passive|Passive]] |
|||
| style="text-align:center; font-size:12px;" | - |
|||
| style="text-align:left; font-size:12px;" | |
|||
* [[Blood Kelp Zone]] |
|||
* [[Grassy Plateaus]] |
|||
* [[Koosh Zone]] |
|||
* [[Mushroom Forest]] |
|||
* [[Sparse Reef]] |
|||
* [[Underwater Islands]] |
|||
|- |
|||
| style="text-align:center; font-size:12px;" |[[File:Reginald Fauna.png|200px|center|link=Reginald]][[Reginald]] |
|||
| style="text-align:center; font-size:12px;" |[[:Category:Attitude: Passive|Passive]] |
|||
| style="text-align:center; font-size:12px;" | - |
|||
| style="text-align:left; font-size:12px;" | |
|||
* [[Crash Zone]] |
|||
* [[Grand Reef]] |
|||
* [[Grassy Plateaus]] |
|||
* [[Mountains]] |
|||
* [[Mountain Range Caves]] |
|||
* [[Sparse Reef]] |
|||
* [[Grassy Plateaus Caves]] |
|||
|- |
|||
| style="text-align:center; font-size:12px;" |[[File:Sea Treader Fauna.png|200px|center|link=Sea Treader]][[Sea Treader]] |
|||
| style="text-align:center; font-size:12px;" |[[:Category:Attitude: Defensive|Defensive]] |
|||
| style="text-align:center; font-size:12px;" | - |
|||
| style="text-align:left; font-size:12px;" | |
|||
* [[Grand Reef]] |
|||
* [[Sea Treader's Path]] |
|||
* [[Sea Treader's Tunnel Caves]] |
|||
|- |
|||
| style="text-align:center; font-size:12px;" |[[File:Spadefish Fauna.png|200px|center|link=Spadefish]][[Spadefish]] |
|||
| style="text-align:center; font-size:12px;" |[[:Category:Attitude: Passive|Passive]] |
|||
| style="text-align:center; font-size:12px;" | - |
|||
| style="text-align:left; font-size:12px;" | |
|||
* [[Dunes]] |
|||
* [[Grassy Plateaus]] |
|||
* [[Mushroom Forest Caves]] |
|||
* [[Mushroom Forest]] |
|||
* [[Sparse Reef]] |
|||
* [[Underwater Islands]] |
|||
* [[Sea Treader's Path]] |
|||
* [[Grand Reef]] |
|||
* [[Sea Treader's Tunnel Caves]] |
|||
|- |
|||
| style="text-align:center; font-size:12px;" |[[File:Blood Hoopfish Fauna.png|200px|center|link=Spinefish]][[Spinefish]] |
|||
| style="text-align:center; font-size:12px;" |[[:Category:Attitude: Passive|Passive]] |
|||
| style="text-align:center; font-size:12px;" | - |
|||
| style="text-align:left; font-size:12px;" | |
|||
* [[Blood Kelp Zone]] |
|||
* [[Blood Kelp Caves]] |
|||
* [[Lost River]] |
|||
|} |
|||
{{Clear}} |
|||
===Scavengers & Parasites=== |
|||
{| class="article-table sortable" style="width: 100%;" cellspacing="1" cellpadding="1" border="0" |
|||
|- |
|||
! class="unsortable" style="width: 25%; text-align: center;" |Fauna |
|||
! class="unsortable" style="width: 25%; text-align: center;" |Attitude |
|||
! class="unsortable" style="width: 25%; text-align: center;" |DNA |
|||
! class="unsortable" style="width: 25%; text-align: center;" |Biome |
|||
|- |
|||
| style="text-align:center; font-size:12px;" |[[File:Bleeder Fauna-0.png|200px|center|link=Bleeder]][[Bleeder]] |
|||
| style="text-align:center; font-size:12px;" |[[:Category:Attitude: Aggressive|Aggressive]] |
|||
| style="text-align:center; font-size:12px;" | - |
|||
| style="text-align:left; font-size:12px;" | |
|||
* [[Aurora]] |
|||
* [[Kelp Forest]] |
|||
* [[Sparse Reef]] |
|||
* [[Grassy Plateaus Caves]] |
|||
|- |
|||
| style="text-align:center; font-size:12px;" |[[File:Blood Crawler Fauna.png|200px|center|link=Blood Crawler]][[Blood Crawler]] |
|||
| style="text-align:center; font-size:12px;" |[[:Category:Attitude: Aggressive|Aggressive]] |
|||
| style="text-align:center; font-size:12px;" | - |
|||
| style="text-align:left; font-size:12px;" | |
|||
* [[Blood Kelp Zone]] |
|||
* [[Blood Kelp Caves]] |
|||
|- |
|||
| style="text-align:center; font-size:12px;" |[[File:Cave Crawler (01).png|200px|center|link=Cave Crawler]][[Cave Crawler]] |
|||
| style="text-align:center; font-size:12px;" |[[:Category:Attitude: Aggressive|Aggressive]] |
|||
| style="text-align:center; font-size:12px;" | - |
|||
| style="text-align:left; font-size:12px;" | |
|||
* [[Aurora]] |
|||
* [[Dunes]] |
|||
* [[Mountain Island]] |
|||
* [[Mountain Range Caves]] |
|||
* [[Underwater Islands|Underwater Island]] |
|||
|- |
|||
| style="text-align:center; font-size:12px;" |[[File:Floater Fauna-0.png|200px|center|link=Floater]][[Floater]] |
|||
| style="text-align:center; font-size:12px;" |[[:Category:Attitude: Passive|Passive]] |
|||
| style="text-align:center; font-size:12px;" | - |
|||
| style="text-align:left; font-size:12px;" | |
|||
* [[Grassy Plateaus]] |
|||
* [[Safe Shallows]] |
|||
* [[Floater Island]] |
|||
* [[Underwater Islands]] |
|||
* [[Blood Kelp Zone]] |
|||
|- |
|||
| style="text-align:center; font-size:12px;" |[[File:Lava Larva Fauna.png|200px|center|link=Lava Larva]][[Lava Larva]] |
|||
| style="text-align:center; font-size:12px;" |[[:Category:Attitude: Passive|Passive]] |
|||
| style="text-align:center; font-size:12px;" | - |
|||
| style="text-align:left; font-size:12px;" | |
|||
* [[Active Lava Zone]] |
|||
* [[Inactive Lava Zone]] |
|||
|- |
|||
| style="text-align:center; font-size:12px;" |[[File:Rockgrub Fauna.png|200px|center|link=Rockgrub]][[Rockgrub]] |
|||
| style="text-align:center; font-size:12px;" |[[:Category:Attitude: Passive|Passive]] |
|||
| style="text-align:center; font-size:12px;" | - |
|||
| style="text-align:left; font-size:12px;" | |
|||
* [[Caves]] |
|||
* [[Dunes]] |
|||
* [[Koosh Zone Caves]] |
|||
* [[Sparse Reef]] |
|||
|- |
|||
| style="text-align:center; font-size:12px;" |[[File:Jumper Fauna.png|200px|center|link=Shuttlebug]][[Shuttlebug]] |
|||
| style="text-align:center; font-size:12px;" |[[:Category:Attitude: Passive|Passive]] |
|||
| style="text-align:center; font-size:12px;" | - |
|||
| style="text-align:left; font-size:12px;" | |
|||
* [[Crash Zone]] |
|||
* [[Dunes]] |
|||
* [[Koosh Zone]] |
|||
* [[Mountains]] |
|||
* [[Mountain Range Caves]] |
|||
* [[Mushroom Forest Caves]] |
|||
* [[Sparse Reef]] |
|||
* [[Sea Treader's Path]] |
|||
* [[Sea Treader's Tunnel Caves]] |
|||
* [[Grassy Plateaus Caves]] |
|||
|} |
|||
{{Clear}} |
|||
===Other Entities=== |
|||
{| class="article-table sortable" style="width: 100%;" cellspacing="1" cellpadding="1" border="0" |
|||
|- |
|||
! class="unsortable" style="width: 25%; text-align: center;" |Fauna |
|||
! class="unsortable" style="width: 25%; text-align: center;" |Attitude |
|||
! class="unsortable" style="width: 25%; text-align: center;" |DNA |
|||
! class="unsortable" style="width: 25%; text-align: center;" |Biome |
|||
|- |
|||
| style="text-align:center; font-size:12px;" |[[File:Shoal of Fish Fauna.png|200px|center|link=Shoal of Fish]][[Shoal of Fish]] |
|||
| style="text-align:center; font-size:12px;" |[[:Category:Attitude: Passive|Passive]] |
|||
| style="text-align:center; font-size:12px;" | - |
|||
| style="text-align:left; font-size:12px;" | |
|||
* [[Biomes|All Biomes]] |
|||
|- |
|||
| style="text-align:center; font-size:12px;" |[[File:Skyray Fauna.png|200px|center|link=Skyray]][[Skyray]] |
|||
| style="text-align:center; font-size:12px;" |[[:Category:Attitude: Passive|Passive]] |
|||
| style="text-align:center; font-size:12px;" | - |
|||
| style="text-align:left; font-size:12px;" | |
|||
* [[Aurora]] |
|||
* [[Crash Zone]] |
|||
* [[Floater Island]] |
|||
* [[Mountain Island]] |
|||
* [[Safe Shallows]] |
|||
|- |
|||
| style="text-align:center; font-size:12px;" |[[File:Starfish Fauna.png|200px|center|link=Starfish]][[Starfish]] |
|||
| style="text-align:center; font-size:12px;" |[[:Category:Attitude: Passive|Passive]] |
|||
| style="text-align:center; font-size:12px;" | - |
|||
| style="text-align:left; font-size:12px;" | |
|||
* [[Abandoned Seabases]] |
|||
* [[Jelly Shroom Caves]] |
|||
|} |
|||
{{Clear}} |
|||
===In Development=== |
|||
{| class="article-table sortable" style="width: 100%;" cellspacing="1" cellpadding="1" border="0" |
|||
|- |
|||
! class="unsortable" style="width: 25%; text-align: center;" |Fauna |
|||
! class="unsortable" style="width: 25%; text-align: center;" |Attitude |
|||
! class="unsortable" style="width: 25%; text-align: center;" |DNA |
|||
! class="unsortable" style="width: 25%; text-align: center;" |Biome |
|||
|- |
|||
| style="text-align:center; font-size:12px;" |[[File:Bloomplankton-1.png|200px|center|link=Bloom Plankton]][[Bloom Plankton]] |
|||
| style="text-align:center; font-size:12px;" |[[:Category:Attitude: Passive|Passive]] |
|||
| style="text-align:center; font-size:12px;" | - |
|||
| style="text-align:left; font-size:12px;" | |
|||
* - |
|||
|- |
|||
| style="text-align:center; font-size:12px;" |[[File:Blue Barnacles Fauna.png|200px|center|link=Blue Barnacles]][[Blue Barnacles]] |
|||
| style="text-align:center; font-size:12px;" | - |
|||
| style="text-align:center; font-size:12px;" | - |
|||
| style="text-align:left; font-size:12px;" | |
|||
* [[Twisty Bridges]] |
|||
|- |
|||
| style="text-align:center; font-size:12px;" |[[File:Cute Fish Fauna.png|200px|center|link=Cutefish]][[Cutefish]] |
|||
| style="text-align:center; font-size:12px;" |[[:Category:Attitude: Passive|Passive]] |
|||
| style="text-align:center; font-size:12px;" | - |
|||
| style="text-align:left; font-size:12px;" | |
|||
* - |
|||
|- |
|||
| style="text-align:center; font-size:12px;" |[[File: Sea Emperor Fauna.png |200px|center|link=Sea Emperor]][[Sea Emperor]] |
|||
| style="text-align:center; font-size:12px;" | - |
|||
| style="text-align:center; font-size:12px;" | - |
|||
| style="text-align:left; font-size:12px;" | |
|||
* - |
|||
|- |
|||
| style="text-align:center; font-size:12px;" |[[File:Baby Leviathan Fauna.png|200px|center|link=Sea Emperor Juvenile]][[Sea Emperor Juvenile]] |
|||
| style="text-align:center; font-size:12px;" | - |
|||
| style="text-align:center; font-size:12px;" | - |
|||
| style="text-align:left; font-size:12px;" | |
|||
* - |
|||
|} |
|||
{{Clear}} |
|||
===Unconfirmed=== |
|||
{| class="article-table sortable" style="width: 100%;" cellspacing="1" cellpadding="1" border="0" |
|||
|+ |
|||
|- |
|||
! class="unsortable" style="width: 25%; text-align: center;" |Fauna |
|||
! class="unsortable" style="width: 25%; text-align: center;" |Attitude |
|||
! class="unsortable" style="width: 25%; text-align: center;" |DNA |
|||
! class="unsortable" style="width: 25%; text-align: center;" |Biome |
|||
|- |
|||
| style="text-align:center; font-size:12px;" |[[File:Rock Puncher Fauna.png|200px|link=Rock Puncher]][[Rock Puncher]] |
|||
| style="text-align:center; font-size:12px;" | - |
|||
| style="text-align:center; font-size:12px;" | - |
|||
| style="text-align:left; font-size:12px;" | |
|||
* - |
|||
|} |
|||
== Gallery == |
== Gallery == |
||
Revision as of 18:49, 18 November 2016

|
This seems new This article contains information that is updated for the latest Experimental Version of Subnautica. Players using stable mode may find this information inaccurate. |
Fauna are life forms found all over the world of Subnautica, from the deepest darkest depths to the vibrant safe shallows.
There are a large variety of fauna, ranging from eels that use bioelectricity to incapacitate predators and hunt, to heavily armored predators that hide in the sand, waiting to ambush any creatures that may swim too close to what lurks in the sand, and even massive underwater Sea Dragons that breathe fire!
Future Plans
- In future updates, DNA can be extracted from various fauna, using the transfuser, in order to create diverse serums, each with unique effects and implementations in various upgrades.
Gallery

Subnautica Fauna Sheet 1
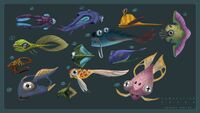
Various Fauna Concept Art
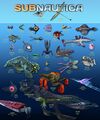
Updated Subnautica Fauna Sheet 1
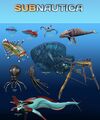
Updated Subnautica Fauna Sheet 2


Trivia
- Fauna were intended to posses inherent attributes, that would have caused them to exhibit unique behaviors. These included, e.g., "Fertile" (occasionally lay eggs that can be hatched), "Alpha" (attacked the player if other creatures were killed by the player in the immediate vicinity), "Complex" (specimens take longer to scan), "Greater" (specimens are of larger size and weight), ... Whether these attributes are currently implemented or will be implemented in future updates is unknown.
- As of the Dangerous Creatures update, all fauna have yellow blood. Before this update, fauna had red blood. This is due to the ESRB giving Subnautica a higher rating than excepted due to the animal's red blood.
- The Cute Fish is curently the only obtainable pet fauna in development, which is obtainable through the debug console and will only be granted to players whom purchased the early access version of subnautica
References
Lua error in package.lua at line 80: module 'Dev:Navbox' not found.