
Bioreactor (Subnautica): Difference between revisions
UnderseaDee (talk | contribs) No edit summary |
(Wanted to change Shocker to Ampeel because the Enemy is called Ampeel, not Shocker, but for some reason it didn't work.) Tags: Manual revert 2017 source edit |
||
| (84 intermediate revisions by 39 users not shown) | |||
| Line 1: | Line 1: | ||
{{SubnauticaLink|Bioreactors}} |
|||
{{Craftable|title1 = Bioreactor|image4 = Bioreactor.png|tab = [[Interior Pieces]]|description = Composts organic matter into electrical energy.|acqired_from = [[Fragments]]|fragments = |item_id = ''basebioreactor''|crafting = [[File:Lubricant.png|30px|link=Lubricant]] [[File:Titanium.png|30px|link=Titanium]] x4|category = [[Energy]]|image2 = <gallery> |
|||
{{Craftable |
|||
|title1 = Bioreactor |
|||
|image4 = Bioreactor.png |
|||
|tab = [[Interior Pieces]] |
|||
|description = Composts organic matter into electrical energy. |
|||
|acqired_from = [[Fragments (Subnautica)|Fragments]] |
|||
|fragments = |
|||
|debugspawn = ''basebioreactor'' |
|||
|crafting = [[File:Lubricant.png|30px|link=Lubricant]] [[File:Titanium.png|30px|link=Titanium]] x4 |
|||
|category = [[Energy]] |
|||
|image2 = <gallery widths="200" spacing="small"> |
|||
Bioreactor Fragment 1.png|1 |
Bioreactor Fragment 1.png|1 |
||
Bioreactor Fragment 2.png|2 |
Bioreactor Fragment 2.png|2 |
||
Bioreactor Fragment 3.png|3 |
Bioreactor Fragment 3.png|3 |
||
Bioreactor Fragment 4.png|4 |
Bioreactor Fragment 4.png|4 |
||
</gallery> |
</gallery> |
||
|location2 = * Seabed |
|||
**[[Grassy Plateaus]] |
|||
* [[Wrecks]] |
|||
** [[Kelp Forest]] |
** [[Kelp Forest]] |
||
** [[Sparse Reef]] |
** [[Sparse Reef]] |
||
|Fragments2 = 2 |
|||
** 8x [[Grassy Plateaus]] |
|||
|debugspawn2 = ''BioreactorFragment'' |
|||
|Fragments2 = 2|debugspawn2 = ''BioreactorFragment''|item2 = Bioreactor Fragment}}{{Quote2|A reliable power source is a critical step toward self-sufficiency. Consider keeping a photo-journal of your achievements to motivate you in times of despair. |
|||
|item2 = Bioreactor Fragment}} |
|||
[[File:BioreactorVO.ogg]]|PDA|Dialogue}}The '''Bioreactor''' is constructed with the [[Habitat Builder]] and composts organic matter into [[Energy]]. It can break down any organic matter into reliable energy for [[Seabases]]. The '''Bioreactor''' produces 5 energy every 12 seconds with a maximum capacity of 500 units per '''Bioreactor'''. It can only be placed inside a [[Multipurpose Room]]. It does not affect power in [[Game Modes|creative mode]]. |
|||
<nowiki> |
|||
</nowiki> |
|||
{{Quote2|A reliable power source is a critical step toward self-sufficiency. Consider keeping a photo-journal of your achievements to motivate you in times of despair. |
|||
[[File:BioreactorVO.ogg]]|PDA|Dialogue}} |
|||
The '''Bioreactor''' is constructed with the [[Habitat Builder (Subnautica)|Habitat Builder]] and composts organic matter into [[Energy]]. It has a 4×4 inventory grid to place organic items into, and items placed inside it cannot be removed once placed. It can break down any organic matter into reliable energy for [[Seabases (Subnautica)|Seabases]]. The Bioreactor produces 1 unit of energy every 1.2 seconds (50 per minute), with a maximum capacity of 500 units per Bioreactor. It can only be placed in the centers of a [[Multipurpose Room (Subnautica)|Multipurpose Room]] or [[Large Room (Subnautica)|Large Room]]. It does not affect power in [[Game Modes|creative mode]]. |
|||
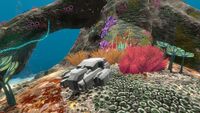
Bioreactors work well in biomes where organic matter is plentiful, such as [[Kelp Forest]]s or [[Mushroom Forest]]s, where [[Solar Panel (Subnautica)|Solar Panels]] may be less efficient. It is also easy to supply a Bioreactor with fuel if one keeps an [[Exterior Growbed (Subnautica)|Exterior Growbed]], [[Interior Growbed]] or [[Alien Containment (Subnautica)|Alien Containment]] full of fish nearby. It is also useful for disposing of any excess or spoiled flora and fauna that the player has no more need of. [[Eggs|Egg]]-hatched fish, in particular, provide the most energy. |
|||
Thanks to its low costs and easily renewable fuel it is perfectly suited to power outposts with low |
Thanks to its low costs and easily renewable fuel, it is perfectly suited to power outposts with low-power devices like a [[Battery Charger (Subnautica)|Battery Charger]] or [[Power Cell Charger (Subnautica)|Power Cell Charger]], especially if the area lacks the requirements for both Solar Panels ''and'' [[Thermal Plant (Subnautica)|Thermal Plants]]. But even if better sources are available, it still provides easy additional energy for demanding seabases. |
||
==Recipe== |
==Recipe== |
||
{{Recipe2}} |
|||
{{Recipe|item1=Titanium|count1 = 3|item2=Wiring Kit|count2 = 1|item3=Lubricant|count3 = 1|machine=Builder|result=Bioreactor}} |
|||
== |
==Energy Values== |
||
<div class="mw-collapsible mw-collapsed"> |
<div class="mw-collapsible mw-collapsed">{{Clear}} |
||
<tabber> |
<tabber> |
||
Flora (Marine)= |
Flora (Marine)= |
||
{{ |
{{Recipe2|page=Acid Mushroom}} |
||
{{ |
{{Recipe2|page=Acid Mushroom Spore}} |
||
{{Recipe2|page=Blood Oil}} |
|||
{{Recipe|item= Blue Palm Seed|machine=Bioreactor|result=Energy|resultcount=50}} |
|||
{{Recipe2|page=Blue Palm Seed}} |
|||
{{Recipe|item= Cave Bush Seed|machine=Bioreactor|result=Energy|resultcount=50}} |
|||
{{Recipe2|page=Koosh Sample}} |
|||
{{Recipe|item= Creepvine Sample|machine=Bioreactor|result=Energy|resultcount=75}} |
|||
{{Recipe2|page=Cave Bush Seed}} |
|||
{{Recipe|item= Creepvine Seed Cluster|machine=Bioreactor|result=Energy|resultcount=50}} |
|||
{{Recipe2|page=Creepvine Sample}} |
|||
{{Recipe|item= Deep Shroom|machine=Bioreactor|result=Energy|resultcount=50}} |
|||
{{Recipe2|page=Creepvine Seed Cluster}} |
|||
{{Recipe|item= Deep Shroom Spore|machine=Bioreactor|result=Energy|resultcount=50}} |
|||
{{Recipe2|page=Deep Shroom}} |
|||
{{Recipe|item= Eyes Plant Seed|machine=Bioreactor|result=Energy|resultcount=50}} |
|||
{{Recipe2|page=Deep Shroom Spore}} |
|||
{{Recipe|item= Furled Papyrus Seed|machine=Bioreactor|result=Energy|resultcount=50}} |
|||
{{Recipe2|page=Eyes Plant Seed}} |
|||
{{Recipe|item= Gabe's Feather Seed|machine=Bioreactor|result=Energy|resultcount=50}} |
|||
{{Recipe2|page=Furled Papyrus Seed}} |
|||
{{Recipe|item=Gel Sack|machine=Bioreactor|result=Energy|resultcount=100}} |
|||
{{Recipe2|page=Gabe's Feather Seed}} |
|||
{{Recipe|item=Spore Sack Seed|machine=Bioreactor|result=Energy|resultcount=50}} |
|||
{{Recipe2|page=Gel Sack}} |
|||
{{Recipe|item= Ghost Weed Seed|machine=Bioreactor|result=Energy|resultcount=50}} |
|||
{{Recipe2|page=Spore Sack Seed}} |
|||
{{Recipe|item= Jellyshroom Spore|machine=Bioreactor|result=Energy|resultcount=50}} |
|||
{{Recipe2|page=Ghost Weed Seed}} |
|||
{{Recipe|item= Koosh Sample|machine=Bioreactor|result=Energy|resultcount=75}} |
|||
{{Recipe2|page=Jellyshroom Spore}} |
|||
{{Recipe|item= Membrain Tree Seed|machine=Bioreactor|result=Energy|resultcount=50}} |
|||
{{Recipe2|page=Membrain Tree Seed}} |
|||
{{Recipe|item= Pygmy Fan Seed|machine=Bioreactor|result=Energy|resultcount=50}} |
|||
{{Recipe2|page=Pygmy Fan Seed}} |
|||
{{Recipe|item= Redwort Seed|machine=Bioreactor|result=Energy|resultcount=50}} |
|||
{{Recipe2|page=Redwort Seed}} |
|||
{{Recipe|item= Regress Shell Seed|machine=Bioreactor|result=Energy|resultcount=50}} |
|||
{{Recipe2|page=Regress Shell Seed}} |
|||
{{Recipe|item= Rouge Cradle Seed|machine=Bioreactor|result=Energy|resultcount=50}} |
|||
{{Recipe2|page=Rouge Cradle Seed}} |
|||
{{Recipe|item= Sea Crown Seed|machine=Bioreactor|result=Energy|resultcount=50}} |
|||
{{Recipe2|page=Sea Crown Seed}} |
|||
{{Recipe|item= Spotted Dockleaf Seed|machine=Bioreactor|result=Energy|resultcount=50}} |
|||
{{Recipe2|page=Spotted Dockleaf Seed}} |
|||
{{Recipe|item= Tiger Plant Seed|machine=Bioreactor|result=Energy|resultcount=50}} |
|||
{{Recipe2|page=Tiger Plant Seed}} |
|||
{{Recipe|item= Veined Nettle Seed|machine=Bioreactor|result=Energy|resultcount=50}} |
|||
{{Recipe2|page=Veined Nettle Seed}} |
|||
{{Recipe|item= Violet Beau Seed|machine=Bioreactor|result=Energy|resultcount=50}} |
|||
{{Recipe2|page=Violet Beau Seed}} |
|||
{{Recipe|item= Writhing Weed Seed|machine=Bioreactor|result=Energy|resultcount=50}} |
|||
{{Recipe2|page=Writhing Weed Seed}} |
|||
|-| |
|-| |
||
Flora (Land Based)= |
Flora (Land Based)= |
||
{{ |
{{Recipe2|page=Bulbo Tree Sample}} |
||
{{ |
{{Recipe2|page=Chinese Potato}} |
||
{{ |
{{Recipe2|page=Fern Palm Seed}} |
||
{{ |
{{Recipe2|page=Grub Basket Seed}} |
||
{{ |
{{Recipe2|page=Jaffa Cup Seed}} |
||
{{ |
{{Recipe2|page=Lantern Fruit}} |
||
{{ |
{{Recipe2|page=Marblemelon}} |
||
{{Recipe2|page=Marblemelon Seeds}} |
|||
{{Recipe|item= Marblemelon|machine=Bioreactor|result=Energy|resultcount=550}} |
|||
{{ |
{{Recipe2|page=Small Marblemelon}} |
||
{{ |
{{Recipe2|page=Ming Plant Seed}} |
||
{{Recipe2|page=Pink Cap}} |
|||
{{Recipe|item= Pink Cap|machine=Bioreactor|result=Energy|resultcount=50}} |
|||
{{ |
{{Recipe2|page=Pink Cap Spore}} |
||
{{ |
{{Recipe2|page=Speckled Rattler}} |
||
{{ |
{{Recipe2|page=Speckled Rattler Spore}} |
||
{{ |
{{Recipe2|page=Voxel Shrub Seed}} |
||
|-| |
|-| |
||
Corals= |
Corals= |
||
{{ |
{{Recipe2|page=Coral Tube Sample}} |
||
{{ |
{{Recipe2|page=Fungal Sample}} |
||
{{Recipe2|page=Brain Coral}} |
|||
{{Recipe|item= Purple Brain Coral Sample|machine=Bioreactor|result=Energy|resultcount=50}} |
|||
{{ |
{{Recipe2|page=Table Coral Sample}} |
||
|-| |
|-| |
||
Eggs= |
Eggs= |
||
{{ |
{{Recipe2|page=Shocker Egg}} |
||
{{ |
{{Recipe2|page=Bone Shark Egg}} |
||
{{ |
{{Recipe2|page=Crabsnake Egg}} |
||
{{Recipe2|page=Crabsquid Egg}} |
|||
{{Recipe|item= Gasopod Egg|machine=Bioreactor|result=Energy|resultcount=500}} |
|||
{{Recipe2|page=CrashEgg}} |
|||
{{Recipe|item= Jellyray Egg|machine=Bioreactor|result=Energy|resultcount=500}} |
|||
{{Recipe2|page=Cute Fish Egg}} |
|||
{{Recipe|item= Sand Shark Egg|machine=Bioreactor|result=Energy|resultcount=500}} |
|||
{{Recipe2|page=Gasopod Egg}} |
|||
{{Recipe|item= Stalker Egg|machine=Bioreactor|result=Energy|resultcount=500}} |
|||
{{Recipe2|page=Jellyray Egg}} |
|||
{{Recipe|item= CrashEgg|machine=Bioreactor|result=Energy|resultcount=250}} |
|||
{{Recipe2|page=LavaLizardEgg}} |
|||
{{Recipe|item= Mesmer Egg|machine=Bioreactor|result=Energy|resultcount=250}} |
|||
{{Recipe2|page=Mesmer Egg}} |
|||
{{Recipe|item= Rabbit Ray Egg|machine=Bioreactor|result=Energy|resultcount=250}} |
|||
{{Recipe2|page=Rabbit Ray Egg}} |
|||
{{Recipe|item= Reefback Egg|machine=Bioreactor|result=Energy|resultcount=250}} |
|||
{{Recipe2|page=Reefback Egg}} |
|||
{{Recipe|item= Shuttlebug Egg|machine=Bioreactor|result=Energy|resultcount=250}} |
|||
{{Recipe2|page=Sand Shark Egg}} |
|||
{{Recipe|item= Spadefish Egg|machine=Bioreactor|result=Energy|resultcount=250}} |
|||
{{Recipe2|page=Shuttlebug Egg}} |
|||
{{Recipe2|page=Spadefish Egg}} |
|||
{{Recipe2|page=Stalker Egg}} |
|||
|-| |
|-| |
||
Fauna= |
Fauna= |
||
{{Recipe2|page=Shocker}} |
|||
{{Recipe|item= Reefback|machine=Bioreactor|result=Energy|resultcount=5000}} |
|||
{{Recipe2|page=Bladderfish}} |
|||
{{Recipe|item= Crabsnake|machine=Bioreactor|result=Energy|resultcount=4500}} |
|||
{{Recipe2|page=Boneshark}} |
|||
{{Recipe|item= Shocker|machine=Bioreactor|result=Energy|resultcount=4500}} |
|||
{{Recipe2|page=Boomerang}} |
|||
{{Recipe|item= Sand Shark|machine=Bioreactor|result=Energy|resultcount=4000}} |
|||
{{Recipe2|page=Crabsnake}} |
|||
{{Recipe|item= Stalker|machine=Bioreactor|result=Energy|resultcount=4000}} |
|||
{{Recipe2|page=Crabsquid}} |
|||
{{Recipe|item= Boneshark|machine=Bioreactor|result=Energy|resultcount=4000}} |
|||
{{Recipe2|page=Crashfish}} |
|||
{{Recipe|item= Gasopod|machine=Bioreactor|result=Energy|resultcount=4000}} |
|||
{{Recipe2|page=Eyeye}} |
|||
{{Recipe|item= Jellyray|machine=Bioreactor|result=Energy|resultcount=3000}} |
|||
{{Recipe2|page=Floater}} |
|||
{{Recipe|item= Crashfish|machine=Bioreactor|result=Energy|resultcount=2000}} |
|||
{{Recipe2|page=Garryfish}} |
|||
{{Recipe|item= Mesmer|machine=Bioreactor|result=Energy|resultcount=2000}} |
|||
{{Recipe2|page=Gasopod}} |
|||
{{Recipe|item= Shuttlebug|machine=Bioreactor|result=Energy|resultcount=2000}} |
|||
{{Recipe2|page=Holefish}} |
|||
{{Recipe|item= Rabbit Ray|machine=Bioreactor|result=Energy|resultcount=1500}} |
|||
{{Recipe2|page=Hoopfish}} |
|||
{{Recipe|item= Reginald|machine=Bioreactor|result=Energy|resultcount=1100}} |
|||
{{Recipe2|page=Hoverfish}} |
|||
{{Recipe|item= Floater|machine=Bioreactor|result=Energy|resultcount=1000}} |
|||
{{Recipe2|page=Jellyray}} |
|||
{{Recipe|item= Oculus|machine=Bioreactor|result=Energy|resultcount=750}} |
|||
{{Recipe2|page=Lava Lizard}} |
|||
{{Recipe|item= Peeper|machine=Bioreactor|result=Energy|resultcount=750}} |
|||
{{Recipe2|page=Lava Boomerang}} |
|||
{{Recipe|item= Hoopfish|machine=Bioreactor|result=Energy|resultcount=575}} |
|||
{{Recipe2|page=Mesmer}} |
|||
{{Recipe|item= Hoverfish|machine=Bioreactor|result=Energy|resultcount=575}} |
|||
{{Recipe2|page=Oculus}} |
|||
{{Recipe|item= Lava Boomerang|machine=Bioreactor|result=Energy|resultcount=575}} |
|||
{{Recipe2|page=Peeper}} |
|||
{{Recipe|item= Spadefish|machine=Bioreactor|result=Energy|resultcount=575}} |
|||
{{Recipe2|page=Rabbit Ray}} |
|||
{{Recipe|item= Spinefish|machine=Bioreactor|result=Energy|resultcount=575}} |
|||
{{Recipe2|page=Lava Eyeye}} |
|||
{{Recipe|item= Boomerang|machine=Bioreactor|result=Energy|resultcount=525}} |
|||
{{Recipe2|page=Reefback}} |
|||
{{Recipe|item= Holefish|machine=Bioreactor|result=Energy|resultcount=525}} |
|||
{{Recipe2|page=Reginald}} |
|||
{{Recipe|item= Lava Eyeye|machine=Bioreactor|result=Energy|resultcount=500}} |
|||
{{Recipe2|page=Sand Shark}} |
|||
{{Recipe|item= Eyeye|machine=Bioreactor|result=Energy|resultcount=450}} |
|||
{{Recipe2|page=Shuttlebug}} |
|||
{{Recipe|item= Bladderfish|machine=Bioreactor|result=Energy|resultcount=400}} |
|||
{{Recipe2|page=Spadefish}} |
|||
{{Recipe|item= Garryfish|machine=Bioreactor|result=Energy|resultcount=400}} |
|||
{{Recipe2|page=Spinefish}} |
|||
{{Recipe2|page=Stalker}} |
|||
|-| |
|-| |
||
Others= |
Others= |
||
{{Recipe2|page=LubricantBioreactor}} |
|||
{{Recipe|item= Sea Treader Feces|machine=Bioreactor|result=Energy|resultcount=1000}} |
|||
{{Recipe2|page=Sea Treader Feces}} |
|||
{{Recipe|item= Lubricant|machine=Bioreactor|result=Energy|resultcount=100}} |
|||
{{ |
{{Recipe2|page=Stalker Tooth}} |
||
</tabber> |
</tabber></div> |
||
</div> |
|||
{{clear}} |
{{clear}} |
||
| Line 129: | Line 157: | ||
{| class="article-table sortable" style="width: 100%;" border="0" cellpadding="1" cellspacing="1" |
{| class="article-table sortable" style="width: 100%;" border="0" cellpadding="1" cellspacing="1" |
||
|- |
|- |
||
! class="unsortable" style="width: 100%; text-align: center;" |[[File:Bioreactor-1.png|centre| |
! class="unsortable" style="width: 100%; text-align: center;" |[[File:Bioreactor-1.png|centre|660px]] |
||
|- |
|- |
||
| style="text-align:left; font-size:12px;" | |
| style="text-align:left; font-size:12px;" | |
||
On planets where organic matter is plentiful but sunlight is not, a reliable bioreactor will frequently prove the most efficient power solution. |
On planets where organic matter is plentiful but sunlight is not, a reliable bioreactor will frequently prove the most efficient power solution. |
||
- May be installed in any multipurpose habitat room<br /> |
|||
- Chemically composts organic materials, converting them into energy over time<br /> |
|||
- Accepts all plant matter, from seeds and spores to moldy fruits and vegetables<br /> |
|||
- Can also process animal matter (fat, muscle, eggs etc.) and some organic waste products<br /> |
|||
- Energy production is proportionate to the calories in the organic matter<br /> |
|||
'The Bioreactor: Totally organic.' |
'The Bioreactor: Totally organic.' |
||
| Line 145: | Line 172: | ||
== Gallery == |
== Gallery == |
||
<tabber> |
|||
In-Game= |
|||
<gallery widths="200" spacing="small"> |
<gallery widths="200" spacing="small"> |
||
20160502170323_1.jpg|A Bioreactor inside a Seabase |
20160502170323_1.jpg|A Bioreactor inside a Seabase |
||
Bioreactormodel.png|Bioreactor Model from [https://sketchfab.com/models/f518859b40ff498ea23116f51962b5a1 Sketchfab] |
|||
Bioreactor 1.jpg|Former Bioreactor Model |
Bioreactor 1.jpg|Former Bioreactor Model |
||
The Bioreactor Fragment.JPG| |
The Bioreactor Fragment.JPG|Developer screenshot of the Bioreactor [[Fragments (Subnautica)|Fragments]], via Trello |
||
</gallery> |
</gallery> |
||
|-| |
|||
Models= |
|||
<gallery> |
|||
Bioreactormodel.png|Model from [https://sketchfab.com/models/f518859b40ff498ea23116f51962b5a1 Sketchfab] |
|||
</gallery> |
|||
</tabber> |
|||
== Trivia == |
== Trivia == |
||
* When the |
* When the Bioreactor was first introduced, it was placed outside of the base, much like a Solar Panel. |
||
* |
**The Bioreactor used to only accept a combination of Creepvine Samples and Fungal Samples. |
||
* Only one species of plantable Flora and one species of hatchable Fauna cannot be put in the Bioreactor; respectively, these are [[Spiked Horn Grass]] and the [[Cuddlefish]]. |
|||
{{Navbox Seabase Modules}} |
|||
*Even though silicone rubber is created from organic material, it cannot be placed in the bioreactor. |
|||
[[Category:Constructed with Habitat Builder]] |
|||
[[Category:Crafted with Titanium]] |
|||
{{Navbox Seabase Modules}}<br /> |
|||
[[Category:Crafted with Lubricant]] |
|||
[[fr:Bioréacteur]] |
|||
[[Category:Requires Blueprint]] |
[[Category:Requires Blueprint]] |
||
[[Category:Seabase |
[[Category:Seabase Modules]] |
||
Latest revision as of 06:24, 20 April 2025
<infobox> <title source="title1"><default>Bioreactor (Subnautica)</default></title>
<image source="image4"></image> <label>Category</label> <label>Category</label> <label>Description</label> <label>Hull Integrity</label> <label>Health</label> <label>Blueprint Source</label> <label>Acquired From</label> <label>Fragments</label> <label>Build Time</label> <label>Size</label> <label>Damage</label> <label>Drill Yield</label> <label>Biome</label> <label>Location</label> <label>Coordinates</label> <label>Perks</label> <label>Penalties</label> <label>Attribute</label> <label>Drops</label>
<label>Debug Spawn</label> <format> * {{#explode:basebioreactor||1}} </format> <label>Debug Spawn</label> <format> * {{#explode:{{{item_id}}}||1}} </format><label>Music</label> <group layout="horizontal"> <label>Food</label> <label>H2O</label> </group> <label>Bioreactor</label> <label>Byproduct</label> <group collapse="open" class="tab-fragment"> <header>Fragments</header> <image source="image2"></image> <label>Item</label> <label>Description</label> <label>Location</label> <label>Fragments</label> <label>Attribute</label> <label>Debug Spawn</label> <format>BioreactorFragment</format> <image source="image3"></image> <label>Item</label> <label>Description</label> <label>Location</label> <label>Fragments</label> <label>Attribute</label> <label>Debug Spawn</label> <format>{{{debugspawn3}}}</format> <image source="image5"></image> <label>Item</label> <label>Description</label> <label>Location</label> <label>Fragments</label> <label>Attribute</label> <label>Debug Spawn</label> <format>{{{debugspawn4}}}</format> </group> <group collapse="open" class="tab-fragment"> <header>Data Boxes</header> <image source="image6"></image> <label>Location</label> </group> </infobox>
A reliable power source is a critical step toward self-sufficiency. Consider keeping a photo-journal of your achievements to motivate you in times of despair. File:BioreactorVO.ogg
― PDA, Dialogue
The Bioreactor is constructed with the Habitat Builder and composts organic matter into Energy. It has a 4×4 inventory grid to place organic items into, and items placed inside it cannot be removed once placed. It can break down any organic matter into reliable energy for Seabases. The Bioreactor produces 1 unit of energy every 1.2 seconds (50 per minute), with a maximum capacity of 500 units per Bioreactor. It can only be placed in the centers of a Multipurpose Room or Large Room. It does not affect power in creative mode.
Bioreactors work well in biomes where organic matter is plentiful, such as Kelp Forests or Mushroom Forests, where Solar Panels may be less efficient. It is also easy to supply a Bioreactor with fuel if one keeps an Exterior Growbed, Interior Growbed or Alien Containment full of fish nearby. It is also useful for disposing of any excess or spoiled flora and fauna that the player has no more need of. Egg-hatched fish, in particular, provide the most energy.
Thanks to its low costs and easily renewable fuel, it is perfectly suited to power outposts with low-power devices like a Battery Charger or Power Cell Charger, especially if the area lacks the requirements for both Solar Panels and Thermal Plants. But even if better sources are available, it still provides easy additional energy for demanding seabases.
Recipe
(no target detected)
Energy Values


Data Bank Entry
 |
|---|
|
On planets where organic matter is plentiful but sunlight is not, a reliable bioreactor will frequently prove the most efficient power solution. - May be installed in any multipurpose habitat room 'The Bioreactor: Totally organic.' |
Gallery
<tabber> In-Game=

A Bioreactor inside a Seabase
Former Bioreactor Model
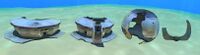
Developer screenshot of the Bioreactor Fragments, via Trello


|-| Models=
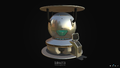
Model from Sketchfab

</tabber>
Trivia
- When the Bioreactor was first introduced, it was placed outside of the base, much like a Solar Panel.
- The Bioreactor used to only accept a combination of Creepvine Samples and Fungal Samples.
- Only one species of plantable Flora and one species of hatchable Fauna cannot be put in the Bioreactor; respectively, these are Spiked Horn Grass and the Cuddlefish.
- Even though silicone rubber is created from organic material, it cannot be placed in the bioreactor.
Lua error in package.lua at line 80: module 'Dev:Navbox' not found.