
Wrecks: Difference between revisions
Tags: Visual edit apiedit |
RichCrusher (talk | contribs) m (added some trivia.) |
||
| (373 intermediate revisions by more than 100 users not shown) | |||
| Line 1: | Line 1: | ||
{{Spoiler}} |
|||
{{Infobox Biome |
|||
{{SimilarName|the '''Wrecks'''|the [[Aurora]] or [[Destroyed Lifepods]]}} |
|||
|image = Wrecks (01).jpg|type = [[:Category:Surface|Surface]]|depthrange = 100 - 500 meters}} |
|||
{{Biome2 |
|||
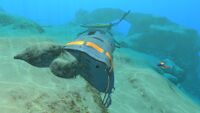
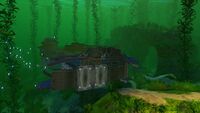
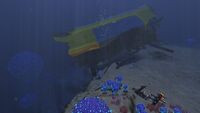
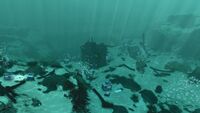
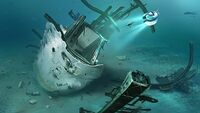
The '''Wrecks''' are explorable pieces of debris from the [[Aurora]], which can only be located after its explosion. '''Large Wrecks''' contain valuable technology in the form of [[Fragments]] while '''Small Wrecks''' contain only [[Supply Crate]]s. |
|||
|image1 = Wrecks Infobox.png|type = Surface|depth_range = 100 - 500 meters|Gotoid = goto wreck(1-21)}} |
|||
The '''Wrecks''' are explorable pieces of debris from the ''[[Aurora]]''.<ref>http://m.imgur.com/a/5QsZJ</ref> They vary widely in sizes and structure. Large Wrecks contain valuable technology in the form of [[Fragments (Subnautica)|Fragments]] and sometimes [[Data Boxes]] or [[Supply Crate]]s, while Small Wrecks contain only a limited amount of fragments. |
|||
'''Note:''' Certain fragments or data boxes won't spawn if one has already obtained the [[Blueprints (Subnautica)|Blueprints]] and didn't load the area/wreck/biome beforehand. This does not include miscellaneous or some decorative interior or exterior modules such as [[Plant Pots (Subnautica)|Plant Pots]] or [[Beds (Subnautica)|Beds]]. |
|||
==Large Wrecks== |
==Large Wrecks== |
||
There are |
There are twenty-three Large Wrecks spread throughout the ocean at the beginning of the game. Each of them is surrounded by their local [[Flora]] and [[Fauna]] and possesses their own unique challenges. Many of them include sections that are only accessible with the [[Laser Cutter]] or a [[Repair Tool]], or require unblocking a passage blocked with [[Cargo Crate]]s or other debris using a [[Propulsion Cannon]]. While each contains a unique set of fragments, there are common items found in many Wrecks, for example chairs and desks. |
||
==Large Wreck List== |
==Large Wreck List== |
||
<div align="center"><tabber> |
|||
{| style="width: 100%;" class="article-table sortable" border="0" cellpadding="1" cellspacing="1" |
|||
Blood Kelp Trench= |
|||
{| class="article-table sortable" style="width: 100%;" cellspacing="1" cellpadding="1" border="0" |
|||
|- |
|- |
||
! class="unsortable" style="width: 160px; text-align: center;" |Image |
! class="unsortable" style="width: 160px; text-align: center;" |Image |
||
! |
! class="unsortable" style="width: auto; text-align: center;" |Items |
||
! class="unsortable" style="width: auto; text-align: center;" |Unique Fragments |
|||
! data-sort-type="text" style="width: 10%; text-align: center;" |Coordinates |
! data-sort-type="text" style="width: 10%; text-align: center;" |Coordinates |
||
|- |
|- |
||
|[[File: |
|[[File:BloodKelpWreck-1.jpg|thumb]] |
||
| style="text-align:center; font-size:12px;" | |
|||
| style="text-align:left; font-size:12px;" | |
| style="text-align:left; font-size:12px;" | |
||
*[[Databank (Subnautica)#Join Alterra.27s Board of Directors|Abandoned PDA - Join Alterra's Board of Directors]] (-1210 -340 -394) |
|||
*[[Chair]] |
|||
*[[Bench (Subnautica)|Bench]] |
|||
*[[Desk]] |
|||
*[[Chair|Command Chair]] |
|||
*[[Data Downloads|Abandoned PDA]] |
|||
*[[Plant Pot|Composite Plant Pot]] |
|||
*[[Seaglide]] Fragments |
|||
*[[Cyclops Fire Suppression System|Data Box - Cyclops Fire Suppression System]] |
|||
| style="text-align:center; font-size:13px;" | -40 -14 -400 |
|||
*[[Cyclops Sonar Upgrade|Data Box - Cyclops Sonar Upgrade]] |
|||
*[[Desk (Subnautica)|Desk]] |
|||
*[[Floodlight (Subnautica)|Floodlight]] |
|||
*[[Moonpool|Moonpool Fragments]] |
|||
*[[Nuclear Reactor|Nuclear Reactor Fragments]] |
|||
*[[Plant Shelf (Subnautica)|Plant Shelf]] |
|||
*[[Prawn Suit Grappling Arm|Prawn Suit Grappling Arm Fragments]] |
|||
*[[Prawn Suit Torpedo Arm|Prawn Suit Torpedo Arm Fragments]] |
|||
*[[Prawn Suit Drill Arm|Prawn Suit Drill Arm Fragments]] |
|||
| style="text-align:center; font-size:13px;" | -1201 -324 -396 |
|||
(wreck8) |
|||
|} |
|||
|-| |
|||
Bulb Zone= |
|||
{| class="article-table sortable" style="width: 100%;" cellspacing="1" cellpadding="1" border="0" |
|||
|- |
|- |
||
! class="unsortable" style="width: 160px; text-align: center;" |Image |
|||
|[[File:SafeShallowsWreck-2.jpg|thumb|160px]] |
|||
! class="unsortable" style="width: auto; text-align: center;" |Items |
|||
! data-sort-type="text" style="width: 10%; text-align: center;" |Coordinates |
|||
|- |
|||
|[[File:20170604125129_1.jpg|thumb]] |
|||
| style="text-align:left; font-size:12px;" | |
| style="text-align:left; font-size:12px;" | |
||
*[[Databank (Subnautica)#The Charter|Abandoned PDA - The Charter]] (912 -202 610) |
|||
*[[Seaglide]] Fragments |
|||
*[[Plant Pot|Basic Plant Pot]] |
|||
*[[Chair]] |
|||
*[[Bench (Subnautica)|Bench]] |
|||
*[[Desk]] |
|||
*[[Plant Pot|Chic Plant Pot]] |
|||
| style="text-align:center; font-size:13px;" | 366 -6 -203 |
|||
*[[Chair|Command Chair]] |
|||
*[[Cyclops Sonar Upgrade|Data Box - Cyclops Sonar Upgrade]] |
|||
*[[Lightweight High Capacity Tank|Data Box - Lightweight High Capacity Tank]] |
|||
*[[Reinforced Dive Suit|Data Box - Reinforced Dive Suit]] |
|||
*[[Desk (Subnautica)|Desk]] |
|||
*[[Exterior Growbed]] |
|||
*[[Floodlight (Subnautica)|Floodlight]] |
|||
*[[Interior Growbed]] |
|||
*[[Light Stick|Light Stick Fragments]] |
|||
*[[Power Transmitter|Power Transmitter Fragments]] |
|||
*[[Modification Station|Modification Station Fragments]] |
|||
*[[Scanner Room|Scanner Room Fragments]] |
|||
*[[Stasis Rifle|Stasis Rifle Fragments]] |
|||
*[[Chair|Swivel Chair]] |
|||
*[[Supply Crate]] |
|||
| style="text-align:center; font-size:13px;" | 929 -198 593 |
|||
(wreck 24) |
|||
|- |
|- |
||
|[[File: |
|[[File:KooshZoneWreck2.jpg|thumb]] |
||
| style="text-align:center; font-size:12px;" |[[Kelp Forest]] |
|||
| style="text-align:left; font-size:12px;" | |
| style="text-align:left; font-size:12px;" | |
||
*[[Bar Table (Subnautica)|Bar Table]] |
|||
*[[Seaglide]] Fragments |
|||
*[[Plant Pot|Basic Plant Pot]] |
|||
*[[Bench]] |
|||
*[[Beds (Subnautica)|Basic Double Bed]] |
|||
*[[Chair]] |
|||
*[[Bench (Subnautica)|Bench]] |
|||
*[[Desk]] |
|||
*[[Carry-all]] |
|||
| style="text-align:center; font-size:13px;" | 320 -40 -336 |
|||
*[[Plant Pot|Chic Plant Pot]] |
|||
*[[Alien Containment (Subnautica)|Data Box - Alien Containment]] |
|||
*[[Water Filtration Suit|Data Box - Water Filtration Suit]] |
|||
*[[Desk (Subnautica)|Desk]] |
|||
*[[Light Stick|Light Stick Fragments]] |
|||
*[[Modification Station|Modification Station Fragments]] |
|||
*[[Chair|Office Chair]] |
|||
*[[Power Transmitter|Power Transmitter Fragments]] |
|||
*[[Scanner Room|Scanner Room Fragments]] |
|||
*[[Single Wall Shelf]] |
|||
*[[Stasis Rifle|Stasis Rifle Fragments]] |
|||
*[[Chair|Swivel Chair]] |
|||
*[[Supply Crate]] |
|||
*[[Vending Machine]] |
|||
*[[Wall Shelves (Subnautica)|Wall Shelves]] |
|||
*[[Water Filtration Machine]] |
|||
| style="text-align:center; font-size:13px;" | 1309 -215 570 |
|||
|} |
|||
|-| |
|||
Dunes= |
|||
{| class="article-table sortable" style="width: 100%;" cellspacing="1" cellpadding="1" border="0" |
|||
|- |
|- |
||
! class="unsortable" style="width: 160px; text-align: center;" |Image |
|||
|[[File:KelpForestWreck-2.jpg|thumb|160px]] |
|||
! class="unsortable" style="width: auto; text-align: center;" |Items |
|||
! data-sort-type="text" style="width: 10%; text-align: center;" |Coordinates |
|||
|- |
|||
|[[File:DunesWreck-1.jpg|thumb]] |
|||
| style="text-align:left; font-size:12px;" | |
| style="text-align:left; font-size:12px;" | |
||
*[[Databank (Subnautica)#Profitability Projections|Abandoned PDA - Profitability Projections]] (-1397 -330 729) |
|||
*[[Mobile Vehicle Bay]] Fragments |
|||
*[[Bench (Subnautica)|Bench]] |
|||
*[[Seaglide]] Fragments |
|||
*[[Chair]] |
*[[Chair|Swivel Chair]] |
||
*[[ |
*[[Chair|Command Chair]] |
||
*[[Cyclops Depth Module MK1|Data Box - Cyclops Depth Module MK1]] |
|||
*[[Floodlight]] |
|||
*[[Cyclops Shield Generator|Data Box - Cyclops Shield Generator]] |
|||
| style="text-align:center; font-size:13px;" | -413 -43 310 |
|||
*[[Ultra High Capacity Tank|Data Box - Ultra High Capacity Tank]] |
|||
*[[Desk (Subnautica)|Desk]] |
|||
*[[Floodlight (Subnautica)|Floodlight]] |
|||
*[[Moonpool|Moonpool Fragments]] |
|||
*[[Power Cell Charger|Power Cell Charger Fragments]] |
|||
*[[Prawn Suit Drill Arm|Prawn Suit Drill Arm Fragments]] |
|||
*[[Prawn Suit Grappling Arm|Prawn Suit Grappling Arm Fragments]] |
|||
*[[Thermal Plant|Thermal Plant Fragments]] |
|||
*[[Supply Crate]] |
|||
| style="text-align:center; font-size:13px;" | -1448 -332 723 |
|||
(wreck6) |
|||
|- |
|- |
||
|[[File: |
|[[File:DunesWreck2.jpg|thumb]] |
||
| style="text-align:center; font-size:12px;" |[[Kelp Forest]] |
|||
| style="text-align:left; font-size:12px;" | |
| style="text-align:left; font-size:12px;" | |
||
*[[Bar Table (Subnautica)|Bar Table]] |
|||
*[[Seaglide]] Fragments |
|||
*[[Water Filtration Suit|Data Box - Stillsuit]] |
|||
*[[Chair]] |
|||
*[[Moonpool|Moonpool Fragments]] |
|||
*[[Desk]] |
|||
*[[Power Cell Charger|Power Cell Charger Fragments]] |
|||
| style="text-align:center; font-size:13px;" | -320 -57 252 |
|||
*[[Prawn Suit Drill Arm|Prawn Suit Drill Arm Fragments]] |
|||
*[[Prawn Suit Grappling Arm|Prawn Suit Grappling Arm Fragments]] |
|||
*[[Thermal Plant|Thermal Plant Fragments]] |
|||
*[[Supply Crate]] |
|||
*[[Wall Shelves (Subnautica)|Wall Shelves]] |
|||
*[[Water Filtration Machine]] |
|||
| style="text-align:center; font-size:13px;" | -1632 -334 83 |
|||
|- |
|- |
||
|[[File: |
|[[File:DunesWreck3.jpg|thumb]] |
||
| style="text-align:center; font-size:12px;" |[[Kelp Forest]] |
|||
| style="text-align:left; font-size:12px;" | |
| style="text-align:left; font-size:12px;" | |
||
*[[Coffee Vending Machine (Subnautica)|Coffee Vending Machine]] |
|||
*[[Mobile Vehicle Bay]] Fragments |
|||
*[[Lab Container|Cylindrical Sample Flask]] |
|||
*[[Seaglide]] Fragments |
|||
*[[Plant Pots|Basic Plant Pot]] |
|||
*[[Bench]] |
|||
*[[Bench (Subnautica)|Bench]] |
|||
*[[Chair]] |
|||
*[[ |
*[[Caps|Blue Cap]] |
||
*[[Plant Pot|Chic Plant Pot]] |
|||
*[[Floodlight]] |
|||
*[[Counter (Subnautica)|Counter]] |
|||
*[[Data Downloads|Abandoned PDA]] |
|||
*[[Reinforced Dive Suit|Data Box - Reinforced Dive Suit]] |
|||
| style="text-align:center; font-size:13px;" | 65 -25 385 |
|||
*[[Vehicle Upgrade Console|Data Box - Vehicle Upgrade Console]] |
|||
*[[Caps|Gray Cap]] |
|||
*[[Lab Equipment|Microscope]] |
|||
*[[Moonpool|Moonpool Fragments]] |
|||
*[[Nuclear Waste Disposal]] |
|||
*[[Power Cell Charger|Power Cell Charger Fragments]] |
|||
*[[Prawn Suit Drill Arm|Prawn Suit Drill Arm Fragments]] |
|||
*[[Prawn Suit Grappling Arm|Prawn Suit Grappling Arm Fragments]] |
|||
*[[Lab Equipment|Sample Analyzer]] |
|||
*[[Single Wall Shelf]] |
|||
*[[Chair|Swivel Chair]] |
|||
*[[Thermal Plant|Thermal Plant Fragments]] |
|||
*[[Supply Crate]] |
|||
*[[Vending Machine]] |
|||
*[[Wall Shelves (Subnautica)|Wall Shelves]] |
|||
| style="text-align:center; font-size:13px;" | -1210 -217 7 |
|||
|} |
|||
|-| |
|||
Grand Reef= |
|||
{| class="article-table sortable" style="width: 100%;" cellspacing="1" cellpadding="1" border="0" |
|||
|- |
|- |
||
! class="unsortable" style="width: 160px; text-align: center;" |Image |
|||
|[[File:GrassyPlateausWreck-1.jpg|thumb|160px]] |
|||
! class="unsortable" style="width: auto; text-align: center;" |Items |
|||
! data-sort-type="text" style="width: 10%; text-align: center;" |Coordinates |
|||
|- |
|||
|[[File:Grand Reef Wreck 1.png|thumb]] |
|||
| style="text-align:left; font-size:12px;" | |
| style="text-align:left; font-size:12px;" | |
||
*[[Databank (Subnautica)#Corporate Profile: Torgal Corp.|Abandoned PDA - Corporate Profile: Torgal Corp.]] (-273 -254 -788) |
|||
*[[Battery Charger]] Fragments |
|||
*[[Bench (Subnautica)|Bench]] |
|||
*[[Bioreactor]] Fragments |
|||
*[[Chair|Command Chair]] |
|||
*[[Seamoth]] Fragments |
|||
*[[Cyclops Depth Module MK1|Data Box - Cyclops Depth Module MK1]] |
|||
*[[Seaglide]] Fragments |
|||
*[[Cyclops Docking Bay Repair Module|Data Box - Cyclops Docking Bay Repair Module]] |
|||
*[[Bar Table]] |
|||
*[[Repulsion Cannon|Data Box - Repulsion Cannon]] |
|||
*[[Chair]] |
|||
*[[Desk]] |
*[[Desk (Subnautica)|Desk]] |
||
*[[Moonpool|Moonpool Fragments]] |
|||
*[[Floodlight]] |
|||
*[[Chair|Office Chair]] |
|||
*[[Data Downloads|Abandoned PDA]] |
|||
*[[Prawn Suit Drill Arm|Prawn Suit Drill Arm Fragments]] |
|||
| style="text-align:center; font-size:13px;" | -25 -88 -615 |
|||
*[[Prawn Suit Grappling Arm|Prawn Suit Grappling Arm Fragments]] |
|||
*[[Scanner Room|Scanner Room Fragments]] |
|||
*[[Thermal Plant|Thermal Plant Fragments]] |
|||
| style="text-align:center; font-size:13px;" | -290 -222 -773 |
|||
(wreck10) |
|||
|- |
|- |
||
|[[File: |
|[[File:Grand Reef Wreck 2.png|thumb]] |
||
| style="text-align:center; font-size:12px;" |[[Grassy Plateaus]] |
|||
| style="text-align:left; font-size:12px;" | |
| style="text-align:left; font-size:12px;" | |
||
*[[Databank (Subnautica)#Surveillance Log.2C Leisure Deck B|Abandoned PDA - Surveillance Log, Leisure Deck B]] (-888 -446 -1422) |
|||
*[[Battery Charger]] Fragments |
|||
*[[Caps|Blue Cap]] |
|||
*[[Bioreactor]] Fragments |
|||
*[[Carry-all]] |
|||
*[[Prawn Suit Drill Arm]] Fragments |
|||
*[[Chair|Command Chair]] |
|||
*[[Light Stick]] Fragments |
|||
*[[Plant Pots (Subnautica)|Composite Plant Pot]] |
|||
*[[Mobile Vehicle Bay]] Fragments |
|||
*[[Cyclops Decoy Tube Upgrade|Data Box - Cyclops Decoy Tube Upgrade]] |
|||
*[[Seamoth]] Fragments |
|||
*[[Cyclops Sonar Upgrade|Data Box - Cyclops Sonar Upgrade]] |
|||
*[[Bench]] |
|||
*[[Cyclops Thermal Reactor Module|Data Box - Cyclops Thermal Reactor Module]] |
|||
*[[Floodlight]] |
|||
*[[Desk (Subnautica)|Desk]] |
|||
*[[Picture Frame]] |
|||
*[[Moonpool|Moonpool Fragments]] |
|||
*[[Plant Pot]] |
|||
*[[ |
*[[Chair|Office Chair]] |
||
*[[Plant Shelf (Subnautica)|Plant Shelf]] |
|||
*[[Poster]] |
|||
*[[Prawn Suit Drill Arm|Prawn Suit Drill Arm Fragments]] |
|||
*[[Supply Crate]]s |
|||
*[[Prawn Suit Grappling Arm|Prawn Suit Grappling Arm Fragments]] |
|||
| style="text-align:center; font-size:13px;" | 320 -66 431 |
|||
*[[Beds (Subnautica)|Quilted Double Bed]] |
|||
*[[Scanner Room|Scanner Room Fragments]] |
|||
*[[Chair|Swivel Chair]] |
|||
*[[Thermal Plant|Thermal Plant Fragments]] |
|||
*[[Trash Can (Subnautica)|Trash Can]] |
|||
*[[Supply Crate]] |
|||
*[[Wall Shelves (Subnautica)|Wall Shelves]] |
|||
| style="text-align:center; font-size:13px;" | -865 -430 -1390 |
|||
(wreck11) |
|||
|} |
|||
|-| |
|||
Grassy Plateaus= |
|||
{| class="article-table sortable" style="width: 100%;" cellspacing="1" cellpadding="1" border="0" |
|||
|- |
|- |
||
! class="unsortable" style="width: 160px; text-align: center;" |Image |
|||
|[[File:GrassyPlateausWreck-3.jpg|thumb|160px]] |
|||
! class="unsortable" style="width: auto; text-align: center;" |Items |
|||
! data-sort-type="text" style="width: 10%; text-align: center;" |Coordinates |
|||
|- |
|||
|[[File:Grassy_Plateaus_Wreck_no1.jpg|thumb]] |
|||
| style="text-align:left; font-size:12px;" | |
| style="text-align:left; font-size:12px;" | |
||
*[[Databank (Subnautica)#Trans-Gov Profile: Mongolian Independent States|Abandoned PDA - Trans-Gov Profile: Mongolian Independent States]] (-28 -106 -607) |
|||
*[[Seaglide]] Fragments |
|||
*[[Bar Table (Subnautica)|Bar Table]] |
|||
*[[Seamoth]] Fragments |
|||
*[[ |
*[[Battery Charger (Subnautica)|Battery Charger Fragments]] |
||
*[[ |
*[[Bioreactor (Subnautica)|Bioreactor Fragments]] |
||
*[[Chair]] |
*[[Chair|Command Chair]] |
||
*[[Ultra Glide Fins|Data Box - Ultra Glide Fins]] |
|||
*[[Desk]] |
|||
*[[Desk (Subnautica)|Desk]] |
|||
| style="text-align:center; font-size:13px;" | -390 -120 648 |
|||
*[[Floodlight (Subnautica)|Floodlight]] |
|||
*[[Laser Cutter|Laser Cutter Fragments]] |
|||
*[[Mobile Vehicle Bay|Mobile Vehicle Bay Fragments]] |
|||
*[[Modification Station|Modification Station Fragments]] |
|||
*[[Propulsion Cannon|Propulsion Cannon Fragments]] |
|||
*[[Scanner Room|Scanner Room Fragments]] |
|||
*[[Seamoth|Seamoth Fragments]] |
|||
*[[Chair|Swivel Chair]] |
|||
*[[Supply Crate]] |
|||
| style="text-align:center; font-size:13px;" | -15 -96 -624 |
|||
(wreck13) |
|||
|- |
|- |
||
|[[File:GrassyPlateausWreck- |
|[[File:GrassyPlateausWreck-3.jpg|thumb]] |
||
| style="text-align:center; font-size:12px;" |[[Grassy Plateaus]] |
|||
| style="text-align:left; font-size:12px;" | |
| style="text-align:left; font-size:12px;" | |
||
*[[Battery Charger |
*[[Battery Charger (Subnautica)|Battery Charger Fragments]] |
||
*[[Bioreactor |
*[[Bioreactor (Subnautica)|Bioreactor Fragments]] |
||
*[[Chair|Swivel Chair]] |
|||
*[[Prawn Suit Drill Arm]] Fragments |
|||
*[[Desk (Subnautica)|Desk]] |
|||
*[[Prawn Suit|Prawn Suit Claw Arm]] Fragments |
|||
*[[ |
*[[Laser Cutter|Laser Cutter Fragments]] |
||
*[[Mobile Vehicle Bay |
*[[Mobile Vehicle Bay|Mobile Vehicle Bay Fragments]] |
||
*[[Modification Station|Modification Station Fragments]] |
|||
*[[Bench]] |
|||
*[[Propulsion Cannon|Propulsion Cannon Fragments]] |
|||
*[[Chair]] |
|||
*[[Seamoth|Seamoth Fragments]] |
|||
*[[Chair 3]] |
|||
*[[ |
*[[Supply Crate]] |
||
| style="text-align:center; font-size:13px;" | -390 -120 648 |
|||
*[[Floodlight]] |
|||
(wreck12) |
|||
|- |
|||
|[[File:GrassyPlateausWreck-2.jpg|thumb]] |
|||
| style="text-align:left; font-size:12px;" | |
|||
*[[Plant Pot|Basic Plant Pot]] |
|||
*[[Battery Charger (Subnautica)|Battery Charger Fragments]] |
|||
*[[Bench (Subnautica)|Bench]] |
|||
*[[Bioreactor (Subnautica)|Bioreactor Fragments]] |
|||
*[[Plant Pot|Chic Plant Pot]] |
|||
*[[Plant Pot|Composite Plant Pot]] |
|||
*[[Lightweight High Capacity Tank|Data Box - Lightweight High Capacity Tank]] |
|||
*[[Vehicle Upgrade Console|Data Box - Vehicle Upgrade Console]] |
|||
*[[Floodlight (Subnautica)|Floodlight]] |
|||
*[[Laser Cutter|Laser Cutter Fragments]] |
|||
*[[Light Stick|Light Stick Fragments]] |
|||
*[[Mobile Vehicle Bay|Mobile Vehicle Bay Fragments]] |
|||
*[[Modification Station|Modification Station Fragments]] |
|||
*[[Picture Frame]] |
*[[Picture Frame]] |
||
*[[Plant Shelf (Subnautica)|Plant Shelf]] |
|||
*[[Poster]] |
|||
*[[Propulsion Cannon|Propulsion Cannon Fragments]] |
|||
*[[Data Downloads|Abandoned PDA]] x2 |
|||
*[[Posters|Poster - Natural Selection II]] |
|||
| style="text-align:center; font-size:13px;" | -630 -50 -6 |
|||
*[[Scanner Room|Scanner Room Fragments]] |
|||
*[[Seamoth|Seamoth Fragments]] |
|||
*[[Supply Crate]] |
|||
| style="text-align:center; font-size:13px;" | 286 -72 444 |
|||
(wreck1) |
|||
|- |
|- |
||
|[[File:GrassyPlateausWreck- |
|[[File:GrassyPlateausWreck-4.jpg|thumb]] |
||
| style="text-align:center; font-size:12px;" |[[Grassy Plateaus]] |
|||
| style="text-align:left; font-size:12px;" | |
| style="text-align:left; font-size:12px;" | |
||
*[[Databank (Subnautica)#Alterra Citizen Testimonials|Abandoned PDA - Alterra Citizen Testimonials]] (-642 -111 -19) |
|||
*[[Seaglide]] Fragments |
|||
*[[Databank (Subnautica)#Degasi Crew Manifest: Marguerit Maida|Abandoned PDA - Degasi Crew Manifest: Marguerit Maida]] (-632 -74 -9) |
|||
*[[Seamoth]] Fragments |
|||
*[[Battery Charger (Subnautica)|Battery Charger Fragments]] |
|||
*[[Chair]] |
|||
*[[Bench (Subnautica)|Bench]] |
|||
*[[Desk]] |
|||
*[[Bioreactor (Subnautica)|Bioreactor Fragments]] |
|||
| style="text-align:center; font-size:13px;" | -432 -90 -268 |
|||
*[[Chair|Swivel Chair]] |
|||
*[[Chair|Command Chair]] |
|||
*[[Databank (Subnautica)#Data Downloads without headline|Data Terminal - Data Download without headline #2]] (-664 -96 -9) |
|||
*[[Desk (Subnautica)|Desk]] |
|||
*[[Floodlight (Subnautica)|Floodlight]] |
|||
*[[Laser Cutter|Laser Cutter Fragments]] |
|||
*[[Mobile Vehicle Bay|Mobile Vehicle Bay Fragments]] |
|||
*[[Picture Frame]] |
|||
*[[Posters|Poster - Natural Selection II]] |
|||
*[[Prawn Suit|Prawn Suit Claw Arm Fragments]] |
|||
*[[Propulsion Cannon|Propulsion Cannon Fragments]] |
|||
*[[Scanner Room|Scanner Room Fragments]] |
|||
*[[Seamoth|Seamoth Fragments]] |
|||
*[[Supply Crate]] |
|||
| style="text-align:center; font-size:13px;" | -635 -50 -2 |
|||
(wreck2) |
|||
|- |
|- |
||
|[[File: |
|[[File:GrassyPlateausWreck-5.jpg|thumb]] |
||
| style="text-align:center; font-size:12px;" |[[Koosh Zone]] |
|||
| style="text-align:left; font-size:12px;" | |
| style="text-align:left; font-size:12px;" | |
||
*[[ |
*[[Battery Charger (Subnautica)|Battery Charger Fragments]] |
||
*[[ |
*[[Beacon (Subnautica)|Beacon Fragments]] |
||
*[[ |
*[[Bioreactor (Subnautica)|Bioreactor Fragments]] |
||
*[[ |
*[[Chair|Swivel Chair]] |
||
*[[Chair|Command Chair]] |
|||
*[[Indoor Growbed|Interior Growbed]] |
|||
*[[Lightweight High Capacity Tank|Data Box - Lightweight High Capacity Tank]] |
|||
*[[Floodlight]] |
|||
*[[ |
*[[Desk (Subnautica)|Desk]] |
||
*[[Laser Cutter|Laser Cutter Fragments]] |
|||
*[[Bench]] |
|||
*[[Mobile Vehicle Bay|Mobile Vehicle Bay Fragments]] |
|||
| style="text-align:center; font-size:13px;" | 940 -198 593 |
|||
*[[Propulsion Cannon|Propulsion Cannon Fragments]] |
|||
*[[Scanner Room|Scanner Room Fragments]] |
|||
*[[Supply Crate]] |
|||
| style="text-align:center; font-size:13px;" | -432 -90 -268 |
|||
(wreck14) |
|||
|} |
|||
|-| |
|||
Kelp Forest= |
|||
{| class="article-table sortable" style="width: 100%;" cellspacing="1" cellpadding="1" border="0" |
|||
|- |
|- |
||
! class="unsortable" style="width: 160px; text-align: center;" |Image |
|||
|[[File:UnderwaterIslandWreck-1.jpg|thumb|center|160px]] |
|||
! class="unsortable" style="width: auto; text-align: center;" |Items |
|||
! data-sort-type="text" style="width: 10%; text-align: center;" |Coordinates |
|||
|- |
|||
|[[File:KelpForestWreck-3.jpg|thumb]] |
|||
| style="text-align:left; font-size:12px;" | |
| style="text-align:left; font-size:12px;" | |
||
*[[Beacon (Subnautica)|Beacon Fragments]] |
|||
*[[Cyclops|Cyclops Engine]] Fragments |
|||
*[[ |
*[[Bioreactor (Subnautica)|Bioreactor Fragments]] |
||
*[[Compass (Subnautica)|Data Box - Compass]] |
|||
*[[Prawn Suit]] Fragments |
|||
*[[Desk (Subnautica)|Desk]] |
|||
*[[Prawn Suit Grappling Arm]] Fragments |
|||
*[[Grav Trap|Grav Trap Fragments]] |
|||
*[[Prawn Suit|Prawn Suit Claw Arm]] Fragments |
|||
*[[ |
*[[Mobile Vehicle Bay|Mobile Vehicle Bay Fragments]] |
||
*[[ |
*[[Seaglide|Seaglide Fragments]] |
||
*[[Stasis Rifle|Stasis Rifle Fragments]] |
|||
*[[Chair|Chair 3]] |
|||
*[[ |
*[[Chair|Swivel Chair]] |
||
| style="text-align:center; font-size:13px;" | -320 -57 252 |
|||
*[[Desk]] |
|||
*[[Floodlight]] |
|||
(wreck18) |
|||
*[[Picture Frame]] |
|||
|- |
|||
*[[Plant Pot 2]] |
|||
|[[File:KelpForestWreck-4.jpg|thumb]] |
|||
*[[Plant Pot 3]] |
|||
| style="text-align: |
| style="text-align:left; font-size:12px;" | |
||
*[[Databank (Subnautica)#Degasi Crew Manifest: Bart Torgal|Abandoned PDA - Degasi Crew Manifest: Bart Torgal]] (62 -38 383) |
|||
*[[Bench (Subnautica)|Bench]] |
|||
*[[Desk (Subnautica)|Desk]] |
|||
*[[Floodlight (Subnautica)|Floodlight]] |
|||
*[[Grav Trap|Grav Trap Fragments]] |
|||
*[[Mobile Vehicle Bay|Mobile Vehicle Bay Fragments]] |
|||
*[[Stasis Rifle|Stasis Rifle Fragments]] |
|||
*[[Chair|Swivel Chair]] |
|||
| style="text-align:center; font-size:13px;" | 65 -25 385 |
|||
(wreck17) |
|||
|} |
|||
|-| |
|||
Mountains= |
|||
{| class="article-table sortable" style="width: 100%;" cellspacing="1" cellpadding="1" border="0" |
|||
|- |
|||
! class="unsortable" style="width: 160px; text-align: center;" |Image |
|||
! class="unsortable" style="width: auto; text-align: center;" |Items |
|||
! data-sort-type="text" style="width: 10%; text-align: center;" |Coordinates |
|||
|- |
|- |
||
|[[File:MountainsWreck-1.jpg|thumb |
|[[File:MountainsWreck-1.jpg|thumb]] |
||
| style="text-align:center; font-size:12px;" |[[Mountains]] |
|||
| style="text-align:left; font-size:12px;" | |
| style="text-align:left; font-size:12px;" | |
||
*[[Beds (Subnautica)|Basic Double Bed]] |
|||
*[[Prawn Suit Torpedo Arm]] Fragments |
|||
*[[Plant Pot|Basic Plant Pot]] |
|||
*[[Prawn Suit|Prawn Suit Claw Arm]] Fragments |
|||
*[[Bench (Subnautica)|Bench]] |
|||
*[[Prawn Suit]] Fragments |
|||
*[[Chairs (Subnautica)|Command Chair]] |
|||
*[[Cyclops|Cyclops Engine]] Fragments |
|||
*[[Plant Pot|Composite Plant Pot]] |
|||
*[[Modification Station]] Fragments |
|||
*[[Plant Pot|Chic Plant Pot]] |
|||
*[[Moonpool]] Fragments |
|||
*[[Cyclops|Cyclops Engine Fragments]] |
|||
*[[Vehicle Modification Station]] Fragments |
|||
*[[Alien Containment (Subnautica)|Data Box - Alien Containment]] |
|||
*[[Stillsuit]] Fragments |
|||
*[[Cyclops Thermal Reactor Module|Data Box - Cyclops Thermal Reactor Module]] |
|||
*[[Bench]] |
|||
*[[Water Filtration Suit|Data Box - Stillsuit]] |
|||
*[[Chair]] |
|||
*[[Databank (Subnautica)#Data Downloads without headline|Data Terminal - Data Download without headline #3]] (705 -365 1200) |
|||
*[[Chair 2]] |
|||
*[[ |
*[[Desk (Subnautica)|Desk]] |
||
*[[Floodlight (Subnautica)|Floodlight]] |
|||
*[[Desk]] |
|||
*[[Light Stick|Light Stick Fragments]] |
|||
*[[Floodlight]] |
|||
*[[Modification Station|Modification Station Fragments]] |
|||
*[[Moonpool|Moonpool Fragments]] |
|||
*[[Nuclear Reactor|Nuclear Reactor Fragments]] |
|||
*[[Chairs (Subnautica)|Office Chair]] |
|||
*[[Picture Frame]] |
*[[Picture Frame]] |
||
*[[Plant |
*[[Plant Shelf (Subnautica)|Plant Shelf]] |
||
*[[Prawn Suit|Prawn Suit Claw Arm Fragments]] |
|||
*[[Plant Pot 2]] |
|||
*[[Prawn Suit|Prawn Suit Fragments]] |
|||
*[[Plant Pot 3]] |
|||
*[[Prawn Suit Grappling Arm|Prawn Suit Grappling Arm Fragments]] |
|||
*[[Bed 1]] |
|||
*[[Prawn Suit Propulsion Cannon|Prawn Suit Propulsion Cannon Fragments]] |
|||
*[[Bed 2]] |
|||
*[[Prawn Suit Torpedo Arm|Prawn Suit Torpedo Arm Fragments]] |
|||
*[[Beds (Subnautica)|Quilted Double Bed]] |
|||
*[[Single Wall Shelf]] |
*[[Single Wall Shelf]] |
||
*[[Chairs (Subnautica)|Swivel Chair]] |
|||
*[[Wall Shelves]] |
|||
*[[Supply Crate]] |
|||
| style="text-align:center; font-size:13px;" | 701 -346 1224 |
|||
*[[Wall Shelves (Subnautica)|Wall Shelves]] |
|||
| style="text-align:center; font-size:13px;" | 701 -346 1224 |
|||
(wreck5) |
|||
|- |
|- |
||
|[[File: |
|[[File:2017-04-08 00001.jpg|thumb]] |
||
| style="text-align:center; font-size:12px;" |[[Mushroom Forest]] |
|||
| style="text-align:left; font-size:12px;" | |
| style="text-align:left; font-size:12px;" | |
||
*[[Chair|Command Chair]] |
|||
* [[Cyclops|Cyclops Hull]] Fragments |
|||
*[[Cyclops|Cyclops Engine Fragments]] |
|||
* [[Power Cell Charger]] Fragments |
|||
*[[Cyclops Docking Bay Repair Module|Data Box - Cyclops Docking Bay Repair Module]] |
|||
* [[Power Transmitter]] Fragments |
|||
*[[Cyclops Decoy Tube Upgrade|Data Box - Cyclops Decoy Tube Upgrade]] |
|||
* [[Propulsion Cannon]] Fragments |
|||
*[[Desk (Subnautica)|Desk]] |
|||
* [[Multipurpose Room]] Fragments |
|||
*[[Floodlight (Subnautica)|Floodlight]] |
|||
* [[Bench]] |
|||
*[[Moonpool|Moonpool Fragments]] |
|||
* [[Chair 2]] |
|||
*[[Nuclear Reactor|Nuclear Reactor Fragments]] |
|||
* [[Chair 3]] |
|||
*[[Prawn Suit Grappling Arm|Prawn Suit Grappling Arm Fragments]] |
|||
* [[Desk]] |
|||
*[[Prawn Suit Propulsion Cannon|Prawn Suit Propulsion Cannon Fragments]] |
|||
* [[Floodlight]] |
|||
*[[Prawn Suit Torpedo Arm|Prawn Suit Torpedo Arm Fragments]] |
|||
* [[Picture Frame]] |
|||
| style="text-align:center; font-size:13px;" | 1057 -254 1359 |
|||
* [[Plant Pot 2]] |
|||
* [[Plant Shelf]] |
|||
(wreck19) |
|||
* [[Data Downloads|Abandoned PDA]] x2 |
|||
|} |
|||
| style="text-align:center; font-size:13px;" | -630 -125 752 |
|||
|-| |
|||
Northwestern Mushroom Forest= |
|||
{| class="article-table sortable" style="width: 100%;" cellspacing="1" cellpadding="1" border="0" |
|||
|- |
|- |
||
! class="unsortable" style="width: 160px; text-align: center;" |Image |
|||
|[[File:DunesWreck-1.jpg|thumb|center|160px]] |
|||
! class="unsortable" style="width: auto; text-align: center;" |Items |
|||
! data-sort-type="text" style="width: 10%; text-align: center;" |Coordinates |
|||
*[[Vehicle Modification Station]] Fragments |
|||
*[[Stillsuit]] Fragments |
|||
*[[Thermal Plant]] Fragments |
|||
*[[Bulkhead]] Fragments |
|||
*[[Bench]] |
|||
*[[Chair]] |
|||
*[[Desk]] |
|||
*[[Floodlight]] |
|||
| style="text-align:center; font-size:13px;" | -1448 -332 732 |
|||
|- |
|- |
||
|[[File: |
|[[File:MushroomForestWreck-1.jpg|thumb]] |
||
| style="text-align:center; font-size:12px;" |[[Sea Treader's Path]] |
|||
| style="text-align:left; font-size:12px;" | |
| style="text-align:left; font-size:12px;" | |
||
*[[Databank (Subnautica)#Aurora Scanner Room Voice Log 2|Abandoned PDA - Aurora Scanner Room Voice Log]] (-662 -113 778) |
|||
*[[Alien Containment]] Fragments |
|||
<!--*Aurora Scanner Room Voice Log (Encrypted Public Version) (-652 -122 782)--><!--This thing's a crate now...--> |
|||
*[[Cyclops|Cyclops Hull]] Fragments |
|||
*[[Bench (Subnautica)|Bench]] |
|||
*[[Cyclops|Cyclops Bridge]] Fragments |
|||
*[[Chair|Command Chair]] |
|||
*[[Prawn Suit Propulsion Cannon]] Fragments |
|||
*[[Plant Pot|Composite Plant Pot]] |
|||
*[[Prawn Suit]] Fragments |
|||
*[[ |
*[[Cyclops|Cyclops Bridge Fragments]] |
||
*[[ |
*[[Cyclops|Cyclops Hull Fragments]] |
||
*[[Cyclops Thermal Reactor Module|Data Box - Cyclops Thermal Reactor Module]] |
|||
*[[Bench]] |
|||
*[[Vehicle Upgrade Console|Data Box - Vehicle Upgrade Console]] |
|||
*[[Chair]] |
|||
*[[Desk]] |
*[[Desk (Subnautica)|Desk]] |
||
*[[Floodlight]] |
*[[Floodlight (Subnautica)|Floodlight]] |
||
*[[Light Stick|Light Stick Fragments]] |
|||
*[[Modification Station|Modification Station Fragments]] |
|||
*[[Chair|Office Chair]] |
|||
*[[Picture Frame]] |
*[[Picture Frame]] |
||
*[[Plant |
*[[Plant Shelf (Subnautica)|Plant Shelf]] |
||
*[[Power Cell Charger|Power Cell Charger Fragments]] |
|||
*[[Plant Shelf]] |
|||
*[[Power Transmitter|Power Transmitter Fragments]] |
|||
| style="text-align:center; font-size:13px;" | -1083 -190 -735 |
|||
| style="text-align:center; font-size:13px;" | -645 -120 773 |
|||
(wreck9) |
|||
|} |
|||
|-| |
|||
Safe Shallows= |
|||
{| class="article-table sortable" style="width: 100%;" cellspacing="1" cellpadding="1" border="0" |
|||
|- |
|- |
||
! class="unsortable" style="width: 160px; text-align: center;" |Image |
|||
|[[File:BloodKelpWreck-1.jpg|thumb|center|160px]] |
|||
! class="unsortable" style="width: auto; text-align: center;" |Items |
|||
! data-sort-type="text" style="width: 10%; text-align: center;" |Coordinates |
|||
|- |
|||
|[[File:SafeShallowsWreck-1.jpg|thumb]] |
|||
| style="text-align:left; font-size:12px;" | |
| style="text-align:left; font-size:12px;" | |
||
*[[Databank (Subnautica)#Degasi Crew Manifest: Paul Torgal|Abandoned PDA - Degasi Crew Manifest: Paul Torgal]] (-44 -29 -404) |
|||
*[[Alien Containment]] Fragments |
|||
*[[Beacon (Subnautica)|Beacon Fragments]] |
|||
*[[Cyclops Pressure Compensator]] Fragments |
|||
*[[Desk (Subnautica)|Desk]] |
|||
*[[Modification Station]] Fragments |
|||
*[[ |
*[[Grav Trap|Grav Trap Fragments]] |
||
*[[ |
*[[Mobile Vehicle Bay|Mobile Vehicle Bay Fragments]] |
||
*[[Seaglide|Seaglide Fragments]] |
|||
*[[Floodlight]] |
|||
*[[Stasis Rifle|Stasis Rifle Fragments]] |
|||
| style="text-align:center; font-size:13px;" | -1208 -332 -390 |
|||
*[[Chair|Swivel Chair]] |
|||
| style="text-align:center; font-size:13px;" | -40 -14 -400 |
|||
(wreck15) |
|||
|- |
|- |
||
|[[File: |
|[[File:SafeShallowsWreck-2.jpg|thumb]] |
||
| style="text-align:center; font-size:12px;" |[[Grand Reef]] |
|||
| style="text-align:left; font-size:12px;" | |
| style="text-align:left; font-size:12px;" | |
||
*[[Beacon (Subnautica)|Beacon Fragments]] |
|||
* [[Cyclops Pressure Compensator]] Fragments |
|||
*[[Chair|Command Chair]] |
|||
* [[Moonpool]] Fragments |
|||
*[[Desk (Subnautica)|Desk]] |
|||
* [[Scanner Room]] Fragments |
|||
*[[Grav Trap|Grav Trap Fragments]] |
|||
* [[Chair]] |
|||
*[[Mobile Vehicle Bay|Mobile Vehicle Bay Fragments]] |
|||
* [[Desk]] |
|||
*[[Chair|Office Chair]] |
|||
| style="text-align:center; font-size:13px;" | -284 -250 -850 |
|||
*[[Seaglide|Seaglide Fragments]] |
|||
*[[Stasis Rifle|Stasis Rifle Fragments]] |
|||
*[[Chair|Swivel Chair]] |
|||
*[[Supply Crate]] |
|||
| style="text-align:center; font-size:13px;" | 366 -6 -203 |
|||
(wreck16) |
|||
|} |
|||
|-| |
|||
Sea Treader's Path= |
|||
{| class="article-table sortable" style="width: 100%;" cellspacing="1" cellpadding="1" border="0" |
|||
|- |
|||
! class="unsortable" style="width: 160px; text-align: center;" |Image |
|||
! class="unsortable" style="width: auto; text-align: center;" |Items |
|||
! data-sort-type="text" style="width: 10%; text-align: center;" |Coordinates |
|||
|- |
|- |
||
|[[File: |
|[[File:SeaTreadersWreck-1.jpg|thumb]] |
||
| style="text-align:center; font-size:12px;" |[[Grand Reef]] |
|||
| style="text-align:left; font-size:12px;" | |
| style="text-align:left; font-size:12px;" | |
||
*[[Databank (Subnautica)#Alterra Alms Pamphlet|Abandoned PDA - Alterra Alms Pamphlet]] (-1139 -157 -733) |
|||
* [[Cyclops Pressure Compensator]] Fragments |
|||
*[[Bench (Subnautica)|Bench]] |
|||
* [[Moonpool]] Fragments |
|||
*[[Chair|Command Chair]] |
|||
* [[Scanner Room]] Fragments |
|||
*[[Cyclops|Cyclops Bridge Fragments]] |
|||
* [[Vehicle Modification Station]] Fragments |
|||
*[[Cyclops|Cyclops Hull Fragments]] |
|||
* [[Thermal Plant]] Fragments |
|||
*[[Cyclops Decoy Tube Upgrade|Data Box - Cyclops Decoy Tube Upgrade]] |
|||
* [[Bed 1]] |
|||
*[[Cyclops Docking Bay Repair Module|Data Box - Cyclops Docking Bay Repair Module]] |
|||
* [[Chair]] |
|||
*[[Cyclops Shield Generator|Data Box - Cyclops Shield Generator]] |
|||
* [[Chair 3]] |
|||
* |
*[[Desk (Subnautica)|Desk]] |
||
*[[Floodlight (Subnautica)|Floodlight]] |
|||
* [[Wall Shelves]] |
|||
*[[Nuclear Reactor|Nuclear Reactor Fragments]] |
|||
| style="text-align:center; font-size:13px;" | -865 -430 -1420 |
|||
*[[Picture Frame]] |
|||
*[[Plant Pot|Composite Plant Pot]] |
|||
*[[Plant Shelf (Subnautica)|Plant Shelf]] |
|||
*[[Prawn Suit|Prawn Suit Fragments]] |
|||
*[[Prawn Suit Propulsion Cannon|Prawn Suit Propulsion Cannon Fragments]] |
|||
*[[Chair|Swivel Chair]] |
|||
| style="text-align:center; font-size:13px;" | -1131 -166 -729 |
|||
(wreck7) |
|||
|} |
|} |
||
|-| |
|||
Sparse Reef= |
|||
{| class="article-table sortable" style="width: 100%;" cellspacing="1" cellpadding="1" border="0" |
|||
|- |
|||
! class="unsortable" style="width: 160px; text-align: center;" |Image |
|||
! class="unsortable" style="width: auto; text-align: center;" |Items |
|||
! data-sort-type="text" style="width: 10%; text-align: center;" |Coordinates |
|||
|- |
|||
|[[File:Sparse Reef Wreck.png|thumb]] |
|||
| style="text-align:left; font-size:12px;" | |
|||
*[[Bench (Subnautica)|Bench]] |
|||
*[[Bioreactor (Subnautica)|Bioreactor Fragments]] |
|||
*[[Chair|Command Chair]] |
|||
*[[Cyclops Fire Suppression System|Data Box - Cyclops Fire Suppression System]] |
|||
*[[Reinforced Dive Suit|Data Box - Reinforced Dive Suit]] |
|||
*[[Vehicle Upgrade Console|Data Box - Vehicle Upgrade Console]] |
|||
*[[Desk (Subnautica)|Desk]] |
|||
*[[Floodlight (Subnautica)|Floodlight]] |
|||
*[[Light Stick|Light Stick Fragments]] |
|||
*[[Lab Equipment|Microscope]] |
|||
*[[Modification Station|Modification Station Fragments]] |
|||
*[[Moonpool|Moonpool Fragments]] |
|||
*[[Chair|Office Chair]] |
|||
*[[Power Cell Charger|Power Cell Charger Fragments]] |
|||
*[[Prawn Suit Torpedo Arm|Prawn Suit Torpedo Arm Fragments]] |
|||
*[[Lab Equipment|Sample Analyzer]] |
|||
*[[Lab Container|Small Sample Flask]] |
|||
*[[Thermal Plant|Thermal Plant Fragments]] |
|||
*[[Supply Crate]] |
|||
| style="text-align:center; font-size:13px;" | -787 -208 -713 |
|||
(wreck20) |
|||
|} |
|||
|-| |
|||
Underwater Islands= |
|||
{| class="article-table sortable" style="width: 100%;" cellspacing="1" cellpadding="1" border="0" |
|||
|- |
|||
! class="unsortable" style="width: 160px; text-align: center;" |Image |
|||
! class="unsortable" style="width: auto; text-align: center;" |Items |
|||
! data-sort-type="text" style="width: 10%; text-align: center;" |Coordinates |
|||
|- |
|||
|[[File:UnderwaterIslandWreck-1.jpg|thumb]] |
|||
| style="text-align:left; font-size:12px;" | |
|||
*[[Bench (Subnautica)|Bench]] |
|||
*[[Plant Pot|Chic Plant Pot]] |
|||
*[[Chair|Command Chair]] |
|||
*[[Plant Pot|Composite Plant Pot]] |
|||
*[[Cyclops|Cyclops Engine Fragments]] |
|||
*[[Alien Containment (Subnautica)|Data Box - Alien Containment]] |
|||
*[[Creature Decoy|Data Box - Creature Decoy]] |
|||
*[[Cyclops Fire Suppression System|Data Box - Cyclops Fire Suppression System]] |
|||
*[[Repulsion Cannon|Data Box - Repulsion Cannon]] |
|||
*[[Swim Charge Fins|Data Box - Swim Charge Fins]] |
|||
*[[Databank (Subnautica)#Data Downloads without headline|Data Terminal - Data Download without headline #1]] (-130 -190 885) |
|||
*[[Desk (Subnautica)|Desk]] |
|||
*[[Floodlight (Subnautica)|Floodlight]] |
|||
*[[Chair|Office Chair]] |
|||
*[[Picture Frame]] |
|||
*[[Power Cell Charger|Power Cell Charger Fragments]] |
|||
*[[Prawn Suit|Prawn Suit Claw Arm Fragments]] |
|||
*[[Prawn Suit|Prawn Suit Fragments]] |
|||
*[[Prawn Suit Drill Arm|Prawn Suit Drill Arm Fragments]] |
|||
*[[Prawn Suit Grappling Arm|Prawn Suit Grappling Arm Fragments]] |
|||
*[[Prawn Suit Propulsion Cannon|Prawn Suit Propulsion Cannon Fragments]] |
|||
*[[Propulsion Cannon|Propulsion Cannon Fragments]] |
|||
*[[Stasis Rifle|Stasis Rifle Fragments]] |
|||
*[[Chair|Swivel Chair]] |
|||
*[[Supply Crate]] |
|||
| style="text-align:center; font-size:13px;" | -102 -179 860 |
|||
(wreck4) |
|||
|} |
|||
</tabber></div> |
|||
==Small Wrecks== |
==Small Wrecks== |
||
'''Small Wrecks''' can be found surrounding the '''Large Wrecks''' |
'''Small Wrecks''', also known as Scatters, can be found surrounding the '''Large Wrecks'''. They can contain useful items and fragments, though generally don't contain as much as Large Wrecks. |
||
<div align="center"><tabber> |
|||
{| style="width: 100%;" class="article-table sortable" border="0" cellpadding="1" cellspacing="1" |
|||
Safe Shallows= |
|||
{| class="article-table sortable" style="width: 100%;" cellspacing="1" cellpadding="1" border="0" |
|||
|- |
|- |
||
! class="unsortable" style="width: 160px; text-align: center;" |Image |
! class="unsortable" style="width: 160px; text-align: center;" |Image |
||
! |
! class="unsortable" style="width: auto; text-align: center;" |Items |
||
! class="unsortable" style="width: auto; text-align: center;" |Unique Fragments |
|||
! data-sort-type="text" style="width: 10%; text-align: center;" |Coordinates |
! data-sort-type="text" style="width: 10%; text-align: center;" |Coordinates |
||
|- |
|- |
||
|[[File: |
|[[File:Safe Shallows Small Wreck 1.png|thumb]] |
||
| style="text-align:center; font-size:12px;" |[[Safe Shallows]] |
|||
| style="text-align:left; font-size:12px;" | |
| style="text-align:left; font-size:12px;" | |
||
*[[Beacon (Subnautica)|Beacon Fragments]] |
|||
*[[Trash Cans]] |
|||
*[[Grav Trap|Grav Trap Fragments]] |
|||
*[[Seaglide|Seaglide Fragments]] |
|||
*[[Trash Can (Subnautica)|Trash Can]] |
|||
| style="text-align:center; font-size:13px;" | 20 -10 300 |
| style="text-align:center; font-size:13px;" | 20 -10 300 |
||
(scatter36) |
|||
|- |
|- |
||
|[[File: |
|[[File:Safe Shallows Small Wreck 2.png|thumb]] |
||
| style="text-align:center; font-size:12px;" |[[Safe Shallows]] |
|||
| style="text-align:left; font-size:12px;" | |
| style="text-align:left; font-size:12px;" | |
||
* |
|||
*[[Beacon (Subnautica)|Beacon Fragments]] |
|||
*[[Grav Trap|Grav Trap Fragments]] |
|||
*[[Seaglide|Seaglide Fragments]] |
|||
| style="text-align:center; font-size:13px;" | 90 -20 120 |
| style="text-align:center; font-size:13px;" | 90 -20 120 |
||
(scatter39) |
|||
|- |
|- |
||
|[[File: |
|[[File:Safe Shallows Small Wreck 3.png|thumb]] |
||
| style="text-align:center; font-size:12px;" |[[Safe Shallows]] |
|||
| style="text-align:left; font-size:12px;" | |
| style="text-align:left; font-size:12px;" | |
||
*[[Beacon (Subnautica)|Beacon Fragments]] |
|||
*[[Lab Counter]] |
|||
*[[Counter (Subnautica)|Counter]] |
|||
*[[Grav Trap|Grav Trap Fragments]] |
|||
*[[Seaglide|Seaglide Fragments]] |
|||
| style="text-align:center; font-size:13px;" | 65 -10 -85 |
| style="text-align:center; font-size:13px;" | 65 -10 -85 |
||
(scatter38) |
|||
|- |
|- |
||
|[[File: |
|[[File:Safe Shallows Small Wreck 4.png|thumb]] |
||
| style="text-align:center; font-size:12px;" |[[Safe Shallows]] |
|||
| style="text-align:left; font-size:12px;" | |
| style="text-align:left; font-size:12px;" | |
||
*[[Beacon (Subnautica)|Beacon Fragments]] |
|||
*[[Luggage Bag]] x2 |
|||
*[[ |
*[[Counter (Subnautica)|Counter]] |
||
*[[Grav Trap|Grav Trap Fragments]] |
|||
*[[Seaglide|Seaglide Fragments]] |
|||
| style="text-align:center; font-size:13px;" | -160 -20 -225 |
| style="text-align:center; font-size:13px;" | -160 -20 -225 |
||
(scatter40) |
|||
|- |
|- |
||
|[[File: |
|[[File:Safe Shallows Small Wreck 5.png|thumb]] |
||
| style="text-align:center; font-size:12px;" |[[Safe Shallows]] |
|||
| style="text-align:left; font-size:12px;" | |
| style="text-align:left; font-size:12px;" | |
||
*[[Beacon (Subnautica)|Beacon Fragments]] |
|||
*[[Lab Equipment|Fluid Analyzer]] |
|||
*[[Grav Trap|Grav Trap Fragments]] |
|||
*[[Seaglide|Seaglide Fragments]] |
|||
*[[Lab Equipment|Sample Analyzer]] |
|||
*[[Trash Can (Subnautica)|Trash Can]] |
|||
*[[Vending Machine]] |
*[[Vending Machine]] |
||
*[[Trash Cans]] |
|||
*[[Lab Trash Can]] |
|||
*[[Lab Equipment]] x2 |
|||
*[[Luggage Bag]] x2 |
|||
| style="text-align:center; font-size:13px;" | 175 -23 -253 |
| style="text-align:center; font-size:13px;" | 175 -23 -253 |
||
(scatter41) |
|||
|- |
|- |
||
|[[File: |
|[[File:Safe Shallows Small Wreck 6.png|thumb]] |
||
| style="text-align:center; font-size:12px;" |[[Safe Shallows]] |
|||
| style="text-align:left; font-size:12px;" | |
| style="text-align:left; font-size:12px;" | |
||
*[[Beacon (Subnautica)|Beacon Fragments]] |
|||
*[[Coffee vending machine|Coffee Vending Machine]] |
|||
*[[Coffee Vending Machine (Subnautica)|Coffee Vending Machine]] |
|||
*[[Luggage Bag]] |
|||
*[[Grav Trap|Grav Trap Fragments]] |
|||
*[[Seaglide|Seaglide Fragments]] |
|||
| style="text-align:center; font-size:13px;" | 310 -23 -119 |
| style="text-align:center; font-size:13px;" | 310 -23 -119 |
||
(scatter37) |
|||
|} |
|||
|-| |
|||
Grassy Plateaus= |
|||
{| class="article-table sortable" style="width: 100%;" cellspacing="1" cellpadding="1" border="0" |
|||
|- |
|- |
||
! class="unsortable" style="width: 160px; text-align: center;" |Image |
|||
|[[File:SafeShallowsSmallWreck-7.jpg|thumb|160px]] |
|||
! class="unsortable" style="width: auto; text-align: center;" |Items |
|||
! data-sort-type="text" style="width: 10%; text-align: center;" |Coordinates |
|||
*[[Supply Crate]]s |
|||
| style="text-align:center; font-size:13px;" | 527 -23 -43 |
|||
|- |
|- |
||
|- |
|||
|[[File:GrassyPlateausSmallWreck-1.jpg|thumb|160px]] |
|||
|[[File:Grassy Plateaus Small Wreck 1.png|thumb]] |
|||
| style="text-align:left; font-size:12px;" | |
| style="text-align:left; font-size:12px;" | |
||
*[[ |
*[[Bioreactor (Subnautica)|Bioreactor Fragments]] |
||
*[[Scanner Room|Scanner Room Fragments]] |
|||
| style="text-align:center; font-size:13px;" | 165 -86 -520 |
|||
*[[Seamoth|Seamoth Fragments]] |
|||
| style="text-align:center; font-size:13px;" | 165 -86 -520 |
|||
(scatter32) |
|||
|- |
|- |
||
|[[File: |
|[[File:Grassy Plateaus Small Wreck 2.png|thumb]] |
||
| style="text-align:center; font-size:12px;" |[[Grassy Plateaus]] |
|||
| style="text-align:left; font-size:12px;" | |
| style="text-align:left; font-size:12px;" | |
||
*[[Bar Table (Subnautica)|Bar Table]] |
|||
*[[Fragments|Battery Charger Fragments]] |
|||
*[[ |
*[[Bioreactor (Subnautica)|Bioreactor Fragments]] |
||
*[[Scanner Room|Scanner Room Fragments]] |
|||
*[[Coffee vending machine|Coffee Vending Machine]] |
|||
*[[Seamoth|Seamoth Fragments]] |
|||
*[[Bar Table]] |
|||
*[[Trash |
*[[Trash Can (Subnautica)|Trash Can]] |
||
| style="text-align:center; font-size:13px;" | |
| style="text-align:center; font-size:13px;" | 322 -90 222 |
||
(scatter34) |
|||
|- |
|- |
||
|[[File: |
|[[File:Grassy Plateaus Small Wreck 3.png|thumb]] |
||
| style="text-align:center; font-size:12px;" |[[Grassy Plateaus]] |
|||
| style="text-align:left; font-size:12px;" | |
| style="text-align:left; font-size:12px;" | |
||
*[[Bioreactor (Subnautica)|Bioreactor Fragments]] |
|||
*[[Lab Trash Can]] |
|||
*[[Nuclear Waste Disposal]] |
|||
*[[Scanner Room|Scanner Room Fragments]] |
|||
*[[Seamoth|Seamoth Fragments]] |
|||
| style="text-align:center; font-size:13px;" | 270 -85 70 |
| style="text-align:center; font-size:13px;" | 270 -85 70 |
||
(scatter35) |
|||
|- |
|- |
||
|[[File: |
|[[File:Grassy Plateaus Small Wreck 4.png|thumb]] |
||
| style="text-align:center; font-size:12px;" |[[Grassy Plateaus]] |
|||
| style="text-align:left; font-size:12px;" | |
| style="text-align:left; font-size:12px;" | |
||
*[[ |
*[[Bioreactor (Subnautica)|Bioreactor Fragments]] |
||
*[[Scanner Room|Scanner Room Fragments]] |
|||
| style="text-align:center; font-size:13px;" | -370 -100 475 |
|||
*[[Seamoth|Seamoth Fragments]] |
|||
| style="text-align:center; font-size:13px;" | -370 -100 475 |
|||
(scatter31) |
|||
|- |
|- |
||
|[[File: |
|[[File:Grassy Plateaus Small Wreck 5.png|thumb]] |
||
| style="text-align:center; font-size:12px;" |[[Grassy Plateaus]] |
|||
| style="text-align:left; font-size:12px;" | |
| style="text-align:left; font-size:12px;" | |
||
*[[ |
*[[Bioreactor (Subnautica)|Bioreactor Fragments]] |
||
*[[ |
*[[Scanner Room|Scanner Room Fragments]] |
||
*[[ |
*[[Seamoth|Seamoth Fragments]] |
||
| style="text-align:center; font-size:13px;" | -284 -93 606 |
| style="text-align:center; font-size:13px;" | -284 -93 606 |
||
(scatter42?) |
|||
|- |
|- |
||
|[[File: |
|[[File:Grassy Plateaus Small Wreck 6.png|thumb]] |
||
| style="text-align:center; font-size:12px;" |[[Grassy Plateaus]] |
|||
| style="text-align:left; font-size:12px;" | |
| style="text-align:left; font-size:12px;" | |
||
*[[Bioreactor (Subnautica)|Bioreactor Fragments]] |
|||
*[[Luggage Bag]] |
|||
*[[Scanner Room|Scanner Room Fragments]] |
|||
*[[Seamoth|Seamoth Fragments]] |
|||
*[[Vending Machine]] |
*[[Vending Machine]] |
||
| style="text-align:center; font-size:13px;" | -520 -90 -215 |
| style="text-align:center; font-size:13px;" | -520 -90 -215 |
||
(scatter33) |
|||
|} |
|} |
||
</tabber></div> |
|||
== |
==Sounds== |
||
{{SoundTable| |
|||
* The [[Poster]] is a unique item that can only be found inside the '''First Grassy Plateaus Wrecks'''. |
|||
{{str|wrea_1shot_1|Ambient Sound 1}} |
|||
{{str|wrea_1shot_2|Ambient Sound 2}} |
|||
{{str|wrea_1shot_3|Ambient Sound 3}} |
|||
{{str|wrea_1shot_4|Ambient Sound 4}} |
|||
{{str|wrea_1shot_5|Ambient Sound 5}} |
|||
{{str|wrea_1shot_6|Ambient Sound 6}} |
|||
{{str|wrea_1shot_7|Ambient Sound 7}} |
|||
{{str|Wreak_ambient_loop|Ambient Loop}} |
|||
}} |
|||
==Gallery== |
== Gallery == |
||
<tabber> |
|||
In Game View= |
|||
<gallery widths="200" spacing="small"> |
|||
SafeShallowsSmallWreck-7.jpg|[[Safe Shallows]] Small Wreck 7 |
|||
SafeShallowsSmallWreck-6.jpg|[[Safe Shallows]] Small Wreck 6 |
|||
SafeShallowsSmallWreck-5.jpg|[[Safe Shallows]] Small Wreck 5 |
|||
SafeShallowsSmallWreck-4.jpg|[[Safe Shallows]] Small Wreck 4 |
|||
SafeShallowsSmallWreck-3.jpg|[[Safe Shallows]] Small Wreck 3 |
|||
SafeShallowsSmallWreck-2.jpg|[[Safe Shallows]] Small Wreck 2 |
|||
SafeShallowsSmallWreck-1.jpg|[[Safe Shallows]] Small Wreck 1 |
|||
SafeShallowsWreck-2.jpg|[[Safe Shallows]] Large Wreck 2 |
|||
SafeShallowsWreck-1.jpg|[[Safe Shallows]] Large Wreck 1 |
|||
KelpForestWreck-4.jpg|[[Kelp Forest]] Large Wreck 4 |
|||
KelpForestWreck-3.jpg|[[Kelp Forest]] Large Wreck 3 |
|||
KelpForestWreck-2.jpg|[[Kelp Forest]] Large Wreck 2 (Removed) |
|||
KelpForestWreck-1.jpg|[[Kelp Forest]] Large Wreck 1 (Removed) |
|||
GrassyPlateausWreck-4.jpg|[[Grassy Plateaus]] Large Wreck 4 |
|||
GrassyPlateausWreck-5.jpg|[[Grassy Plateaus]] Large Wreck 5 |
|||
GrassyPlateausWreck-3.jpg|[[Grassy Plateaus]] Large Wreck 3 |
|||
GrassyPlateausWreck-2.jpg|[[Grassy Plateaus]] Large Wreck 2 |
|||
GrassyPlateausWreck-1.jpg|[[Grassy Plateaus]] Large Wreck 1 |
|||
KooshZoneWreck-1.jpg|[[Bulb Zone]] Large Wreck 1 |
|||
MushroomForestWreck-1.jpg|[[Mushroom Forest]] Large Wreck 1 |
|||
UnderwaterIslandWreck-1.jpg|[[Underwater Islands]] Large Wreck 1 |
|||
DunesWreck-1.jpg|[[Dunes]] Large Wreck 1 |
|||
SeaTreadersWreck-1.jpg|[[Sea Treader's Path]] Large Wreck 1 |
|||
MountainsWreck-1.jpg|[[Mountains]] Large Wreck 1 |
|||
BloodKelpWreck-1.jpg|[[Blood Kelp Zone]] Large Wreck 1 |
|||
GrandReefWreck-1.jpg|[[Grand Reef]] Large Wreck 1 |
|||
GrandReefWreck-2.jpg|[[Grand Reef]] Large Wreck 2 |
|||
Screen Shot 2019-01-20 at 5.07.23 pm.png|Location of all large wrecks with coordinates attached |
|||
Sparse Reef Large Wreck20.jpg|Sparse Reef Large Wreck20 |
|||
</gallery> |
|||
|-| |
|||
Models= |
|||
{{#tag:Tabber| |
|||
Wrecks= |
|||
<gallery position="left" widths="200" spacing="small" captionalign="left"> |
|||
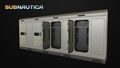
Explorablewreckmodel.png|Large Explorable Wreck Model from [https://sketchfab.com/models/7bd5aaf2ee54451aa70fc672dc7e2e8d Sketchfab] |
|||
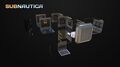
Wreck3model.png|Another Large Explorable Wreck Model from [https://sketchfab.com/models/e8021897236e40c3b9dd64cde6f5e339 Sketchfab] (Wreck 4) |
|||
Aurora_debris.png|Small Explorable Wreck's Model from [https://sketchfab.com/models/e612f9449de8479f9ecc1235e482ddf5 Sketchfab] (Scatter 42?) |
|||
</gallery> |
|||
{{!}}-{{!}} |
|||
Decor= |
|||
<gallery> |
<gallery> |
||
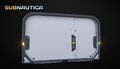
NoTouchieDoorModel.jpeg|Door model from [https://sketchfab.com/3d-models/doors-d9661e5406724b19a1ed20353dcba8db Sketchfab] |
|||
WreckDoorModel.jpeg|Intractable door model from [https://sketchfab.com/3d-models/door-manual-ea79641d56504ac48a1ad151b52b36b5 Sketchfab] |
|||
TechBoxModel.jpeg|[[Radio]]-like decoration model from [https://sketchfab.com/3d-models/tech-box-01-2071f32838064bfc844991085db627a2 Sketchfab] |
|||
WireDecorModel.jpeg|Multiple wire models from [https://sketchfab.com/3d-models/circuit-box-01-55d89a2f917c40ef9839791063907751 Sketchfab] |
|||
WrecksConcept2.jpeg|Large Explorable Wreck's [[Concept Art]] |
|||
NoSignalMonitorModels.jpeg|Multiple inactive monitor models from [https://sketchfab.com/3d-models/wall-monitor-01-125919f809234336a043191d1b84c038 Sketchfab] |
|||
WrecksConcept.jpeg|Small Explorable Wreck's [[Concept Art]] |
|||
SingleLockerModel.jpeg|A singular locker model from [https://sketchfab.com/3d-models/locker-single-ad4a70f934394aeebb1bc7e5d90eaf08 Sketchfab] |
|||
Wrecks_(1).jpg|Small wreckage, found in the [[Crash Zone]] |
|||
LockerRowModel.jpeg|A locker row model from [https://sketchfab.com/3d-models/comb-locker-low-8aba759d484d42a586fbb85191cc051a Sketchfab] |
|||
StairsModel.jpeg|Stair model from [https://sketchfab.com/3d-models/stairs-aaad295200fb4d9fab480bfb60c19a7c Sketchfab] |
|||
BigDoorModel.jpeg|Large mechanical door model from [https://sketchfab.com/3d-models/big-cargo-doors-2ef69bd0da824836b4e89cede391065c Sketchfab] |
|||
VentDetailsModel.jpeg|Vent details models from [https://sketchfab.com/3d-models/ventilation-constructor-33ab320d22af4dc3bc7e0d213cdf7e0f Sketchfab] |
|||
VentDeadEndModel.jpeg|Vent dead end model from [https://sketchfab.com/3d-models/vent-deadend-fe122b880f3e4a92931bf1ff20ee0622 Sketchfab] |
|||
</gallery>}} |
|||
|-| |
|||
Concept Art= |
|||
<gallery widths="200" spacing="small"> |
|||
WreckConcept2.JPG|Large Explorable Wreck's [[Concept art]] |
|||
WreckConcept1.JPG|Small Explorable Wreck's Concept Art |
|||
File:Wreck_Concept-FOX3D.jpg|The destroyed interior of a Wreck Concept Art |
|||
</gallery> |
</gallery> |
||
</tabber> |
|||
For a more complete gallery, see [[Wrecks/Gallery]]. |
|||
[[Category:In Development]] |
|||
== Trivia == |
|||
[[Category:Surface]] |
|||
*Wreck 1 ([[Grassy Plateaus]]) seemingly randomly plays a unique ambience track and sound effects which do not play in any other wrecks while in the upper portion of the wreck. Entering the wreck through the ventilation duct on its western side seems to have a noticeably more common chance of making these ambient effects occur, although it can occur when entering from any entrance. |
|||
**If the ambience does happen to play, the game's command console will state the player is in a biome named "WreckInterior" rather than the normal "<biomename>_WreckInterior" that most wrecks show as your current biome when inside of them. |
|||
*Wrecks 2, 4, 5, 6 and 7 all share the same U-shape wreck model. |
|||
**Wrecks 1, 3, 8, 9, 10, and 22 also share a similar model. The same goes for Wreck 18 and 20, except 18 is only one part instead of 3 large scattered Wrecks. |
|||
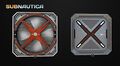
**The scanner room icon for Wrecks is based off of the model for wrecks 1, 3, 8, 9, 10, and 22. |
|||
*There used to be 4 small wrecks scattered to the west of the [[Aurora]] that yielded only [[Supply Crate]]s. These were removed at some point, and Supply Crates can be found across all of the [[Crash Zone]] as of now. |
|||
*Non-scannable [[Picture Frame]]s are present in the second [[Bulb Zone]] wreck and the third [[Dunes]] wreck. It is unknown whether this is intended or not. |
|||
*Wreck 2 has a terminal that can be downloaded to your PDA, however, this terminal gives nothing of importance as it ends up spitting out a set of characters as if someone was smashing a computer keyboard. |
|||
*[[Underwater Islands|The Underwater Islands]] Wreck also has a data terminal, but has no importance as it only gives what seems like a rule when working with Prawn Suits. |
|||
*[[Degasi Seabases]] and [[Destroyed Lifepods]] are also classified as wrecks as confirmed by the [[Scanner Room]]. |
|||
== References == |
|||
<references /> |
|||
[[de:Wrack]] |
|||
[[fr:Épaves]] |
|||
[[pl:Wraki]] |
|||
[[ru:Затонувшие части Авроры]] |
|||
[[Category:Explorable Structures]] |
[[Category:Explorable Structures]] |
||
[[Category:Wrecks]] |
|||
Latest revision as of 15:26, 11 April 2025
.png)
|
Read at own risk This article contains unmarked spoilers. Players new to the game would want to avoid or be cautious toward this article. |
<infobox layout="stacked">
 <title source="title1">
   <default>Wrecks</default>
 </title>
 <image source="image1">
</image> <label>Tab</label> <label>Type</label> <label>Biome</label> <label>Depth Range</label> <label>Temperature Range</label> <label>Biome ID</label> <label>Harvesting Nodes</label> <label>goto ID</label> <label>Coordinates</label> <label>Base ID</label> <group> <label>Point of Interest</label> <label>Music</label> </group> </infobox> The Wrecks are explorable pieces of debris from the Aurora.[1] They vary widely in sizes and structure. Large Wrecks contain valuable technology in the form of Fragments and sometimes Data Boxes or Supply Crates, while Small Wrecks contain only a limited amount of fragments. Note: Certain fragments or data boxes won't spawn if one has already obtained the Blueprints and didn't load the area/wreck/biome beforehand. This does not include miscellaneous or some decorative interior or exterior modules such as Plant Pots or Beds.
Large Wrecks
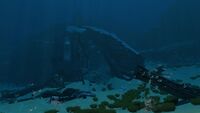
There are twenty-three Large Wrecks spread throughout the ocean at the beginning of the game. Each of them is surrounded by their local Flora and Fauna and possesses their own unique challenges. Many of them include sections that are only accessible with the Laser Cutter or a Repair Tool, or require unblocking a passage blocked with Cargo Crates or other debris using a Propulsion Cannon. While each contains a unique set of fragments, there are common items found in many Wrecks, for example chairs and desks.
Large Wreck List
Blood Kelp Trench=

|-| Bulb Zone=


|-| Dunes=


|-| Grand Reef=


|-| Grassy Plateaus=


|-| Kelp Forest=
| Image | Items | Coordinates |
|---|---|---|
| -320 -57 252
(wreck18) | ||
| 65 -25 385
(wreck17) |


|-| Mountains=


|-| Northwestern Mushroom Forest=

|-| Safe Shallows=
| Image | Items | Coordinates |
|---|---|---|
| -40 -14 -400
(wreck15) | ||
| 366 -6 -203
(wreck16) |


|-| Sea Treader's Path=

|-| Sparse Reef=

|-| Underwater Islands=

Small Wrecks
Small Wrecks, also known as Scatters, can be found surrounding the Large Wrecks. They can contain useful items and fragments, though generally don't contain as much as Large Wrecks.
Safe Shallows=
| Image | Items | Coordinates |
|---|---|---|
| 20 -10 300
(scatter36) | ||
| 90 -20 120
(scatter39) | ||
| 65 -10 -85
(scatter38) | ||
| -160 -20 -225
(scatter40) | ||
| 175 -23 -253
(scatter41) | ||
| 310 -23 -119
(scatter37) |


|-| Grassy Plateaus=
| Image | Items | Coordinates |
|---|---|---|
| 165 -86 -520
(scatter32) | ||
| 322 -90 222
(scatter34) | ||
| 270 -85 70
(scatter35) | ||
| -370 -100 475
(scatter31) | ||
| -284 -93 606
(scatter42?) | ||
| -520 -90 -215
(scatter33) |


Sounds
| File | Type |
|---|---|
| File:Wrea 1shot 1.ogg | Ambient Sound 1 |
| File:Wrea 1shot 2.ogg | Ambient Sound 2 |
| File:Wrea 1shot 3.ogg | Ambient Sound 3 |
| File:Wrea 1shot 4.ogg | Ambient Sound 4 |
| File:Wrea 1shot 5.ogg | Ambient Sound 5 |
| File:Wrea 1shot 6.ogg | Ambient Sound 6 |
| File:Wrea 1shot 7.ogg | Ambient Sound 7 |
| File:Wreak ambient loop.ogg | Ambient Loop |
Gallery
<tabber> In Game View=
Safe Shallows Small Wreck 7
Safe Shallows Small Wreck 6
Safe Shallows Small Wreck 5

Safe Shallows Small Wreck 4
Safe Shallows Small Wreck 3
Safe Shallows Small Wreck 2
Safe Shallows Small Wreck 1
Safe Shallows Large Wreck 2
Safe Shallows Large Wreck 1
Kelp Forest Large Wreck 4
Kelp Forest Large Wreck 3

Kelp Forest Large Wreck 2 (Removed)
Kelp Forest Large Wreck 1 (Removed)
Grassy Plateaus Large Wreck 4
Grassy Plateaus Large Wreck 5
Grassy Plateaus Large Wreck 3
Grassy Plateaus Large Wreck 2
Grassy Plateaus Large Wreck 1
Bulb Zone Large Wreck 1
Mushroom Forest Large Wreck 1

Underwater Islands Large Wreck 1
Dunes Large Wreck 1
Sea Treader's Path Large Wreck 1
Mountains Large Wreck 1
Blood Kelp Zone Large Wreck 1

Grand Reef Large Wreck 1
Grand Reef Large Wreck 2
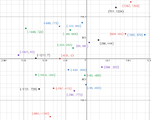
Location of all large wrecks with coordinates attached
Sparse Reef Large Wreck20


|-| Models= <tabber> Wrecks=
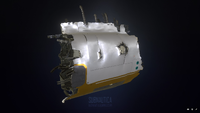
Large Explorable Wreck Model from Sketchfab
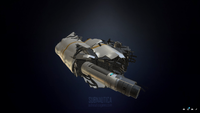
Another Large Explorable Wreck Model from Sketchfab (Wreck 4)

Small Explorable Wreck's Model from Sketchfab (Scatter 42?)


|-| Decor=
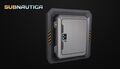
Door model from Sketchfab
Intractable door model from Sketchfab
Multiple wire models from Sketchfab
Multiple inactive monitor models from Sketchfab
A singular locker model from Sketchfab
A locker row model from Sketchfab

Stair model from Sketchfab
Large mechanical door model from Sketchfab
Vent details models from Sketchfab
Vent dead end model from Sketchfab


</tabber>
|-| Concept Art=
Large Explorable Wreck's Concept art
Small Explorable Wreck's Concept Art
The destroyed interior of a Wreck Concept Art


</tabber>
Trivia
- Wreck 1 (Grassy Plateaus) seemingly randomly plays a unique ambience track and sound effects which do not play in any other wrecks while in the upper portion of the wreck. Entering the wreck through the ventilation duct on its western side seems to have a noticeably more common chance of making these ambient effects occur, although it can occur when entering from any entrance.
- If the ambience does happen to play, the game's command console will state the player is in a biome named "WreckInterior" rather than the normal "<biomename>_WreckInterior" that most wrecks show as your current biome when inside of them.
- Wrecks 2, 4, 5, 6 and 7 all share the same U-shape wreck model.
- Wrecks 1, 3, 8, 9, 10, and 22 also share a similar model. The same goes for Wreck 18 and 20, except 18 is only one part instead of 3 large scattered Wrecks.
- The scanner room icon for Wrecks is based off of the model for wrecks 1, 3, 8, 9, 10, and 22.
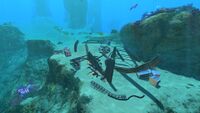
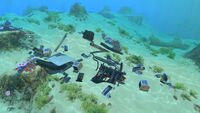
- There used to be 4 small wrecks scattered to the west of the Aurora that yielded only Supply Crates. These were removed at some point, and Supply Crates can be found across all of the Crash Zone as of now.
- Non-scannable Picture Frames are present in the second Bulb Zone wreck and the third Dunes wreck. It is unknown whether this is intended or not.
- Wreck 2 has a terminal that can be downloaded to your PDA, however, this terminal gives nothing of importance as it ends up spitting out a set of characters as if someone was smashing a computer keyboard.
- The Underwater Islands Wreck also has a data terminal, but has no importance as it only gives what seems like a rule when working with Prawn Suits.
- Degasi Seabases and Destroyed Lifepods are also classified as wrecks as confirmed by the Scanner Room.