
Fauna: Difference between revisions
Hehhdhdhhe (talk | contribs) No edit summary |
Nibbenator (talk | contribs) No edit summary |
||
| (97 intermediate revisions by 40 users not shown) | |||
| Line 1: | Line 1: | ||
{{SubnauticaLinkThe}} |
|||
{{SimilarName|'''Fauna'''|[[Flora]]}} |
{{SimilarName|'''Fauna'''|[[Flora]]}} |
||
{{Spoiler}} |
{{Spoiler}} |
||
'''Fauna''' is the term for animals, in this case, the animals of [[Planet 4546B]]. Fauna in ''[[Subnautica]]'' can be found all over the planet, from the |
'''Fauna''' is the term for animals, in this case, the animals of [[Planet 4546B]]. Fauna in ''[[Subnautica]]'' can be found all over the planet, from the mysterious depths of the [[Crystal Caves]] to the vibrant [[Safe Shallows]], and the fiery pits of the [[Lava Lakes]]. |
||
Fauna on Planet 4546B comes in all shapes, |
Fauna on Planet 4546B comes in all shapes, sizes, and forms. Ranging from the tiny, cave-dwelling [[Rockgrub]], to the colossal [[Sea Dragon Leviathan]] that spews molten minerals from its mouth. Fauna on Planet 4546B is capable of enduring and adapting to [[Biomes|various environments]], although previously unable to thrive due to the presence of the [[Kharaa Bacterium]]. Certain species of small fauna can sometimes be seen forming mostly non-interactive [[Shoal of Fish|shoals]]. Fauna on 4546B also has yellow blood. The fact that the appearance of some species of the planet being similar to that of planet Earth species can be explained as a simple case of convergent evolution. |
||
The player can scan Fauna with the [[Scanner]], the same as they would with Flora and objects, allowing them to view information about |
The player can scan Fauna with the [[Scanner|Handheld Scanner]], the same as they would with [[Flora]] and objects, allowing them to view information about creatures in their [[PDA]]. |
||
In ''Subnautica'' additional scans after unlocking the [[Databank (Subnautica)|Data Bank]] Entry for that particular species of Fauna alert the player as to whether or not the specimen is infected with Kharaa. As Kharaa has been eliminated from the wild in ''[[Subnautica: Below Zero|Below Zero]]'' this function is not present. |
|||
==Reproduction== |
==Reproduction== |
||
Most known fauna species on Planet 4546B are simultaneous hermaphrodites, meaning that they have a single-sex capable of playing the role of either the male or female in reproduction and every individual being able to lay [[eggs]] and fertilize them. Two parents are still required to fertilize the eggs once laid, making it sexual reproduction. At least one fauna species is exempt from this and reproduces entirely asexually although the norm for the planet is sexual reproduction, as can be observed in all species that can be placed in an [[Alien Containment]] unit who will require two individuals of their species to produce eggs. The only species that does not reproduce is the |
Most known fauna species on Planet 4546B are simultaneous hermaphrodites, meaning that they have a single-sex capable of playing the role of either the male or female in reproduction and every individual being able to lay [[eggs]] and fertilize them. Two parents are still required to fertilize the eggs once laid, making it sexual reproduction. At least one fauna species is exempt from this and reproduces entirely asexually, although the norm for the planet is sexual reproduction, as can be observed in all species that can be placed in an [[Alien Containment]] unit who will require two individuals of their species to produce eggs. The only species that does not reproduce is the [[Warper]], as they are artificial constructs. |
||
The only one of the complex fauna species on the planet known to be an exception to this rule is the [[Sea Emperor Leviathan]] species, which is entirely asexual and does not require a mate. |
The only one of the complex fauna species on the planet known to be an exception to this rule is the [[Sea Emperor Leviathan]] species, which is entirely asexual and does not require a mate. The Sea Dragon Leviathan may share this method of reproduction as it is likely the closest living relative of the Sea Emperor Leviathan and was being studied by the [[Architects]] to learn more about the Sea Emperor's hatching process, which was apparently successful. |
||
=Fauna of [[The Crater]]= |
|||
The majority of the complex species on 4546B reproduce via egg-laying. Exceptions include the reaper leviathan, peeper, boomerang, bladderfish, and other small prey fish. |
|||
==Carnivores== |
|||
{| class="article-table sortable TTable" |
|||
|- |
|||
! Fauna |
|||
! Attitude |
|||
! class="unsortable" | Biome |
|||
{{tr|name=Ampeel|filename=Ampeel Fauna.png|c2= * Aggressive|c3= |
|||
Invertebrates make up the minority of fauna species within the crater on Planet 4546B, around 16.45%, contrasting with Earth on which invertebrates make up around 97% of fauna species. |
|||
* [[Blood Kelp Caves]] |
|||
* [[Blood Kelp Zone]] |
|||
* [[Bulb Zone]]}} |
|||
{{tr|name=Biter|filename=Biter Fauna.png|c2= * Aggressive|c3= |
|||
==List of Fauna== |
|||
* [[Crash Zone Mesas]] |
|||
===Carnivores=== |
|||
* [[Grassy Plateaus]] |
|||
{| class="article-table sortable" style="width: 100%;" border="0" cellspacing="1" cellpaddig="1" |
|||
* [[Grassy Plateaus Caves]] |
|||
|- |
|||
* [[Jellyshroom Cave]] |
|||
! class="unsortable" style="width: 25%; text-align: center;" |Fauna Name and ID |
|||
* [[Mountains]] |
|||
! class="unsortable" style="width: 25%; text-align: center;" |Attitude |
|||
* [[Mountains Caves]]}} |
|||
! class="unsortable" style="width: 25%; text-align: center;" |Biome |
|||
|- |
|||
{{tr|name=Blighter|filename=Blighter Fauna.png|c2= * Aggressive|c3= |
|||
| style="text-align:center; font-size:12px;" |[[File:Shocker_Fauna.png|200px|center|link=Ampeel]][[Ampeel]] |
|||
* [[Blood Kelp Caves]] |
|||
''Shocker'' |
|||
* [[Blood Kelp Zone]]}} |
|||
| style="text-align:center; font-size:12px;" |[[:Category:Attitude: Aggressive|Aggressive]] |
|||
| style="text-align:left; font-size:12px;" | |
|||
{{tr|name=Boneshark|filename=Boneshark Fauna.png|c2= * Aggressive|c3= |
|||
*[[Blood Kelp Caves]] |
|||
*[[ |
* [[Bulb Zone]] |
||
*[[ |
* [[Crag Field]] |
||
* [[Crash Zone Mesas]] |
|||
|- |
|||
* [[Mushroom Forest]] |
|||
| style="text-align:center; font-size:12px;" |[[File:Biter Fauna.png|200px|center|link=Biter]][[Biter]] |
|||
* [[Primary Containment Facility#Aquarium|Primary Containment Facility Aquarium]] |
|||
''Biter'' |
|||
* [[Underwater Islands]]}} |
|||
| style="text-align:center; font-size:12px;" |[[:Category:Attitude: Aggressive|Aggressive]] |
|||
| style="text-align:left; font-size:12px;" | |
|||
{{tr|name=Crabsnake|filename=Crabsnake Fauna.png|c2= * Aggressive|c3= |
|||
*[[Crash Zone Mesas]] |
|||
*[[ |
* [[Jellyshroom Cave]]}} |
||
*[[Grassy Plateaus Caves]] |
|||
{{tr|name=Crabsquid|filename=Crabsquid Fauna.png|c2= * Aggressive|c3= |
|||
*[[Jellyshroom Cave]] |
|||
*[[ |
* [[Deep Grand Reef]] |
||
*[[ |
* [[Blood Kelp Caves|Northern Blood Kelp Caves]] |
||
* [[Blood Kelp Zone|Northern Blood Kelp Zone]] |
|||
|- |
|||
* [[Lost River]] |
|||
| style="text-align:center; font-size:12px;" |[[File:Blighter Fauna.png|200px|center|link=Blighter]][[Blighter]] |
|||
** [[Lost River|Corridor]] |
|||
''Blighter'' |
|||
** [[Lost River|Ghost Canyon]]}} |
|||
| style="text-align:center; font-size:12px;" |[[:Category:Attitude: Aggressive|Aggressive]] |
|||
| style="text-align:left; font-size:12px;" | |
|||
{{tr|name=Crashfish (Subnautica)|display=Crashfish|filename=Crashfish Fauna.png|c2= * Defensive|c3= |
|||
*[[Blood Kelp Caves]] |
|||
*[[ |
* [[Kelp Forest Caves]] |
||
* [[Safe Shallows Caves]]}} |
|||
|- |
|||
| style="text-align:center; font-size:12px;" |[[File:Boneshark Fauna.png|200px|center|link=Boneshark]][[Boneshark]] |
|||
{{tr|name=Lava Lizard|filename=Lava Lizard Fauna.png|c2= * Aggressive|c3= |
|||
''Boneshark'' |
|||
* [[Inactive Lava Zone Corridor]] |
|||
| style="text-align:center; font-size:12px;" |[[:Category:Attitude: Aggressive|Aggressive]] |
|||
* [[Inactive Lava Zone]] |
|||
| style="text-align:left; font-size:12px;" | |
|||
*[[ |
* [[Lava Lakes]] |
||
*[[ |
* [[Lava Castle]]}} |
||
*[[Crash Zone Mesas]] |
|||
{{tr|name=Mesmer|filename=Mesmer Fauna.png|c2= * Aggressive|c3= |
|||
*[[Mushroom Forest]] |
|||
* [[Bulb Zone]] |
|||
*[[Primary Containment Facility#Aquarium|Primary Containment Facility Aquarium]] |
|||
*[[ |
* [[Crag Field]] |
||
* [[Kelp Forest Caves]] |
|||
|- |
|||
* [[Lost River]] |
|||
| style="text-align:center; font-size:12px;" |[[File:Crabsnake_Fauna.png|200px|center|link=Crabsnake]][[Crabsnake]] |
|||
''Crabsnake'' |
|||
| style="text-align:center; font-size:12px;" |[[:Category:Attitude: Aggressive|Aggressive]] |
|||
| style="text-align:left; font-size:12px;" | |
|||
*[[Jellyshroom Cave]] |
|||
|- |
|||
| style="text-align:center; font-size:12px;" |[[File:Crabsquid Fauna.png|200px|center|link=Crabsquid]][[Crabsquid]] |
|||
''Crabsquid'' |
|||
| style="text-align:center; font-size:12px;" |[[:Category:Attitude: Aggressive|Aggressive]] |
|||
| style="text-align:left; font-size:12px;" | |
|||
*[[Deep Grand Reef]] |
|||
*[[Blood Kelp Caves|Northern Blood Kelp Caves]] |
|||
*[[Blood Kelp Zone|Northern Blood Kelp Zone]] |
|||
*[[Lost River]] |
|||
**[[Lost River|Corridor]] |
|||
**[[Lost River|Ghost Canyon]] |
|||
|- |
|||
| style="text-align:center; font-size:12px;" |[[File:Crash Fauna.png|200px|center|link=Crashfish]][[Crashfish]] |
|||
''Crash'' |
|||
| style="text-align:center; font-size:12px;" | |
|||
[[:Category:Attitude: Defensive|Defensive]] |
|||
| style="text-align:left; font-size:12px;" | |
|||
*[[Kelp Forest Caves]] |
|||
*[[Safe Shallows Caves]] |
|||
|- |
|||
| style="text-align:center; font-size:12px;" |[[File:Lava Lizard Fauna A.png|200px|center|link=Lava Lizard]][[Lava Lizard]] |
|||
''lavalizard'' |
|||
| style="text-align:center; font-size:12px;" |[[:Category:Attitude: Aggressive|Aggressive]] |
|||
| style="text-align:left; font-size:12px;" | |
|||
*[[Inactive Lava Zone Corridor]] |
|||
*[[Inactive Lava Zone]] |
|||
*[[Lava Lakes]] |
|||
*[[Lava Castle]] |
|||
|- |
|||
| style="text-align:center; font-size:12px;" |[[File:Mesmer Fauna.png|200px|center|link=Mesmer]][[Mesmer]] |
|||
''mesmer'' |
|||
| style="text-align:center; font-size:12px;" | |
|||
[[:Category:Attitude: Aggressive|Aggressive]] |
|||
| style="text-align:left; font-size:12px;" | |
|||
*[[Bulb Zone]] |
|||
*[[Crag Field]] |
|||
*[[Kelp Forest Caves]] |
|||
*[[Lost River]] |
|||
**[[Lost River|Bones Field]] |
**[[Lost River|Bones Field]] |
||
*[[Mushroom Forest|Northeastern Mushroom Forest]] |
* [[Mushroom Forest|Northeastern Mushroom Forest]]}} |
||
|- |
|||
{{tr|name=River Prowler|filename=River Prowler Fauna.png|c2= * Aggressive|c3= |
|||
| style="text-align:center; font-size:12px;" |[[File:Spine Eel Fauna.png|205px|center|link=River Prowler]][[River Prowler]] |
|||
* [[Lost River]] |
|||
''spineeel'' |
|||
** [[Lost River|Bone Fields]] |
|||
| style="text-align:center; font-size:12px;" |[[:Category:Attitude: Aggressive|Aggressive]] |
|||
** [[Lost River|Ghost Forest]] |
|||
| style="text-align:left; font-size:12px;" | |
|||
*[[Lost River]] |
** [[Lost River|Junction]] |
||
**[[Lost River| |
** [[Lost River|Mountains Corridor]]}} |
||
**[[Lost River|Ghost Forest]] |
|||
{{tr|name=Sand Shark|filename=Sand Shark Fauna.png|c2= * Aggressive|c3= |
|||
**[[Lost River|Junction]] |
|||
* [[Crash Zone]] |
|||
**[[Lost River|Mountains Corridor]] |
|||
* [[Dunes]] |
|||
|- |
|||
* [[Grassy Plateaus]]}} |
|||
| style="text-align:center; font-size:12px;" |[[File:Sand Shark Fauna.png|200px|center|link=Sand Shark]][[Sand Shark]] |
|||
''sandshark'' |
|||
{{tr|name=Stalker|filename=Stalker Fauna.png|c2= * Aggressive|c3= |
|||
| style="text-align:center; font-size:12px;" | |
|||
* [[Crash Zone]] |
|||
[[:Category:Attitude: Aggressive|Aggressive]] |
|||
* [[Kelp Forest]] |
|||
| style="text-align:left; font-size:12px;" | |
|||
*[[ |
* [[Kelp Forest Caves]] |
||
* [[Primary Containment Facility#Aquarium|Primary Containment Facility Aquarium]]}} |
|||
*[[Dunes]] |
|||
*[[Grassy Plateaus]] |
|||
{{tr|name=Warper|filename=Warper Fauna.png|c2= * Aggressive (when target has [[Kharaa]]) |
|||
|- |
|||
* Passive when target is not infected|c3= |
|||
| style="text-align:center; font-size:12px;" |[[File:Stalker Fauna.png|200px|center|link=Stalker]][[Stalker]] |
|||
* [[Blood Kelp Caves]] |
|||
''stalker'' |
|||
* [[Blood Kelp Zone]] |
|||
| style="text-align:center; font-size:12px;" |[[:Category:Attitude: Aggressive|Aggressive]] |
|||
* [[Deep Grand Reef]] |
|||
| style="text-align:left; font-size:12px;" | |
|||
*[[ |
* [[Dunes]] |
||
*[[ |
* [[Grand Reef]] |
||
*[[ |
* [[Inactive Lava Zone]] |
||
* [[Inactive Lava Zone Corridor]] |
|||
*[[Primary Containment Facility#Aquarium|Primary Containment Facility Aquarium]] |
|||
* [[Lava Lakes]] |
|||
|- |
|||
* [[Lost River]] |
|||
| style="text-align:center; font-size:12px;" |[[File:Warper Fauna.png|200px|center|link=Warper]][[Warper]] |
|||
** [[Lost River|Junction]] |
|||
''warper'' |
|||
* [[Mountain Island]] |
|||
| style="text-align:center; font-size:12px;" | |
|||
** [[Quarantine Enforcement Platform]] |
|||
*[[:Category:Attitude: Aggressive|Aggressive]] when the target is infected with the [[Kharaa Bacterium]] |
|||
* [[Sea Treader's Path]]}} |
|||
*[[:Category:Attitude: Passive|Passive]] when the target is not infected |
|||
| style="text-align:left; font-size:12px;" | |
|||
*[[Blood Kelp Caves]] |
|||
*[[Blood Kelp Zone]] |
|||
*[[Deep Grand Reef]] |
|||
*[[Dunes]] |
|||
*[[Grand Reef]] |
|||
*[[Inactive Lava Zone]] |
|||
*[[Inactive Lava Zone Corridor]] |
|||
*[[Lava Lakes]] |
|||
*[[Lost River]] |
|||
**[[Lost River|Junction]] |
|||
*[[Mountain Island]] |
|||
**[[Quarantine Enforcement Platform]] |
|||
*[[Sea Treader's Path]] |
|||
|} |
|} |
||
{{Clear}} |
|||
==Herbivores== |
|||
{| class="article-table sortable |
{| class="article-table sortable TTable" |
||
|- |
|||
! class="unsortable" style="width: 25%; text-align: center;" |Fauna Name and ID |
|||
! class="unsortable" style="width: 25%; text-align: center;" |Attitude |
|||
! class="unsortable" style="width: 25%; text-align: center;" |Biome |
|||
|- |
|||
| style="text-align:center; font-size:12px;" |[[File:Airsack_Fauna.png|200px|center|link=Bladderfish]][[Bladderfish]] |
|||
''bladderfish'' |
|||
| style="text-align:center; font-size:12px;" |[[:Category:Attitude: Passive|Passive]] |
|||
| style="text-align:left; font-size:12px;" | |
|||
*[[Crash Zone Mesas]] |
|||
*[[Dunes]] |
|||
*[[Grand Reef]] |
|||
*[[Grassy Plateaus]] |
|||
*[[Kelp Forest]] |
|||
*[[Lost River]] |
|||
**[[Lost River|Tree Cove]] |
|||
*[[Mushroom Forest]] |
|||
*[[Primary Containment Facility#Aquarium|Primary Containment Facility Aquarium]] |
|||
*[[Safe Shallows]] |
|||
|- |
|- |
||
! Fauna |
|||
| style="text-align:center; font-size:12px;" |[[File:Boomerang Fauna.png|200px|center|link=Boomerang]][[Boomerang]] |
|||
! Attitude |
|||
''boomerang'' |
|||
! class="unsortable" | Biome |
|||
| style="text-align:center; font-size:12px;" |[[:Category:Attitude: Passive|Passive]] |
|||
| style="text-align:left; font-size:12px;" | |
|||
{{tr|name=Bladderfish (Subnautica)|display=Bladderfish|filename=Bladderfish Fauna.png|c2= * Passive|c3= |
|||
*[[Bulb Zone]] |
|||
*[[ |
* [[Crash Zone Mesas]] |
||
*[[ |
* [[Dunes]] |
||
*[[ |
* [[Grand Reef]] |
||
*[[ |
* [[Grassy Plateaus]] |
||
*[[ |
* [[Kelp Forest]] |
||
*[[ |
* [[Lost River]] |
||
*[[ |
** [[Lost River|Tree Cove]] |
||
*[[ |
* [[Mushroom Forest]] |
||
* [[Primary Containment Facility#Aquarium|Primary Containment Facility Aquarium]] |
|||
*[[Mountains Caves]] |
|||
* [[Safe Shallows]]}} |
|||
*[[Primary Containment Facility#Aquarium|Primary Containment Facility Aquarium]] |
|||
*[[Safe Shallows]] |
|||
{{tr|name=Boomerang (Subnautica)|display=Boomerang|filename=Boomerang Fauna.png|c2= * Passive|c3= |
|||
*[[Safe Shallows Caves]] |
|||
*[[ |
* [[Bulb Zone]] |
||
* [[Crag Field]] |
|||
*[[Sea Treader's Tunnel Caves]] |
|||
*[[ |
* [[Crash Zone]] |
||
* [[Deep Grand Reef]] |
|||
|- |
|||
* [[Dunes]] |
|||
| style="text-align:center; font-size:12px;" |[[File:Red Ghost Ray Fauna.png|200px|center|link=Crimson Ray]][[Crimson Ray]] |
|||
* [[Grand Reef]] |
|||
''ghostrayred'' |
|||
* [[Grassy Plateaus]] |
|||
| style="text-align:center; font-size:12px;" |[[:Category:Attitude: Passive|Passive]] |
|||
* [[Kelp Forest]] |
|||
| style="text-align:left; font-size:12px;" | |
|||
*[[ |
* [[Mountains]] |
||
*[[ |
* [[Mountains Caves]] |
||
* [[Primary Containment Facility#Aquarium|Primary Containment Facility Aquarium]] |
|||
|- |
|||
* [[Safe Shallows]] |
|||
| style="text-align:center; font-size:12px;" |[[File:Cute Fish Fauna.png|200px|center|link=Cuddlefish]][[Cuddlefish]] |
|||
* [[Safe Shallows Caves]] |
|||
''cutefish'' |
|||
* [[Sea Treader's Path]] |
|||
| style="text-align:center; font-size:12px;" |[[:Category:Attitude: Passive|Passive]] |
|||
* [[Sea Treader's Tunnel Caves]] |
|||
| style="text-align:left; font-size:12px;" | |
|||
* [[Underwater Islands]]}} |
|||
{{tr|name=Crimson Ray|filename=Crimson Ray Fauna.png|c2= * Passive|c3= |
|||
* [[Inactive Lava Zone]] |
|||
* [[Lava Lakes]]}} |
|||
{{tr|name=Cuddlefish|filename=Cuddlefish Fauna.png|c2= * Passive|c3= |
|||
*[[Eggs]] |
*[[Eggs]] |
||
**[[Degasi Seabases|Deep Grand Reef Degasi Base]] |
** [[Degasi Seabases|Deep Grand Reef Degasi Base]] |
||
**[[Dunes|Dunes Sinkhole]] |
** [[Dunes|Dunes Sinkhole]] |
||
**[[Lost River Laboratory Cache]] |
** [[Lost River Laboratory Cache]] |
||
**[[Mushroom Forest Caves]] |
** [[Mushroom Forest Caves]]}} |
||
{{tr|name=Eyeye|filename=Eyeye Fauna.png|c2= * Passive|c3= |
|||
* [[Bulb Zone]] |
|||
* [[Bulb Zone Caves]] |
|||
* [[Crash Zone]] |
|||
* [[Dunes]] |
|||
* [[Grand Reef]] |
|||
* [[Jellyshroom Cave]] |
|||
* [[Kelp Forest]] |
|||
* [[Kelp Forest Caves]] |
|||
* [[Sea Treader's Path]] |
|||
* [[Sea Treader's Tunnel Caves]]}} |
|||
{{tr|name=Garryfish|filename=Garryfish Fauna.png|c2= * Passive|c3= |
|||
* [[Crash Zone Mesas]] |
|||
* [[Dunes]] |
|||
* [[Primary Containment Facility#Aquarium|Primary Containment Facility Aquarium]] |
|||
* [[Safe Shallows]] |
|||
* [[Safe Shallows Caves]] |
|||
* [[Underwater Islands]]}} |
|||
{{tr|name=Gasopod|filename=Gasopod Fauna.png|c2= * Defensive|c3= |
|||
* [[Crash Zone Mesas]] |
|||
* [[Dunes]] |
|||
* [[Safe Shallows]]}} |
|||
{{tr|name=Ghostray|filename=Ghostray Fauna.png|c2= * Passive|c3= |
|||
* [[Lost River]] |
|||
** [[Lost River|Bone Fields]] |
|||
** [[Lost River|Ghost Canyon]] |
|||
** [[Lost River|Ghost Forest]] |
|||
** [[Lost River|Tree Cove]] |
|||
** [[Lost River|Junction]] |
|||
** [[Lost River|Mountains Corridor]]}} |
|||
{{tr|name=Holefish|filename=Holefish Fauna.png|c2= * Passive|c3= |
|||
* [[Bulb Zone Caves]] |
|||
* [[Crash Zone]] |
|||
* [[Mushroom Forest Caves]] |
|||
* [[Primary Containment Facility#Aquarium|Primary Containment Facility Aquarium]] |
|||
* [[Safe Shallows]] |
|||
* [[Safe Shallows Caves]]}} |
|||
{{tr|name=Hoopfish (Subnautica)|display=Hoopfish|filename=Hoopfish Fauna.png|c2= * Passive|c3= |
|||
* [[Bulb Zone]] |
|||
* [[Crag Field]] |
|||
* [[Dunes]] |
|||
* [[Grand Reef]] |
|||
* [[Grassy Plateaus]] |
|||
* [[Kelp Forest]] |
|||
* [[Kelp Forest Caves]] |
|||
* [[Mountains]] |
|||
* [[Primary Containment Facility#Aquarium|Primary Containment Facility Aquarium]] |
|||
* [[Sea Treader's Path]] |
|||
* [[Sea Treader's Tunnel Caves]] |
|||
* [[Underwater Islands]]}} |
|||
{{tr|name=Hoverfish|filename=Hoverfish Fauna.png|c2= * Passive|c3= |
|||
* [[Crash Zone]] |
|||
* [[Crash Zone Mesas]] |
|||
* [[Kelp Forest]] |
|||
* [[Primary Containment Facility#Aquarium|Primary Containment Facility Aquarium]]}} |
|||
{{tr|name=Jellyray|filename=Jellyray Fauna.png|c2= * Passive|c3= |
|||
* [[Deep Grand Reef]] |
|||
* [[Mushroom Forest]]}} |
|||
{{tr|name=Magmarang|filename=Magmarang Fauna.png|c2= * Passive|c3= |
|||
* [[Inactive Lava Zone]] |
|||
* [[Inactive Lava Zone Corridor]] |
|||
* [[Lava Lakes]]}} |
|||
{{tr|name=Oculus|filename=Oculus Fauna.png|c2= * Passive|c3= |
|||
* [[Jellyshroom Cave]] |
|||
* [[Primary Containment Facility#Aquarium|Primary Containment Facility Aquarium]]}} |
|||
{{tr|name=Peeper|filename=Peeper Fauna.png|c2= * Passive|c3= |
|||
* [[Bulb Zone]] |
|||
* [[Crash Zone]] |
|||
* [[Crash Zone Mesas]] |
|||
* [[Deep Sparse Reef]] |
|||
* [[Dunes]] |
|||
* [[Grand Reef]] |
|||
* [[Grassy Plateaus]] |
|||
* [[Kelp Forest]] |
|||
* [[Mountains]] |
|||
* [[Mushroom Forest]] |
|||
* [[Safe Shallows]] |
|||
* [[Sea Treader's Path]] |
|||
* [[Sparse Reef]] |
|||
* [[Primary Containment Facility#Aquarium|Primary Containment Facility Aquarium]]}} |
|||
{{tr|name=Rabbit Ray|filename=Rabbit Ray Fauna.png|c2= * Passive|c3= |
|||
* [[Crash Zone]] |
|||
* [[Crash Zone Mesas]] |
|||
* [[Kelp Forest]] |
|||
* [[Primary Containment Facility#Aquarium|Primary Containment Facility Aquarium]] |
|||
* [[Safe Shallows]]}} |
|||
{{tr|name=Red Eyeye|filename=Red Eyeye Fauna.png|c2= * Passive|c3= |
|||
* [[Inactive Lava Zone]] |
|||
* [[Inactive Lava Zone Corridor]] |
|||
* [[Lava Lakes]]}} |
|||
{{tr|name=Reginald|filename=Reginald Fauna.png|c2= * Passive|c3= |
|||
* [[Crash Zone]] |
|||
* [[Crash Zone Mesas]] |
|||
* [[Deep Sparse Reef]] |
|||
* [[Grand Reef]] |
|||
* [[Grand Reef Caves]] |
|||
* [[Grassy Plateaus]] |
|||
* [[Lost River]] |
|||
** [[Lost River|Ghost Canyon]] |
|||
** [[Lost River|Ghost Forest]] |
|||
** [[Lost River|Junction]] |
|||
** [[Lost River|Mountains Corridor]] |
|||
* [[Mountains Caves]] |
|||
* [[Mountains]] |
|||
* [[Primary Containment Facility#Aquarium|Primary Containment Facility Aquarium]] |
|||
* [[Sea Treader's Path]] |
|||
* [[Sparse Reef]]}} |
|||
{{tr|name=Skyray (Subnautica)|display=Skyray|filename=Skyray Fauna.png|c2= * Passive|c3= |
|||
* [[Crash Zone]] |
|||
* [[Floating Island]] |
|||
* [[Mountain Island]] |
|||
* [[Lifepod 5]]}} |
|||
{{tr|name=Spadefish|filename=Spadefish Fauna.png|c2= * Passive|c3= |
|||
* [[Deep Sparse Reef]] |
|||
* [[Dunes]] |
|||
* [[Grand Reef]] |
|||
* [[Grassy Plateaus]] |
|||
* [[Mushroom Forest]] |
|||
* [[Mushroom Forest Caves]] |
|||
* [[Sea Treader's Path]] |
|||
* [[Sea Treader's Tunnel Caves]] |
|||
* [[Sparse Reef]] |
|||
* [[Underwater Islands]]}} |
|||
{{tr|name=Spinefish (Subnautica)|display=Spinefish|filename=Spinefish Fauna.png|c2= * Passive|c3= |
|||
* [[Blood Kelp Caves]] |
|||
* [[Blood Kelp Zone]] |
|||
* [[Lost River]] |
|||
** [[Lost River|Bone Fields]] |
|||
** [[Lost River|Corridor]] |
|||
** [[Lost River|Ghost Canyon]] |
|||
** [[Lost River|Ghost Forest]] |
|||
** [[Lost River|Junction]] |
|||
** [[Lost River|Mountains Corridor]] |
|||
* [[Bone Fields Caves]]}} |
|||
|} |
|||
==Scavengers and Parasites== |
|||
{| class="article-table sortable TTable" |
|||
|- |
|- |
||
! Fauna |
|||
| style="text-align:center; font-size:12px;" |[[File:Eyeye Fauna.png|200px|center|link=Eyeye]][[Eyeye]] |
|||
! Attitude |
|||
''eyeye'' |
|||
! class="unsortable" | Biome |
|||
| style="text-align:center; font-size:12px;" |[[:Category:Attitude: Passive|Passive]] |
|||
| style="text-align:left; font-size:12px;" | |
|||
{{tr|name=Amoeboid|filename=Amoeboid Fauna.png|c2= * Passive|c3= |
|||
*[[Bulb Zone]] |
|||
*[[ |
* [[Disease Research Facility]] |
||
*[[ |
* [[Lost River]] |
||
** [[Lost River|Bone Fields]] |
|||
*[[Dunes]] |
|||
** [[Lost River|Ghost Canyon]] |
|||
*[[Grand Reef]] |
|||
** [[Lost River|Ghost Forest]] |
|||
*[[Jellyshroom Cave]] |
|||
*[[ |
** [[Lost River|Junction]] |
||
** [[Lost River|Mountains Corridor]] |
|||
*[[Kelp Forest Caves]] |
|||
* [[Lost River Laboratory Cache]]}} |
|||
*[[Sea Treader's Path]] |
|||
*[[Sea Treader's Tunnel Caves]] |
|||
{{tr|name=Ancient Floater|filename=Ancient Floater Fauna.png|c2= * Passive|c3= |
|||
* [[Floating Island]] |
|||
* [[Blood Kelp Zone|Northern Blood Kelp Zone]] |
|||
* [[Underwater Islands]]}} |
|||
{{tr|name=Bleeder|filename=Bleeder Fauna.png|c2= * Aggressive|c3= |
|||
* [[Aurora]] |
|||
* [[Deep Sparse Reef]] |
|||
* [[Kelp Forest]] |
|||
* [[Kelp Forest Caves]] |
|||
* [[Lost River]] |
|||
** [[Lost River|Bone Fields]]}} |
|||
{{tr|name=Blood Crawler|filename=Blood Crawler Fauna.png|c2= * Aggressive|c3= |
|||
* [[Blood Kelp Zone]] |
|||
* [[Blood Kelp Caves]] |
|||
* [[Lost River]] |
|||
** [[Lost River|Ghost Forest]]}} |
|||
{{tr|name=Cave Crawler|filename=Cave Crawler Fauna.png|c2= * Aggressive|c3= |
|||
* [[Aurora]] |
|||
* [[Dunes]] |
|||
* [[Dunes Caves]] |
|||
* [[Floating Island]] |
|||
* [[Mountain Island]] |
|||
* [[Primary Containment Facility#Aquarium|Primary Containment Facility Aquarium]] |
|||
* [[Underwater Islands Caves]]}} |
|||
{{tr|name=Floater|filename=Floater Fauna.png|c2= * Defensive|c3= |
|||
* [[Grassy Plateaus]] |
|||
* [[Safe Shallows]]}} |
|||
{{tr|name=Lava Larva|filename=Lava Larva Fauna.png|c2= * Passive|c3= |
|||
* [[Inactive Lava Zone]] |
|||
* [[Inactive Lava Zone Corridor]] |
|||
* [[Lava Lakes]]}} |
|||
{{tr|name=Rockgrub (Subnautica)|display=Rockgrub|filename=Rockgrub Fauna.png|c2= * Passive|c3= |
|||
* [[Bulb Zone Caves]] |
|||
* [[Deep Sparse Reef]] |
|||
* [[Dunes]] |
|||
* [[Dunes Caves]] |
|||
* [[Grassy Plateaus Caves]] |
|||
* [[Mountains Caves]]}} |
|||
{{tr|name=Shuttlebug|filename=Shuttlebug Fauna.png|c2= * Passive|c3= |
|||
* [[Bulb Zone]] |
|||
* [[Crag Field]] |
|||
* [[Crash Zone]] |
|||
* [[Deep Sparse Reef]] |
|||
* [[Dunes]] |
|||
* [[Dunes Caves]] |
|||
* [[Grassy Plateaus Caves]] |
|||
* [[Mountains]] |
|||
* [[Mountains Caves]] |
|||
* [[Mushroom Forest Caves]] |
|||
* [[Primary Containment Facility#Aquarium|Primary Containment Facility Aquarium]] |
|||
* [[Safe Shallows Caves]] |
|||
* [[Sea Treader's Path]] |
|||
* [[Sea Treader's Tunnel Caves]] |
|||
* [[Sparse Reef]]}} |
|||
|} |
|||
==Leviathan Class== |
|||
{| class="article-table sortable TTable" |
|||
|- |
|- |
||
!Fauna |
|||
| style="text-align:center; font-size:12px;" |[[File:Garryfish Fauna.png|200px|center|link=Garryfish]][[Garryfish]] |
|||
!Attitude |
|||
''garryfish'' |
|||
! class="unsortable" |Biome |
|||
| style="text-align:center; font-size:12px;" |[[:Category:Attitude: Passive|Passive]] |
|||
| style="text-align:left; font-size:12px;" | |
|||
{{tr|name=Ghost Leviathan|filename=Ghost Leviathan Fauna.png|c2= * Aggressive|c3= |
|||
*[[Crash Zone Mesas]] |
|||
*[[ |
* [[Crater Edge]] |
||
* [[Grand Reef]] |
|||
*[[Primary Containment Facility#Aquarium|Primary Containment Facility Aquarium]] |
|||
* [[Blood Kelp Zone|Northern Blood Kelp Zone]]}} |
|||
*[[Safe Shallows]] |
|||
*[[Safe Shallows Caves]] |
|||
{{tr|name=Ghost Leviathan Juvenile|filename=Ghost Leviathan Fauna.png|c2= * Aggressive|c3= |
|||
*[[Underwater Islands]] |
|||
* [[Lost River|Bones Field]] |
|||
|- |
|||
* [[Lost River|Ghost Forest]] |
|||
| style="text-align:center; font-size:12px;" |[[File:Gasopod Fauna.png|200px|center|link=Gasopod]][[Gasopod]] |
|||
* [[Lost River|Mountains Corridor]]}} |
|||
''gasopod '' |
|||
| style="text-align:center; font-size:12px;" |[[:Category:Attitude: Defensive|Defensive]] |
|||
{{tr|name=Reaper Leviathan|filename=Reaper Leviathan Fauna.png|c2= * Aggressive|c3= |
|||
| style="text-align:left; font-size:12px;" | |
|||
*[[ |
* [[Bulb Zone]] |
||
*[[ |
* [[Crash Zone]] |
||
*[[ |
* [[Crash Zone Mesas]] |
||
* [[Dunes]] |
|||
|- |
|||
* [[Mountains]]}} |
|||
| style="text-align:center; font-size:12px;" |[[File:Ghost_Ray_Fauna.png|200px|center|link=Ghostray]][[Ghostray]] |
|||
''ghostrayblue'' |
|||
{{tr|name=Reefback Leviathan|filename=Reefback Leviathan Fauna.png|c2= * Passive|c3= |
|||
| style="text-align:center; font-size:12px;" |[[:Category:Attitude: Passive|Passive]] |
|||
* [[Blood Kelp Zone]] |
|||
| style="text-align:left; font-size:12px;" | |
|||
*[[ |
* [[Bulb Zone]] |
||
* |
* [[Crag Field]] |
||
* [[Grassy Plateaus]] |
|||
**[[Lost River|Ghost Canyon]] |
|||
* |
* [[Mushroom Forest]] |
||
* |
* [[Sparse Reef]] |
||
* [[Underwater Islands]]}} |
|||
**[[Lost River|Junction]] |
|||
**[[Lost River|Mountains Corridor]] |
|||
{{tr|name=Reefback Leviathan Juvenile|filename=Reefback Leviathan Juvenile Fauna.png|c2= * Passive|c3= |
|||
|- |
|||
* [[Blood Kelp Zone]] |
|||
| style="text-align:center; font-size:12px;" |[[File:Holefish Fauna.png|200px|center|link=Holefish]][[Holefish]] |
|||
* [[Bulb Zone]] |
|||
''holefish'' |
|||
* [[Crag Field]] |
|||
| style="text-align:center; font-size:12px;" |[[:Category:Attitude: Passive|Passive]] |
|||
* [[Grassy Plateaus]] |
|||
| style="text-align:left; font-size:12px;" | |
|||
*[[ |
* [[Mushroom Forest]] |
||
*[[ |
* [[Sparse Reef]] |
||
* [[Underwater Islands]]}} |
|||
*[[Mushroom Forest Caves]] |
|||
*[[Primary Containment Facility#Aquarium|Primary Containment Facility Aquarium]] |
|||
{{tr|name=Sea Dragon Leviathan|filename=Sea Dragon Leviathan Fauna.png|c2= * Aggressive|c3= |
|||
*[[Safe Shallows]] |
|||
*[[ |
* [[Inactive Lava Zone]] |
||
* [[Lava Lakes]]}} |
|||
|- |
|||
| style="text-align:center; font-size:12px;" |[[File:Hoopfish Fauna.png|200px|center|link=Hoopfish]][[Hoopfish]] |
|||
{{tr|name=Sea Emperor Leviathan|filename=Sea Emperor Leviathan Fauna.png|c2= * Passive|c3= |
|||
''hoopfish'' |
|||
* [[Primary Containment Facility#Aquarium|Primary Containment Facility Aquarium]]}} |
|||
| style="text-align:center; font-size:12px;" |[[:Category:Attitude: Passive|Passive]] |
|||
| style="text-align:left; font-size:12px;" | |
|||
{{tr|name=Sea Emperor Leviathan Baby|filename=Sea Emperor Leviathan Baby Fauna.png|c2= * Passive|c3= |
|||
*[[Bulb Zone]] |
|||
* [[Primary Containment Facility#Aquarium|Primary Containment Facility Aquarium]]}} |
|||
*[[Crag Field]] |
|||
*[[Dunes]] |
|||
{{tr|name=Sea Emperor Leviathan Juvenile|filename=Sea Emperor Leviathan Juvenile Fauna.png|c2= * Passive|c3= |
|||
*[[Grand Reef]] |
|||
* [[Blood Kelp Zone|Northern Blood Kelp Zone]] |
|||
*[[Grassy Plateaus]] |
|||
*[[ |
* [[Crag Field]] |
||
*[[ |
* [[Dunes]] |
||
*[[ |
* [[Grand Reef]] |
||
* [[Mountains]]}} |
|||
*[[Primary Containment Facility#Aquarium|Primary Containment Facility Aquarium]] |
|||
*[[Sea Treader's Path]] |
|||
{{tr|name=Sea Treader Leviathan|filename=Sea Treader Leviathan Fauna.png|c2= * Defensive|c3= |
|||
*[[Sea Treader's Tunnel Caves]] |
|||
*[[ |
* [[Grand Reef]] |
||
* [[Sea Treader's Path]] |
|||
|- |
|||
* [[Sea Treader's Tunnel Caves]]}} |
|||
| style="text-align:center; font-size:12px;" |[[File:Hoverfish Fauna.png|200px|center|link=Hoverfish]][[Hoverfish]] |
|||
''hoverfish'' |
|||
|} |
|||
| style="text-align:center; font-size:12px;" |[[:Category:Attitude: Passive|Passive]] |
|||
| style="text-align:left; font-size:12px;" | |
|||
==Extinct Species == |
|||
*[[Crash Zone]] |
|||
{| class="article-table sortable TTable" |
|||
*[[Crash Zone Mesas]] |
|||
*[[Kelp Forest]] |
|||
*[[Primary Containment Facility#Aquarium|Primary Containment Facility Aquarium]] |
|||
|- |
|- |
||
! class="unsortable" |Species |
|||
| style="text-align:center; font-size:12px;" |[[File:Jellyray Fauna.png|200px|center|link=Jellyray]][[Jellyray]] |
|||
! class="unsortable" |Location of Remains |
|||
''jellyray'' |
|||
! class="unsortable" |Age |
|||
| style="text-align:center; font-size:12px;" |[[:Category:Attitude: Passive|Passive]] |
|||
| style="text-align:left; font-size:12px;" | |
|||
{{tr|name=Alpha Peeper Species|filename=Alpha Peeper Species Fauna.png|c2= * N/A|c3=Unknown}} |
|||
*[[Deep Grand Reef]] |
|||
*[[Mushroom Forest]] |
|||
{{tr|name=Alpha Ray Species|filename=Alpha Ray Species Fauna.png|c2= * N/A|c3=Unknown}} |
|||
|- |
|||
| style="text-align:center; font-size:12px;" |[[File:Lavaboomerang.png|200px|center|link=Magmarang]][[Magmarang]] |
|||
{{tr|name=Ancient Skeleton|filename=Ancient Skeleton Fauna.png|c2= * [[Lost River Laboratory Cache]]|c3=~1,000,000 years}} |
|||
''lavaboomerang'' |
|||
| style="text-align:center; font-size:12px;" |[[:Category:Attitude: Passive|Passive]] |
|||
{{tr|name=Gargantuan Fossil|filename=Gargantuan Fossil Fauna.png|c2= * [[Lost River|Lost River Bones Field]] |
|||
| style="text-align:left; font-size:12px;" | |
|||
* [[Lost River |Lost River Ghost Forest]]|c3=~3,000,000 years}} |
|||
*[[Inactive Lava Zone]] |
|||
*[[Inactive Lava Zone Corridor]] |
|||
{{tr|name=Research Specimen|filename=Research Specimen Theta Fauna.png|c2= * [[Disease Research Facility]]|c3=~1000 years}} |
|||
*[[Lava Lakes]] |
|||
|- |
|||
| style="text-align:center; font-size:12px;" |[[File:Oculus Fauna.png|200px|center|link=Oculus]][[Oculus]] |
|||
''oculus'' |
|||
| style="text-align:center; font-size:12px;" |[[:Category:Attitude: Passive|Passive]] |
|||
| style="text-align:left; font-size:12px;" | |
|||
*[[Jellyshroom Cave]] |
|||
*[[Primary Containment Facility#Aquarium|Primary Containment Facility Aquarium]] |
|||
|- |
|||
| style="text-align:center; font-size:12px;" |[[File:Peeper Fauna.png|200px|center|link=Peeper]][[Peeper]] |
|||
''peeper '' |
|||
| style="text-align:center; font-size:12px;" |[[:Category:Attitude: Passive|Passive]] |
|||
| style="text-align:left; font-size:12px;" | |
|||
*[[Bulb Zone]] |
|||
*[[Crash Zone]] |
|||
*[[Crash Zone Mesas]] |
|||
*[[Deep Sparse Reef]] |
|||
*[[Dunes]] |
|||
*[[Grand Reef]] |
|||
*[[Grassy Plateaus]] |
|||
*[[Kelp Forest]] |
|||
*[[Mountains]] |
|||
*[[Mushroom Forest]] |
|||
*[[Safe Shallows]] |
|||
*[[Sea Treader's Path]] |
|||
*[[Sparse Reef]] |
|||
*[[Primary Containment Facility#Aquarium|Primary Containment Facility Aquarium]] |
|||
|- |
|||
| style="text-align:center; font-size:12px;" |[[File:Rabbit Ray Fauna.png|200px|center|link=Rabbit Ray]][[Rabbit Ray]] |
|||
''rabbitray'' |
|||
| style="text-align:center; font-size:12px;" |[[:Category:Attitude: Passive|Passive]] |
|||
| style="text-align:left; font-size:12px;" | |
|||
*[[Crash Zone]] |
|||
*[[Crash Zone Mesas]] |
|||
*[[Kelp Forest]] |
|||
*[[Primary Containment Facility#Aquarium|Primary Containment Facility Aquarium]] |
|||
*[[Safe Shallows]] |
|||
|- |
|||
| style="text-align:center; font-size:12px;" |[[File:Lava Eyeye.PNG|200px|center|link=Red Eyeye]][[Red Eyeye]] |
|||
''lavaeyeye'' |
|||
| style="text-align:center; font-size:12px;" |[[:Category:Attitude: Passive|Passive]] |
|||
| style="text-align:left; font-size:12px;" | |
|||
*[[Inactive Lava Zone]] |
|||
*[[Inactive Lava Zone Corridor]] |
|||
*[[Lava Lakes]] |
|||
|- |
|||
| style="text-align:center; font-size:12px;" |[[File:Reginald Fauna.png|200px|center|link=Reginald]][[Reginald]] |
|||
''reginald'' |
|||
| style="text-align:center; font-size:12px;" |[[:Category:Attitude: Passive|Passive]] |
|||
| style="text-align:left; font-size:12px;" | |
|||
*[[Crash Zone]] |
|||
*[[Crash Zone Mesas]] |
|||
*[[Deep Sparse Reef]] |
|||
*[[Grand Reef]] |
|||
*[[Grand Reef Caves]] |
|||
*[[Grassy Plateaus]] |
|||
*[[Lost River]] |
|||
**[[Lost River|Ghost Canyon]] |
|||
**[[Lost River|Ghost Forest]] |
|||
**[[Lost River|Junction]] |
|||
**[[Lost River|Mountains Corridor]] |
|||
*[[Mountains Caves]] |
|||
*[[Mountains]] |
|||
*[[Primary Containment Facility#Aquarium|Primary Containment Facility Aquarium]] |
|||
*[[Sea Treader's Path]] |
|||
*[[Sparse Reef]] |
|||
|- |
|||
| style="text-align:center; font-size:12px;" |[[File:Skyray Fauna.png|200px|center|link=Skyray]][[Skyray]] |
|||
''skyray'' |
|||
| style="text-align:center; font-size:12px;" |[[:Category:Attitude: Passive|Passive]] |
|||
| style="text-align:left; font-size:12px;" | |
|||
*[[Crash Zone]] |
|||
*[[Floating Island]] |
|||
*[[Mountain Island]] |
|||
*[[Lifepod 5]] |
|||
|- |
|||
| style="text-align:center; font-size:12px;" |[[File:Spadefish Fauna.png|200px|center|link=Spadefish]][[Spadefish]] |
|||
''spadefish'' |
|||
| style="text-align:center; font-size:12px;" |[[:Category:Attitude: Passive|Passive]] |
|||
| style="text-align:left; font-size:12px;" | |
|||
*[[Deep Sparse Reef]] |
|||
*[[Dunes]] |
|||
*[[Grand Reef]] |
|||
*[[Grassy Plateaus]] |
|||
*[[Mushroom Forest]] |
|||
*[[Mushroom Forest Caves]] |
|||
*[[Sea Treader's Path]] |
|||
*[[Sea Treader's Tunnel Caves]] |
|||
*[[Sparse Reef]] |
|||
*[[Underwater Islands]] |
|||
|- |
|||
| style="text-align:center; font-size:12px;" |[[File:Blood Hoopfish Fauna.png|200px|center|link=Spinefish]][[Spinefish]] |
|||
''spinefish'' |
|||
| style="text-align:center; font-size:12px;" |[[:Category:Attitude: Passive|Passive]] |
|||
| style="text-align:left; font-size:12px;" | |
|||
*[[Blood Kelp Caves]] |
|||
*[[Blood Kelp Zone]] |
|||
*[[Lost River]] |
|||
**[[Lost River|Bone Fields]] |
|||
**[[Lost River|Corridor]] |
|||
**[[Lost River|Ghost Canyon]] |
|||
**[[Lost River|Ghost Forest]] |
|||
**[[Lost River|Junction]] |
|||
**[[Lost River|Mountains Corridor]] |
|||
*[[Bone Fields Caves]] |
|||
|} |
|} |
||
{{Clear}} |
{{Clear}} |
||
=Fauna of [[Sector Zero]]= |
|||
===Scavengers & Parasites=== |
|||
==Carnivores== |
|||
{| class="article-table sortable" style="width: 100%;" cellspacing="1" cellpadding="1" border="0" |
|||
{| class="article-table sortable TTable" |
|||
|- |
|- |
||
!Fauna |
|||
! class="unsortable" style="width: 25%; text-align: center;" |Fauna Name and ID |
|||
!Attitude |
|||
! class="unsortable" style="width: 25%; text-align: center;" |Attitude |
|||
! class="unsortable |
! class="unsortable" |Biome |
||
|- |
|||
{{tr|name=Brinewing|filename=Brinewing Fauna.png|c2= * Aggressive|c3= |
|||
| style="text-align:center; font-size:12px;" | |
|||
* [[Sparse Arctic]]}} |
|||
[[File:Amoeboid Fauna.png|200px|center|link=Amoeboid]][[Amoeboid]] |
|||
''blueamoeba'' |
|||
{{tr|name=Brute Shark|filename=Brute Shark Fauna.png|c2= * Aggressive|c3= |
|||
| style="text-align:center; font-size:12px;" |[[:Category:Attitude: Passive|Passive]] |
|||
* [[Lilypad Islands]] |
|||
| style="text-align:left; font-size:12px;" | |
|||
* [[Tree Spires]] |
|||
*[[Disease Research Facility]] |
|||
*[[ |
* [[Twisty Bridges]]}} |
||
**[[Lost River|Bone Fields]] |
|||
{{tr|name=Crashfish (Below Zero)|display=Crashfish|filename=Crashfish Fauna.png|c2= * Defensive|c3= |
|||
**[[Lost River|Ghost Canyon]] |
|||
* |
* [[Arctic Kelp Caves]] |
||
* |
* [[Crystal Castle]] |
||
* [[Purple Vents]] |
|||
**[[Lost River|Mountains Corridor]] |
|||
*[[ |
* [[Twisty Bridges Caves]] |
||
}} |
|||
|- |
|||
| style="text-align:center; font-size:12px;" | |
|||
{{tr|name=Cryptosuchus|filename=Cryptosuchus Fauna.png|c2= * Aggressive|c3= |
|||
* [[Purple Vents]] |
|||
* [[Thermal Spires]]}} |
|||
{{tr|name=Noot Fish|filename=Noot Fish Fauna.png|c2= * Passive|c3= |
|||
* [[Lilypad Islands]]}} |
|||
{{tr|name=Pengling|filename=Pengling Fauna.png|c2= * Passive|c3= |
|||
* [[Arctic Kelp Forest]] |
|||
* [[Arctic|East Arctic]] |
|||
* [[Glacial Basin]] |
|||
* [[Ice Floes]] |
|||
* [[Sparse Arctic]] |
|||
* [[Arctic|West Arctic]]}} |
|||
{{tr|name=Pengwing|filename=Pengwing Fauna.png|c2= * Defensive|c3= |
|||
* [[Arctic Kelp Forest]] |
|||
* [[Arctic|East Arctic]] |
|||
* [[Delta Island]] |
|||
* [[Glacial Basin]] |
|||
* [[Ice Floes]] |
|||
* [[Sparse Arctic]] |
|||
* [[Arctic|West Arctic]]}} |
|||
{{tr|name=Pinnacarid|filename=Pinnacarid Fauna.png|c2= * Passive|c3= |
|||
* [[Arctic Kelp Forest]] |
|||
* [[Arctic|East Arctic]] |
|||
* [[Arctic|West Arctic]]}} |
|||
{{tr|name=Rock Puncher|filename=Rock Puncher Fauna.png|c2= * Aggressive|c3= |
|||
* [[Crystal Caves]] |
|||
* [[Koppa Mining Site]] |
|||
* [[Thermal Spires]]}} |
|||
{{tr|name=Snow Stalker|filename=Snow Stalker Fauna.png|c2= * Aggressive|c3= |
|||
* [[Arctic Spires]] |
|||
* [[Glacial Basin]]}} |
|||
{{tr|name=Snow Stalker Baby|filename=Snow Stalker Baby Fauna.png|c2= * Passive|c3= |
|||
* [[Glacial Basin]]}} |
|||
{{tr|name=Spikey Trap|filename=Spike Trap Yellow.png|c2= * Aggressive|c3= |
|||
* [[Deep Lilypads Cave]] |
|||
* [[Deep Twisty Bridges]] |
|||
* [[Lilypads Crevice]]}} |
|||
{{tr|name=Squidshark|filename=Squidshark Fauna.png|c2= * Aggressive|c3= |
|||
* [[Deep Lilypads Cave]] |
|||
* [[Deep Twisty Bridges]] |
|||
* [[Lilypad Islands]]}} |
|||
{{tr|name=Symbiote|filename=Symbiote Fauna.png|c2= * Aggressive|c3= |
|||
* [[Sparse Arctic]]}} |
|||
[[File:Ancient_Floater_Fauna.png|200px|center|link=Floater]][[Ancient Floater]] |
|||
''largefloater'' |
|||
| style="text-align:center; font-size:12px;" |[[:Category:Attitude: Passive|Passive]] |
|||
| style="text-align:left; font-size:12px;" | |
|||
*[[Floating Island]] |
|||
*[[Blood Kelp Zone|Northern Blood Kelp Zone]] |
|||
*[[Underwater Islands]] |
|||
|- |
|||
| style="text-align:center; font-size:12px;" |[[File:Bleeder Fauna-0.png|200px|center|link=Bleeder]][[Bleeder]] |
|||
''bleeder'' |
|||
| style="text-align:center; font-size:12px;" | |
|||
[[:Category:Attitude: Aggressive|Aggressive]] |
|||
| style="text-align:left; font-size:12px;" | |
|||
*[[Aurora]] |
|||
*[[Deep Sparse Reef]] |
|||
*[[Kelp Forest]] |
|||
*[[Kelp Forest Caves]] |
|||
*[[Lost River]] |
|||
**[[Lost River|Bone Fields]] |
|||
|- |
|||
| style="text-align:center; font-size:12px;" |[[File:Blood Crawler Fauna.png|200px|center|link=Blood Crawler]][[Blood Crawler]] |
|||
''shuttlebug'' |
|||
| style="text-align:center; font-size:12px;" |[[:Category:Attitude: Aggressive|Aggressive]] |
|||
| style="text-align:left; font-size:12px;" | |
|||
*[[Blood Kelp Zone]] |
|||
*[[Blood Kelp Caves]] |
|||
*[[Lost River]] |
|||
**[[Lost River|Ghost Forest]] |
|||
|- |
|||
| style="text-align:center; font-size:12px;" |[[File:Cave Crawler (01).png|200px|center|link=Cave Crawler]][[Cave Crawler]] |
|||
''cavecrawler'' |
|||
| style="text-align:center; font-size:12px;" |[[:Category:Attitude: Aggressive|Aggressive]] |
|||
| style="text-align:left; font-size:12px;" | |
|||
*[[Aurora]] |
|||
*[[Dunes]] |
|||
*[[Dunes Caves]] |
|||
*[[Floating Island]] |
|||
*[[Mountain Island]] |
|||
*[[Primary Containment Facility#Aquarium|Primary Containment Facility Aquarium]] |
|||
*[[Underwater Islands Caves]] |
|||
|- |
|||
| style="text-align:center; font-size:12px;" |[[File:Floater Fauna-0.png|200px|center|link=Floater]][[Floater]] |
|||
''floater'' |
|||
| style="text-align:center; font-size:12px;" |[[:Category:Attitude: Passive|Passive]] |
|||
| style="text-align:left; font-size:12px;" | |
|||
*[[Grassy Plateaus]] |
|||
*[[Safe Shallows]] |
|||
|- |
|||
| style="text-align:center; font-size:12px;" |[[File:Lava Larva Fauna.png|200px|center|link=Lava Larva]][[Lava Larva]] |
|||
''lavalarva'' |
|||
| style="text-align:center; font-size:12px;" |[[:Category:Attitude: Passive|Passive]] |
|||
| style="text-align:left; font-size:12px;" | |
|||
*[[Inactive Lava Zone]] |
|||
*[[Inactive Lava Zone Corridor]] |
|||
*[[Lava Lakes]] |
|||
|- |
|||
| style="text-align:center; font-size:12px;" |[[File:Rockgrub Fauna.png|200px|center|link=Rockgrub]][[Rockgrub]] |
|||
''rockgrub'' |
|||
| style="text-align:center; font-size:12px;" |[[:Category:Attitude: Passive|Passive]] |
|||
| style="text-align:left; font-size:12px;" | |
|||
*[[Bulb Zone Caves]] |
|||
*[[Deep Sparse Reef]] |
|||
*[[Dunes]] |
|||
*[[Dunes Caves]] |
|||
*[[Grassy Plateaus Caves]] |
|||
*[[Mountains Caves]] |
|||
|- |
|||
| style="text-align:center; font-size:12px;" |[[File:Jumper Fauna.png|200px|center|link=Shuttlebug]][[Shuttlebug]] |
|||
''jumper'' |
|||
| style="text-align:center; font-size:12px;" |[[:Category:Attitude: Passive|Passive]] |
|||
| style="text-align:left; font-size:12px;" | |
|||
*[[Bulb Zone]] |
|||
*[[Crag Field]] |
|||
*[[Crash Zone]] |
|||
*[[Deep Sparse Reef]] |
|||
*[[Dunes]] |
|||
*[[Dunes Caves]] |
|||
*[[Grassy Plateaus Caves]] |
|||
*[[Mountains]] |
|||
*[[Mountains Caves]] |
|||
*[[Mushroom Forest Caves]] |
|||
*[[Primary Containment Facility#Aquarium|Primary Containment Facility Aquarium]] |
|||
*[[Safe Shallows Caves]] |
|||
*[[Sea Treader's Path]] |
|||
*[[Sea Treader's Tunnel Caves]] |
|||
*[[Sparse Reef]] |
|||
|} |
|} |
||
== |
==Herbivores== |
||
{| class="article-table sortable |
{| class="article-table sortable TTable" |
||
|- |
|- |
||
!Fauna |
|||
! class="unsortable" style="width: 25%; text-align: center;" |Fauna Name and ID |
|||
!Attitude |
|||
! class="unsortable" style="width: 25%; text-align: center;" |Attitude |
|||
! class="unsortable |
! class="unsortable" |Biome |
||
|- |
|||
| style="text-align:center; font-size:12px;" | |
|||
[[File:Ghost_Leviathan_Fauna.png|center|200px|link=Ghost Leviathan]][[Ghost Leviathan]] |
|||
{{tr|name=Arctic Peeper|filename=Arctic Peeper Fauna.png|c2= * Passive|c3= |
|||
''ghostleviathan''<br />''ghostleviathanjuvenile'' |
|||
* [[Arctic Kelp Forest]] |
|||
| style="text-align:center; font-size:12px;" | |
|||
* [[Arctic|East Arctic]] |
|||
[[:Category:Attitude: Aggressive|Aggressive]] |
|||
* [[Glacial Bay]] |
|||
| style="text-align:left; font-size:12px;" | |
|||
* [[Shallow Twisty Bridges]] |
|||
*Adult |
|||
* |
* [[Sparse Arctic]] |
||
* |
* [[Thermal Spires]] |
||
* [[Twisty Bridges]] |
|||
**[[Blood Kelp Zone|Northern Blood Kelp Zone]] |
|||
* [[Underwater Caves]] |
|||
*Juvenile |
|||
* |
* [[Arctic|West Arctic]]}} |
||
***[[Lost River|Bones Field]] |
|||
{{tr|name=Arctic Ray|filename=Arctic Ray Fauna.png|c2= * Passive|c3= |
|||
***[[Lost River|Ghost Forest]] |
|||
* [[Glacial Bay]] |
|||
***[[Lost River|Mountains Corridor]] |
|||
* [[Arctic|East Arctic]] |
|||
|- |
|||
* [[Twisty Bridges]] |
|||
| style="text-align:center; font-size:12px;" |[[File:Reaper Leviathan Fauna.png|195px|center|link=Reaper Leviathan]][[Reaper Leviathan]] |
|||
* [[Arctic|West Arctic]]}} |
|||
''reaperleviathan'' |
|||
| style="text-align:center; font-size:12px;" | |
|||
{{tr|name=Arrow Ray|filename=Arrow Ray Fauna (BZ).png|c2= * Passive|c3= |
|||
[[:Category:Attitude: Aggressive|Aggressive]] |
|||
* [[Lilypad Islands]] |
|||
| style="text-align:left; font-size:12px;" | |
|||
*[[ |
* [[Tree Spires]]}} |
||
*[[Crash Zone Mesas]] |
|||
{{tr|name=Bladderfish (Below Zero)|display=Bladderfish|filename=Bladderfish Fauna.png|c2= * Passive|c3= |
|||
*[[Dunes]] |
|||
*[[ |
* [[Crystal Caves]] |
||
* [[Deep Purple Vents]] |
|||
|- |
|||
* [[Arctic|East Arctic]] |
|||
| style="text-align:center; font-size:12px;" |[[File:Reefback Fauna.png|200px|center|link=Reefback Leviathan]][[Reefback Leviathan]] |
|||
* [[Glacial Bay]] |
|||
''reefback'' |
|||
* [[Lilypad Islands]] |
|||
| style="text-align:center; font-size:12px;" |[[:Category:Attitude: Passive|Passive]] |
|||
* [[Marguerit Maida's Base]] |
|||
| style="text-align:left; font-size:12px;" | |
|||
*[[ |
* [[Purple Vents]] |
||
*[[ |
* [[Shallow Twisty Bridges]] |
||
*[[ |
* [[Thermal Spires]] |
||
*[[ |
* [[Twisty Bridges]] |
||
*[[ |
* [[Underwater Caves]] |
||
*[[ |
* [[Arctic|West Arctic]]}} |
||
*[[Underwater Islands]] |
|||
{{tr|name=Boomerang (Below Zero)|display=Boomerang|filename=Boomerang Fauna.png|c2= * Passive|c3= |
|||
|- |
|||
* [[Arctic|East Arctic]] |
|||
| style="text-align:center; font-size:12px;" |[[File:Sea_Dragon_Leviathan_Fauna.png|210px|center|link=Sea Dragon Leviathan]][[Sea Dragon Leviathan]] |
|||
* [[Arctic Kelp Forest]] |
|||
''seadragon'' |
|||
* [[Deep Purple Vents]] |
|||
| style="text-align:center; font-size:12px;" |[[:Category:Attitude: Aggressive|Aggressive]] |
|||
* [[Fabricator Caverns]] |
|||
| style="text-align:left; font-size:12px;" | |
|||
*[[ |
* [[Lilypad Islands]] |
||
** [[Lilypad Islands| Main Lilypad Islands]] |
|||
*[[Lava Lakes]] |
|||
* [[Shallow Twisty Bridges]] |
|||
|- |
|||
* [[Thermal Spires]] |
|||
| style="text-align:center; font-size:12px;" |<tabber>Adult=[[File: Sea Emperor Fauna.png |235px|center|link=Sea Emperor Leviathan]][[Sea Emperor Leviathan]]{{Clear}} |
|||
* [[Twisty Bridges]] |
|||
''N/A'' |
|||
* [[Arctic|West Arctic]]}} |
|||
|-|Juvenile=[[File: Sea Emperor Leviathan Fauna (Juvenile).png |235px|center|link=Sea Emperor Leviathan Juveniles]][[Sea Emperor Leviathan Juveniles]] |
|||
''seaemperorjuvenile'' |
|||
{{tr|name=Discus Fish|filename=Discus Fish Fauna.png|c2= * Passive|c3= |
|||
|-|Baby=[[File: Sea Emperor Leviathan Fauna (Baby).png |235px|center|link=Sea Emperor Leviathan (Babies)]][[Sea Emperor Leviathan (Babies)]] |
|||
* [[Deep Lilypads Cave]] |
|||
''seaemperorbaby''</tabber> |
|||
* [[Tree Spires]] |
|||
| style="text-align:center; font-size:12px;" |[[:Category:Attitude: Passive|Passive]] |
|||
}} |
|||
| style="text-align:left; font-size:12px;" | |
|||
*[[Sea Emperor Leviathan|Adult]] |
|||
{{tr|name=Eye Jelly|filename=Eye Jelly Fauna.png|c2= * Defensive|c3= |
|||
**[[Primary Containment Facility#Aquarium|Primary Containment Facility Aquarium]] |
|||
* [[Glacial Bay]] |
|||
*[[Sea Emperor Leviathan (Juveniles)|Juvenile]] |
|||
* [[Glacial Connection]] |
|||
**[[Blood Kelp Zone|Northern Blood Kelp Zone]] |
|||
* |
* [[Arctic|West Arctic]]}} |
||
**[[Dunes]] |
|||
{{tr|name=Feather Fish|filename=Feather Fish Fauna (BZ).png|c2= * Passive|c3= |
|||
**[[Grand Reef]] |
|||
* |
* [[Lilypad Islands]] |
||
* [[Purple Vents]] |
|||
* [[Thermal Spires]] |
|||
* [[Tree Spires]]}} |
|||
{{tr|name=Red Feather Fish|filename=Red Feather Fish Fauna.png|c2= * Passive|c3= |
|||
* [[Koppa Mining Site]] |
|||
* [[Crystal Caves]] |
|||
* [[Deep Purple Vents]] |
|||
* [[Fabricator Caverns]] |
|||
* [[Mercury II]] |
|||
* [[Tree Spires]]}} |
|||
{{tr|name=Hivemind|filename=Hivemind Fauna.png|c2= * Passive|c3= |
|||
* [[Lilypads Crevice]]}} |
|||
{{tr|name=Hoopfish (Below Zero)|display=Hoopfish|filename=Hoopfish Fauna.png|c2= * Passive|c3= |
|||
* [[Arctic Kelp Caves]] |
|||
* [[Arctic Kelp Forest]] |
|||
* [[Lilypad Islands]] |
|||
** [[Lilypad Islands| Main Lilypad Islands]] |
|||
* [[Shallow Twisty Bridges]] |
|||
* [[Tree Spires]] |
|||
* [[Twisty Bridges]]}} |
|||
{{tr|name=Lily Paddler|filename=Lily Paddler Fauna.png|c2= * Defensive|c3= |
|||
* [[Deep Lilypads Cave]] |
|||
* [[Large Tree Spire]] |
|||
* [[Lilypads Crevice]] |
|||
* [[Lilypad Islands]]}} |
|||
{{tr|name=Sea Monkey|filename=Sea Monkey Fauna.png|c2= * Passive|c3= |
|||
* [[Arctic Kelp Caves]] |
|||
* [[Arctic Kelp Forest]] |
|||
* [[Lilypads Crevice]] |
|||
* [[Lilypad Islands]]}} |
|||
{{tr|name=Sea Monkey Baby|filename=Sea Monkey Baby Fauna.png|c2= * Passive|c3= |
|||
* [[Eggs]] |
|||
**[[Sea Monkey Nest]]}} |
|||
{{tr|name=Skyray (Below Zero)|display=Skyray|filename=Skyray Fauna.png|c2= * Passive|c3= |
|||
* [[Glacial Bay]] |
|||
* [[Glacial Basin]] |
|||
* [[Delta Island]]}} |
|||
{{tr|name=Spinefish (Below Zero)|display=Spinefish|filename=Spinefish Fauna.png|c2= * Passive|c3= |
|||
* [[Crystal Caves]] |
|||
* [[Deep Lilypads Cave]] |
|||
* [[Deep Twisty Bridges]] |
|||
* [[Fabricator Caverns]] |
|||
* [[Mercury II]]}} |
|||
{{tr|name=Spinner Fish|filename=Spinner Fish Fauna.png|c2= * Passive|c3= |
|||
* [[Arctic Kelp Caves]] |
|||
* [[Deep Lilypads Cave]] |
|||
* [[Lilypads Crevice]] |
|||
* [[Lilypad Islands]]}} |
|||
{{tr|name=Titan Holefish|filename=Titan Holefish Fauna.png|c2= * Passive|c3= |
|||
* [[Arctic|East Arctic]] |
|||
* [[Sparse Arctic]] |
|||
* [[Arctic|West Arctic]]}} |
|||
{{tr|name=Triops|filename=Triops Fauna.png|c2= * Passive|c3= |
|||
* [[Koppa Mining Site]] |
|||
* [[Crystal Caves]] |
|||
* [[Deep Lilypads Cave]] |
|||
* [[Deep Twisty Bridges]] |
|||
* [[Fabricator Caverns]] |
|||
* [[Tree Spires]]}} |
|||
{{tr|name=Trivalve|filename=Trivalve Fauna.png|c2= * Passive|c3= |
|||
* [[Eggs]] |
|||
**[[Arctic Spires]] |
|||
**[[Deep Lilypads Cave]] |
|||
**[[West Arctic]]}} |
|||
|} |
|||
== Scavengers & Parasites== |
|||
{| class="article-table sortable TTable" |
|||
|- |
|- |
||
!Fauna |
|||
| style="text-align:center; font-size:12px;" |[[File:Sea Treader Fauna.png|200px|center|link=Sea Treader Leviathan]][[Sea Treader Leviathan]] |
|||
!Attitude |
|||
''seatreader'' |
|||
! class="unsortable" |Biome |
|||
| style="text-align:center; font-size:12px;" |[[:Category:Attitude: Defensive|Defensive]] |
|||
{{tr|name=Rockgrub (Below Zero)|display=Rockgrub|filename=Rockgrub Fauna.png|c2= * Passive|c3= |
|||
| style="text-align:left; font-size:12px;" | |
|||
*[[ |
* [[Crystal Caves]] |
||
*[[ |
* [[Arctic|East Arctic]] |
||
*[[ |
* [[Koppa Mining Site]] |
||
* [[Arctic#West Artic|West Arctic]]}} |
|||
|} |
|} |
||
== |
==Leviathans== |
||
{| class="article-table sortable |
{| class="article-table sortable TTable" |
||
|- |
|- |
||
!Fauna |
|||
! class="unsortable" style="width: 25%; text-align: center;" |Name |
|||
!Attitude |
|||
! class="unsortable" style="width: 25%; text-align: center;" |Location Of Remains |
|||
! class="unsortable" |
! class="unsortable" |Biome |
||
! class="unsortable" style="width: 25%; text-align: center;" |Living Relatives |
|||
{{tr|name=Chelicerate|filename=Chelicerate Fauna.png|c2= * Aggressive|c3= |
|||
|- |
|||
* [[Arctic|East Arctic]] |
|||
| style="text-align:center; font-size:12px;" |[[File:Unknown.png|90px|center|link=Alpha Peeper Species]][[Alpha Peeper Species]] |
|||
* [[Purple Vents]] |
|||
| style="text-align:center; font-size:12px;" | |
|||
* [[Tree Spires]]}} |
|||
*''N/A'' |
|||
| style="text-align:center; font-size:12px;" |Many millions of years old |
|||
{{tr|name=Glow Whale|filename=Glow Whale Fauna.png|c2= * Passive|c3= |
|||
| style="text-align:left; font-size:12px;" | |
|||
*[[ |
* [[Arctic|East Arctic]] |
||
*[[ |
* [[Lilypad Islands]]}} |
||
*[[Eyeye]] |
|||
{{tr|name=Ice Worm|filename=Ice Worm Fauna.png|c2= * Aggressive|c3= |
|||
*[[Oculus]] |
|||
*[[ |
* [[Arctic Spires]]}} |
||
|- |
|||
{{tr|name=Juvenile Ventgarden|filename=Juvenile Ventgarden Fauna.png|c2= * Passive|c3= |
|||
| style="text-align:center; font-size:12px;" |[[File:Unknown.png|90px|center|link=Alpha Ray Species]][[Alpha Ray Species]] |
|||
* [[Tree Spires]]}} |
|||
| style="text-align:center; font-size:12px;" | |
|||
*''N/A'' |
|||
{{tr|name=Shadow Leviathan|filename=Shadow Leviathan Fauna.png|c2= * Aggressive|c3= |
|||
| style="text-align:center; font-size:12px;" |Many millions of years old |
|||
* [[Crystal Caves]] |
|||
| style="text-align:left; font-size:12px;" | |
|||
*[[ |
* [[Fabricator Caverns]]}} |
||
*[[Ghostray]] |
|||
{{tr|name=Ventgarden|filename=Ventgarden Fauna.png|c2= * Passive|c3= |
|||
*[[Jellyray]] |
|||
*[[ |
* [[Tree Spires]]}} |
||
|- |
|||
{{tr|name=Void Chelicerate|filename=Void Chelicerate Fauna.png|c2= * Aggressive|c3= |
|||
| style="text-align:center; font-size:12px;" |[[File:Ancient Skeleton.png|200px|center|link=Ancient Skeleton]][[Ancient Skeleton]] |
|||
* [[World Edge]]}} |
|||
| style="text-align:center; font-size:12px;" | |
|||
*[[Lost River Laboratory Cache]] |
|||
| style="text-align:center; font-size:12px;" |1,000,000 years |
|||
| style="text-align:left; font-size:12px;" | |
|||
*''Unknown'' |
|||
|- |
|||
| style="text-align:center; font-size:12px;" |[[File:Gargantuan Skull.png|200px|center|link=Gargantuan Fossil]][[Gargantuan Fossil]] |
|||
| style="text-align:center; font-size:12px;" | |
|||
*[[Lost River|Lost River Bones Field]] |
|||
*[[Lost River |Lost River Ghost Forest]] |
|||
| style="text-align:center; font-size:12px;" |3,000,000 years |
|||
| style="text-align:left; font-size:12px;" | |
|||
*''Unknown'' |
|||
|- |
|||
| style="text-align:center; font-size:12px;" |[[File:Disease Research Facility Skeleton.png|200px|center|link=Research Specimen Theta]][[Research Specimen Theta]] |
|||
| style="text-align:center; font-size:12px;" | |
|||
*[[Disease Research Facility]] |
|||
| style="text-align:center; font-size:12px;" |1000 years |
|||
| style="text-align:left; font-size:12px;" | |
|||
*[[Biter]] |
|||
*[[Blighter]] |
|||
*[[Sand Shark]] |
|||
*[[Boneshark]] |
|||
*[[Rockgrub]] |
|||
|} |
|} |
||
== |
==Extinct Species== |
||
{| class="article-table sortable |
{| class="article-table sortable TTable" |
||
|- |
|- |
||
! class="unsortable" |
! class="unsortable" |Fauna |
||
! class="unsortable" |
! class="unsortable" |Location of Remains |
||
! class="unsortable |
! class="unsortable" |Age |
||
|- |
|||
{{tr|name=Frozen Leviathan|filename=Frozen Leviathan.png|c2= * [[Phi Excavation Site]]|c3= |
|||
| style="text-align:center; font-size:12px;" |[[File:Shoal of Fish Fauna.png|200px|center|link=Shoal of Fish]][[Shoal of Fish]] |
|||
~1000 years at most}} |
|||
| style="text-align:center; font-size:12px;" | |
|||
[[:Category:Attitude: Passive|Passive]] |
|||
| style="text-align:left; font-size:12px;" | |
|||
*[[Blood Kelp Zone]] |
|||
*[[Bulb Zone]] |
|||
*[[Crag Field]] |
|||
*[[Crash Zone]] |
|||
*[[Crash Zone Mesas]] |
|||
*[[Deep Grand Reef]] |
|||
*[[Dunes]] |
|||
*[[Grand Reef]] |
|||
*[[Grassy Plateaus]] |
|||
*[[Kelp Forest]] |
|||
*[[Lost River]] |
|||
**[[Lost River|Bones Field]] |
|||
**[[Lost River|Corridor]] |
|||
**[[Lost River|Ghost Canyon]] |
|||
**[[Lost River|Ghost Forest]] |
|||
**[[Lost River|Junction]] |
|||
**[[Lost River|Mountains Corridor]] |
|||
*[[Mountains]] |
|||
*[[Mushroom Forest]] |
|||
*[[Safe Shallows]] |
|||
*[[Sea Treader's Path]] |
|||
*[[Sparse Reef]] |
|||
*[[Underwater Islands]] |
|||
|- |
|||
|[[File:Alien Robot.png|alt=<nowiki>[[Alien Robot]]</nowiki>|center|frameless]]<small>[[Alien Robot]]</small> |
|||
|[[:Category:Aggressive|<small>Aggressive</small>]] |
|||
|<br /> |
|||
*[[Alien Thermal Plant|<small>Alien Thermal Plant</small>]] |
|||
*[[Primary Containment Facility|<small>Primary Containment Facility</small>]] |
|||
*<small>[[Crag Field]] [[Alien Arch Caches|Alien Arch Cache]]</small> |
|||
|} |
|} |
||
=Gallery= |
|||
<gallery widths="200" spacing=" |
<gallery widths="200" spacing="medium" orientation="none"> |
||
Unspecified.jpg|Subnautica fauna Sheet 1 |
|||
Unspecified2.jpg|Subnautica fauna Sheet 2 |
|||
Fauna 1 Fox3D.png|Various fauna & flora renders |
Fauna 1 Fox3D.png|Various fauna & flora renders |
||
Fauna 2 Fox3D.png|Various fauna renders |
Fauna 2 Fox3D.png|Various fauna renders |
||
</gallery> |
</gallery> |
||
=Trivia= |
|||
*As of the Dangerous Creatures update, all fauna have yellow blood. Before this update, all fauna had red blood. This is due to the ESRB giving Subnautica a higher rating than expected due to red blood. |
|||
**Scientifically speaking, the fauna of planet 4546B might have high concentrations of [https://en.wikipedia.org/wiki/Vanabin vanabin] in their blood. |
|||
*As of the Dangerous Creatures update, all fauna have yellow blood. Before this update, all fauna had red blood. This is due to the ESRB giving Subnautica a higher rating than expected due to red blood. |
|||
**Scientifically speaking, the fauna of planet 4546B might have high concentrations of vanabin in their blood. |
|||
*Fauna were once intended to possess inherent attributes, that would have caused them to exhibit unique behaviors. These included, e.g., "Fertile" (occasionally lay eggs that can be hatched), "Alpha" (attacked the player if other creatures were killed by the player in the immediate vicinity), "Complex" (specimens take longer to scan), "Greater" (specimens are of larger size and weight). This, however, was scrapped upon the final release. |
*Fauna were once intended to possess inherent attributes, that would have caused them to exhibit unique behaviors. These included, e.g., "Fertile" (occasionally lay eggs that can be hatched), "Alpha" (attacked the player if other creatures were killed by the player in the immediate vicinity), "Complex" (specimens take longer to scan), "Greater" (specimens are of larger size and weight). This, however, was scrapped upon the final release. |
||
*There are some Fauna that are unknown creatures that only exist as ambience sounds. These include the Big Snake, Docile Whale (possibly a glow whale), Screecher, Echolocator, Sounds of birds and insects, Kaiju, and a few more. These are only in Subnautica Below Zero. |
|||
*In the very early stages of ''Subnautica'', there were many unused and cut fauna. |
*In the very early stages of ''Subnautica'', there were many unused and cut fauna. |
||
**An unused creature named the [[Cut Content#Sandworm|Sandworm]] could only be found in the [[Cut Content#Entity Gallery|Entity Gallery]]. It was intended to stay in one place under the ground, and when the player or an NPC was right above it, it would spring up and would do 1 damage at a very fast rate. It only had animations for shooting out of the ground, going back into its hole, and an idle animation. |
**An unused creature named the [[Cut Content (Subnautica)#Sandworm|Sandworm]] could only be found in the [[Cut Content (Subnautica)#Entity Gallery|Entity Gallery]]. It was intended to stay in one place under the ground, and when the player or an NPC was right above it, it would spring up and would do 1 damage at a very fast rate. It only had animations for shooting out of the ground, going back into its hole, and an idle animation. |
||
**The unused [[Cut Content#Grabcrab|Grabcrab]] creature would leave its burrow and search for items to drag back to its hole. These items included small resources and even small fish. Its burrow also had the same model as the Grabcrab. |
**The unused [[Cut Content (Subnautica)#Grabcrab|Grabcrab]] creature would leave its burrow and search for items to drag back to its hole. These items included small resources and even small fish. Its burrow also had the same model as the Grabcrab. |
||
**Unused clusters of [[Cut Content (Subnautica)#Bloom Plankton|Bloom Plankton]] can be spawned in the game, and react to light. They will glow red if a [[Flare]] is shining on them, and white if a [[Flashlight]] or [[Vehicles|Vehicle's]] light is shining on them. |
|||
**The [[Cut Content#Rock Puncher|Rock Puncher]] was a fauna that would have used its large appendages to smash terrain. However, it is making an appearance in [[Subnautica: Below Zero]] in the Thermal Spires Biome. |
|||
**In the [[Update History (Subnautica)#Early Access Release|Early Access Release]] trailer, the [[Cut Content (Subnautica)#Large Bird|Large Bird]] can be seen flying among the Skyrays. They were cut entirely out of the game sometime before Early Access, making their appearance in the trailer the last time they were seen. |
|||
**Unused clusters of [[Cut Content#Bloom Plankton|Bloom Plankton]] can be spawned in the game, and react to light. They will glow red if a [[Flare]] is shining on them, and white if a [[Flashlight]] or [[Vehicles|Vehicle's]] light is shining on them. |
|||
**In the [[Update History#Early Access Release|Early Access Release]] trailer, the [[Cut Content#Large Bird|Large Bird]] can be seen flying among the Skyrays. They were cut entirely out of the game sometime before Early Access, making their appearance in the trailer the last time they were seen. |
|||
{{ |
{{Crater Fauna}} |
||
{{Navbox Fauna (BZ)}} |
|||
[[fr:Faune]] |
|||
[[de:Fauna]] |
|||
[[fr:Faune]] |
|||
[[es:Fauna]] |
|||
[[pt-br:Fauna]] |
|||
[[pl:Fauna]] |
|||
[[ru:Фауна]] |
[[ru:Фауна]] |
||
[[Category:Fauna]] |
[[Category:Fauna]] |
||
[[Category:Lifeforms]] |
|||
[[Category:Passive]] |
|||
[[Category:Aggressive]] |
|||
Latest revision as of 10:53, 10 December 2024
.png)
|
Read at own risk This article contains unmarked spoilers. Players new to the game would want to avoid or be cautious toward this article. |
Fauna is the term for animals, in this case, the animals of Planet 4546B. Fauna in Subnautica can be found all over the planet, from the mysterious depths of the Crystal Caves to the vibrant Safe Shallows, and the fiery pits of the Lava Lakes.
Fauna on Planet 4546B comes in all shapes, sizes, and forms. Ranging from the tiny, cave-dwelling Rockgrub, to the colossal Sea Dragon Leviathan that spews molten minerals from its mouth. Fauna on Planet 4546B is capable of enduring and adapting to various environments, although previously unable to thrive due to the presence of the Kharaa Bacterium. Certain species of small fauna can sometimes be seen forming mostly non-interactive shoals. Fauna on 4546B also has yellow blood. The fact that the appearance of some species of the planet being similar to that of planet Earth species can be explained as a simple case of convergent evolution.
The player can scan Fauna with the Handheld Scanner, the same as they would with Flora and objects, allowing them to view information about creatures in their PDA.
In Subnautica additional scans after unlocking the Data Bank Entry for that particular species of Fauna alert the player as to whether or not the specimen is infected with Kharaa. As Kharaa has been eliminated from the wild in Below Zero this function is not present.
Reproduction
Most known fauna species on Planet 4546B are simultaneous hermaphrodites, meaning that they have a single-sex capable of playing the role of either the male or female in reproduction and every individual being able to lay eggs and fertilize them. Two parents are still required to fertilize the eggs once laid, making it sexual reproduction. At least one fauna species is exempt from this and reproduces entirely asexually, although the norm for the planet is sexual reproduction, as can be observed in all species that can be placed in an Alien Containment unit who will require two individuals of their species to produce eggs. The only species that does not reproduce is the Warper, as they are artificial constructs.
The only one of the complex fauna species on the planet known to be an exception to this rule is the Sea Emperor Leviathan species, which is entirely asexual and does not require a mate. The Sea Dragon Leviathan may share this method of reproduction as it is likely the closest living relative of the Sea Emperor Leviathan and was being studied by the Architects to learn more about the Sea Emperor's hatching process, which was apparently successful.
Fauna of The Crater
Carnivores
| Fauna | Attitude | Biome |
|---|---|---|
 |
|
|
 |
|
|
 |
|
|
 |
|
|
 |
|
|
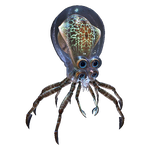 |
|
|
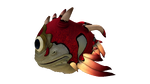 |
|
|
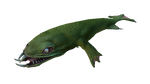 |
|
|
 |
|
|
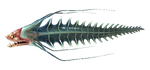 |
|
|
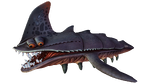 |
|
|
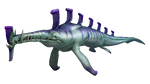 |
|
|
 |
|
Herbivores
| Fauna | Attitude | Biome |
|---|---|---|
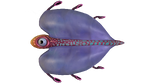 |
|
|
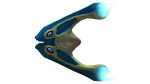 |
|
|
 |
|
|
 |
|
|
 |
|
|
 |
|
|
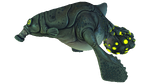 |
|
|
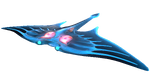 |
|
|
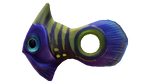 |
|
|
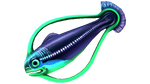 |
|
|
 |
|
|
 |
|
|
 |
|
|
 |
|
|
 |
|
|
 |
|
|
 |
|
|
 |
|
|
 |
|
|
 |
|
|
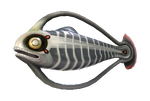 |
|
Scavengers and Parasites
| Fauna | Attitude | Biome |
|---|---|---|
 |
|
|
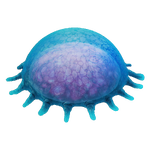 |
|
|
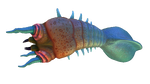 |
|
|
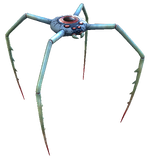 |
|
|
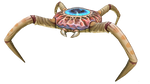 |
|
|
 |
|
|
 |
|
|
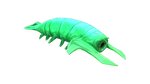 |
|
|
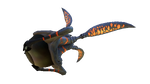 |
|
Leviathan Class
| Fauna | Attitude | Biome |
|---|---|---|
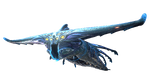 |
|
|
|
|
|
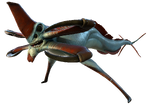 |
|
|
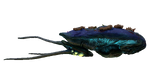 |
|
|
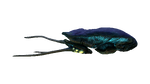 |
|
|
 |
|
|
 |
|
|
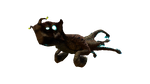 |
|
|
 |
|
|
 |
|
Extinct Species
| Species | Location of Remains | Age |
|---|---|---|
 |
|
Unknown |
 |
|
Unknown |
 |
~1,000,000 years | |
 |
~3,000,000 years | |
 |
~1000 years |
Fauna of Sector Zero
Carnivores
| Fauna | Attitude | Biome |
|---|---|---|
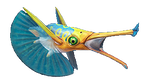 |
|
|
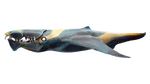 |
|
|
|
|
|
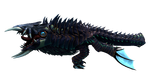 |
|
|
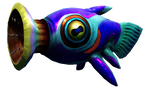 |
|
|
 |
|
|
 |
|
|
 |
|
|
 |
|
|
 |
|
|
 |
|
|
 |
|
|
 |
|
|
 |
|
Herbivores
| Fauna | Attitude | Biome |
|---|---|---|
 |
|
|
 |
|
|
|
||
|
|
|
|
|
|
 |
|
|
 |
|
|
 |
|
|
 |
|
|
 |
|
|
|
|
|
 |
|
|
 |
|
|
 |
|
|
|
|
|
|
|
|
 |
|
|
 |
|
|
 |
|
|
 |
|
Scavengers & Parasites
| Fauna | Attitude | Biome |
|---|---|---|
|
|
Leviathans
| Fauna | Attitude | Biome |
|---|---|---|
 |
|
|
 |
|
|
|
||
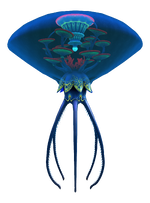 |
|
|
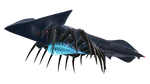 |
|
|
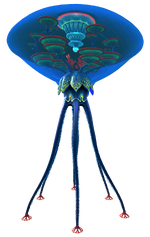 |
|
|
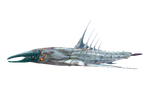 |
|
Extinct Species
| Fauna | Location of Remains | Age |
|---|---|---|
 |
~1000 years at most |
Gallery
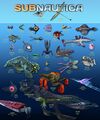
Subnautica fauna Sheet 1
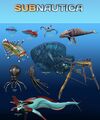
Subnautica fauna Sheet 2
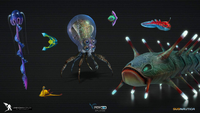
Various fauna & flora renders
Various fauna renders


Trivia
- As of the Dangerous Creatures update, all fauna have yellow blood. Before this update, all fauna had red blood. This is due to the ESRB giving Subnautica a higher rating than expected due to red blood.
- Scientifically speaking, the fauna of planet 4546B might have high concentrations of vanabin in their blood.
- Fauna were once intended to possess inherent attributes, that would have caused them to exhibit unique behaviors. These included, e.g., "Fertile" (occasionally lay eggs that can be hatched), "Alpha" (attacked the player if other creatures were killed by the player in the immediate vicinity), "Complex" (specimens take longer to scan), "Greater" (specimens are of larger size and weight). This, however, was scrapped upon the final release.
- There are some Fauna that are unknown creatures that only exist as ambience sounds. These include the Big Snake, Docile Whale (possibly a glow whale), Screecher, Echolocator, Sounds of birds and insects, Kaiju, and a few more. These are only in Subnautica Below Zero.
- In the very early stages of Subnautica, there were many unused and cut fauna.
- An unused creature named the Sandworm could only be found in the Entity Gallery. It was intended to stay in one place under the ground, and when the player or an NPC was right above it, it would spring up and would do 1 damage at a very fast rate. It only had animations for shooting out of the ground, going back into its hole, and an idle animation.
- The unused Grabcrab creature would leave its burrow and search for items to drag back to its hole. These items included small resources and even small fish. Its burrow also had the same model as the Grabcrab.
- Unused clusters of Bloom Plankton can be spawned in the game, and react to light. They will glow red if a Flare is shining on them, and white if a Flashlight or Vehicle's light is shining on them.
- In the Early Access Release trailer, the Large Bird can be seen flying among the Skyrays. They were cut entirely out of the game sometime before Early Access, making their appearance in the trailer the last time they were seen.
Lua error in package.lua at line 80: module 'Dev:Navbox' not found. Lua error in package.lua at line 80: module 'Dev:Navbox' not found.