
Seabases (Subnautica): Difference between revisions
m (The Cyclops does not make the same sound as a seabase when it runs out of power) |
m (Bench, not ladder) |
||
| (47 intermediate revisions by 21 users not shown) | |||
| Line 1: | Line 1: | ||
{{SubnauticaLink |
{{SubnauticaLink}} |
||
{{SimilarName|the '''Seabases'''|the [[Degasi Seabases]]}} |
{{SimilarName|the '''Seabases'''|the [[Degasi Seabases]]}} |
||
'''Seabases''' are installations created by the player through the use of the [[Habitat Builder]]. |
'''Seabases''' are installations created by the player through the use of the [[Habitat Builder (Subnautica)|Habitat Builder]]. |
||
A Seabase provides an area where the [[Player]] can return for oxygen |
A Seabase provides an area where the [[Ryley Robinson|Player]] can return for oxygen and serves as an alternative to [[Lifepod 5]] as a base of operations. Within a seabase, the player can construct additional storage space, grow food, access [[Interior Modules|Appliances]] not available in Lifepod 5, and add aesthetic options. Thus Seabases provide safe havens away from the [[Safe Shallows]] the player starts in. |
||
In all [[Game Modes]] except Creative Mode, entering a Seabase secures the player's inventory, so if the player dies, they will return to the last Seabase they visited (Lifepod 5 and a [[Cyclops]] also count as Seabases for this purpose) and keep all the items in their inventory that they had when they were there. This occurs even if they die while inside the base in question: thus, quickly building a single |
In all [[Game Modes]] except Creative Mode, entering a Seabase secures the player's inventory, so if the player dies, they will return to the last Seabase they visited (Lifepod 5 and a [[Cyclops]] also count as Seabases for this purpose) and keep all the items in their inventory that they had when they were there. This occurs even if they die while inside the base in question: thus, quickly building a single [[I Compartment (Subnautica)|I Compartment]] and a [[Hatch (Subnautica)|Hatch]] on the seabed can be a valid tactic to secure the player's inventory if they are about to die. |
||
The player will start |
The player will start with most of the blueprints they need for a basic Seabase; at the bare minimum, one needs a Compartment, a Hatch, and a power generator (the [[Solar Panel (Subnautica)|Solar Panel]] is unlocked by default). The initial compartment must be built on or near the ground (or on a [[Foundation (Subnautica)|Foundation]], which is not necessary but provides greater [[Hull Integrity]] and a flat surface to work with), but any additional compartments can overhang without any issue, allowing bases to be built over cliffsides. The player can acquire [[Blueprints (Subnautica)|Blueprints]] which allow additional module types to be created. |
||
{{ExtraSpoilersection|[[Degasi Seabases]] can be found at the center and on the tops of the mountains of the [[Floating Island]], [[Jellyshroom Cave]], and [[Deep Grand Reef]]. These abandoned Seabases provide blueprints for additional base components that the player doesn't have access to by default, such as the [[Multipurpose Room]] and the [[Observatory]]. Other base components, power generators, appliances and furniture, can be found in [[Wrecks]].}} |
{{ExtraSpoilersection|[[Degasi Seabases]] can be found at the center and on the tops of the mountains of the [[Floating Island]], [[Jellyshroom Cave]], and [[Deep Grand Reef]]. These abandoned Seabases provide blueprints for additional base components that the player doesn't have access to by default, such as the [[Multipurpose Room (Subnautica)|Multipurpose Room]] and the [[Observatory (Subnautica)|Observatory]]. Other base components, power generators, appliances and, furniture, can be found in [[Wrecks]].}} |
||
Despite their name, Seabases can be built on land. When on land, |
Despite their name, Seabases can be built on land. When on land, hull integrity is not a factor, and bases can be built without the need for additional [[Reinforcement (Subnautica)|Reinforcement]]s, Foundations, or [[Bulkhead (Subnautica)|Bulkhead]]s. Power is still needed for them to operate, but not to provide [[Oxygen|oxygen]]. |
||
== Hull Integrity == |
== Hull Integrity == |
||
{{Main|Hull Integrity}} |
|||
[[File:Seabase interior.png|thumb|220x220px]] |
|||
[[Hull Integrity]] refers to the ability of the player's Seabase to withstand the pressure of the surrounding water, and as a mechanic slows the expansion of the Seabase. A Seabase starts at 10 integrity, but the majority of the modules will lower the integrity once added with the amount varying by module. As Seabases are built at a greater depth the integrity reduction caused by each module will increase. Hull integrity can be increased by constructing Reinforcement panels, placing a Seabase on or near a Foundation (foundations built on top of rooms will still provide their benefit), or installing Bulkheads on the ends of Compartment modules. |
|||
When the hull integrity of a Seabase is less than or equal to zero, it will begin to form hull breaches. Any corridor or room that is connected to the breach will begin flooding with water. Bulkheads can compartmentalize the base and prevent floodwaters from moving between compartments, but if the integrity remains below zero then eventually every compartment will develop a leak and the base will fill with water. To avoid this, quickly increase the base's integrity (by either adding strengthening components or removing weak components) and fix all hull breaches in the base using a [[Repair Tool (Subnautica)|Repair Tool]]. |
|||
[[Hull Integrity]] refers to the ability of the player's Seabase to withstand the pressure of the surrounding water. The majority of the modules lower the hull integrity. At greater depths the integrity reduction caused by each module increases. |
|||
A Seabase that receives damage to its exterior will also spring leaks, but the hull integrity will be unaffected. This is most likely to occur if the player hits the base with a [[Cyclops]], as aggressive [[Fauna]] cannot damage bases. In this case, leaks will be limited to only the module that was hit and will not spread, making Bulkheads an effective method of preventing widespread flooding. |
|||
When the hull integrity of a Seabase is less than or equal to zero, it will begin to form hull breaches. Any corridor or room that is connected to the breach will begin flooding with water. Bulkheads can compartmentalize the base and prevent floodwaters from moving between compartments, but if the integrity remains below zero then eventually every compartment will develop a leak and the base will fill completely with water. To avoid this, quickly increase the base's integrity (by either adding strengthening components or removing weak components) and fix all hull breaches in the base using a [[Repair Tool]]. |
|||
== Energy Usage == |
|||
Seabase modules use a multiplier system on negative hull integrity penalties instead of having a specific crush depth, and are not affected by high local temperatures. |
|||
[[Energy]] can be provided to a Seabase by building various types of generators near or inside the Seabase. Any number or combination can be used. Appliances such as the Fabricator will drain energy from the Seabase. |
|||
There are currently four generators available to power Seabases: |
|||
A Seabase that receives damage to its exterior will also spring leaks, but the hull integrity will be unaffected. For the most part, only the player can damage a Seabase, typically through vehicle collisions: otherwise, aggressive [[Fauna]] will ignore one, though predators may be seen trying to attack prey species through the walls of a module containing an [[Alien Containment]] tank. Exceptions to this are [[Crashfish]] which can damage the base when they explode, and [[Tiger Plant]]s placed in an [[Exterior Growbed]], which can damage the base with missed shots. |
|||
* [[Solar Panel (Subnautica)|Solar Panel]]s, which work best near the surface |
|||
* [[Bioreactor (Subnautica)|Bioreactor]]s, which consume any organic matter for power |
|||
* [[Thermal Plant (Subnautica)|Thermal Plant]]s, which collect heat energy (use near Lava Geysers and Black Smokers) |
|||
* [[Nuclear Reactor (Subnautica)|Nuclear Reactor]]s, which consume [[Reactor Rod (Subnautica)|Reactor Rod]]s made from [[Uraninite Crystal (Subnautica)|Uraninite Crystal]]s |
|||
Bioreactors and Nuclear Reactors are built inside a [[Multipurpose Room (Subnautica)|Multipurpose Room]] or [[Large Room (Subnautica)|Large Room]]. Solar Panels and Thermal Plants are built outside and can be directly attached to the base or connected via [[Power Transmitter (Subnautica)|Power Transmitter]]s if the distance is too great. |
|||
Seabases do not require energy to operate in [[Game Modes|Creative Mode]]. |
|||
Seabase modules built above water do not use the hull integrity system. If a base is partially above water, the components that are above will neither add to or subtract from the hull integrity of the base overall. |
|||
The following appliances and rooms draw power from the Seabase: |
|||
== Energy == |
|||
* [[Fabricator (Subnautica)|Fabricator]] |
|||
[[Energy]] is a resource that needs to be managed for bases, much like Food, Water and Oxygen need to be for the player. All seabases, no matter what module, have a default of 0 power capacity. Different types of generator have different energy capacity. Bases that isn’t connected in any way handle their energy demands and generation individually. |
|||
* [[Battery Charger (Subnautica)|Battery Charger]] |
|||
* [[Power Cell Charger (Subnautica)|Power Cell Charger]] |
|||
=== Energy Production === |
|||
* [[Modification Station (Subnautica)|Modification Station]] |
|||
Energy is produced by energy generators, all buildable by the player through the use of the [[Habitat Builder]]. There are four different types, two can only be built inside a [[Multipurpose Room]], and the other two must be placed externally. These last two can be located further away from the habitable parts of the seabase if the player rigs up [[Power Transmitter]]s to bridge the gap. |
|||
* [[Water Filtration Machine (Subnautica)|Water Filtration Machine]] |
|||
Each energy generator comes with its own '''energy storage capacity''' and its own '''energy generation rate.''' |
|||
Built inside a [[Multipurpose Room]]: |
|||
* [[Bioreactor]]s (capacity 500E, rate 50E/min) convert organic matter into a certain amount of energy at a set rate. Rate does not change with object. |
|||
* [[Nuclear Reactor]]s (capacity 2500E, rate 250E/min) convert [[Reactor Rod]]s into a certain amount of energy at a set rate |
|||
Built on their own: |
|||
* [[Solar Panel]]s (capacity 75E, the rate varies) convert light to energy during daylight hours at a variable rate affected by depth |
|||
* [[Thermal Plant]]s (capacity 250E, the rate varies) convert heat energy (build near [[Lava Geyser]]s and Black Smokers) at a variable rate affected by local water temperature |
|||
=== Energy Usage === |
|||
Each appliance consumes a certain '''amount of energy''' for a task and it does this at a certain '''energy consumption rate.''' The energy requirement may be either continuous or only when a device is being used, depending on the type of device: for example, a [[Fabricator]] only uses energy while it is creating something, while a [[Floodlight]] uses energy constantly. |
|||
If energy is not being used, Bioreactors and Nuclear Reactors will not consume resources. |
|||
The following Appliances draw power from the Seabase: |
|||
* [[Fabricator]] |
|||
* [[Battery Charger]] |
|||
* [[Power Cell Charger]] |
|||
* [[Modification Station]] |
|||
* [[Water Filtration Machine]] |
|||
* [[Spotlight]] |
* [[Spotlight]] |
||
* [[Floodlight]] |
* [[Floodlight (Subnautica)|Floodlight]] |
||
* [[Scanner Room (Subnautica)|Scanner Room]] (fabricator and active scanning, along with recharging the Camera Drones) |
|||
* [[Moonpool]] |
|||
* [[Vehicle Upgrade Console]] (fabricator only) |
|||
* [[Scanner Room]] (fabricator and active scanning, along with recharging the Camera Drones) |
|||
Seabases do not require energy to operate in [[Game Modes|Creative Mode]]. A notable exception to this is the ability to dock a [[Seamoth]] in a [[Moonpool]], which does require power. |
|||
=== Energy transfer === |
|||
[[Power Transmitter]]s are used to transfer energy. They come with some caveats. Most obviously, they can only transmit power from a generator to a base, not from a base to a distant power-demanding structure. |
|||
==Oxygen== |
|||
Seabases automatically produce [[Oxygen]] as long as there is power supplied. If the power is depleted, the Seabase will slowly lose oxygen, until it is completely gone. |
|||
== Oxygen == |
|||
Oxygen is always available in any portion of a seabase that is above water, regardless of power. |
|||
Seabases automatically produce [[Oxygen]] as long as there is power supplied, and can be used as a remote oxygen source outside the base through a [[Pipes (Subnautica)|Base-attached Air Pump]] and Pipes. If the power is depleted, the Seabase will slowly lose oxygen until it is completely gone. |
|||
== How to Build a Seabase == |
== How to Build a Seabase == |
||
# Find a suitable piece of land. |
# Find a suitable piece of seabed or land. |
||
# Equip the Habitat Builder and press |
# Equip the Habitat Builder and press the appropriate key to bring up a crafting menu. |
||
# In the |
# In the Interior Pieces tab, select the desired module. |
||
# Aim at the desired building place (the outline of the module will become green if the location is valid). |
# Aim at the desired building place (the outline of the module will become green if the location is valid). |
||
# Adjust the rotation |
# Adjust the rotation if desired. You cannot rotate the moonpool once another module has been placed. |
||
# Place the module with |
# Place the module with the correct button. |
||
# Once placed, hold |
# Once placed, hold the correct key to add the required materials to finish the building process. |
||
# Go to Step 2 and repeat for each room you want to build. Remember that once the desired module has been placed other modules that are placed near it will snap to its position, making it easier to build. |
# Go to Step 2 and repeat for each room you want to build. Remember that once the desired module has been placed, other modules that are placed near it will snap to its position, making it easier to build. |
||
To deconstruct a Seabase module, equip the Habitat Builder and hold {{Key|Q}} (Xbox One and PlayStation 4:{{Key/PS4|dpaddown}}) while facing the module. If enough [[PDA|inventory]] space is available, the module will be deconstructed and all materials used to create the module will be returned to the player's inventory, one item at a time. Note that everything inside the module and attached to the outside of the module must be deconstructed (This excludes other Seabase modules, they do not need to be deconstructed in order to remove a part.) before the module itself can be deconstructed. |
|||
To deconstruct a Seabase module, equip the Habitat Builder and hold the appropriate button while facing the module. If enough [[PDA|inventory]] space is available, the module will be deconstructed and all materials used to create the module will be returned to the player's inventory, one item at a time. Note that everything inside the module and attached to the outside of the module must be deconstructed (This excludes other Seabase modules, they do not need to be deconstructed to remove a part.) before the module itself can be deconstructed. |
|||
==Audio== |
|||
The Seabase's AI plays various messages that correspond to different circumstances, some accompanied by sound cues: |
|||
=== Controls === |
|||
{| class="article-table sortable" style="width: 100%;" cellspacing="1" cellpadding="1" border="0" |
|||
{| class="article-table" |
|||
! Action |
|||
! Mouse & Keyboard |
|||
! Xbox One |
|||
! PlayStation 4 |
|||
! Nintendo Switch |
|||
|- |
|- |
||
| '''Open Building Menu''' |
|||
! class="unsortable" style="width: 20%; text-align: center;" | |
|||
| <center>{{Key|RMB}}</center> |
|||
! class="unsortable" style="width: 20%; text-align: center;" |Trigger |
|||
| {{Key/Xbox|RT}} |
|||
! class="unsortable" style="width: 60%; text-align: center;" |Dialogue |
|||
| {{Key/PS4|R2}} |
|||
| {{Key/Switch|ZR}} |
|||
|- |
|- |
||
| '''Rotate Object''' |
|||
| style="text-align:center; font-size:12px;" |[[File:Log-128.png]] |
|||
| <center>Mouse Wheel</center> |
|||
| style="text-align:center; font-size:12px;" | When [[Seabases|Seabase]] is repaired |
|||
<center>or</center> |
|||
| style="text-align:left; font-size:12px;" |''"Hull integrity restored. Draining systems initiated."'' |
|||
<center>{{Key|[}} and {{Key|]}}</center> |
|||
| {{Key/Xbox|Dpadleft}} {{Key/Xbox|Dpadright}} |
|||
| {{Key/PS4|Dpadleft}} {{key/PS4|Dpadright}} |
|||
| {{Key/Switch|Dpadleft}} {{Key/Switch|Dpadright}} |
|||
|- |
|||
| '''Build Object''' |
|||
| <center>{{Key|LMB}}</center> |
|||
| {{Key/Xbox|A}} |
|||
| {{Key/PS4|Cross}} |
|||
| {{Key/Switch|A}} |
|||
|- |
|||
| '''Deconstruct Object''' |
|||
| <center>{{Key|Q}}</center> |
|||
| {{Key/Xbox|Dpaddown}} |
|||
| {{Key/PS4|Dpaddown}} |
|||
| {{Key/Switch|Dpaddown}} |
|||
|} |
|||
== Dialogue == |
|||
The Seabase's AI plays various messages that correspond to different circumstances, some accompanied by sound cues: |
|||
{| class="article-table" style="width:100%; border:0; border-spacing:0" |
|||
! style="width:20%; text-align:center" | |
|||
! style="width:20%; text-align:center" | Trigger |
|||
! style="width:60%; text-align:center" | Dialogue |
|||
|- style="text-align:center; font-size:12px" |
|||
| [[File:Log-128.png]] |
|||
| When [[Seabases (Subnautica)|Seabase]] is repaired |
|||
| style="text-align:left" | ''"Hull integrity restored. Draining systems initiated."'' |
|||
[[File:SeabaseRepaired.ogg]] |
[[File:SeabaseRepaired.ogg]] |
||
|- style="text-align:center; font-size:12px" |
|||
|- |
|||
| |
| [[File:Log-128.png]] |
||
| |
| Entering [[Seabases (Subnautica)|Seabase]] with no power source |
||
| style="text-align:left |
| style="text-align:left" | ''"Warning: Emergency power only. Oxygen production offline."'' |
||
[[File:SeabaseNoPower.ogg]] |
|||
|- style="text-align:center; font-size:12px" |
|||
| [[File:Log-128.png]] |
|||
| When the [[Seabases (Subnautica)|Seabase]] has no power |
|||
| style="text-align:left" | ''"Warning: Emergency power only. Oxygen production offline."'' |
|||
[[File:SeabasePowerDown.ogg]] |
[[File:SeabasePowerDown.ogg]] |
||
|- style="text-align:center; font-size:12px" |
|||
|- |
|||
| |
| [[File:Log-128.png]] |
||
| Restoring [[Seabases (Subnautica)|Seabase's]] power |
|||
| style="text-align:left |
| style="text-align:left" | ''"Power restored. All primary systems online."'' |
||
[[File:SeabasePowerUp.ogg]] |
[[File:SeabasePowerUp.ogg]] |
||
|- style="text-align:center; font-size:12px" |
|||
|- |
|||
| |
| [[File:Log-128.png]] |
||
| |
| Entering [[Seabases (Subnautica)|Seabase]] or [[Seamoth]] |
||
| style="text-align:left |
| style="text-align:left" | ''"Welcome aboard captain."'' |
||
[[File:BaseWelcomeAboard.ogg]] |
[[File:BaseWelcomeAboard.ogg]] |
||
|} |
|} |
||
== |
== Base Parts == |
||
=== Base Pieces === |
|||
{| class="article-table sortable" style="width: 100%;" border="0" cellpadding="1" cellspacing="1" |
|||
{| class="article-table" style="width:100%; border:0; border-spacing:0" |
|||
! style="width:20%; text-align:center" | Item |
|||
! style="width:50%; text-align:left" | Description |
|||
! style="width:30%; text-align:center" | Hull Integrity |
|||
|- style="text-align:center; font-size:12px" |
|||
| [[File:Bulkhead.png|70px|center|link=Bulkhead]][[Bulkhead (Subnautica)|Bulkhead]] |
|||
| style="text-align:left" | Provides structural support and prevents flooding. |
|||
| style="font-size:14px" | +3.0 Units |
|||
|- style="text-align:center; font-size:12px" |
|||
| [[File:I Compartment.png|70px|center|link=I Compartment]][[I Compartment (Subnautica)|I Compartment]] |
|||
| style="text-align:left" | Basic tubular compartment. |
|||
| style="font-size:14px" | -1.0 Unit |
|||
|- style="text-align:center; font-size:12px" |
|||
| [[File:I-Corridor Glass.png|70px|center|link=Glass Compartment]][[Glass Compartment]] |
|||
| style="text-align:left" | Basic glass-walled compartment. |
|||
| style="font-size:14px" | -2.0 Units |
|||
|- style="text-align:center; font-size:12px" |
|||
| [[File:L Corridor.png|70px|center|link=L Compartment]][[L Compartment (Subnautica)|L Compartment]] |
|||
| style="text-align:left" | L-shaped compartment. |
|||
| style="font-size:14px" | -1.0 Unit |
|||
|- style="text-align:center; font-size:12px" |
|||
| [[File:L-Corridor Glass.png|70px|center|link=L Glass Compartment]][[L Glass Compartment (Subnautica)|L Glass Compartment]] |
|||
| style="text-align:left" | L-shaped glass compartment. |
|||
| style="font-size:14px" | -2.0 Units |
|||
|- style="text-align:center; font-size:12px" |
|||
| [[File:T Corridor.png|70px|center|link=T Compartment]][[T Compartment (Subnautica)|T Compartment]] |
|||
| style="text-align:left" | T-shaped compartment. |
|||
| style="font-size:14px" | -1.0 Unit |
|||
|- style="text-align:center; font-size:12px" |
|||
| [[File:X Corridor.png|70px|center|link=X Compartment]][[X Compartment (Subnautica)|X Compartment]] |
|||
| style="text-align:left" | X-shaped compartment. |
|||
| style="font-size:14px" | -1.0 Unit |
|||
|- style="text-align:center; font-size:12px" |
|||
| [[File:Foundation.png|70px|center|link=Foundation]][[Foundation (Subnautica)|Foundation]] |
|||
| style="text-align:left" | Reinforced habitat foundation. |
|||
| style="font-size:14px" | +2.0 Units |
|||
|- style="text-align:center; font-size:12px" |
|||
| [[File:Hatch.png|70px|center|link=Hatch]][[Hatch (Subnautica)|Hatch]] |
|||
| style="text-align:left" | Provides an access point to the habitat. |
|||
| style="font-size:14px" | -1.0 Unit |
|||
|- style="text-align:center; font-size:12px" |
|||
| [[File:Large Room_Icon.png|70px|center|link=Large Room]][[Large Room (Subnautica)|Large Room]] |
|||
| style="text-align:left" | A large room. |
|||
| style="font-size:14px" | -4.0 Unit |
|||
|- style="text-align:center; font-size:12px" |
|||
| [[File:Large Room Glass Dome Icon.png|70px|center|link=Large Room Glass Dome]][[Large Room Glass Dome]] |
|||
| style="text-align:left" | A large glass dome. |
|||
| style="font-size:14px" | -8.0 Unit |
|||
|- style="text-align:center; font-size:12px" |
|||
| [[File:Moon Pool.png|70px|center|link=Moonpool]][[Moonpool (Subnautica)|Moonpool]] |
|||
| style="text-align:left" | Vehicle docking bay. |
|||
| style="font-size:14px" | -5.0 Units |
|||
|- style="text-align:center; font-size:12px" |
|||
| [[File:Room.png|70px|center|link=Multipurpose Room]][[Multipurpose Room (Subnautica)|Multipurpose Room]] |
|||
| style="text-align:left" | Basic room. |
|||
| style="font-size:14px" | -1.25 Units |
|||
|- style="text-align:center; font-size:12px" |
|||
| [[File:Multipurpose Room Glass Dome Icon.png|70px|center|link=Multipurpose Room Glass Dome]][[Multipurpose Room Glass Dome]] |
|||
| style="text-align:left" | A glass dome. |
|||
| style="font-size:14px" | -2.0 Units |
|||
|- style="text-align:center; font-size:12px" |
|||
| [[File:Observatory.png|70px|center|link=Observatory]][[Observatory (Subnautica)|Observatory]] |
|||
| style="text-align:left; font-size:12px" | Compartment with 360-degree views and low structural integrity. |
|||
| style="font-size:14px" | -3.0 Units |
|||
|- style="text-align:center; font-size:12px" |
|||
| [[File:Reinforcement.png|70px|center|link=Reinforcement]][[Reinforcement (Subnautica)|Reinforcement]] |
|||
| style="text-align:left" | Increases hull strength. |
|||
| style="font-size:14px" | +7.0 Units |
|||
|- style="text-align:center; font-size:12px" |
|||
| [[File:Scanner Room.png|70px|center|link=Scanner Room]][[Scanner Room (Subnautica)|Scanner Room]] |
|||
| style="text-align:left" | Locates resources and wrecks within range. |
|||
| style="font-size:14px" | -1 Units |
|||
|- style="text-align:center; font-size:12px" |
|||
| [[File:Vertical Connector.png|70px|center|link=Vertical Connector]][[Vertical Connector (Subnautica)|Vertical Connector]] |
|||
| style="text-align:left" | Vertical base connector. |
|||
| style="font-size:14px" | -0.5 Units |
|||
|- style="text-align:center; font-size:12px" |
|||
| [[File:Window.png|70px|center|link=Window]][[Window (Subnautica)|Window]] |
|||
| style="text-align:left" | Observatory window. |
|||
| style="font-size:14px" | -1.0 Unit |
|||
|} |
|||
=== External Modules === |
|||
{| class="article-table" style="width:100%; border:0; border-spacing:0" |
|||
! style="width:20%; text-align:center" | Item |
|||
! style="width:50%; text-align:left" | Description |
|||
! style="width:30%; text-align:center" | Item IDs |
|||
|- style="text-align:center; font-size:12px" |
|||
| [[File:Solar Panel.png|70px|center|link=Solar Panel]][[Solar Panel (Subnautica)|Solar Panel]] |
|||
| style="text-align:left" | Build on the ground in the sun to charge (25 power/min). |
|||
| solarpanel |
|||
|- style="text-align:center; font-size:12px" |
|||
| [[File:Thermal Plant.png|70px|center|link=Thermal Plant]][[Thermal Plant (Subnautica)|Thermal Plant]] |
|||
| style="text-align:left" | Converts heat to energy (> 15 °C) (50 power/min). |
|||
| thermalplant |
|||
|- style="text-align:center; font-size:12px" |
|||
| [[File:Power Transmitter.png|70px|center|link=Power Transmitter]][[Power Transmitter (Subnautica)|Power Transmitter]] |
|||
| style="text-align:left" | Extends range of power source. |
|||
| powertransmitter |
|||
|- style="text-align:center; font-size:12px" |
|||
| [[File:Floodlight.png|70px|center|link=Floodlight]][[Floodlight (Subnautica)|Floodlight]] |
|||
| style="text-align:left" | Industrial lighting, designed for all environments. |
|||
| techlight |
|||
|- style="text-align:center; font-size:12px" |
|||
| [[File:Spotlight.png|70px|center|link=Spotlight]][[Spotlight]] |
|||
| style="text-align:left" | Fixed lighting solution. |
|||
| spotlight |
|||
|- style="text-align:center; font-size:12px" |
|||
| [[File:Exterior Growbed.png|70px|center|link=Exterior Growbed]][[Exterior Growbed (Subnautica)|Exterior Growbed]] |
|||
| style="text-align:left" | Artificial plant bed, suitable for use on land or underwater. |
|||
| farmingtray |
|||
|- style="text-align:center; font-size:12px" |
|||
| [[File:Base Pipe Connector.png|70px|center|link=Pipe]][[Pipe|Base-attached Air Pump]] |
|||
| style="text-align:left" | Base-attached device that pumps air into pipes. Acts as a starting point for a pipe chain. |
|||
| basepipeconnector |
|||
|} |
|||
=== Interior Modules === |
|||
{| class="article-table" style="width: 100%; border:0; border-spacing:0" |
|||
! style="width:20%; text-align:center" | Item |
|||
! style="width:50%; text-align:left" | Description |
|||
! style="width:30%; text-align:center" | Item IDs |
|||
|- style="text-align:center; font-size:12px" |
|||
| [[File:Fabricator.png|70px|center|link=Fabricator]][[Fabricator (Subnautica)|Fabricator]] |
|||
| style="text-align:left" | Basic survival fabricator. Atomically rearranges raw resources into useful objects. |
|||
| fabricator |
|||
|- style="text-align:center; font-size:12px" |
|||
| [[File:Radio.png|70px|center|link=Radio]][[Radio]] |
|||
| style="text-align:left" | Receive short-range communications. |
|||
| radio |
|||
|- style="text-align:center; font-size:12px" |
|||
| [[File:Medical Kit Fabricator.png|70px|center|link=Medical Kit Fabricator]][[Medical Kit Fabricator]] |
|||
| style="text-align:left" | Fabricates a medical kit every 30 minutes. |
|||
| medicalcabinet |
|||
|- style="text-align:center; font-size:12px" |
|||
| [[File:Wall Locker.png|70px|center|link=Wall Locker]][[Wall Locker (Subnautica)|Wall Locker]] |
|||
| style="text-align:left" | Wall-mounted storage locker. |
|||
| smalllocker |
|||
|- style="text-align:center; font-size:12px" |
|||
| [[File:Locker.png|70px|center|link=Locker]][[Locker (Subnautica)|Locker]] |
|||
| style="text-align:left" | Stores excessive things you need to store. |
|||
| locker |
|||
|- style="text-align:center; font-size:12px" |
|||
| [[File:Battery_Charger.png|70px|center|link=Battery Charger]][[Battery Charger (Subnautica)|Battery Charger]] |
|||
| style="text-align:left" | Can charge up to 4 batteries simultaneously. |
|||
| batterycharger |
|||
|- style="text-align:center; font-size:12px" |
|||
| [[File:Power Cell Charger.png|70px|center|link=Power Cell Charger]][[Power Cell Charger (Subnautica)|Power Cell Charger]] |
|||
| style="text-align:left" | Can charge up to 2 power cells simultaneously. |
|||
| powercellcharger |
|||
|- style="text-align:center; font-size:12px" |
|||
| [[File:Aquarium.png|70px|center|link=Aquarium]][[Aquarium (Subnautica)|Aquarium]] |
|||
| style="text-align:left" | Self-sustaining aquatic habitat. |
|||
| aquarium |
|||
|- style="text-align:center; font-size:12px" |
|||
| [[File:Modification Station.png|70px|center|link=Modification Station]][[Modification Station (Subnautica)|Modification Station]] |
|||
| style="text-align:left" | Advanced fabricator for modification of equipment. |
|||
| workbench |
|||
|- style="text-align:center; font-size:12px" |
|||
| [[File:Plant Pot.png|70px|center|link=Plant Pot]][[Plant Pot|Basic Plant Pot]] |
|||
| style="text-align:left" | Titanium pot containing synthetic soil. |
|||
| planterpot |
|||
|- style="text-align:center; font-size:12px" |
|||
| [[File:Plant Pot 2.png|70px|center|link=Plant Pot]][[Plant Pot|Composite Plant Pot]] |
|||
| style="text-align:left" | Designed titanium pot containing synthetic soil. |
|||
| planterpot2 |
|||
|- style="text-align:center; font-size:12px" |
|||
| [[File:Plant Pot 3.png|70px|center|link=Plant Pot]][[Plant Pot|Chic Plant Pot]] |
|||
| style="text-align:left" | Upmarket titanium pot containing synthetic soil. |
|||
| planterpot3 |
|||
|- style="text-align:center; font-size:12px" |
|||
| [[File:Indoor Growbed.png|70px|center|link=Interior Growbed]][[Interior Growbed]] |
|||
| style="text-align:left" | Artificial plant bed, suitable for interior use only. |
|||
| planterbox |
|||
|- style="text-align:center; font-size:12px" |
|||
| [[File:Plant Shelf.png|70px|center|link=Plant Shelf]][[Plant Shelf (Subnautica)|Plant Shelf]] |
|||
| style="text-align:left" | Wall-mounted plant pot. |
|||
| plantershelf |
|||
|} |
|||
=== Interior Pieces === |
|||
{| class="article-table" style="width:100%; border:0; border-spacing:0" |
|||
|- |
|- |
||
! |
! style="width:20%; text-align:center" | Item |
||
! |
! style="width:50%; text-align:left" | Description |
||
! |
! style="width:30%; text-align:center" | Item IDs |
||
|- style="text-align:center; font-size:12px" |
|||
| [[File:Ladder.png|70px|center|link=Ladder]][[Ladder (Subnautica)|Ladder]] |
|||
| style="text-align:left" | For connecting two floors. |
|||
| baseladder |
|||
|- style="text-align:center; font-size:12px" |
|||
| [[File:Water Filtration Machine.png|70px|center|link=Water Filtration Machine]][[Water Filtration Machine (Subnautica)|Water Filtration Machine]] |
|||
| style="text-align:left" | Separates water and salt. |
|||
| basefiltrationmachine |
|||
|- style="text-align:center; font-size:12px" |
|||
| [[File:Bulkhead.png|70px|center|link=Bulkhead]][[Bulkhead (Subnautica)|Bulkhead]] |
|||
| style="text-align:left" | Structural support and can stop water flow (+3HP). |
|||
| basebulkhead |
|||
|- style="text-align:center; font-size:12px" |
|||
| [[File:Seamoth Modification Station.png|70px|center|link=Vehicle Upgrade Console]][[Vehicle Upgrade Console (Subnautica)|Vehicle Upgrade Console]] |
|||
| style="text-align:left" | Build this in the moonpool to upgrade docked vehicles. |
|||
| baseupgradeconsole |
|||
|- style="text-align:center; font-size:12px" |
|||
| [[File:Bioreactor.png|70px|center|link=Bioreactor]][[Bioreactor (Subnautica)|Bioreactor]] |
|||
| style="text-align:left" | Composts organic matter into electrical energy. |
|||
| basebioreactor |
|||
|- style="text-align:center; font-size:12px" |
|||
| [[File:Nuclear Reactor.png|70px|center|link=Nuclear Reactor]][[Nuclear Reactor (Subnautica)|Nuclear Reactor]] |
|||
| style="text-align:left" | Processes nuclear reactor rods. |
|||
| basenuclearreactor |
|||
|- style="text-align:center; font-size:12px" |
|||
| [[File:Alien Containment.png|70px|center|link=Alien Containment]][[Alien Containment (Subnautica)|Alien Containment]] |
|||
| style="text-align:left" | Provides optimal conditions for flora and fauna. Add a hatch to enter. |
|||
| basewaterpark |
|||
|} |
|||
===Miscellaneous Items=== |
|||
{| class="article-table" style="width:100%; border:0; border-spacing:0" |
|||
|- |
|- |
||
! style="width:20%; text-align:center" |Item |
|||
! style="width:50%; text-align:left" |Description |
|||
! style="width:30%; text-align:center" |Item IDs |
|||
|- style="text-align:center; font-size:12px" |
|||
|- |
|||
|[[File:Bench.png|70px|center|link=Bench]][[Bench (Subnautica)|Bench]] |
|||
| style="text-align:left |
| style="text-align:left" |Simple metal relaxation appliance. Conserves energy when resting. |
||
|bench |
|||
| style="text-align:center;" | -1.0 Unit |
|||
|- style="text-align:center; font-size:12px" |
|||
|- |
|||
|[[File:Bed.png|70px|center|link=Beds]][[Beds (Subnautica)|Basic Double Bed]] |
|||
| style="text-align:left |
| style="text-align:left" |A double bed. |
||
|bed1 |
|||
| style="text-align:center;" | -2.0 Units |
|||
|- style="text-align:center; font-size:12px" |
|||
|- |
|||
|[[File:Bed_2.png|70px|center|link=Beds]][[Beds (Subnautica)|Quilted Double Bed]] |
|||
| style="text-align:left |
| style="text-align:left" |A double bed with a beautiful gray linen spread. |
||
|bed2 |
|||
| style="text-align:center;" | -1.0 Unit |
|||
|- style="text-align:center; font-size:12px" |
|||
|- |
|||
| |
| [[File:Narrow_Bed.png|70px|center|link=Beds]][[Beds (Subnautica)|Single Bed]] |
||
| style="text-align:left |
| style="text-align:left" |A single bed. |
||
|narrowbed |
|||
| style="text-align:center;" | -2.0 Units |
|||
|- style="text-align:center; font-size:12px" |
|||
|- |
|||
| |
| [[File:Desk.png|70px|center|link=Desk]][[Desk (Subnautica)|Desk]] |
||
| style="text-align:left |
| style="text-align:left" |Common starship work desk. |
||
| starshipdesk |
|||
| style="text-align:center;" | -1.0 Unit |
|||
|- style="text-align:center; font-size:12px" |
|||
|- |
|||
|[[File:Chair.png|70px|center|link=Vehicle Upgrade Console]][[Chairs (Subnautica)|Swivel Chair]] |
|||
| style="text-align:left |
| style="text-align:left" |Turns 360 degrees. |
||
|starshipchair |
|||
| style="text-align:center;" | -1.0 Unit |
|||
|- style="text-align:center; font-size:12px" |
|||
|- |
|||
|[[File:Chair_2.png|70px|center|link=Bioreactor]][[Chairs (Subnautica)|Office Chair]] |
|||
| style="text-align:left |
| style="text-align:left" | Relaxing and confidence building. |
||
|starshipchair2 |
|||
| style="text-align:center;" | +2.0 Units |
|||
|- style="text-align:center; font-size:12px" |
|||
|- |
|||
|[[File:Chair_3.png|70px|center|link=Nuclear Reactor]][[Chairs (Subnautica)|Command Chair]] |
|||
| style="text-align:left |
| style="text-align:left" |Commandeering. |
||
|starshipchair3 |
|||
| style="text-align:center;" | -1.0 Unit |
|||
|- style="text-align:center; font-size:12px" |
|||
|- |
|||
|[[File:Sign.png|70px|center|link=Sign]][[Sign (Subnautica)|Sign]] |
|||
| style="text-align:left |
| style="text-align:left" |Sign post with configurable text. |
||
|sign |
|||
| style="text-align:center;" | -5.0 Units |
|||
|- style="text-align:center; font-size:12px" |
|||
|- |
|||
|[[File:Picture_Frame.png|70px|center|link=Picture Frame]][[Picture Frame (Subnautica)|Picture Frame]] |
|||
| style="text-align:left |
| style="text-align:left" |Wall-mounted frame, upload desired image from compatible PDA photo galleries. |
||
|pictureframe |
|||
| style="text-align:center;" | -1.25 Units |
|||
|- style="text-align:center; font-size:12px" |
|||
|- |
|||
|[[File:Bar_Table.png|70px|center|link=Bar Table]][[Bar Table (Subnautica)|Bar Table]] |
|||
| style="text-align:left |
| style="text-align:left" |Round glass table. |
||
|bartable |
|||
| style="text-align:center;" | -3.0 Units |
|||
|- style="text-align:center; font-size:12px" |
|||
|- |
|||
|[[File:Trash_Cans.png|70px|center|link=Trash Can]][[Trash Can (Subnautica)|Trash Can]] |
|||
| style="text-align:left |
| style="text-align:left" |Permanently deconstruct unwanted items and safely release their constituent atoms into the atmosphere. |
||
|trashcans |
|||
| style="text-align:center;" | +7.0 Units |
|||
|- style="text-align:center; font-size:12px" |
|||
|- |
|||
|[[File:Lab_Trash_Can.png|70px|center|link=Nuclear Waste Disposal]][[Nuclear Waste Disposal (Subnautica)|Nuclear Waste Disposal]] |
|||
| style="text-align:left |
| style="text-align:left" |Used to dispose of nuclear waste. |
||
|labtrashcan |
|||
| style="text-align:center;" | -1 Units |
|||
|- style="text-align:center; font-size:12px" |
|||
|- |
|||
|[[File:Vending_Machine.png|70px|center|link=Vending Machine]][[Vending Machine (Subnautica)|Vending Machine]] |
|||
| style="text-align:left |
| style="text-align:left" |Vending machine. |
||
|vendingmachine |
|||
| style="text-align:center;" | -0.5 Units |
|||
|- style="text-align:center; font-size:12px" |
|||
|- |
|||
|[[File:Coffee_Vending_Machine.png|70px|center|link=Coffee Vending Machine]][[Coffee Vending Machine (Subnautica)|Coffee Vending Machine]] |
|||
| style="text-align:center; font-size:12px;" |[[File:Window.png|70px|center|link=Window]][[Window]] |
|||
| style="text-align:left |
| style="text-align:left" |Synthesizes hydrating, caffeine-free coffee. |
||
|coffeevendingmachine |
|||
| style="text-align:center;" | -1.0 Unit |
|||
|- style="text-align:center; font-size:12px" |
|||
|[[File:Lab_Counter.png|70px|center|link=Counter]][[Counter (Subnautica)|Counter]] |
|||
| style="text-align:left" |Lab counter. |
|||
|labcounter |
|||
|- style="text-align:center; font-size:12px" |
|||
|[[File:Wall_Planter.png|70px|center|link=Wall Planter]][[Wall Planter (Subnautica)|Wall Planter]] |
|||
| style="text-align:left" |Wall-mounted foliage. Purely decorational. |
|||
|baseplanter |
|||
|- style="text-align:center; font-size:12px" |
|||
|[[File:Single_Wall_Shelf.png|70px|center|link=Single Wall Shelf]][[Single Wall Shelf (Subnautica)|Single Wall Shelf]] |
|||
| style="text-align:left" |Single wall shelf. |
|||
|singlewallshelf |
|||
|- style="text-align:center; font-size:12px" |
|||
|[[File:Wall_Shelves.png|70px|center|link=Wall Shelves]][[Wall Shelves (Subnautica)|Wall Shelves]] |
|||
| style="text-align:left" |Wall shelves. |
|||
|wallshelves |
|||
|- style="text-align:center; font-size:12px" |
|||
|[[File:Markiplier_Doll.png|70px|center|link=Sign]][[An Unusual Doll]] |
|||
| style="text-align:left" |An unusual doll. |
|||
|Unknown ID |
|||
|} |
|} |
||
*Note that negative changes to hull integrity increase with depth. For more information see [[Hull Integrity]]. |
|||
==External modules== |
|||
For complete list see [[Exterior Modules|exterior modules]]. |
|||
==Interior modules== |
|||
For complete list see [[Interior Modules|interior modules]]. |
|||
==Achievement== |
|||
== Interior pieces == |
|||
{{Main|Achievements}} |
|||
For complete list see [[interior Pieces|interior pieces]]. |
|||
{{:Achievements/Settling in for the Long Haul|}} |
|||
{{Clear}} |
|||
==Trivia== |
|||
*Originally when prototyping bases, the developers used square base pieces. This was seen in a developer update along with a screenshot of early base models on the Trello. |
|||
*Several base pieces were cut during development. This includes examples such as the Specimen Analyzer, Power Generator, and Fragment Analyzer. |
|||
== |
==Gallery== |
||
<tabber> |
<tabber> |
||
Screenshots= |
|-|Screenshots= |
||
<gallery widths="200" spacing="small"> |
<gallery widths="200" spacing="small" hideaddbutton="true"> |
||
Seabase_day.jpg|An example of a Seabase |
|||
Seabase_night.jpg|Ditto, at night-time |
|||
Islandbase.jpg|A Seabase on the [[Floating Island]] |
Islandbase.jpg|A Seabase on the [[Floating Island]] |
||
Seabase_interior_new.jpg|Inside a typical Seabase |
|||
</gallery> |
</gallery> |
||
|-|Concept Art= |
|||
|-| |
|||
<gallery widths="200" spacing="small" hideaddbutton="true"> |
|||
Concept Art= |
|||
<gallery widths="200" spacing="small"> |
|||
Seabase concept.jpg|Seabase [[Concept art]] |
Seabase concept.jpg|Seabase [[Concept art]] |
||
NoPlatformsLongerLegs.jpg|Seabase with terraformed ground [[Concept Art]] |
|||
Base_Interior_Icorridor_lowRes.jpg|[[I Compartment (Subnautica)|I Compartment]] [[Concept art]] |
|||
Base Interior Xcorridors LowRes.jpg|[[X Compartment (Subnautica)|X Compartment]] [[Concept Art]] |
|||
seabaseroomconcept.jpg|[[Multipurpose Room (Subnautica)|Multipurpose Room]] [[Concept Art]] |
|||
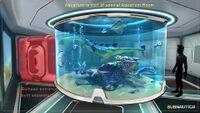
Image03.jpg|[[Alien Containment (Subnautica)|Alien Containment]] [[Concept Art]] |
|||
Base Large Aquarium Notes.jpg|Ditto, annotated |
|||
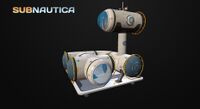
Scanner Room Concept Hi Res.jpg|[[Scanner Room (Subnautica)|Scanner Room]] [[Concept Art]] |
|||
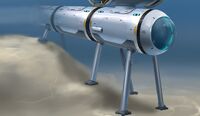
Moonpoolconceptart.jpg|[[Moonpool (Subnautica)|Moonpool]] [[Concept Art]] |
|||
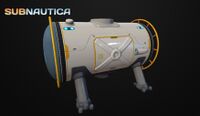
Image00.png|[[Water Filtration Machine (Subnautica)|Water Filtration Machine]] [[Concept Art]] |
|||
Fabricator_FINAL_LowRes.jpg|[[Fabricator (Subnautica)|Fabricator]] [[Concept Art]] |
|||
Tech Workbench LowRes.jpg|[[Modification Station (Subnautica)|Modification Station]] [[Concept Art]] |
|||
Workbench concept.png|Ditto |
|||
Locker Concept.png|[[Locker (Subnautica)|Locker]] [[Concept Art]] |
|||
Planter Concept Art.jpg|[[Plant Pot]]s [[Concept Art]] |
|||
SolarPanelConcept.jpeg|[[Solar Panel (Subnautica)|Solar Panel]] [[Concept Art]] |
|||
C21FjfMUsAAGB2D.jpg|[[Vending Machine (Subnautica)|Vending Machine]] [[Concept Art]] |
|||
</gallery> |
|||
|-|Models= |
|||
<gallery widths="200" spacing="small" hideaddbutton="true"> |
|||
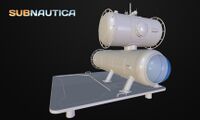
SimpleStraightModel.jpeg|A simple straight Seabase model from [https://sketchfab.com/3d-models/basemodularsections-straight-01-540e2c169d69448087af2d612a361a70 Sketchfab] |
|||
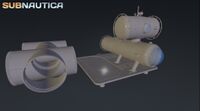
ComplexBaseModel.jpeg|A complex base model from [https://sketchfab.com/3d-models/basemodularsections-straight-01-textures-133422e6c44f4877ab318e2fede7e7e2 Sketchfab] |
|||
WIPComplexModel.jpeg|WIP model of a complex base from [https://sketchfab.com/3d-models/bases-wip-01-bbc2fd84938840669733543d495c11e8 Sketchfab] |
|||
HighpolyWIPModel.jpeg|Highpoly WIP model from [https://sketchfab.com/3d-models/basemodularsections-straight-01-db136d0bc5e54d7ab3a891ec267c374c Sketchfab] |
|||
InteriorBaseModel.jpeg|Base interior model from [https://sketchfab.com/3d-models/base-interior-62b915263c234b82962e7c3ff4c50eab Sketchfab] |
|||
CurvedBaseInterior.jpeg|Curved base interior model from [https://sketchfab.com/3d-models/base-interior-62b915263c234b82962e7c3ff4c50eab Sketchfab] |
|||
</gallery> |
</gallery> |
||
</tabber> |
</tabber> |
||
{{Navbox Seabase Modules}} |
{{Navbox Seabase Modules}} |
||
<!-- Interwiki Language Links --> |
|||
[[ru:Морские базы]] |
|||
[[fr:Bases marines]] |
|||
[[de:Unterwasserstützpunkte]] |
[[de:Unterwasserstützpunkte]] |
||
[[fr:Bases marines]] |
|||
[[es:Bases]] |
|||
[[pt-br:Bases submarinas]] |
|||
[[pl:Bazy podwodne]] |
|||
[[ru:Морские базы]] |
|||
<!-- Categories --> |
|||
[[Category:Constructed with Habitat Builder]] |
[[Category:Constructed with Habitat Builder]] |
||
[[Category:Uses Energy]] |
[[Category:Uses Energy]] |
||
Latest revision as of 18:24, 26 November 2024
Seabases are installations created by the player through the use of the Habitat Builder.
A Seabase provides an area where the Player can return for oxygen and serves as an alternative to Lifepod 5 as a base of operations. Within a seabase, the player can construct additional storage space, grow food, access Appliances not available in Lifepod 5, and add aesthetic options. Thus Seabases provide safe havens away from the Safe Shallows the player starts in.
In all Game Modes except Creative Mode, entering a Seabase secures the player's inventory, so if the player dies, they will return to the last Seabase they visited (Lifepod 5 and a Cyclops also count as Seabases for this purpose) and keep all the items in their inventory that they had when they were there. This occurs even if they die while inside the base in question: thus, quickly building a single I Compartment and a Hatch on the seabed can be a valid tactic to secure the player's inventory if they are about to die.
The player will start with most of the blueprints they need for a basic Seabase; at the bare minimum, one needs a Compartment, a Hatch, and a power generator (the Solar Panel is unlocked by default). The initial compartment must be built on or near the ground (or on a Foundation, which is not necessary but provides greater Hull Integrity and a flat surface to work with), but any additional compartments can overhang without any issue, allowing bases to be built over cliffsides. The player can acquire Blueprints which allow additional module types to be created.
|
Spoiler alert: The following section contains story related material. |
|---|
|
Degasi Seabases can be found at the center and on the tops of the mountains of the Floating Island, Jellyshroom Cave, and Deep Grand Reef. These abandoned Seabases provide blueprints for additional base components that the player doesn't have access to by default, such as the Multipurpose Room and the Observatory. Other base components, power generators, appliances and, furniture, can be found in Wrecks. |
Despite their name, Seabases can be built on land. When on land, hull integrity is not a factor, and bases can be built without the need for additional Reinforcements, Foundations, or Bulkheads. Power is still needed for them to operate, but not to provide oxygen.
Hull Integrity
Hull Integrity refers to the ability of the player's Seabase to withstand the pressure of the surrounding water, and as a mechanic slows the expansion of the Seabase. A Seabase starts at 10 integrity, but the majority of the modules will lower the integrity once added with the amount varying by module. As Seabases are built at a greater depth the integrity reduction caused by each module will increase. Hull integrity can be increased by constructing Reinforcement panels, placing a Seabase on or near a Foundation (foundations built on top of rooms will still provide their benefit), or installing Bulkheads on the ends of Compartment modules.
When the hull integrity of a Seabase is less than or equal to zero, it will begin to form hull breaches. Any corridor or room that is connected to the breach will begin flooding with water. Bulkheads can compartmentalize the base and prevent floodwaters from moving between compartments, but if the integrity remains below zero then eventually every compartment will develop a leak and the base will fill with water. To avoid this, quickly increase the base's integrity (by either adding strengthening components or removing weak components) and fix all hull breaches in the base using a Repair Tool.
A Seabase that receives damage to its exterior will also spring leaks, but the hull integrity will be unaffected. This is most likely to occur if the player hits the base with a Cyclops, as aggressive Fauna cannot damage bases. In this case, leaks will be limited to only the module that was hit and will not spread, making Bulkheads an effective method of preventing widespread flooding.
Energy Usage
Energy can be provided to a Seabase by building various types of generators near or inside the Seabase. Any number or combination can be used. Appliances such as the Fabricator will drain energy from the Seabase.
There are currently four generators available to power Seabases:
- Solar Panels, which work best near the surface
- Bioreactors, which consume any organic matter for power
- Thermal Plants, which collect heat energy (use near Lava Geysers and Black Smokers)
- Nuclear Reactors, which consume Reactor Rods made from Uraninite Crystals
Bioreactors and Nuclear Reactors are built inside a Multipurpose Room or Large Room. Solar Panels and Thermal Plants are built outside and can be directly attached to the base or connected via Power Transmitters if the distance is too great.
Seabases do not require energy to operate in Creative Mode.
The following appliances and rooms draw power from the Seabase:
- Fabricator
- Battery Charger
- Power Cell Charger
- Modification Station
- Water Filtration Machine
- Spotlight
- Floodlight
- Scanner Room (fabricator and active scanning, along with recharging the Camera Drones)
Oxygen
Seabases automatically produce Oxygen as long as there is power supplied, and can be used as a remote oxygen source outside the base through a Base-attached Air Pump and Pipes. If the power is depleted, the Seabase will slowly lose oxygen until it is completely gone.
How to Build a Seabase
- Find a suitable piece of seabed or land.
- Equip the Habitat Builder and press the appropriate key to bring up a crafting menu.
- In the Interior Pieces tab, select the desired module.
- Aim at the desired building place (the outline of the module will become green if the location is valid).
- Adjust the rotation if desired. You cannot rotate the moonpool once another module has been placed.
- Place the module with the correct button.
- Once placed, hold the correct key to add the required materials to finish the building process.
- Go to Step 2 and repeat for each room you want to build. Remember that once the desired module has been placed, other modules that are placed near it will snap to its position, making it easier to build.
To deconstruct a Seabase module, equip the Habitat Builder and hold the appropriate button while facing the module. If enough inventory space is available, the module will be deconstructed and all materials used to create the module will be returned to the player's inventory, one item at a time. Note that everything inside the module and attached to the outside of the module must be deconstructed (This excludes other Seabase modules, they do not need to be deconstructed to remove a part.) before the module itself can be deconstructed.
Controls
| Action | Mouse & Keyboard | Xbox One | PlayStation 4 | Nintendo Switch |
|---|---|---|---|---|
| Open Building Menu | 
|

|
||
| Rotate Object |  
|
 
|
 
| |
| Build Object | 
|

|

| |
| Deconstruct Object | 
|

|

|
Dialogue
The Seabase's AI plays various messages that correspond to different circumstances, some accompanied by sound cues:
| Trigger | Dialogue | |
|---|---|---|
| When Seabase is repaired | "Hull integrity restored. Draining systems initiated." | |
| Entering Seabase with no power source | "Warning: Emergency power only. Oxygen production offline." | |
| When the Seabase has no power | "Warning: Emergency power only. Oxygen production offline." | |
| Restoring Seabase's power | "Power restored. All primary systems online." | |
| Entering Seabase or Seamoth | "Welcome aboard captain." |
Base Parts
Base Pieces
| Item | Description | Hull Integrity |
|---|---|---|
 |
Provides structural support and prevents flooding. | +3.0 Units |
 |
Basic tubular compartment. | -1.0 Unit |
 |
Basic glass-walled compartment. | -2.0 Units |
 |
L-shaped compartment. | -1.0 Unit |
 |
L-shaped glass compartment. | -2.0 Units |
 |
T-shaped compartment. | -1.0 Unit |
 |
X-shaped compartment. | -1.0 Unit |
 |
Reinforced habitat foundation. | +2.0 Units |
 |
Provides an access point to the habitat. | -1.0 Unit |
| A large room. | -4.0 Unit | |
| A large glass dome. | -8.0 Unit | |
 |
Vehicle docking bay. | -5.0 Units |
 |
Basic room. | -1.25 Units |
| A glass dome. | -2.0 Units | |
 |
Compartment with 360-degree views and low structural integrity. | -3.0 Units |
 |
Increases hull strength. | +7.0 Units |
 |
Locates resources and wrecks within range. | -1 Units |
 |
Vertical base connector. | -0.5 Units |
 |
Observatory window. | -1.0 Unit |
External Modules
| Item | Description | Item IDs |
|---|---|---|
 |
Build on the ground in the sun to charge (25 power/min). | solarpanel |
 |
Converts heat to energy (> 15 °C) (50 power/min). | thermalplant |
 |
Extends range of power source. | powertransmitter |
 |
Industrial lighting, designed for all environments. | techlight |
 |
Fixed lighting solution. | spotlight |
 |
Artificial plant bed, suitable for use on land or underwater. | farmingtray |
 |
Base-attached device that pumps air into pipes. Acts as a starting point for a pipe chain. | basepipeconnector |
Interior Modules
| Item | Description | Item IDs |
|---|---|---|
 |
Basic survival fabricator. Atomically rearranges raw resources into useful objects. | fabricator |
 |
Receive short-range communications. | radio |
 |
Fabricates a medical kit every 30 minutes. | medicalcabinet |
 |
Wall-mounted storage locker. | smalllocker |
 |
Stores excessive things you need to store. | locker |
 |
Can charge up to 4 batteries simultaneously. | batterycharger |
 |
Can charge up to 2 power cells simultaneously. | powercellcharger |
 |
Self-sustaining aquatic habitat. | aquarium |
 |
Advanced fabricator for modification of equipment. | workbench |
 |
Titanium pot containing synthetic soil. | planterpot |
 |
Designed titanium pot containing synthetic soil. | planterpot2 |
 |
Upmarket titanium pot containing synthetic soil. | planterpot3 |
 |
Artificial plant bed, suitable for interior use only. | planterbox |
 |
Wall-mounted plant pot. | plantershelf |
Interior Pieces
| Item | Description | Item IDs |
|---|---|---|
 |
For connecting two floors. | baseladder |
 |
Separates water and salt. | basefiltrationmachine |
|
Structural support and can stop water flow (+3HP). | basebulkhead |
 |
Build this in the moonpool to upgrade docked vehicles. | baseupgradeconsole |
 |
Composts organic matter into electrical energy. | basebioreactor |
 |
Processes nuclear reactor rods. | basenuclearreactor |
 |
Provides optimal conditions for flora and fauna. Add a hatch to enter. | basewaterpark |
Miscellaneous Items
| Item | Description | Item IDs |
|---|---|---|
 |
Simple metal relaxation appliance. Conserves energy when resting. | bench |
 |
A double bed. | bed1 |
 |
A double bed with a beautiful gray linen spread. | bed2 |
 |
A single bed. | narrowbed |
 |
Common starship work desk. | starshipdesk |
 |
Turns 360 degrees. | starshipchair |
 |
Relaxing and confidence building. | starshipchair2 |
 |
Commandeering. | starshipchair3 |
 |
Sign post with configurable text. | sign |
 |
Wall-mounted frame, upload desired image from compatible PDA photo galleries. | pictureframe |
 |
Round glass table. | bartable |
 |
Permanently deconstruct unwanted items and safely release their constituent atoms into the atmosphere. | trashcans |
 |
Used to dispose of nuclear waste. | labtrashcan |
 |
Vending machine. | vendingmachine |
 |
Synthesizes hydrating, caffeine-free coffee. | coffeevendingmachine |
 |
Lab counter. | labcounter |
 |
Wall-mounted foliage. Purely decorational. | baseplanter |
 |
Single wall shelf. | singlewallshelf |
 |
Wall shelves. | wallshelves |
 |
An unusual doll. | Unknown ID |
Achievement
| Spoiler alert: The following section contains story related material.
| |

|
Settling in for the Long Haul Build a habitat
|
Trivia
- Originally when prototyping bases, the developers used square base pieces. This was seen in a developer update along with a screenshot of early base models on the Trello.
- Several base pieces were cut during development. This includes examples such as the Specimen Analyzer, Power Generator, and Fragment Analyzer.
Gallery
<tabber> |-|Screenshots=
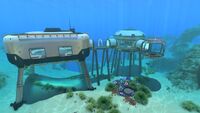
An example of a Seabase
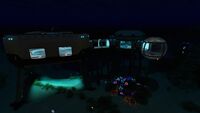
Ditto, at night-time

A Seabase on the Floating Island
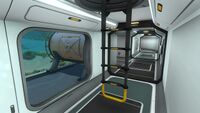
Inside a typical Seabase


|-|Concept Art=
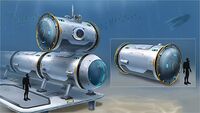
Seabase Concept art
Seabase with terraformed ground Concept Art
Ditto, annotated

Ditto


|-|Models=
A simple straight Seabase model from Sketchfab
A complex base model from Sketchfab
WIP model of a complex base from Sketchfab
Highpoly WIP model from Sketchfab
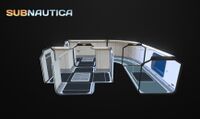
Base interior model from Sketchfab
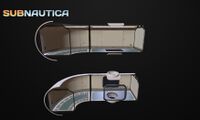
Curved base interior model from Sketchfab


</tabber> Lua error in package.lua at line 80: module 'Dev:Navbox' not found.