Aurora: Difference between revisions
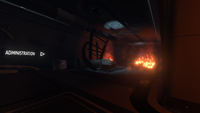
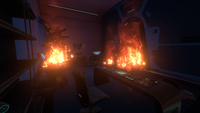
(→Gallery: Added interior categorization. Will add a few more interior photos soon.) |
KOALA NET21 (talk | contribs) No edit summary |
||
| Line 192: | Line 192: | ||
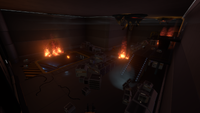
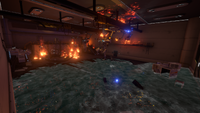
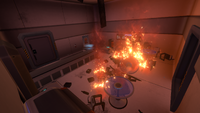
Leaving the locker room, there will be a sign labeled "Prawn Bay". This is the location where the Prawn Suit Fragments will be found. The door to this room is locked, and like before, has a panel that needs to be repaired. Once the door is unlocked the player can proceed into the room. This room has multiple Prawn Suits hanging from the ceiling, presumably waiting to be deployed. To the right is a pile of rubble with broken Prawn Suit Fragments and other miscellaneous things piled on top of each other. The fragments may require nearby fires to be put out in order to be scanned. Among the rubble is a [[Storage Module]], located on an upgrade console. Next to that is a ramp blocked off by fire and rubble. Once those are cleared, there is a door that leads to the "Living Quarters". |
Leaving the locker room, there will be a sign labeled "Prawn Bay". This is the location where the Prawn Suit Fragments will be found. The door to this room is locked, and like before, has a panel that needs to be repaired. Once the door is unlocked the player can proceed into the room. This room has multiple Prawn Suits hanging from the ceiling, presumably waiting to be deployed. To the right is a pile of rubble with broken Prawn Suit Fragments and other miscellaneous things piled on top of each other. The fragments may require nearby fires to be put out in order to be scanned. Among the rubble is a [[Storage Module]], located on an upgrade console. Next to that is a ramp blocked off by fire and rubble. Once those are cleared, there is a door that leads to the "Living Quarters". |
||
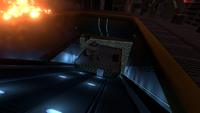
In the water is a large system of pipes and wires. In the system of wires is a hole where one can swim through to enter the room containing the Aurora's black box data. Heading north through a doorway will lead to the Laboratory, however, one must use a Laser Cutter to open a door to enter. |
In the water is a large system of pipes and wires. In the system of wires is a hole where one can swim through to enter the room containing the Aurora's black box data. Heading north through a doorway will lead to the Laboratory, however, one must use a Laser Cutter to open a door to enter. |
||
===Laboratory=== |
===Laboratory=== |
||
| Line 199: | Line 199: | ||
Coming through the Prawn Suit Bay: Go underwater at the far right corner from the entrance to the Bay to find a tunnel leading to the lab. A room prior to the actual laboratory contains a Data Terminal with a Data Download titled "[[Data Downloads#Aurora Black Box Data|Aurora Black Box Data]]". There also is a Vac-pack containing a Battery in front of a locked door that requires the Laser Cutter. Behind it is the actual laboratory. |
Coming through the Prawn Suit Bay: Go underwater at the far right corner from the entrance to the Bay to find a tunnel leading to the lab. A room prior to the actual laboratory contains a Data Terminal with a Data Download titled "[[Data Downloads#Aurora Black Box Data|Aurora Black Box Data]]". There also is a Vac-pack containing a Battery in front of a locked door that requires the Laser Cutter. Behind it is the actual laboratory. |
||
A nearby Abandoned PDA has a Data Download titled "[[Data Downloads#Lab Access|Lab Access]]" containing the code, 6483, for the two nearby doors. These grant access to the storage room, where three [[Lab Container|Large Sample |
A nearby Abandoned PDA has a Data Download titled "[[Data Downloads#Lab Access|Lab Access]]" containing the code, 6483, for the two nearby doors. These grant access to the storage room, where three [[Lab Container|Large Sample Flasks]] can be found, one Cylindrical Sample Flask, a [[Lab Equipment|Microscope]] and a Sample Analyzer. The two Vac-packs contain [[Disinfected Water]] and there's a Data Terminal that states it de-corrupted the player's PDA and unlocks the Repulsion Cannon. On a [[Counter]] close to the terminal, there's also an Abandoned PDA named "[[Data Downloads#What Can We Learn From the Hive Mind of Strader VI?|What Can We Learn From the Hive Mind of Strader VI?]]". |
||
===Living Quarters=== |
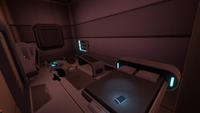
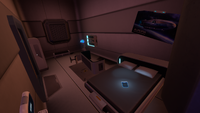
===Living Quarters=== |
||
| Line 342: | Line 342: | ||
|- |
|- |
||
|Seamoth Bay |
|Seamoth Bay |
||
| |
| |
||
* [[Data Downloads#VR Suite Log|VR Suite Log]] |
* [[Data Downloads#VR Suite Log|VR Suite Log]] |
||
| |
| |
||
* 907 0 15 |
* 907 0 15 |
||
|- |
|- |
||
| Line 475: | Line 475: | ||
==Trivia== |
==Trivia== |
||
* On a phone number pad, the third letter for each number of the code to the captain's quarters door “2679” spells out “Cory”. This is in reference to Subnautica's art director Cory Strader. |
* On a phone number pad, the third letter for each number of the code to the captain's quarters door “2679” spells out “Cory”. This is in reference to Subnautica's art director Cory Strader. |
||
[[fr:Aurora]] |
|||
[[Category:Aurora]] |
[[Category:Aurora]] |
||
[[Category:Explorable Structures]] |
[[Category:Explorable Structures]] |
||
Revision as of 16:40, 13 April 2019

|
Read at own risk This article contains unmarked spoilers. Players new to the game would want to avoid or be cautious toward this article. |
| This article is about Aurora in Subnautica. For the related article on the Below Zero Wiki, see Aurora. |
<infobox> <title source="title1"><default>Aurora</default></title>
<image source="image1"></image> <label>Category</label> <label>Category</label> <label>Description</label> <label>Inhabit</label> <label>Loot</label> <label>Attitude</label> <label>Damage</label> <label>Obtain From</label> <label>Biome</label> <label>Active During</label> <label>Reap</label> <label>Music</label> <group> <image source="image2"></image> <label>Tab</label> <label>Description</label> <label>Size</label> <label>Bioreactor</label> <label>Drops</label>
<label>Debug Spawn</label> <format> * {{#explode:aurora||1}} </format> <label>Debug Spawn</label> <format> * {{#explode:aurora||1}} </format></group> <group layout="horizontal"> <header>Sustenance</header> <label>Food</label> <label>H2O</label> </group> <group collapse="open" class="tab-seeds"> <header>Seeds</header> <image source="image3"></image> <label>Tab</label> <label>Description</label> <label>Size</label> <label>Bioreactor</label> <label>Item ID</label> </group> </infobox>
The Aurora suffered orbital hull failure. Cause: unknown. Zero human life signs detected. File:Lifepod1.ogg
― PDA, Dialogue
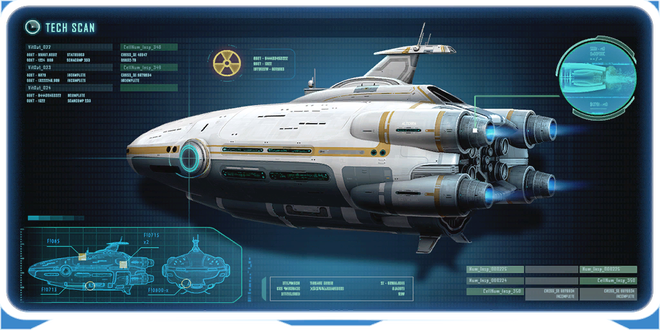
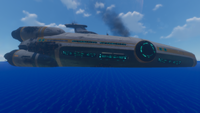
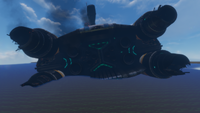
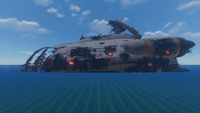
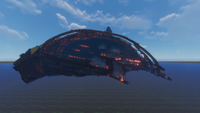
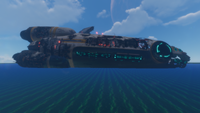
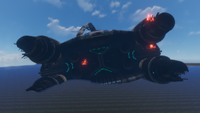
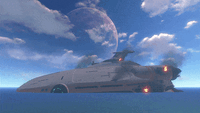
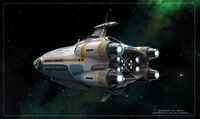
The Aurora is a spacecraft sent to the Ariadne Arm by the Alterra Corporation in order to build a phasegate. However, its secondary mission, unknown to most of the crew, was to search for and, if possible, rescue the survivors of the Degasi crew.
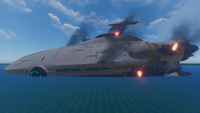
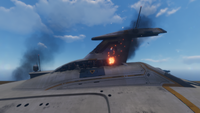
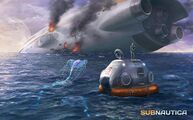
During a gravity slingshot maneuver around Planet 4546B, the Aurora was struck by a mysterious energy pulse, resulting in catastrophic hull failure, leading to its crash landing on the surface of the planet. It is later revealed that it was the Quarantine Enforcement Platform that shot it down. Many Lifepods were destroyed by the energy pulse and the ones that did launch were all compromised with the exception of two: Lifepod 5, which contained Ryley Robinson, and Lifepod 4, though its flotation devices seemingly failed or was possibly overturned by a Reaper Leviathan.
Upon crashing, the Aurora plowed into the terrain, unearthing it and leaving small sand hills around the ship, resulting in huge quantities of Metal Salvage and Vac-packs being dispersed within the vicinity of the ship, providing useful materials such as Food & Water, batteries, and titanium. Multiple Reaper Leviathans patrol the crash site.
By the time the Player awakens and begins his exploration of the area, all of the other Lifepods have been destroyed and their occupants have vanished. After the Aurora's Drive Core explodes, the ship's wreckage is surrounded by Radiation and is unapproachable without a Radiation Suit. While quite dangerous and far out, it is possible for the player to visit the Aurora early in-game before it explodes, although several tools are needed to properly explore the ship.
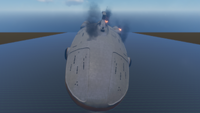
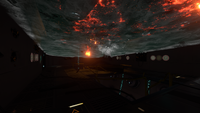
The Aurora is located on the far eastern edge of the map, with its bow facing north and its stern facing south. It is visible from the surface nearly anywhere on the map, making it a useful landmark, especially if the player lacks a compass. It is approximately 1,280 meters long from nose to thrusters.
Mission
Crash
PDA Speech
Aurora Exploration
Over the course of several in-game days, the PDA informs the Player on the condition of the degradation of The Aurora's engine, until its eventual explosion.
The explosion is focused towards the front section of the ship. The player can be killed by the explosion if in the crash zone biome when the event occurs.
Only after the explosion is the Player able to explore inside the Aurora, but only if equipped with a radiation suit. All three parts to the suit must be equipped in order to negate the radiation damage. Upon entry, the PDA warns that creatures around the Aurora contain traces of human tissue inside their digestive systems, indicating all bodies were consumed by Bleeders and Cave Crawlers. Also, fire and falling debris can injure the Player, and periodic shaking of the hull occurs. Further dangers are posed by the Reaper Leviathans that spawn around the ship, Cave Crawlers that litter the entrance area of the ship, and Bleeders in the underwater sections within the Aurora.
For avoiding the Reapers, there is usually one patrolling between the basin West of the Aurora, and the deep chasm beneath its bow. A Seamoth can safely sneak past by approaching from the Safe Shallows nearest to the Aurora and hugging the Aurora's side, until reaching a gap large enough for the Seamoth to squeeze through. It is recommended to disembark in shallow water so that the ramp beneath you will protect you from Reaper attack, though the Reaper doesn't normally swim that close to the entrance.
The following equipment is recommended for exploring the Aurora:
- Radiation Suit (required to approach the Aurora)
- A weapon for self-defense against Cave Crawlers (Such as a Stasis Rifle, Propulsion Cannon, or Repulsion Cannon)
- Repair Tool, for repairing the Drive Room and mending broken doors.
- Propulsion Cannon, for removing crate barriers at both the main hallway and Laboratory entrance, and to remove the Bleeders from the player's arms. A Repulsion Cannon is also a viable tool for removing crates and barriers.
- Fire Extinguisher, for various fires (some can be found on site)
- Laser Cutter, for entering various rooms including the Prawn Suit Bay and Aurora Black Box Terminal.
- A Seaglide for quick navigation through the submerged sections.
- A Survival Knife / Thermoblade to kill the Bleeders.
There are two routes to the inside of the ship. The first is on the right side of the shore area of the torn up front section and constitutes an entryway behind a Floodlight blocked off by various crates. Behind the crates are a Fire Extinguisher and a fire to put out, after which the Player will find themselves in the Laboratory. The second requires going up a ramp in the torn up front section of the Aurora, the Player can enter a corridor that leads inside the ship. On the way up, the user can find several Vac-packs with crafted items inside of them. The door leading to the T-section is partially blocked off by fire. Fortunately, there are a few Fire Extinguishers lying around, which can come in handy. When the Player enters, there will be a sign to the left that says Airlock.
To the right of the T-section, there is a door which is blocked off by fire. The left corridor leads to the "Cargo Bay 3". The right door leads to "Administration". These rooms are indicated by signs on the Aurora itself.
Administration Office
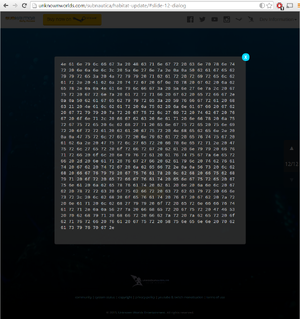
The administration office has a Data Terminal with a downloadable log titled "Alterra Launches the Aurora". The office also contains shelves, a Desk, and a Prawn Suit poster which can be taken. It also contains an Abandoned PDA with a Data Download under the headline "Notes to self", which will give the player the code "1454".
Cargo Bay 3
Down the left corridor, there is rubble blocking the entrance to Cargo Bay 3. Before this, an Abandoned PDA named "Aurora Engineering Drone - Log" next to a single Propulsion Cannon Fragment, right at the start of the ramp leading to the entrance. These can be gotten around dropping down from above or by using the Propulsion Cannon or Repulsion Cannon to move these out of the way. Alternatively, the player can jump and sprint from the slope to the first large cargo container, and then from there to the top of the pile. Note that in doing so, there is a fire that cannot be put out; it must simply be avoided. There is then a locked door with a keypad that can be interacted with. Entering the code from the previously mentioned Data Download into the keypad will open the door. Alternatively, you can unlock the door without using a code from the other side. The Cargo Bay is a large area full of cargo containers, Vac-packs, forklifts, and a few other miscellaneous things. Very rarely, Cyclops Engine parts can appear inside some of the large cargo containers
There is a cargo elevator in the cargo bay, which is stuck halfway. Close to it, there's an Abandoned PDA named "Trans-Gov Profile: Alterra Corp.".
Following the ramp down reveals an underwater section which leads to a T-corridor. To the left, there will be a Sealed Door. To the right, there is a room called the "Seamoth Bay".
Seamoth Bay
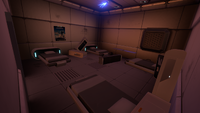
The door to this room is locked, but there is a damaged panel which the Repair Tool can repair. When this panel is repaired, the door is unlocked, and the player can enter. The Seamoth Bay contains two pieces of a damaged Seamoth, which can be scanned. It also has a Seamoth Depth Module MK1 Upgrade Module and an Abandoned PDA called "VR Suite Log".
Locker Room
Cutting through the Sealed Door will lead the player into a locker room. Some of the lockers are open and have loot inside, like batteries, first-aid kits, and water. There is an Abandoned PDA with a Data Download titled "Sweet Offer". It will give the player the code "1869", required for Cabin 1 in the Living Quarters.
Prawn Suit Bay
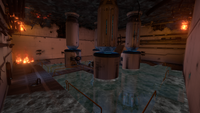
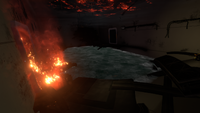
Leaving the locker room, there will be a sign labeled "Prawn Bay". This is the location where the Prawn Suit Fragments will be found. The door to this room is locked, and like before, has a panel that needs to be repaired. Once the door is unlocked the player can proceed into the room. This room has multiple Prawn Suits hanging from the ceiling, presumably waiting to be deployed. To the right is a pile of rubble with broken Prawn Suit Fragments and other miscellaneous things piled on top of each other. The fragments may require nearby fires to be put out in order to be scanned. Among the rubble is a Storage Module, located on an upgrade console. Next to that is a ramp blocked off by fire and rubble. Once those are cleared, there is a door that leads to the "Living Quarters".
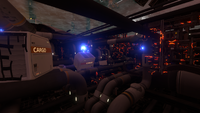
In the water is a large system of pipes and wires. In the system of wires is a hole where one can swim through to enter the room containing the Aurora's black box data. Heading north through a doorway will lead to the Laboratory, however, one must use a Laser Cutter to open a door to enter.
Laboratory
Coming from the Aurora entrance: Remove the crates blocking the doorway, then follow the hallway until there is a fire. On the right lies a fire extinguisher which is useful for putting out the aforementioned fire. Continue until a submerged room is reached.
Coming through the Prawn Suit Bay: Go underwater at the far right corner from the entrance to the Bay to find a tunnel leading to the lab. A room prior to the actual laboratory contains a Data Terminal with a Data Download titled "Aurora Black Box Data". There also is a Vac-pack containing a Battery in front of a locked door that requires the Laser Cutter. Behind it is the actual laboratory.
A nearby Abandoned PDA has a Data Download titled "Lab Access" containing the code, 6483, for the two nearby doors. These grant access to the storage room, where three Large Sample Flasks can be found, one Cylindrical Sample Flask, a Microscope and a Sample Analyzer. The two Vac-packs contain Disinfected Water and there's a Data Terminal that states it de-corrupted the player's PDA and unlocks the Repulsion Cannon. On a Counter close to the terminal, there's also an Abandoned PDA named "What Can We Learn From the Hive Mind of Strader VI?".
Living Quarters
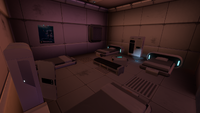
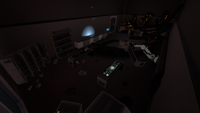
The Living Quarters are various rooms that provided living conditions for the various crew and passengers on the ship. If the player goes right, there is a Supply room filled with Filtered Water and Nutrient Blocks. If the player goes left, there is a Canteen. There are bar tables and chairs lying on the ground, along with a few handy Vac-packs, a vending machine against the wall, a bar with single wall shelves, a fire extinguisher is on the wall behind the bar as well as a Keep Calm Poster, which can be taken.
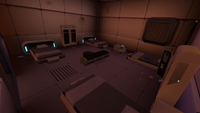
At the front end of the corridor, there are cabins for the people on board. There are beds, posters, Carry-alls and some Vac-packs:
To the left, you can find Cabins 1 through 3 and the Captain's Quartes. Cabin 1 is locked by a code, which is "1869", found in the Abandoned PDA named "Sweet Offer". In this room, a Blue Cap, Arcade Gorge Toy and an Abandoned PDA, "Responsible Autonomous Relationships", can be found. Cabin 3 contains the Prawn Suit Poster - Land. Another locked door at the end of the hallway, Captain's Quarters, can be unlocked with the code "2679", which is received later in the game on the radio. Inside the room, there is an Aurora Miniature, an Aurora Poster, an Abandoned PDA titled "Captain's Log" on the bed, and a Data Terminal that contains a Data Download titled "Alterra HQ - Last Recorded Transmissions", that unlocks the Neptune Escape Rocket.
To the right, you can find Cabins 4 through 7. Cabin 4 contains an Abandoned PDA named "Relationship Contract Legal Recording" and the Prawn Suit Poster - Sea. Facing this room there is Cabin 7 and the doorway is blocked by fire, which you will need to put out in order to go through. There, you will find another Abandoned PDA, "Alterra Alms Pamphlet". Cabin 6 has a Natural Selection 2 Poster.
Backtrack to the T-corridor from earlier, and this time, go straight. This will lead to the Drive Room.
Drive Room
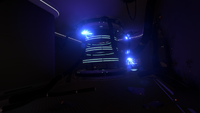
Inside the Drive Room are four large generators. They are connected by catwalks, though some are underwater and heavily damaged. The generators are covered in breaches, and the Player's objective is to repair them using the Repair Tool, however, it should be noted that the flooded part of the drive core, where most repairs need to be done, is full of Bleeders. Repairing the breaches removes the radiation entirely after three in-game days.
When entering the generator room, the PDA warns the player that radiation is at its maximum tolerable level.
The Cyclops Engine Efficiency Module for the Cyclops can also be found in the Drive Room, sticking out from the upgrade console at the center of the room. Bleeders can also be found in the water around the generators.
Mentioned Areas
The Aurora had a virtual cinema/theater, an antigravity gym, VR suites, and several canteens/cafés. It is possible that these areas were destroyed either when the Aurora crashed or during the drive core detonation.
<tabber> Fauna=
|-| Fragments=
- Bar Table
- Basic Double Bed
- Bench
- Command Chair
- Counter
- Cyclops Engine
- Desk
- Floodlight
- Prawn Suit
- Propulsion Cannon
- Seamoth
- Single Bed
- Single Wall Shelf
- Swivel Chair
- Trash Can
- Vending Machine
- Wall Shelves
|-| Other=
- Abandoned PDA
- Arcade Gorge Toy
- Aurora Miniature
- Aurora Poster
- Blue Cap
- Carry-all
- Cylindrical Sample Flask
- Cyclops Engine Efficiency Module
- Fire Extinguisher
- Filtered Water
- Flashlight
- Keep Calm Poster
- Large Sample Flask
- Microscope
- Natural Selection 2 Poster
- Neptune Escape Rocket Blueprint
- Nutrient Block
- Prawn Suit Poster - Land
- Prawn Suit Poster - Sea
- Repulsion Cannon Blueprint
- Sample Analyzer
- Seamoth Depth Module MK1
- Storage Module
- Vac-pack
</tabber>
Data Bank Entries
<tabber> Aurora Ship Status=
|
Ship Class: Alterra Long-Range Capital Ship Status: Engineering section: Habitation section: |
|-| Drive Core Shielding Breach=
|
The Aurora's drive core is shielded by a thick metal shell, which breached in multiple locations shortly after the crash. Once breached it will continue to leak radiation into the surrounding environment until the breaches are sealed. After that point the radiation in the environment will dissipate over time. This procedure should only be attempted with appropriate radiation protection and a fully charged repair tool. |
</tabber>
Data Downloads Checklist
| Ship Section | Name of Data Bank Entry | Coordinates |
|---|---|---|
| Administration Office |
| |
| Cargo Bay 3 |
| |
| Seamoth Bay |
| |
| Locker Room |
| |
| Laboratory |
| |
| Living Quarters |
| |
| Captain's Quarters |
|
Gallery
<tabber> Exterior=
|-| Interior= <tabber> Entrance=
Collapsed Hallway, blocked by Cargo Crates
|-| Cargo Bay=
|-| Quad-Junction Hallway=
Seamoth Bay
|-| Prawn Bay=
|-| Exit Area=
</tabber> |-| Concept Art=
|-| Other= <gallery widths="200" spacing="small"> Aurora_and_Lifepod-Fox3D.png|Fox3D art including Lifepod 5 Cyclops Aurora Fox3D.png|Fox3D art including the Cyclops aurora.png|The Aurora crashing into 4546B after being shot down by the Quarantine Enforcement Platform seen in the Cinematic Trailer </tabber>
Trivia
- On a phone number pad, the third letter for each number of the code to the captain's quarters door “2679” spells out “Cory”. This is in reference to Subnautica's art director Cory Strader.

