Seabases (Subnautica)
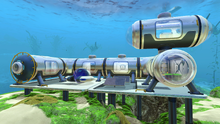
Seabases are player homes created by the player.
They are created through the use of the builder tool.
"Seabases are available now, and allow the construction of habitats on the sea floor. Bases are composed of modular units such as compartments, windows, and hatches, bases allow you to create an outpost from which you can go forth and explore Subnautica’s vast ocean."[1]
Seabases can be customized in the same way as the Cyclops through the installation of lockers; fabricators; and fragment analyzers.
BUG: When on land, if the hull integrity of a base sinks below 0, the Seabase will still flood with water.
Future Plans
Developers have indicated that one future update to the game will be dedicated to the enhancement of Seabases. In particular, the numerous requests to have a docking module for the Seamoth will be addressed, most likely in the form of a moon pool. Also, actual rooms will be added to the game. [Citation needed]
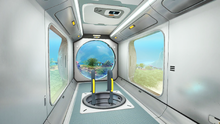
In the near future, a glass corridor module will be added to the game.
Further, there are still many planned machines and similar objects missing from the game that the player will be able to place in the Seabase.
Special Properties: Hull Integrity
Hull integrity refers the ability of your Seabase to withstand the pressure of the surrounding water.
Hull integrity can be increased by crafting special parts called reinforcements using the builder tool.
Factors that affect hull integrity
- Number of interconnected modules
- Windows
- Depth at which the Seabase is built
When the hull integrity of a Seabase reaches zero, it will begin to form hull breaches. Eventually, the whole base will fill with water. To avoid this, quickly increase the integrity and fix all hull breaches in the base using a Welder.
Requirements for All Seabases
- Builder
- Power Generator (crafted through builder)
- Hatch to allow entrance to seabase (crafted through builder)
How to Build a Seabase
- Find a suitable flat piece of land, or terraform the environment with the Terraformer.
- Equip the Builder, click the RMB to bring up a crafting menu.
- Select the desired module.
- Look at the desired building place (the outline of the module will become green if the location is valid).
- Adjust the rotation by pressing Q or E or by scrolling the mouse wheel.
- Place the module by clicking the LMB.
- Once placed, hold the LMB to finish the building process.
- Go to Step 2 and repeat.


