Template:Recipe: Difference between revisions
No edit summary Tag: sourceedit |
No edit summary Tag: sourceedit |
||
| Line 1: | Line 1: | ||
<table><tr style="height:{{#ifeq:{{{small|}}}|yes|36|72}}px;"><!-- |
<table><tr style="height:{{#ifeq:{{{small|}}}|yes|36|72}}px;"><!-- |
||
-->{{#if: {{{item1|{{{item|}}}}}} | {{repeat | 1={{{count1|{{{count|1}}}}}} | 2=<td><span style="z-index: 1; position: relative;">[[File:Inventory background.jpg{{#ifeq:{{{small|}}}|yes|{{!}}36px}}|link=]]<span style="position: absolute; top: 0; bottom: 0; left: 0; right: 0; padding:7px;">[[File:{{{item1|{{{item|}}}}}}.png{{#ifeq:{{{small|}}}|yes|{{!}}32px}}|link={{{item1|{{{item|}}}}}}]]</span></span></td> | 3=<td><p style="font-size:150%;">×'''{{{count1|{{{count|1}}}}}}'''</p></td> }} }}<!-- |
-->{{#if: {{{item1|{{{item|}}}}}} | {{repeat | 1={{{count1|{{{count|1}}}}}} | 2=<td><span style="z-index: 1; position: relative; display: inline-block;">[[File:Inventory background.jpg{{#ifeq:{{{small|}}}|yes|{{!}}36px}}|link=]]<span style="position: absolute; top: 0; bottom: 0; left: 0; right: 0; padding:7px;">[[File:{{{item1|{{{item|}}}}}}.png{{#ifeq:{{{small|}}}|yes|{{!}}32px}}|link={{{item1|{{{item|}}}}}}]]</span></span></td> | 3=<td><p style="font-size:150%;">×'''{{{count1|{{{count|1}}}}}}'''</p></td> }} }}<!-- |
||
-->{{#if: {{{item2|}}} | {{repeat | 1={{{count2|1}}} | 2=<td><span style="z-index:? 1; position: absolute;">[[File:Inventory background.jpg{{#ifeq:{{{small|}}}|yes|{{!}}36px}}|link=]] |
-->{{#if: {{{item2|}}} | {{repeat | 1={{{count2|1}}} | 2=<td><span style="z-index:? 1; position: absolute;">[[File:Inventory background.jpg{{#ifeq:{{{small|}}}|yes|{{!}}36px}}|link=]] |
||
Revision as of 06:14, 9 March 2015
| --> |
- Overview
This template is used to make an organized, standardized recipe layout with automatic links/icons and add the necessary Crafted with categories. Full in-game item names should be used, as this will select the corresponding article and image. The "item" text corresponds to the ingredients text, the "machine" text corresponds to the method of crafting, and the "result" text corresponds to the products. While the typical order is "item", "machine, then "result" any order will work as long as there is proper separation. This is also true for the "count" text. The "item=" and "item1=" texts are interchangeable and the same goes for "result1" and "count1". If no count is provided for an item or result then a single count is assumed. Therefore "count=1" is unnecessary but will still work.
Note: in most cases, it is easier and simpler to use {{Recipe2}}, which will add the proper recipe for the topic automatically. However, if the recipe must be written out manually, then the following should be noted.
- Usage
- Full syntax:
{{Recipe|Main=|item1=|count1=|item2=|count2=|item3=|count3=|item4=|count4=|item5=|count5=|item6=|count6=|item7=|count7=|item8=|count8=|machine=|result1=|resultcount1=|result2=|resultcount2=|result3=|resultcount3=}}
- Basic usage is as follows:
{{Recipe|item=Bladderfish|machine=Fabricator|result=Filtered Water}}
  | --> |   |
- If the recipe is for how to craft the topic of the article (e.g., the recipe for Bladderfish on the Bladderfish page), add
Main=to the recipe code:
{{Recipe|item=Bladderfish|machine=Fabricator|result=Filtered Water}}would not add the Crafted with Bladderfish or Crafted with Fabricator categories; however,{{Recipe|Main=|item=Bladderfish|machine=Fabricator|result=Filtered Water}}would add the categories.
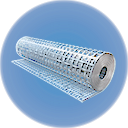
- Typically, more than 1 of an item is needed:
{{Recipe|item=Creepvine Sample|count=2|machine=Fabricator|result=Fiber Mesh}}
  |   | --> |   |
- Multiple results of the same item are possible, too:
{{Recipe|item=Creepvine Seed Cluster|machine=Fabricator|result=Silicone Rubber|resultcount=2}}
  | --> |  |  |
- This will also show a multiplier if a lot of an item (i.e. more than three units) is needed:
{{Recipe|item=Titanium|count=10|machine=Fabricator|result=Titanium Ingot}}
  | ×10 | --> |  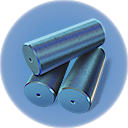 |
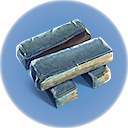
- Most recipes need several different items:
{{Recipe|item1=Plasteel Ingot|count1 = 3|item2=Enameled Glass|count2 = 3|item3=Lubricant|item4=Advanced Wiring Kit|item5=Lead|count5=3|machine=Mobile Vehicle Bay|result=Cyclops}}
  |   |   | 
 | 
 | 
 |   |   | --> |   |
- While it hasn't been utilized on the wiki there is a small syntax:
{{Recipe|item1=Salt Deposit|item2=Spadefish|machine=Fabricator|result=Cooked Spadefish|small=yes}}
| --> |
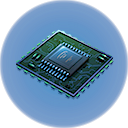
- If the recipe is known but cannot be used in the game the "machine" is set to "stop":
{{Recipe|item = Titanium|count=2|item2 = Wiring Kit|item3=Computer Chip|item4=Workbench Blueprint|machine=stop|result = Modification Station}}
  |   | 
 |   |   | --> |   |
Lastly, credit where credit is due: Big thanks to the Don't Starve Wikia for the base code. It has been modified to (hopefully) be more resilient.
