
User:PinguOnSub: Difference between revisions
PinguOnSub (talk | contribs) |
PinguOnSub (talk | contribs) |
||
| Line 22: | Line 22: | ||
==Fauna & Flora== |
==Fauna & Flora== |
||
=== Flora === |
|||
==== Harvestable ==== |
|||
{| class="article-table sortable" style="width: 100%;" border="0" cellpadding="1" cellspacing="1" |
|||
|- |
|||
! class="unsortable" style="width: 25%; text-align: center;" |Flora |
|||
! class="unsortable" style="width: 25%; text-align: center;" |Classification |
|||
! class="unsortable" style="width: 25%; text-align: left;" |Locations |
|||
! class="unsortable" style="width: 25%; text-align: left;" |Comment |
|||
|- |
|||
| style="text-align:center; font-size:12px;" |[[File:Acid Mushroom Flora.png|150px|center|link=Acid Mushroom]][[Acid Mushroom]] |
|||
| style="text-align:center; font-size:12px;" | |
|||
[[:Category:Hazardous|Hazardous]] |
|||
| style="text-align:left; font-size:12px;" | |
|||
* [[Dunes]] |
|||
* [[Dunes Caves]] |
|||
* [[Grassy Plateaus]] |
|||
* [[Grassy Plateaus Caves]] |
|||
* [[Mushroom Forest]] |
|||
* [[Reefback Leviathan]] |
|||
* [[Safe Shallows]] |
|||
* [[Safe Shallows Caves]] |
|||
* [[Primary Containment Facility#Aquarium|Primary Containment Facility Aquarium]] |
|||
| style="text-align:left; font-size:12px;" | |
|||
* Raw Material |
|||
* Releases acid when struck with a [[Survival Knife|knife]], can be picked up or harvested for [[List of Plantable Flora|Acid Mushroom Spores]] |
|||
|- |
|||
| style="text-align:center; font-size:12px;" |[[File:Blood_Cave_Root_Flora.png|150px|center|link=Bloodroot]][[Bloodroot]] |
|||
| style="text-align:center; font-size:12px;" | |
|||
[[:Category:Harvestable|Harvestable]] |
|||
| style="text-align:left; font-size:12px;" | |
|||
* [[Blood Kelp Caves]] |
|||
* [[Blood Kelp Zone]] |
|||
| style="text-align:left; font-size:12px;" | |
|||
* Raw Material |
|||
* Gives [[Blood Oil]] |
|||
|- |
|||
| style="text-align:center; font-size:12px;" |[[File:Bloodvine Flora.png|150px|center|link=Bloodvine]][[Bloodvine]] |
|||
| style="text-align:center; font-size:12px;" | |
|||
[[:Category:Harvestable|Harvestable]] |
|||
| style="text-align:left; font-size:12px;" | |
|||
* [[Blood Kelp Zone]] |
|||
| style="text-align:left; font-size:12px;" | |
|||
* Raw Material |
|||
* Gives [[Blood Oil]] |
|||
|- |
|||
| style="text-align:center; font-size:12px;" |[[File:Blue Palm Flora.png|150px|center|link=Blue Palm]][[Blue Palm]] |
|||
| style="text-align:center; font-size:12px;" | |
|||
[[:Category:Harvestable|Harvestable]] |
|||
| style="text-align:left; font-size:12px;" | |
|||
* [[Bulb Zone]] |
|||
* [[Mountains Caves]] |
|||
* [[Mushroom Forest]] |
|||
* [[Primary Containment Facility#Aquarium|Primary Containment Facility Aquarium]] |
|||
* [[Safe Shallows]] |
|||
| style="text-align:left; font-size:12px;" | |
|||
* Decor |
|||
* Gives [[List of Plantable Flora|Blue Palm Seeds]] |
|||
|- |
|||
| style="text-align:center; font-size:12px;" |[[File:Koosh Bush Flora.png|150px|center|link=Bulb Bush]][[Bulb Bush]] |
|||
| style="text-align:center; font-size:12px;" | |
|||
[[:Category:Harvestable|Harvestable]] |
|||
| style="text-align:left; font-size:12px;" | |
|||
* [[Bulb Zone]] |
|||
| style="text-align:left; font-size:12px;" | |
|||
* [[Food & Water|Edible]] |
|||
* Gives [[Bulb Bush Sample]]s |
|||
|- |
|||
| style="text-align:center; font-size:12px;" |[[File:Tree.png|150px|center|link=Bulbo Tree]][[Bulbo Tree]] |
|||
| style="text-align:center; font-size:12px;" | |
|||
[[:Category:Harvestable|Harvestable]] |
|||
| style="text-align:left; font-size:12px;" | |
|||
* [[Floating Island]] |
|||
* [[Mountain Island]] |
|||
| style="text-align:left; font-size:12px;" | |
|||
* [[Food & Water|Edible]] |
|||
* Gives [[Bulbo Tree Sample]]s |
|||
|- |
|||
| style="text-align:center; font-size:12px;" |[[File:Cave Bush Flora.png|150px|center|link=Cave Bush]][[Cave Bush]] |
|||
| style="text-align:center; font-size:12px;" | |
|||
[[:Category:Harvestable|Harvestable]] |
|||
| style="text-align:left; font-size:12px;" | |
|||
* [[Bulb Zone]] |
|||
* [[Bulb Zone Caves]] |
|||
* [[Jellyshroom Cave]] |
|||
* [[Mountains Caves]] |
|||
* [[Primary Containment Facility#Aquarium|Primary Containment Facility Aquarium]] |
|||
* [[Sea Treader's Path]] |
|||
* [[Sea Treader's Tunnel Caves]] |
|||
| style="text-align:left; font-size:12px;" | |
|||
* Decor |
|||
* Gives [[List of Plantable Flora|Cave Bush Seeds]] |
|||
|- |
|||
| style="text-align:center; font-size:12px;" |[[File:Chinese Potato Plant Flora.png|150px|center|link=Chinese Potato Plant]][[Chinese Potato Plant]] |
|||
| style="text-align:center; font-size:12px;" | |
|||
[[:Category:Harvestable|Harvestable]] |
|||
| style="text-align:left; font-size:12px;" | |
|||
* [[Floating Island]] |
|||
| style="text-align:left; font-size:12px;" | |
|||
* [[Food & Water|Edible]] |
|||
* Gives [[Chinese Potato]]es |
|||
|- |
|||
| style="text-align:center; font-size:12px;" |[[File:Creepvine Flora.png|150px|center|link=Creepvine]][[Creepvine]] |
|||
| style="text-align:center; font-size:12px;" | |
|||
[[:Category:Harvestable|Harvestable]] |
|||
| style="text-align:left; font-size:12px;" | |
|||
* [[Kelp Forest]] |
|||
| style="text-align:left; font-size:12px;" | |
|||
* Raw Material |
|||
* [[Creepvine Sample]] is [[Food & Water|Edible]] |
|||
* Gives [[Creepvine Sample]] when struck with a knife |
|||
* [[Creepvine Seed Cluster]]s are present on some specimens and can be picked |
|||
|- |
|||
| style="text-align:center; font-size:12px;" |[[File:Deep Shroom Flora.png|150px|center|link=Deep Shroom]][[Deep Shroom]] |
|||
| style="text-align:center; font-size:12px;" | |
|||
[[:Category:Hazardous|Hazardous]] |
|||
| style="text-align:left; font-size:12px;" | |
|||
* [[Blood Kelp Caves]] |
|||
* [[Blood Kelp Zone]] |
|||
* [[Inactive Lava Zone]] |
|||
* [[Inactive Lava Zone Corridor]] |
|||
* [[Lost River]] |
|||
* [[Sea Treader's Path]] |
|||
* [[Sea Treader's Tunnel Caves]] |
|||
| style="text-align:left; font-size:12px;" | |
|||
* Raw Material |
|||
* Releases acid when struck with a [[Survival Knife|knife]], can be picked up or harvested for [[List of Plantable Flora|Deep Shroom Spores]] |
|||
|- |
|||
| style="text-align:center; font-size:12px;" |[[File:Eyes_Plant_Flora.png|150px|center|link=Eye Stalk]][[Eye Stalk]] |
|||
| style="text-align:center; font-size:12px;" | |
|||
[[:Category:Harvestable|Harvestable]] |
|||
| style="text-align:left; font-size:12px;" | |
|||
* [[Bulb Zone]] |
|||
* [[Bulb Zone Caves]] |
|||
* [[Crag Field]] |
|||
* [[Deep Sparse Reef]] |
|||
* [[Kelp Forest Caves]] |
|||
* [[Mountains Caves]] |
|||
* [[Sparse Reef]] |
|||
| style="text-align:left; font-size:12px;" | |
|||
* Decor |
|||
* Gives [[List of Plantable Flora|Eye Stalk Seeds]] |
|||
|- |
|||
| style="text-align:center; font-size:12px;" |[[File:Fern_Palm_Flora.png|150px|center|link=Fern Palm]][[Fern Palm]] |
|||
| style="text-align:center; font-size:12px;" | |
|||
[[:Category:Harvestable|Harvestable]] |
|||
| style="text-align:left; font-size:12px;" | |
|||
* [[Floating Island]] |
|||
| style="text-align:left; font-size:12px;" | |
|||
* Decor |
|||
* Gives [[List of Plantable Flora|Fern Palm Seeds]] |
|||
|- |
|||
| style="text-align:center; font-size:12px;" |[[File:Red_Roll_Plant_Flora.png|150px|center|link=Furled Papyrus]][[Furled Papyrus]] |
|||
| style="text-align:center; font-size:12px;" | |
|||
[[:Category:Harvestable|Harvestable]] |
|||
| style="text-align:left; font-size:12px;" | |
|||
* [[Deep Sparse Reef]] |
|||
* [[Dunes]] |
|||
* [[Dunes Caves]] |
|||
* [[Grassy Plateaus]] |
|||
* [[Grassy Plateaus Caves]] |
|||
* [[Mountains Caves]] |
|||
* [[Primary Containment Facility#Aquarium|Primary Containment Facility Aquarium]] |
|||
* [[Reefback Leviathan]] |
|||
* [[Sea Treader's Tunnel Caves]] |
|||
| style="text-align:left; font-size:12px;" | |
|||
* Decor |
|||
* Gives [[List of Plantable Flora|Furled Papyrus Seeds]] |
|||
|- |
|||
| style="text-align:center; font-size:12px;" |[[File:Gabes_Feather_Flora.png|150px|center|link=Gabe's Feather]][[Gabe's Feather]] |
|||
| style="text-align:center; font-size:12px;" |[[:Category:Harvestable|Harvestable]] |
|||
| style="text-align:left; font-size:12px;" | |
|||
* [[Blood Kelp Zone]] |
|||
* [[Deep Sparse Reef]] |
|||
* [[Primary Containment Facility#Aquarium|Primary Containment Facility Aquarium]] |
|||
* [[Sea Treader's Path]] |
|||
* [[Sea Treader's Tunnel Caves]] |
|||
| style="text-align:left; font-size:12px;" | |
|||
* Decor |
|||
* Gives [[List of Plantable Flora|Gabe's Feather Seeds]] |
|||
|- |
|||
| style="text-align:center; font-size:12px;" |[[File:Jelly_Plant_Flora.png|110px|center|link=Gel Sack]][[Gel Sack]] |
|||
| style="text-align:center; font-size:12px;" | |
|||
[[:Category:Harvestable|Harvestable]] |
|||
| style="text-align:left; font-size:12px;" | |
|||
* [[Blood Kelp Zone]] |
|||
* [[Bone Fields Caves]] |
|||
* [[Deep Grand Reef]] |
|||
* [[Deep Sparse Reef]] |
|||
* [[Dunes]] |
|||
* [[Grand Reef]] |
|||
* [[Lost River]] |
|||
* [[Mountains]] |
|||
* [[Mushroom Forest]] |
|||
* [[Primary Containment Facility#Aquarium|Primary Containment Facility Aquarium]] |
|||
| style="text-align:left; font-size:12px;" | |
|||
* Raw material |
|||
* [[Food & Water|Edible]] |
|||
* Can be picked up or harvested for [[Gel Sack Spores]] |
|||
|- |
|||
| style="text-align:center; font-size:12px;" |[[File:Ghost Weed Flora.png|150px|center|link=Ghost Weed]][[Ghost Weed]] |
|||
| style="text-align:center; font-size:12px;" | |
|||
[[:Category:Harvestable|Harvestable]] |
|||
| style="text-align:left; font-size:12px;" | |
|||
* [[Bulb Zone]] |
|||
* [[Blood Kelp Zone]] |
|||
* [[Lost River]] |
|||
** [[Lost River|Bone Fields]] |
|||
** [[Lost River|Corridor]] |
|||
* [[Mountains]] |
|||
| style="text-align:left; font-size:12px;" | |
|||
* Decor |
|||
* Gives [[List of Plantable Flora|Ghost Weed Seeds]] |
|||
|- |
|||
| style="text-align:center; font-size:12px;" |[[File:Orange_Petals_Plant_Flora.png|150px|center|link=Grub Basket]][[Grub Basket]] |
|||
| style="text-align:center; font-size:12px;" | |
|||
[[:Category:Harvestable|Harvestable]] |
|||
| style="text-align:left; font-size:12px;" | |
|||
* [[Floating Island]] |
|||
| style="text-align:left; font-size:12px;" | |
|||
* Decor |
|||
* Gives [[List of Plantable Flora|Grub Basket Seeds]] |
|||
|- |
|||
| style="text-align:center; font-size:12px;" |[[File:Orange_Mushroom_Flora.png|150px|center|link=Jaffa Cup]][[Jaffa Cup]] |
|||
| style="text-align:center; font-size:12px;" | |
|||
[[:Category:Harvestable|Harvestable]] |
|||
| style="text-align:left; font-size:12px;" | |
|||
* [[Floating Island]] |
|||
| style="text-align:left; font-size:12px;" | |
|||
* Decor |
|||
* Gives [[List of Plantable Flora|Jaffa Cup Seeds]] |
|||
|- |
|||
| style="text-align:center; font-size:12px;" |[[File:Jellyshroom Flora.png|150px|center|link=Jellyshroom]][[Jellyshroom]] |
|||
| style="text-align:center; font-size:12px;" | |
|||
[[:Category:Harvestable|Harvestable]] |
|||
| style="text-align:left; font-size:12px;" | |
|||
* [[Jellyshroom Cave]] |
|||
| style="text-align:left; font-size:12px;" | |
|||
* Houses [[Crabsnake]]s, gives [[List of Plantable Flora|Jellyshroom Spores]] |
|||
|- |
|||
| style="text-align:center; font-size:12px;" |[[File:Hanging_Fruit_Tree_Flora.png|150px|center|link=Lantern Tree]][[Lantern Tree]] |
|||
| style="text-align:center; font-size:12px;" |[[:Category:Harvestable|Harvestable]] |
|||
| style="text-align:left; font-size:12px;" | |
|||
* [[Floating Island]] |
|||
| style="text-align:left; font-size:12px;" | |
|||
* Gives [[Lantern Fruit]]s |
|||
|- |
|||
| style="text-align:center; font-size:12px;" |[[File:Marblemelon_Plant_Flora.png|150px|center|link=Marblemelon Plant]][[Marblemelon Plant]] |
|||
| style="text-align:center; font-size:12px;" | |
|||
[[:Category:Harvestable|Harvestable]] |
|||
| style="text-align:left; font-size:12px;" | |
|||
* [[Floating Island]] |
|||
| style="text-align:left; font-size:12px;" | |
|||
* [[Food & Water|Edible]] |
|||
* Gives [[Marblemelon]]s or [[Small Marblemelon]]s |
|||
|- |
|||
| style="text-align:center; font-size:12px;" |[[File:Membrain Tree Flora.png|150px|center|link=Membrain Tree]][[Membrain Tree]] |
|||
| style="text-align:center; font-size:12px;" | |
|||
[[:Category:Harvestable|Harvestable]] |
|||
| style="text-align:left; font-size:12px;" | |
|||
* [[Grand Reef]] |
|||
* [[Sea Treader's Path]] |
|||
| style="text-align:left; font-size:12px;" | |
|||
* Decor |
|||
* Gives [[List of Plantable Flora|Membrain Tree Seeds]] |
|||
|- |
|||
| style="text-align:center; font-size:12px;" |[[File:Purple_Vase_Plant_Flora.png|150px|center|link=Ming Plant]][[Ming Plant]] |
|||
| style="text-align:center; font-size:12px;" |[[:Category:Harvestable|Harvestable]] |
|||
| style="text-align:left; font-size:12px;" | |
|||
* [[Floating Island]] |
|||
| style="text-align:left; font-size:12px;" | |
|||
* Gives [[List of Plantable Flora|Ming Plant Seeds]] |
|||
|- |
|||
| style="text-align:center; font-size:12px;" |[[File:Pink_Mushroom_Flora.png|150px|center|link=Pink Cap]][[Pink Cap]] |
|||
| style="text-align:center; font-size:12px;" |[[:Category:Harvestable|Harvestable]] |
|||
| style="text-align:left; font-size:12px;" | |
|||
* [[Alien Caches|Crag Field Cache]] |
|||
* [[Floating Island]] |
|||
* [[Mountain Island]] |
|||
| style="text-align:left; font-size:12px;" | |
|||
* Can be picked up or harvested for [[List of Plantable Flora|Pink Cap Spores]] |
|||
|- |
|||
| style="text-align:center; font-size:12px;" |[[File:Purple Pinecone Flora.png|110px|center|link=Purple Pinecone]][[Purple Pinecone]] |
|||
| style="text-align:center; font-size:12px;" |[[:Category:Harvestable|Harvestable]] |
|||
| style="text-align:left; font-size:12px;" | |
|||
* [[Mushroom Forest]] |
|||
| style="text-align:left; font-size:12px;" | |
|||
* [[Harvesting Node]] |
|||
* Gives [[Salt Deposit]] |
|||
|- |
|||
| style="text-align:center; font-size:12px;" |[[File:Pygmy Fan Flora.png|150px|center|link=Pygmy Fan]][[Pygmy Fan]] |
|||
| style="text-align:center; font-size:12px;" | |
|||
[[:Category:Harvestable|Harvestable]] |
|||
| style="text-align:left; font-size:12px;" | |
|||
* [[Bulb Zone]] |
|||
* [[Kelp Forest]] |
|||
* [[Kelp Forest Caves]] |
|||
* [[Mushroom Forest]] |
|||
| style="text-align:left; font-size:12px;" | |
|||
* Decor |
|||
* Gives [[List of Plantable Flora|Pygmy Fan Seeds]] |
|||
|- |
|||
| style="text-align:center; font-size:12px;" |[[File:Redwort Flora.png|150px|center|link=Redwort]][[Redwort]] |
|||
| style="text-align:center; font-size:12px;" | |
|||
[[:Category:Harvestable|Harvestable]] |
|||
| style="text-align:left; font-size:12px;" | |
|||
* [[Bulb Zone]] |
|||
* [[Crash Zone Mesas]] |
|||
* [[Dunes]] |
|||
* [[Dunes Caves]] |
|||
* [[Grassy Plateaus Caves]] |
|||
* [[Jellyshroom Cave]] |
|||
* [[Primary Containment Facility#Aquarium|Primary Containment Facility Aquarium]] |
|||
* [[Reefback Leviathan]] |
|||
* [[Sparse Reef]] |
|||
* [[Underwater Islands]] |
|||
| style="text-align:left; font-size:12px;" | |
|||
* Decor |
|||
* Gives [[List of Plantable Flora|Redwort Seeds]] |
|||
|- |
|||
| style="text-align:center; font-size:12px;" |[[File:Red_Cone_Plant_Flora.png|150px|center|link=Regress Shell]][[Regress Shell]] |
|||
| style="text-align:center; font-size:12px;" | |
|||
[[:Category:Harvestable|Harvestable]] |
|||
| style="text-align:left; font-size:12px;" | |
|||
* [[Deep Sparse Reef]] |
|||
* [[Dunes]] |
|||
* [[Dunes Caves]] |
|||
* [[Grassy Plateaus Caves]] |
|||
* [[Mountains Caves]] |
|||
* [[Reefback Leviathan]] |
|||
* [[Sea Treader's Tunnel Caves]] |
|||
| style="text-align:left; font-size:12px;" | |
|||
* Decor |
|||
* Gives [[List of Plantable Flora|Regress Shell Seeds]] |
|||
|- |
|||
| style="text-align:center; font-size:12px;" |[[File:Red_Basket_Plant_Flora.png|150px|center|link=Rouge Cradle]][[Rouge Cradle]] |
|||
| style="text-align:center; font-size:12px;" | |
|||
[[:Category:Harvestable|Harvestable]] |
|||
| style="text-align:left; font-size:12px;" | |
|||
* [[Blood Kelp Zone]] |
|||
* [[Bulb Zone]] |
|||
* [[Dunes]] |
|||
* [[Dunes Caves]] |
|||
* [[Grassy Plateaus]] |
|||
* [[Grassy Plateaus Caves]] |
|||
* [[Primary Containment Facility#Aquarium|Primary Containment Facility Aquarium]] |
|||
* [[Reefback Leviathan]] |
|||
* [[Sparse Reef]] |
|||
| style="text-align:left; font-size:12px;" | |
|||
* Decor |
|||
* Gives [[List of Plantable Flora|Rouge Cradle Seeds]] |
|||
|- |
|||
| style="text-align:center; font-size:12px;" |[[File:Sea Crown Flora.png|150px|center|link=Sea Crown]][[Sea Crown]] |
|||
| style="text-align:center; font-size:12px;" |[[:Category:Harvestable|Harvestable]] |
|||
| style="text-align:left; font-size:12px;" | |
|||
* [[Bulb Zone]] |
|||
* [[Dunes]] |
|||
* [[Dunes Caves]] |
|||
* [[Grassy Plateaus Caves]] |
|||
* [[Primary Containment Facility#Aquarium|Primary Containment Facility Aquarium]] |
|||
| style="text-align:left; font-size:12px;" | |
|||
* Gives [[List of Plantable Flora|Sea Crown Seeds]] |
|||
|- |
|||
| style="text-align:center; font-size:12px;" |[[File:Speckled Rattler Flora.png|150px|center|link=Speckled Rattler]][[Speckled Rattler]] |
|||
| style="text-align:center; font-size:12px;" |[[:Category:Harvestable|Harvestable]] |
|||
| style="text-align:left; font-size:12px;" | |
|||
* [[Alien Caches|Crag Field Cache]] |
|||
* [[Floating Island]] |
|||
* [[Mountain Island]] |
|||
| style="text-align:left; font-size:12px;" | |
|||
* Can be picked up or harvested for [[List of Plantable Flora|Speckled Rattler Spores]] |
|||
|- |
|||
| style="text-align:center; font-size:12px;" |[[File:Spiked Horn Grass Flora.png|150px|center|link=Spiked Horn Grass]][[Spiked Horn Grass]] |
|||
| style="text-align:center; font-size:12px;" | |
|||
[[:Category:Harvestable|Harvestable]] |
|||
| style="text-align:left; font-size:12px;" | |
|||
* [[Bulb Zone Caves]] |
|||
* [[Crash Zone Mesas]] |
|||
* [[Sea Treader's Path]] |
|||
* [[Sparse Reef]] |
|||
| style="text-align:left; font-size:12px;" | |
|||
* Decor |
|||
* Gives [[List of Plantable Flora|Spiked Horn Grass Seeds]] |
|||
|- |
|||
| style="text-align:center; font-size:12px;" |[[File:Spotted Dockleaf Flora.png|150px|center|link=Spotted Dockleaf]][[Spotted Dockleaf]] |
|||
| style="text-align:center; font-size:12px;" | |
|||
[[:Category:Harvestable|Harvestable]] |
|||
| style="text-align:left; font-size:12px;" | |
|||
* [[Bulb Zone]] |
|||
* [[Bulb Zone Caves]] |
|||
* [[Mountains Caves]] |
|||
* [[Primary Containment Facility#Aquarium|Primary Containment Facility Aquarium]] |
|||
* [[Underwater Islands Caves]] |
|||
| style="text-align:left; font-size:12px;" | |
|||
* Decor |
|||
* Gives [[List of Plantable Flora|Spotted Dockleaf Seeds]] |
|||
|- |
|||
| style="text-align:center; font-size:12px;" |[[File:Crash_Plant_Flora.png|150px|center|link=Sulphur Plant]][[Sulphur Plant]] |
|||
| style="text-align:center; font-size:12px;" |[[:Category:Harvestable|Harvestable]] |
|||
| style="text-align:left; font-size:12px;" | |
|||
* [[Kelp Forest Caves]] |
|||
* [[Safe Shallows Caves]] |
|||
| style="text-align:left; font-size:12px;" | |
|||
* Home to the [[Crashfish]] and [[Cave Sulfur]] |
|||
|- |
|||
| style="text-align:center; font-size:12px;" |[[File:Tiger Plant Flora.png|150px|center|link=Tiger Plant]][[Tiger Plant]] |
|||
| style="text-align:center; font-size:12px;" |[[:Category:Hazardous|Hazardous]] |
|||
| style="text-align:left; font-size:12px;" | |
|||
* [[Crag Field]] |
|||
* [[Deep Sparse Reef]] |
|||
* [[Grassy Plateaus]] |
|||
* [[Grassy Plateaus Caves]] |
|||
* [[Reefback Leviathan]] |
|||
* [[Sparse Reef]] |
|||
| style="text-align:left; font-size:12px;" | |
|||
* Shoots spikes, gives [[List of Plantable Flora|Tiger Plant Seeds]] |
|||
|- |
|||
| style="text-align:center; font-size:12px;" |[[File:Purple_Fan_Flora.png|150px|center|link=Veined Nettle]][[Veined Nettle]] |
|||
| style="text-align:center; font-size:12px;" | |
|||
[[:Category:Harvestable|Harvestable]] |
|||
| style="text-align:left; font-size:12px;" | |
|||
* [[Grassy Plateaus]] |
|||
* [[Grassy Plateaus Caves]] |
|||
* [[Safe Shallows]] |
|||
* [[Safe Shallows Caves]] |
|||
* [[Primary Containment Facility#Aquarium|Primary Containment Facility Aquarium]] |
|||
| style="text-align:left; font-size:12px;" | |
|||
* Decor |
|||
* Gives [[List of Plantable Flora|Veined Nettle Seeds]] |
|||
|- |
|||
| style="text-align:center; font-size:12px;" |[[File:Violet Beau Flora.png|150px|center|link=Violet Beau]][[Violet Beau]] |
|||
| style="text-align:center; font-size:12px;" | |
|||
[[:Category:Harvestable|Harvestable]] |
|||
| style="text-align:left; font-size:12px;" | |
|||
* [[Bulb Zone]] |
|||
* [[Deep Sparse Reef]] |
|||
* [[Dunes]] |
|||
* [[Dunes Caves]] |
|||
* [[Grassy Plateaus]] |
|||
* [[Grassy Plateaus Caves]] |
|||
* [[Jellyshroom Cave]] |
|||
* [[Mountains]] |
|||
* [[Mountains Caves]] |
|||
* [[Primary Containment Facility#Aquarium|Primary Containment Facility Aquarium]] |
|||
* [[Sea Treader's Path]] |
|||
* [[Sea Treader's Tunnel Caves]] |
|||
* [[Sparse Reef]] |
|||
| style="text-align:left; font-size:12px;" | |
|||
* Decor |
|||
* Gives [[List of Plantable Flora|Violet Beau Seeds]] |
|||
|- |
|||
| style="text-align:center; font-size:12px;" |[[File:Pink_Flower_Flora.png|150px|center|link=Voxel Shrub]][[Voxel Shrub]] |
|||
| style="text-align:center; font-size:12px;" | |
|||
[[:Category:Harvestable|Harvestable]] |
|||
| style="text-align:left; font-size:12px;" | |
|||
* [[Alien Caches|Crag Field Cache]] |
|||
* [[Alien Caches|Bulb Zone Cache]] |
|||
* [[Floating Island]] |
|||
| style="text-align:left; font-size:12px;" | |
|||
* Decor |
|||
* Gives [[List of Plantable Flora|Voxel Shrub Seeds]] |
|||
|- |
|||
| style="text-align:center; font-size:12px;" |[[File:Writhing_Weed_Flora.png|150px|center|link=Writhing Weed]][[Writhing Weed]] |
|||
| style="text-align:center; font-size:12px;" | |
|||
[[:Category:Harvestable|Harvestable]] |
|||
| style="text-align:left; font-size:12px;" | |
|||
* [[Bulb Zone]] |
|||
* [[Dunes]] |
|||
* [[Dunes Caves]] |
|||
* [[Grassy Plateaus]] |
|||
* [[Grassy Plateaus Caves]] |
|||
* [[Mushroom Forest Caves]] |
|||
* [[Primary Containment Facility#Aquarium|Primary Containment Facility Aquarium]] |
|||
* [[Reefback Leviathan]] |
|||
* [[Safe Shallows]] |
|||
| style="text-align:left; font-size:12px;" | |
|||
* Decor |
|||
* Gives [[List of Plantable Flora|Writhing Weed Seeds]] |
|||
|} |
|||
==== Non-Harvestable ==== |
|||
{| class="article-table sortable" style="width: 100%;" border="0" cellpadding="1" cellspacing="1" |
|||
|- |
|||
! class="unsortable" style="width: 25%; text-align: center;" |Flora |
|||
! class="unsortable" style="width: 25%; text-align: center;" |Classification |
|||
! class="unsortable" style="width: 25%; text-align: left;" |Locations |
|||
! class="unsortable" style="width: 25%; text-align: left;" |Comment |
|||
|- |
|||
| style="text-align:center; font-size:12px;" |[[File:Floating Stones Flora.png|130px|center|link=Anchor Pods]][[Anchor Pods]] |
|||
| style="text-align:center; font-size:12px;" |[[:Category:Non-harvestable|Non-harvestable]] |
|||
| style="text-align:left; font-size:12px;" | |
|||
* [[Deep Grand Reef]] |
|||
* [[Grand Reef]] |
|||
| style="text-align:left; font-size:12px;" | |
|||
|- |
|||
| style="text-align:center; font-size:12px;" |[[File:Bloodgrass Flora.png|150px|center|link=Blood Grass]][[Blood Grass]] |
|||
| style="text-align:center; font-size:12px;" |[[:Category:Non-harvestable|Non-harvestable]] |
|||
| style="text-align:left; font-size:12px;" | |
|||
* [[Grassy Plateaus]] |
|||
* [[Reefback Leviathan]] |
|||
| style="text-align:left; font-size:12px;" | |
|||
|- |
|||
| style="text-align:center; font-size:12px;" |[[File:Brine_Lily_Flora.png|150px|center|link=Brine Lily]][[Brine Lily]] |
|||
| style="text-align:center; font-size:12px;" |[[:Category:Non-harvestable|Non-harvestable]] |
|||
| style="text-align:left; font-size:12px;" | |
|||
* [[Lost River]] |
|||
| style="text-align:left; font-size:12px;" | |
|||
|- |
|||
| style="text-align:center; font-size:12px;" |[[File:Crab Claw Kelp Flora.png|centre|thumb|150x150px]][[Crab Claw Kelp]] |
|||
| style="text-align:center; font-size:12px;" |[[:Category:Non-harvestable|Non-harvestable]] |
|||
| style="text-align:left; font-size:12px;" | |
|||
* [[Lost River]] |
|||
| style="text-align:left; font-size:12px;" | |
|||
|- |
|||
| style="text-align:center; font-size:12px;" |[[File:Grue Cluster Flora.png|150px|center|link=Grue Cluster]][[Grue Cluster]] |
|||
| style="text-align:center; font-size:12px;" |[[:Category:Non-harvestable|Non-harvestable]] |
|||
| style="text-align:left; font-size:12px;" | |
|||
* [[Floating Island]] |
|||
* [[Mushroom Forest]] |
|||
* [[Sea Treader's Path]] |
|||
* [[Sea Treader's Tunnel Caves]] |
|||
| style="text-align:left; font-size:12px;" | |
|||
|- |
|||
| style="text-align:center; font-size:12px;" |[[File:Hanging_Stingers_Flora.png|150px|center|link=Drooping Stingers]][[Drooping Stingers]] |
|||
| style="text-align:center; font-size:12px;" |[[:Category:Hazardous|Hazardous]] |
|||
| style="text-align:left; font-size:12px;" | |
|||
* [[Degasi Seabases]] |
|||
* [[Dunes Caves]] |
|||
* [[Grassy Plateaus Caves]] |
|||
* [[Kelp Forest Caves]] |
|||
* [[Mountains Caves]] |
|||
* [[Underwater Islands Caves]] |
|||
| style="text-align:left; font-size:12px;" | |
|||
* Poison on contact |
|||
|- |
|||
| style="text-align:center; font-size:12px;" |[[File:Giant Cove Tree.png|160px|center|link=Giant Cove Tree]][[Giant Cove Tree]] |
|||
| style="text-align:center; font-size:12px;" |[[:Category:Non-harvestable|Non-harvestable]] |
|||
| style="text-align:left; font-size:12px;" | |
|||
* [[Lost River|Tree Cove]] |
|||
| style="text-align:left; font-size:12px;" | |
|||
|- |
|||
| style="text-align:center; font-size:12px;" |[[File:Green_Reeds_Flora.png|150px|center|link=Spotted Reeds]][[Spotted Reeds]] |
|||
| style="text-align:center; font-size:12px;" |[[:Category:Non-harvestable|Non-harvestable]] |
|||
| style="text-align:left; font-size:12px;" | |
|||
* [[Mountains]] |
|||
* [[Mountains Caves]] |
|||
* [[Primary Containment Facility#Aquarium|Primary Containment Facility Aquarium]] |
|||
* [[Safe Shallows]] |
|||
| style="text-align:left; font-size:12px;" | |
|||
|- |
|||
| style="text-align:center; font-size:12px;" |[[File:Tree_Leech_Fauna.png|150px|center|link=Tree Leech]][[Tree Leech]] |
|||
| style="text-align:center; font-size:12px;" |[[:Category:Non-harvestable|Non-harvestable]] |
|||
| style="text-align:left; font-size:12px;" | |
|||
*[[Crash Zone Mesas]] |
|||
* [[Grassy Plateaus]] |
|||
* [[Kelp Forest Caves]] |
|||
* [[Mountains Caves]] |
|||
* [[Mushroom Forest]] |
|||
* [[Mushroom Forest Caves]] |
|||
| style="text-align:left; font-size:12px;" | |
|||
|} |
|||
===List of Fauna=== |
|||
====Carnivores==== |
|||
{| class="article-table sortable" style="width: 100%;" border="0" cellpaddig="1" cellspacing="1" |
|||
|- |
|||
! class="unsortable" style="width: 25%; text-align: center;" |Fauna Name and ID |
|||
! class="unsortable" style="width: 25%; text-align: center;" |Attitude |
|||
! class="unsortable" style="width: 25%; text-align: center;" |Biome |
|||
|- |
|||
| style="text-align:center; font-size:12px;" |[[File:Shocker_Fauna.png|200px|center|link=Ampeel]][[Ampeel]] |
|||
''Shocker'' |
|||
| style="text-align:center; font-size:12px;" |[[:Category:Attitude: Aggressive|Aggressive]] |
|||
| style="text-align:left; font-size:12px;" | |
|||
* [[Blood Kelp Caves]] |
|||
* [[Blood Kelp Zone]] |
|||
* [[Bulb Zone]] |
|||
|- |
|||
| style="text-align:center; font-size:12px;" |[[File:Biter Fauna.png|200px|center|link=Biter]][[Biter]] |
|||
''Biter'' |
|||
| style="text-align:center; font-size:12px;" |[[:Category:Attitude: Aggressive|Aggressive]] |
|||
| style="text-align:left; font-size:12px;" | |
|||
* [[Crash Zone Mesas]] |
|||
* [[Grassy Plateaus]] |
|||
* [[Jellyshroom Cave]] |
|||
* [[Mountain Island]] |
|||
* [[Mountains]] |
|||
* [[Mountains Caves]] |
|||
|- |
|||
| style="text-align:center; font-size:12px;" |[[File:Blighter Fauna.png|200px|center|link=Blighter]][[Blighter]] |
|||
''Blighter '' |
|||
| style="text-align:center; font-size:12px;" |[[:Category:Attitude: Aggressive|Aggressive]] |
|||
| style="text-align:left; font-size:12px;" | |
|||
* [[Blood Kelp Caves]] |
|||
* [[Blood Kelp Zone]] |
|||
|- |
|||
| style="text-align:center; font-size:12px;" |[[File:Boneshark Fauna.png|200px|center|link=Boneshark]][[Boneshark]] |
|||
''Boneshark'' |
|||
| style="text-align:center; font-size:12px;" |[[:Category:Attitude: Aggressive|Aggressive]] |
|||
| style="text-align:left; font-size:12px;" | |
|||
* [[Bulb Zone]] |
|||
* [[Crag Field]] |
|||
* [[Crash Zone Mesas]] |
|||
* [[Mushroom Forest]] |
|||
* [[Primary Containment Facility#Aquarium|Primary Containment Facility Aquarium]] |
|||
* [[Underwater Islands]] |
|||
|- |
|||
| style="text-align:center; font-size:12px;" |[[File:Crabsnake_Fauna.png|200px|center|link=Crabsnake]][[Crabsnake]] |
|||
''Crabsnake'' |
|||
| style="text-align:center; font-size:12px;" |[[:Category:Attitude: Aggressive|Aggressive]] |
|||
| style="text-align:left; font-size:12px;" | |
|||
* [[Jellyshroom Cave]] |
|||
|- |
|||
| style="text-align:center; font-size:12px;" |[[File:Crabsquid Fauna.png|200px|center|link=Crabsquid]][[Crabsquid]] |
|||
''Crabsquid'' |
|||
| style="text-align:center; font-size:12px;" |[[:Category:Attitude: Aggressive|Aggressive]] |
|||
| style="text-align:left; font-size:12px;" | |
|||
* [[Blood Kelp Caves]] |
|||
* [[Blood Kelp Zone]] |
|||
* [[Deep Grand Reef]] |
|||
* [[Lost River]] |
|||
** [[Lost River|Corridor]] |
|||
** [[Lost River|Ghost Canyon]] |
|||
|- |
|||
| style="text-align:center; font-size:12px;" |[[File:Crash Fauna.png|200px|center|link=Crashfish]][[Crashfish]] |
|||
''Crash'' |
|||
| style="text-align:center; font-size:12px;" | |
|||
[[:Category:Attitude: Defensive|Defensive]] |
|||
| style="text-align:left; font-size:12px;" | |
|||
* [[Kelp Forest Caves]] |
|||
* [[Safe Shallows Caves]] |
|||
|- |
|||
| style="text-align:center; font-size:12px;" |[[File:Lava Lizard Fauna A.png|200px|center|link=Lava Lizard]][[Lava Lizard]] |
|||
''lavalizard'' |
|||
| style="text-align:center; font-size:12px;" |[[:Category:Attitude: Aggressive|Aggressive]] |
|||
| style="text-align:left; font-size:12px;" | |
|||
* [[Inactive Lava Zone Corridor]] |
|||
* [[Inactive Lava Zone]] |
|||
* [[Lava Lakes]] |
|||
* [[Lava Castle]] |
|||
|- |
|||
| style="text-align:center; font-size:12px;" |[[File:Mesmer Fauna.png|200px|center|link=Mesmer]][[Mesmer]] |
|||
''mesmer'' |
|||
| style="text-align:center; font-size:12px;" | |
|||
[[:Category:Attitude: Aggressive|Aggressive]] |
|||
| style="text-align:left; font-size:12px;" | |
|||
* [[Bulb Zone]] |
|||
* [[Bulb Zone Caves]] |
|||
* [[Crag Field]] |
|||
* [[Kelp Forest Caves]] |
|||
* [[Lost River]] |
|||
* [[Mushroom Forest]] |
|||
|- |
|||
| style="text-align:center; font-size:12px;" |[[File:Spine Eel Fauna.png|205px|center|link=River Prowler]][[River Prowler]] |
|||
''spineeel'' |
|||
| style="text-align:center; font-size:12px;" | [[:Category:Attitude: Aggressive|Aggressive]] |
|||
| style="text-align:left; font-size:12px;" | |
|||
* [[Lost River]] |
|||
|- |
|||
| style="text-align:center; font-size:12px;" |[[File:Sand Shark Fauna.png|200px|center|link=Sand Shark]][[Sand Shark]] |
|||
''sandshark'' |
|||
| style="text-align:center; font-size:12px;" | |
|||
[[:Category:Attitude: Aggressive|Aggressive]] |
|||
| style="text-align:left; font-size:12px;" | |
|||
* [[Crash Zone]] |
|||
* [[Dunes]] |
|||
* [[Grassy Plateaus]] |
|||
|- |
|||
| style="text-align:center; font-size:12px;" |[[File:Stalker Fauna.png|200px|center|link=Stalker]][[Stalker]] |
|||
''stalker'' |
|||
| style="text-align:center; font-size:12px;" |[[:Category:Attitude: Aggressive|Aggressive]] |
|||
| style="text-align:left; font-size:12px;" | |
|||
* [[Kelp Forest]] |
|||
* [[Kelp Forest Caves]] |
|||
* [[Primary Containment Facility#Aquarium|Primary Containment Facility Aquarium]] |
|||
|- |
|||
| style="text-align:center; font-size:12px;" |[[File:Warper Fauna.png|200px|center|link=Warper]][[Warper]] |
|||
''warper'' |
|||
| style="text-align:center; font-size:12px;" | |
|||
*[[:Category:Attitude: Aggressive|Aggressive]] when target is infected with the [[Kharaa Bacterium]] |
|||
*[[:Category:Attitude: Passive|Passive]] when target is not infected |
|||
| style="text-align:left; font-size:12px;" | |
|||
* [[Blood Kelp Zone]] |
|||
* [[Deep Grand Reef]] |
|||
* [[Dunes]] |
|||
* [[Grand Reef]] |
|||
* [[Inactive Lava Zone]] |
|||
* [[Inactive Lava Zone Corridor]] |
|||
* [[Lava Lakes]] |
|||
* [[Lost River]] |
|||
* [[Mountain Island]] |
|||
* [[Mountains]] |
|||
* [[Sea Treader's Path]] |
|||
|} |
|||
<br style="clear: both; height: 0px;" />{{Clear}} |
|||
===Herbivores=== |
|||
{| class="article-table sortable" style="width: 100%;" cellspacing="1" cellpadding="1" border="0" |
|||
|- |
|||
! class="unsortable" style="width: 25%; text-align: center;" |Fauna Name and ID |
|||
! class="unsortable" style="width: 25%; text-align: center;" |Attitude |
|||
! class="unsortable" style="width: 25%; text-align: center;" |Biome |
|||
|- |
|||
| style="text-align:center; font-size:12px;" |[[File:Airsack_Fauna.png|200px|center|link=Bladderfish]][[Bladderfish]] |
|||
''bladderfish'' |
|||
| style="text-align:center; font-size:12px;" |[[:Category:Attitude: Passive|Passive]] |
|||
| style="text-align:left; font-size:12px;" | |
|||
* [[Grand Reef]] |
|||
* [[Grassy Plateaus]] |
|||
* [[Kelp Forest]] |
|||
* [[Mushroom Forest]] |
|||
* [[Primary Containment Facility#Aquarium|Primary Containment Facility Aquarium]] |
|||
* [[Safe Shallows]] |
|||
|- |
|||
| style="text-align:center; font-size:12px;" |[[File:Boomerang Fauna.png|200px|center|link=Boomerang]][[Boomerang]] |
|||
''boomerang'' |
|||
| style="text-align:center; font-size:12px;" |[[:Category:Attitude: Passive|Passive]] |
|||
| style="text-align:left; font-size:12px;" | |
|||
* [[Crag Field]] |
|||
* [[Crash Zone]] |
|||
* [[Bulb Zone]] |
|||
* [[Deep Grand Reef]] |
|||
* [[Dunes]] |
|||
* [[Grand Reef]] |
|||
* [[Grassy Plateaus]] |
|||
* [[Grassy Plateaus Caves]] |
|||
* [[Kelp Forest]] |
|||
* [[Kelp Forest Caves]] |
|||
* [[Mountain Island]] |
|||
* [[Mountains Caves]] |
|||
* [[Mushroom Forest]] |
|||
* [[Primary Containment Facility#Aquarium|Primary Containment Facility Aquarium]] |
|||
* [[Safe Shallows]] |
|||
* [[Safe Shallows Caves]] |
|||
* [[Sea Treader's Path]] |
|||
* [[Sea Treader's Tunnel Caves]] |
|||
* [[Underwater Islands]] |
|||
|- |
|||
| style="text-align:center; font-size:12px;" |[[File:Red Ghost Ray Fauna.png|200px|center|link=Crimson Ray]][[Crimson Ray]] |
|||
''ghostrayred'' |
|||
| style="text-align:center; font-size:12px;" |[[:Category:Attitude: Passive|Passive]] |
|||
| style="text-align:left; font-size:12px;" | |
|||
* [[Inactive Lava Zone]] |
|||
* [[Lava Lakes]] |
|||
|- |
|||
| style="text-align:center; font-size:12px;" |[[File:Cute Fish Fauna.png|200px|center|link=Cuddlefish]][[Cuddlefish]] |
|||
''cutefish'' |
|||
| style="text-align:center; font-size:12px;" |[[:Category:Attitude: Passive|Passive]] |
|||
| style="text-align:left; font-size:12px;" | |
|||
*[[Eggs]] |
|||
** [[Degasi Seabases|Deep Grand Reef Degasi Base]] |
|||
** [[Dunes|Dunes Sinkhole]] |
|||
** [[Alien Caches|Lost River Laboratory]] |
|||
** [[Mushroom Forest Caves]] |
|||
|- |
|||
| style="text-align:center; font-size:12px;" |[[File:Eyeye Fauna.png|200px|center|link=Eyeye]][[Eyeye]] |
|||
''eyeye'' |
|||
| style="text-align:center; font-size:12px;" |[[:Category:Attitude: Passive|Passive]] |
|||
| style="text-align:left; font-size:12px;" | |
|||
* [[Bulb Zone]] |
|||
* [[Bulb Zone Caves]] |
|||
* [[Crash Zone]] |
|||
* [[Dunes]] |
|||
* [[Grand Reef]] |
|||
* [[Jellyshroom Cave]] |
|||
* [[Kelp Forest]] |
|||
* [[Sea Treader's Path]] |
|||
* [[Sea Treader's Tunnel Caves]] |
|||
|- |
|||
| style="text-align:center; font-size:12px;" |[[File:Garryfish Fauna.png|200px|center|link=Garryfish]][[Garryfish]] |
|||
''garryfish'' |
|||
| style="text-align:center; font-size:12px;" |[[:Category:Attitude: Passive|Passive]] |
|||
| style="text-align:left; font-size:12px;" | |
|||
* [[Crash Zone Mesas]] |
|||
* [[Dunes]] |
|||
* [[Primary Containment Facility#Aquarium|Primary Containment Facility Aquarium]] |
|||
* [[Safe Shallows]] |
|||
* [[Safe Shallows Caves]] |
|||
* [[Underwater Islands]] |
|||
|- |
|||
| style="text-align:center; font-size:12px;" |[[File:Gasopod Fauna.png|200px|center|link=Gasopod]][[Gasopod]] |
|||
''gasopod '' |
|||
| style="text-align:center; font-size:12px;" |[[:Category:Attitude: Defensive|Defensive]] |
|||
| style="text-align:left; font-size:12px;" | |
|||
* [[Crash Zone Mesas]] |
|||
* [[Dunes]] |
|||
* [[Safe Shallows]] |
|||
|- |
|||
| style="text-align:center; font-size:12px;" |[[File:Ghost_Ray_Fauna.png|200px|center|link=Ghostray]][[Ghostray]] |
|||
''ghostrayblue'' |
|||
| style="text-align:center; font-size:12px;" |[[:Category:Attitude: Passive|Passive]] |
|||
| style="text-align:left; font-size:12px;" | |
|||
* [[Lost River]] |
|||
|- |
|||
| style="text-align:center; font-size:12px;" |[[File:Holefish Fauna.png|200px|center|link=Holefish]][[Holefish]] |
|||
''holefish'' |
|||
| style="text-align:center; font-size:12px;" |[[:Category:Attitude: Passive|Passive]] |
|||
| style="text-align:left; font-size:12px;" | |
|||
* [[Bulb Zone Caves]] |
|||
* [[Crash Zone]] |
|||
* [[Mushroom Forest Caves]] |
|||
* [[Primary Containment Facility#Aquarium|Primary Containment Facility Aquarium]] |
|||
* [[Safe Shallows]] |
|||
* [[Safe Shallows Caves]] |
|||
|- |
|||
| style="text-align:center; font-size:12px;" |[[File:Hoopfish Fauna.png|200px|center|link=Hoopfish]][[Hoopfish]] |
|||
''hoopfish'' |
|||
| style="text-align:center; font-size:12px;" |[[:Category:Attitude: Passive|Passive]] |
|||
| style="text-align:left; font-size:12px;" | |
|||
* [[Bulb Zone]] |
|||
* [[Crag Field]] |
|||
* [[Grand Reef]] |
|||
* [[Grassy Plateaus]] |
|||
* [[Kelp Forest]] |
|||
* [[Kelp Forest Caves]] |
|||
* [[Mountains]] |
|||
* [[Primary Containment Facility#Aquarium|Primary Containment Facility Aquarium]] |
|||
* [[Sea Treader's Path]] |
|||
* [[Sea Treader's Tunnel Caves]] |
|||
* [[Underwater Islands]] |
|||
|- |
|||
| style="text-align:center; font-size:12px;" |[[File:Hoverfish Fauna.png|200px|center|link=Hoverfish]][[Hoverfish]] |
|||
''hoverfish'' |
|||
| style="text-align:center; font-size:12px;" |[[:Category:Attitude: Passive|Passive]] |
|||
| style="text-align:left; font-size:12px;" | |
|||
* [[Crash Zone]] |
|||
* [[Crash Zone Mesas]] |
|||
* [[Kelp Forest]] |
|||
* [[Primary Containment Facility#Aquarium|Primary Containment Facility Aquarium]] |
|||
|- |
|||
| style="text-align:center; font-size:12px;" |[[File:Jellyray Fauna.png|200px|center|link=Jellyray]][[Jellyray]] |
|||
''jellyray'' |
|||
| style="text-align:center; font-size:12px;" |[[:Category:Attitude: Passive|Passive]] |
|||
| style="text-align:left; font-size:12px;" | |
|||
* [[Deep Grand Reef]] |
|||
* [[Mushroom Forest]] |
|||
|- |
|||
| style="text-align:center; font-size:12px;" |[[File:Lavaboomerang.png|200px|center|link=Magmarang]][[Magmarang]] |
|||
''lavaboomerang'' |
|||
| style="text-align:center; font-size:12px;" |[[:Category:Attitude: Passive|Passive]] |
|||
| style="text-align:left; font-size:12px;" | |
|||
* [[Inactive Lava Zone]] |
|||
* [[Inactive Lava Zone Corridor]] |
|||
* [[Lava Lakes]] |
|||
|- |
|||
| style="text-align:center; font-size:12px;" |[[File:Oculus Fauna.png|200px|center|link=Oculus]][[Oculus]] |
|||
''oculus'' |
|||
| style="text-align:center; font-size:12px;" |[[:Category:Attitude: Passive|Passive]] |
|||
| style="text-align:left; font-size:12px;" | |
|||
* [[Jellyshroom Cave]] |
|||
* [[Primary Containment Facility#Aquarium|Primary Containment Facility Aquarium]] |
|||
|- |
|||
| style="text-align:center; font-size:12px;" |[[File:Peeper Fauna.png|200px|center|link=Peeper]][[Peeper]] |
|||
''peeper '' |
|||
| style="text-align:center; font-size:12px;" |[[:Category:Attitude: Passive|Passive]] |
|||
| style="text-align:left; font-size:12px;" | |
|||
*[[Crash Zone]] |
|||
*[[Crash Zone Mesas]] |
|||
* [[Dunes]] |
|||
* [[Grand Reef]] |
|||
* [[Mountains]] |
|||
* [[Mushroom Forest|Northeastern Mushroom Forest]] |
|||
* [[Safe Shallows]] |
|||
* [[Sparse Reef]] |
|||
* [[Primary Containment Facility#Aquarium|Primary Containment Facility Aquarium]] |
|||
|- |
|||
| style="text-align:center; font-size:12px;" |[[File:Rabbit Ray Fauna.png|200px|center|link=Rabbit Ray]][[Rabbit Ray]] |
|||
''rabbitray'' |
|||
| style="text-align:center; font-size:12px;" |[[:Category:Attitude: Passive|Passive]] |
|||
| style="text-align:left; font-size:12px;" | |
|||
* [[Crash Zone]] |
|||
* [[Kelp Forest]] |
|||
* [[Primary Containment Facility#Aquarium|Primary Containment Facility Aquarium]] |
|||
* [[Safe Shallows]] |
|||
|- |
|||
| style="text-align:center; font-size:12px;" |[[File:Lava Eyeye.PNG|200px|center|link=Red Eyeye]][[Red Eyeye]] |
|||
''lavaeyeye'' |
|||
| style="text-align:center; font-size:12px;" |[[:Category:Attitude: Passive|Passive]] |
|||
| style="text-align:left; font-size:12px;" | |
|||
* [[Inactive Lava Zone]] |
|||
* [[Inactive Lava Zone Corridor]] |
|||
* [[Lava Lakes]] |
|||
|- |
|||
| style="text-align:center; font-size:12px;" |[[File:Reginald Fauna.png|200px|center|link=Reginald]][[Reginald]] |
|||
''reginald'' |
|||
| style="text-align:center; font-size:12px;" |[[:Category:Attitude: Passive|Passive]] |
|||
| style="text-align:left; font-size:12px;" | |
|||
* [[Crag Field]] |
|||
* [[Crash Zone]] |
|||
* [[Crash Zone Mesas]] |
|||
* [[Deep Sparse Reef]] |
|||
* [[Grand Reef]] |
|||
* [[Grassy Plateaus]] |
|||
* [[Grassy Plateaus Caves]] |
|||
* [[Lost River]] |
|||
* [[Mountains Caves]] |
|||
* [[Mountains]] |
|||
* [[Primary Containment Facility#Aquarium|Primary Containment Facility Aquarium]] |
|||
* [[Sparse Reef]] |
|||
|- |
|||
| style="text-align:center; font-size:12px;" |[[File:Skyray Fauna.png|200px|center|link=Skyray]][[Skyray]] |
|||
''skyray'' |
|||
| style="text-align:center; font-size:12px;" |[[:Category:Attitude: Passive|Passive]] |
|||
| style="text-align:left; font-size:12px;" | |
|||
* [[Crash Zone]] |
|||
* [[Floating Island]] |
|||
* [[Mountain Island]] |
|||
* [[Lifepod 5]] |
|||
|- |
|||
| style="text-align:center; font-size:12px;" |[[File:Spadefish Fauna.png|200px|center|link=Spadefish]][[Spadefish]] |
|||
''spadefish'' |
|||
| style="text-align:center; font-size:12px;" |[[:Category:Attitude: Passive|Passive]] |
|||
| style="text-align:left; font-size:12px;" | |
|||
* [[Deep Sparse Reef]] |
|||
* [[Dunes]] |
|||
* [[Grand Reef]] |
|||
* [[Grassy Plateaus]] |
|||
* [[Mushroom Forest]] |
|||
* [[Mushroom Forest Caves]] |
|||
* [[Sea Treader's Path]] |
|||
* [[Sea Treader's Tunnel Caves]] |
|||
* [[Sparse Reef]] |
|||
* [[Underwater Islands]] |
|||
|- |
|||
| style="text-align:center; font-size:12px;" |[[File:Blood Hoopfish Fauna.png|200px|center|link=Spinefish]][[Spinefish]] |
|||
''spinefish'' |
|||
| style="text-align:center; font-size:12px;" |[[:Category:Attitude: Passive|Passive]] |
|||
| style="text-align:left; font-size:12px;" | |
|||
* [[Blood Kelp Caves]] |
|||
* [[Blood Kelp Zone]] |
|||
* [[Lost River]] |
|||
**[[Bone Fields Caves]] |
|||
|} |
|||
<br style="clear: both; height: 0px;" />{{Clear}} |
|||
===Scavengers & Parasites=== |
|||
{| class="article-table sortable" style="width: 100%;" cellspacing="1" cellpadding="1" border="0" |
|||
|- |
|||
! class="unsortable" style="width: 25%; text-align: center;" |Fauna Name and ID |
|||
! class="unsortable" style="width: 25%; text-align: center;" |Attitude |
|||
! class="unsortable" style="width: 25%; text-align: center;" |Biome |
|||
|- |
|||
| style="text-align:center; font-size:12px;" | |
|||
[[File:Amoeboid Fauna.png|200px|center|link=Amoeboid]][[Amoeboid]] |
|||
| style="text-align:center; font-size:12px;" |[[:Category:Attitude: Passive|Passive]] |
|||
| style="text-align:left; font-size:12px;" | |
|||
* [[Disease Research Facility]] |
|||
* [[Lost River]] |
|||
** [[Lost River|Bone Fields]] |
|||
** [[Lost River|Ghost Canyon]] |
|||
** [[Lost River|Ghost Forest]] |
|||
** [[Lost River|Junction]] |
|||
** [[Lost River|Mountains Corridor]] |
|||
|- |
|||
| style="text-align:center; font-size:12px;" | |
|||
[[File:Ancient_Floater_Fauna.png|200px|center|link=Floater]][[Ancient Floater]] |
|||
| style="text-align:center; font-size:12px;" |[[:Category:Attitude: Passive|Passive]] |
|||
| style="text-align:left; font-size:12px;" | |
|||
*[[Floating Island]] |
|||
*[[Underwater Islands]] |
|||
|- |
|||
| style="text-align:center; font-size:12px;" |[[File:Bleeder Fauna-0.png|200px|center|link=Bleeder]][[Bleeder]] |
|||
''bleeder'' |
|||
| style="text-align:center; font-size:12px;" |[[:Category:Attitude: Aggressive|Aggressive]] |
|||
| style="text-align:left; font-size:12px;" | |
|||
* [[Aurora]] |
|||
* [[Deep Sparse Reef]] |
|||
* [[Grassy Plateaus]] |
|||
* [[Grassy Plateaus Caves]] |
|||
* [[Kelp Forest]] |
|||
* [[Kelp Forest Caves]] |
|||
* [[Lost River]] |
|||
* [[Sparse Reef]] |
|||
|- |
|||
| style="text-align:center; font-size:12px;" |[[File:Blood Crawler Fauna.png|200px|center|link=Blood Crawler]][[Blood Crawler]] |
|||
''shuttlebug'' |
|||
| style="text-align:center; font-size:12px;" |[[:Category:Attitude: Aggressive|Aggressive]] |
|||
| style="text-align:left; font-size:12px;" | |
|||
* [[Blood Kelp Zone]] |
|||
* [[Blood Kelp Caves]] |
|||
* [[Lost River]] |
|||
|- |
|||
| style="text-align:center; font-size:12px;" |[[File:Cave Crawler (01).png|200px|center|link=Cave Crawler]][[Cave Crawler]] |
|||
''cavecrawler'' |
|||
| style="text-align:center; font-size:12px;" |[[:Category:Attitude: Aggressive|Aggressive]] |
|||
| style="text-align:left; font-size:12px;" | |
|||
* [[Aurora]] |
|||
* [[Dunes]] |
|||
* [[Dunes Caves]] |
|||
* [[Floating Island]] |
|||
* [[Mountain Island]] |
|||
* [[Mountains Caves]] |
|||
* [[Primary Containment Facility#Aquarium|Primary Containment Facility Aquarium]] |
|||
* [[Safe Shallows]] |
|||
* [[Safe Shallows Caves]] |
|||
* [[Underwater Islands Caves]] |
|||
|- |
|||
| style="text-align:center; font-size:12px;" |[[File:Floater Fauna-0.png|200px|center|link=Floater]][[Floater]] |
|||
''floater'' |
|||
| style="text-align:center; font-size:12px;" |[[:Category:Attitude: Passive|Passive]] |
|||
| style="text-align:left; font-size:12px;" | |
|||
* [[Blood Kelp Zone]] |
|||
* [[Floating Island]] |
|||
* [[Grassy Plateaus]] |
|||
* [[Safe Shallows]] |
|||
* [[Underwater Islands]] |
|||
|- |
|||
| style="text-align:center; font-size:12px;" |[[File:Lava Larva Fauna.png|200px|center|link=Lava Larva]][[Lava Larva]] |
|||
''lavalarva'' |
|||
| style="text-align:center; font-size:12px;" |[[:Category:Attitude: Passive|Passive]] |
|||
| style="text-align:left; font-size:12px;" | |
|||
* [[Inactive Lava Zone]] |
|||
* [[Inactive Lava Zone Corridor]] |
|||
* [[Lava Lakes]] |
|||
|- |
|||
| style="text-align:center; font-size:12px;" |[[File:Rockgrub Fauna.png|200px|center|link=Rockgrub]][[Rockgrub]] |
|||
''rockgrub'' |
|||
| style="text-align:center; font-size:12px;" |[[:Category:Attitude: Passive|Passive]] |
|||
| style="text-align:left; font-size:12px;" | |
|||
* [[Bulb Zone]] |
|||
* [[Bulb Zone Caves]] |
|||
* [[Dunes]] |
|||
* [[Dunes Caves]] |
|||
* [[Deep Sparse Reef]] |
|||
|- |
|||
| style="text-align:center; font-size:12px;" |[[File:Jumper Fauna.png|200px|center|link=Shuttlebug]][[Shuttlebug]] |
|||
''jumper'' |
|||
| style="text-align:center; font-size:12px;" |[[:Category:Attitude: Passive|Passive]] |
|||
| style="text-align:left; font-size:12px;" | |
|||
* [[Bulb Zone]] |
|||
* [[Crag Field]] |
|||
* [[Crash Zone]] |
|||
* [[Deep Sparse Reef]] |
|||
* [[Dunes]] |
|||
* [[Dunes Caves]] |
|||
* [[Grassy Plateaus Caves]] |
|||
* [[Mountains]] |
|||
* [[Mountains Caves]] |
|||
* [[Mushroom Forest Caves]] |
|||
* [[Primary Containment Facility#Aquarium|Primary Containment Facility Aquarium]] |
|||
* [[Sea Treader's Path]] |
|||
* [[Sea Treader's Tunnel Caves]] |
|||
* [[Sparse Reef]] |
|||
|} |
|||
===Leviathans=== |
|||
{| class="article-table sortable" style="width: 100%;" border="0" cellpaddig="1" cellspacing="1" |
|||
|- |
|||
! class="unsortable" style="width: 25%; text-align: center;" |Fauna Name and ID |
|||
! class="unsortable" style="width: 25%; text-align: center;" |Attitude |
|||
! class="unsortable" style="width: 25%; text-align: center;" |Biome |
|||
|- |
|||
| style="text-align:center; font-size:12px;" | |
|||
[[File:Ghost_Leviathan_Fauna.png|center|200px|link=Ghost Leviathan]][[Ghost Leviathan]] |
|||
''ghostleviathan''<br />''ghostleviathanjuvenile'' |
|||
| style="text-align:center; font-size:12px;" | |
|||
[[:Category:Attitude: Aggressive|Aggressive]] |
|||
| style="text-align:left; font-size:12px;" | |
|||
* [[Crater Edge]] |
|||
* [[Grand Reef]] |
|||
* [[Lost River]] |
|||
** [[Lost River|Bone Field]] |
|||
** [[Lost River|Ghost Forest]] |
|||
* [[Blood Kelp Zone|Northern Blood Kelp Zone]] |
|||
|- |
|||
| style="text-align:center; font-size:12px;" |[[File:Reaper Leviathan Fauna.png|195px|center|link=Reaper Leviathan]][[Reaper Leviathan]] |
|||
''reaperleviathan'' |
|||
| style="text-align:center; font-size:12px;" | |
|||
[[:Category:Attitude: Aggressive|Aggressive]] |
|||
| style="text-align:left; font-size:12px;" | |
|||
* [[Crash Zone]] |
|||
* [[Crash Zone Mesas]] |
|||
* [[Dunes]] |
|||
* [[Mountains]] |
|||
|- |
|||
| style="text-align:center; font-size:12px;" |[[File:Reefback Fauna.png|200px|center|link=Reefback Leviathan]][[Reefback Leviathan]] |
|||
''reefback'' |
|||
| style="text-align:center; font-size:12px;" |[[:Category:Attitude: Passive|Passive]] |
|||
| style="text-align:left; font-size:12px;" | |
|||
* [[Blood Kelp Zone]] |
|||
* [[Bulb Zone]] |
|||
* [[Crag Field]] |
|||
* [[Grassy Plateaus]] |
|||
* [[Mushroom Forest]] |
|||
* [[Sparse Reef]] |
|||
* [[Underwater Islands]] |
|||
|- |
|||
| style="text-align:center; font-size:12px;" |[[File:Sea_Dragon_Leviathan_Fauna.png|210px|center|link=Sea Dragon Leviathan]][[Sea Dragon Leviathan]] |
|||
''seadragon'' |
|||
| style="text-align:center; font-size:12px;" | [[:Category:Attitude: Aggressive|Aggressive]] |
|||
| style="text-align:left; font-size:12px;" | |
|||
* [[Inactive Lava Zone]] |
|||
* [[Lava Lakes]] |
|||
|- |
|||
| style="text-align:center; font-size:12px;" |[[File: Sea Emperor Fauna.png |235px|center|link=Sea Emperor Leviathan]][[Sea Emperor Leviathan]] |
|||
| style="text-align:center; font-size:12px;" | [[:Category:Attitude: Passive|Passive]] |
|||
| style="text-align:left; font-size:12px;" | |
|||
*[[Sea Emperor Leviathan|Adult]] |
|||
** [[Primary Containment Facility#Aquarium|Primary Containment Facility Aquarium]] |
|||
*[[Sea Emperor Leviathan (Juveniles)|Juvenile]] |
|||
** [[Blood Kelp Zone]] |
|||
** [[Crag Field]] |
|||
** [[Dunes]] |
|||
** [[Grand Reef]] |
|||
** [[Mountains]] |
|||
|- |
|||
| style="text-align:center; font-size:12px;" |[[File:Sea Treader Fauna.png|200px|center|link=Sea Treader Leviathan]][[Sea Treader Leviathan]] |
|||
''seatreader'' |
|||
| style="text-align:center; font-size:12px;" |[[:Category:Attitude: Defensive|Defensive]] |
|||
| style="text-align:left; font-size:12px;" | |
|||
* [[Grand Reef]] |
|||
* [[Sea Treader's Path]] |
|||
* [[Sea Treader's Tunnel Caves]] |
|||
|} |
|||
<br style="clear: both; height: 0px;" />{{Clear}} |
|||
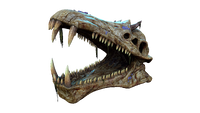
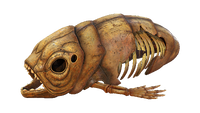
==Extinct Species== |
==Extinct Species== |
||
Revision as of 23:19, 1 March 2020
My Favorite Pages

- https://subnautica.fandom.com/wiki/Leviathan_Class_Organisms
- https://subnautica.fandom.com/wiki/Destroyed_Lifepods
- https://subnautica.fandom.com/wiki/Eggs
Useful Pages
- https://subnautica.fandom.com/wiki/Achievements
- https://subnautica.fandom.com/wiki/Getting_Started
- https://subnautica.fandom.com/wiki/Fauna
- https://subnautica.fandom.com/wiki/Flora
My Favorite Users
All of these users are professionals at what they do!
- https://subnautica.fandom.com/wiki/User:Tueman
- https://subnautica.fandom.com/wiki/User:Mesmerized
- https://subnautica.fandom.com/wiki/User:Jamintheinfinite
Fauna & Flora
Extinct Species
| Name | Location Of Remains | Age | Living Relatives |
|---|---|---|---|
 |
|
Tens if not hundreds of millions of years old | |
|
|
Many millions of years old | |
 |
1,000,000 years |
| |
 |
3,000,000 years |
| |
 |
1000 years |