
Shoal of Fish (Subnautica): Difference between revisions
m (added passive attitude.) |
|||
| Line 5: | Line 5: | ||
|title1 = Shoal of Bladderfish |
|title1 = Shoal of Bladderfish |
||
|tab = [[Fauna]] |
|tab = [[Fauna]] |
||
|attitude = [[:Category: Attitude: Passive|Passive]] |
|||
|image1 = Unknown.png |
|image1 = Unknown.png |
||
|biome = *[[Reefback Leviathan]]}} |
|biome = *[[Reefback Leviathan]]}} |
||
| Line 13: | Line 12: | ||
|tab = [[Fauna]] |
|tab = [[Fauna]] |
||
|image1 = Unknown.png |
|image1 = Unknown.png |
||
|attitude = [[:Category: Attitude: Passive|Passive]] |
|||
|biome = *[[Bulb Zone]] |
|biome = *[[Bulb Zone]] |
||
*[[Crag Field]] |
*[[Crag Field]] |
||
| Line 32: | Line 30: | ||
|tab = [[Fauna]] |
|tab = [[Fauna]] |
||
|image1 = Unknown.png |
|image1 = Unknown.png |
||
|attitude = [[:Category: Attitude: Passive|Passive]] |
|||
|biome = *[[Reefback Leviathan]]}} |
|biome = *[[Reefback Leviathan]]}} |
||
|-| |
|-| |
||
| Line 39: | Line 36: | ||
|tab = [[Fauna]] |
|tab = [[Fauna]] |
||
|image1 = Shoal of Fish Fauna.png |
|image1 = Shoal of Fish Fauna.png |
||
|attitude = [[:Category: Attitude: Passive|Passive]] |
|||
|biome = *[[Bulb Zone]] |
|biome = *[[Bulb Zone]] |
||
*[[Crash Zone Mesas]] |
*[[Crash Zone Mesas]] |
||
| Line 56: | Line 52: | ||
|tab = [[Fauna]] |
|tab = [[Fauna]] |
||
|image1 = Unknown.png |
|image1 = Unknown.png |
||
|attitude = [[:Category: Attitude: Passive|Passive]] |
|||
|biome = *[[Blood Kelp Zone]] |
|biome = *[[Blood Kelp Zone]] |
||
*[[Lost River]] |
*[[Lost River]] |
||
Revision as of 20:44, 23 June 2020
| This article is about Shoal of Fish (Subnautica) in Subnautica. For the related article on the Below Zero Wiki, see Shoal of Fish (Subnautica). |
Bladderfish= <infobox>
 <title source="title1" style="font-weight:bold; text-align:center;">
   <default>Shoal of Fish (Subnautica)</default>
 </title>
 <image source="image1">
</image> <label>Category</label> <label>Tab</label> <label>Description</label> <label>Affiliation</label> <format></format> <label>Age</label> <label>Description when cooked</label> <label>Description when cured</label> <label>Inhabit</label> <label>Attitude</label> <label>Health</label> <label>Damage</label> <label>Adult Damage</label> <label>Juvenile Damage</label> <label>Drops</label> <label>Perks</label> <label>Biome</label> <label>Active During</label> <label>Size</label> <label>Length</label> <label>Bioreactor</label> <label>DNA</label> <label>Voice Actor</label> <label>Debug Spawn</label> <format>
- {{#explode:{{{debugspawn}}}||0}}
- {{#explode:{{{debugspawn}}}||1}}
- {{#explode:{{{debugspawn}}}||2}}
- {{#explode:{{{debugspawn}}}||3}}
- {{#explode:{{{item_id}}}||0}}
- {{#explode:{{{item_id}}}||1}}
- {{#explode:{{{item_id}}}||2}}
- {{#explode:{{{item_id}}}||3}}
- {{#explode:{{{debugspawn2}}}||0}}
- {{#explode:{{{debugspawn2}}}||1}}
- {{#explode:{{{debugspawn2}}}||2}}
- {{#explode:{{{debugspawn2}}}||3}}
- {{#explode:{{{debugspawn}}}||0}}
- {{#explode:{{{debugspawn}}}||1}}
- {{#explode:{{{debugspawn}}}||2}}
- {{#explode:{{{debugspawn}}}||3}}
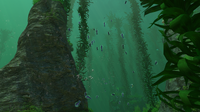
Certain species of passive Fauna in Subnautica sometimes gather together in shoals, indicating that they are most likely juveniles. Usually, Shoals of Fish appear closer to the surface but certain species will swarm in the depths and in open waters.
The Fauna in a Shoal will flee from the player when approached. The player can break up a Shoal by swimming through it, but the fish will swarm again once the danger is over.
While Shoals of Fish cannot normally be interacted with, it is possible to use the Propulsion Cannon and the Prawn Suit Propulsion Cannon to grab and move the Shoal of Fish.
Gallery
A Shoal of Hoopfish in the Kelp Forest
A Shoal of Boomerang near the Jellyshroom Cave Entrance

A Shoal of Bladderfish


Lua error in package.lua at line 80: module 'Dev:Navbox' not found.
- Pages with script errors
- Passive
- Fauna
- Cathemeral
- Bioluminescent
- Inactive Lava Zone
- Mushroom Forest
- Blood Kelp Zone
- Grassy Plateaus
- Bulb Zone
- Dunes
- Floating Island
- Grand Reef
- Deep Grand Reef
- Kelp Forest
- Mountains
- Safe Shallows
- Sea Treader's Path
- Sparse Reef
- Underwater Islands
- Blood Kelp Caves
- Mushroom Forest Caves
- Sea Treader's Tunnel Caves
- Lost River
- Crag Field
- Bone Fields Caves