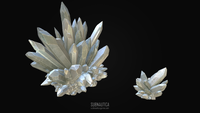
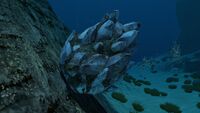
Large Resource Deposits (Subnautica): Difference between revisions
m (→Gallery) |
(updating all biomes) |
||
| Line 14: | Line 14: | ||
| style="text-align:center; font-size:14px;" |8 - 16 |
| style="text-align:center; font-size:14px;" |8 - 16 |
||
| style="text-align:left; font-size:12px;" | |
| style="text-align:left; font-size:12px;" | |
||
* [[ |
* [[Blood Kelp Caves]] |
||
* [[Blood Kelp Zone]] |
* [[Blood Kelp Zone]] |
||
| ⚫ | |||
| ⚫ | |||
* [[Grand Reef]] |
* [[Grand Reef]] |
||
* [[Grassy Plateaus]] |
* [[Grassy Plateaus]] |
||
* [[ |
* [[Inactive Lava Zone Corridor]] |
||
* [[Inactive Lava Zone]] |
* [[Inactive Lava Zone]] |
||
| ⚫ | |||
* [[Mushroom Forest]] |
|||
|- |
|- |
||
| style="text-align:center; font-size:12px;" |[[File:Drillable_Gold_Deposit.png|140px|center]] |
| style="text-align:center; font-size:12px;" |[[File:Drillable_Gold_Deposit.png|140px|center]] |
||
| Line 27: | Line 27: | ||
| style="text-align:center; font-size:14px;" |9 - 18 |
| style="text-align:center; font-size:14px;" |9 - 18 |
||
| style="text-align:left; font-size:12px;" | |
| style="text-align:left; font-size:12px;" | |
||
| ⚫ | |||
* [[Blood Kelp Zone]] |
* [[Blood Kelp Zone]] |
||
| ⚫ | |||
* [[Bulb Zone]] |
* [[Bulb Zone]] |
||
* [[Inactive Lava Zone]] |
* [[Inactive Lava Zone]] |
||
| Line 40: | Line 42: | ||
| style="text-align:left; font-size:12px;" | |
| style="text-align:left; font-size:12px;" | |
||
* [[Inactive Lava Zone]] |
* [[Inactive Lava Zone]] |
||
| ⚫ | |||
* [[Lava Lakes]] |
* [[Lava Lakes]] |
||
|- |
|- |
||
| Line 47: | Line 48: | ||
| style="text-align:center; font-size:14px;" |8 - 16 |
| style="text-align:center; font-size:14px;" |8 - 16 |
||
| style="text-align:left; font-size:12px;" | |
| style="text-align:left; font-size:12px;" | |
||
| ⚫ | |||
* [[Crash Zone]] |
* [[Crash Zone]] |
||
* [[ |
* [[Deep Grand Reef]] |
||
| ⚫ | |||
| ⚫ | |||
* [[Grassy Plateaus]] |
* [[Grassy Plateaus]] |
||
| ⚫ | |||
* [[Inactive Lava Zone]] |
* [[Inactive Lava Zone]] |
||
* [[Lost River]] |
* [[Lost River]] |
||
* [[Mountain Island]] |
|||
* [[Mountains]] |
* [[Mountains]] |
||
* [[Sparse Reef]] |
|||
|- |
|- |
||
| style="text-align:center; font-size:12px;" |[[File:DrillableLithium.png|150px|center]] |
| style="text-align:center; font-size:12px;" |[[File:DrillableLithium.png|150px|center]] |
||
| Line 63: | Line 66: | ||
* [[Bulb Zone]] |
* [[Bulb Zone]] |
||
* [[Crag Field]] |
* [[Crag Field]] |
||
| ⚫ | |||
* [[Deep Sparse Reef]] |
* [[Deep Sparse Reef]] |
||
* [[Jellyshroom Cave]] |
* [[Jellyshroom Cave]] |
||
| ⚫ | |||
* [[Mushroom Forest Caves]] |
|||
* [[Mushroom Forest]] |
* [[Mushroom Forest]] |
||
* [[Sea Treader's |
* [[Sea Treader's Tunnel Caves]] |
||
* [[Sparse Reef]] |
* [[Sparse Reef]] |
||
|- |
|- |
||
| Line 75: | Line 79: | ||
| style="text-align:left; font-size:12px;" | |
| style="text-align:left; font-size:12px;" | |
||
* [[Jellyshroom Cave]] |
* [[Jellyshroom Cave]] |
||
| ⚫ | |||
|- |
|- |
||
| style="text-align:center; font-size:12px;" |[[File:NickelLRS.png|150px|center]] |
| style="text-align:center; font-size:12px;" |[[File:NickelLRS.png|150px|center]] |
||
| Line 87: | Line 90: | ||
| style="text-align:center; font-size:14px;" |7 - 14 |
| style="text-align:center; font-size:14px;" |7 - 14 |
||
| style="text-align:left; font-size:12px;" | |
| style="text-align:left; font-size:12px;" | |
||
| ⚫ | |||
| ⚫ | |||
* [[Crag Field]] |
* [[Crag Field]] |
||
* [[Dunes]] |
* [[Dunes]] |
||
* [[Deep Sparse Reef]] |
* [[Deep Sparse Reef]] |
||
* [[Grand Reef]] |
* [[Grand Reef]] |
||
| ⚫ | |||
* [[Inactive Lava Zone]] |
* [[Inactive Lava Zone]] |
||
* [[Lost River]] |
|||
* [[Mountain Range Caves]] |
|||
* [[Sparse Reef]] |
* [[Sparse Reef]] |
||
|- |
|- |
||
| Line 104: | Line 106: | ||
* [[Crash Zone Mesas]] |
* [[Crash Zone Mesas]] |
||
* [[Dunes]] |
* [[Dunes]] |
||
| ⚫ | |||
* [[Grassy Plateaus]] |
* [[Grassy Plateaus]] |
||
* [[Mountain |
* [[Mountain Range Caves]] |
||
* [[Mountains]] |
* [[Mountains]] |
||
* [[Mushroom Forest]] |
* [[Mushroom Forest]] |
||
* [[Sea Treader's Path]] |
|||
|- |
|- |
||
| style="text-align:center; font-size:12px;" |[[File:DrillableSilver.png|160px|center]] |
| style="text-align:center; font-size:12px;" |[[File:DrillableSilver.png|160px|center]] |
||
| Line 115: | Line 115: | ||
| style="text-align:center; font-size:14px;" |9 - 18 |
| style="text-align:center; font-size:14px;" |9 - 18 |
||
| style="text-align:left; font-size:12px;" | |
| style="text-align:left; font-size:12px;" | |
||
* [[Blood Kelp Zone|Blood Kelp Trench]] |
|||
* [[Crag Field]] |
* [[Crag Field]] |
||
* [[Dunes]] |
|||
* [[Dunes Caves]] |
* [[Dunes Caves]] |
||
| ⚫ | |||
* [[Inactive Lava Zone]] |
* [[Inactive Lava Zone]] |
||
* [[Jellyshroom Cave]] |
|||
* [[Lost River]] |
* [[Lost River]] |
||
| ⚫ | |||
* [[Underwater Islands]] |
* [[Underwater Islands]] |
||
|- |
|- |
||
| Line 128: | Line 127: | ||
| style="text-align:center; font-size:14px;" |8 - 16 |
| style="text-align:center; font-size:14px;" |8 - 16 |
||
| style="text-align:left; font-size:12px;" | |
| style="text-align:left; font-size:12px;" | |
||
| ⚫ | |||
* [[Bulb Zone]] |
* [[Bulb Zone]] |
||
* [[Crash Zone]] |
* [[Crash Zone]] |
||
| ⚫ | |||
| ⚫ | |||
* [[Dunes]] |
* [[Dunes]] |
||
* [[ |
* [[Inactive Lava Zone Corridor]] |
||
* [[Grassy Plateaus]] |
|||
* [[Inactive Lava Zone]] |
* [[Inactive Lava Zone]] |
||
* [[Lost River]] |
* [[Lost River]] |
||
| Line 141: | Line 140: | ||
| style="text-align:center; font-size:14px;" |7 - 14 |
| style="text-align:center; font-size:14px;" |7 - 14 |
||
| style="text-align:left; font-size:12px;" | |
| style="text-align:left; font-size:12px;" | |
||
* [[Blood Kelp |
* [[Blood Kelp Caves]] |
||
* [[Grand Reef]] |
|||
* [[Inactive Lava Zone]] |
* [[Inactive Lava Zone]] |
||
* [[Lost River]] |
* [[Lost River]] |
||
* [[Mountains]] |
|||
* [[Underwater Islands]] |
* [[Underwater Islands]] |
||
|} |
|} |
||
| Line 210: | Line 207: | ||
*Kyanite is one of the few resources in Subnautica that is not guaranteed to eject smaller pieces when drilling chunks from a large node. This is not a bug. |
*Kyanite is one of the few resources in Subnautica that is not guaranteed to eject smaller pieces when drilling chunks from a large node. This is not a bug. |
||
**There is a 0.000000471431432% chance for a large Kyanite deposit to yield 22 Kyanite pieces. |
**There is a 0.000000471431432% chance for a large Kyanite deposit to yield 22 Kyanite pieces. |
||
* There are two Large Resource Deposit models that currently do not appear in Subnautica, the large Ruby |
* There are two Large Resource Deposit models that currently do not appear in Subnautica, the large Ruby and Crystalline Sulfur deposits. It is unknown if any of these will ever appear in Subnautica. <ref>https://trello.com/c/udrs7pku/6192-rawmaterials</ref> |
||
* There used to be Large Resource Deposits of [[Diamond]]s. |
* There used to be Large Resource Deposits of [[Diamond]]s. |
||
Revision as of 14:01, 2 February 2019
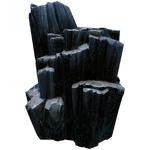
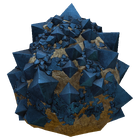
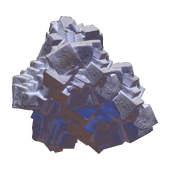
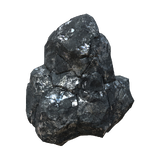
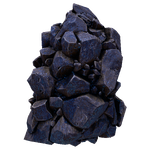
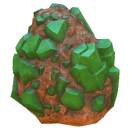
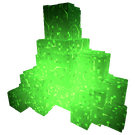
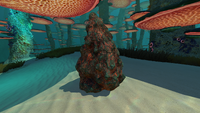
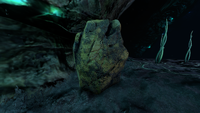
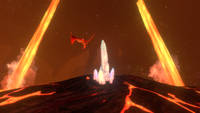
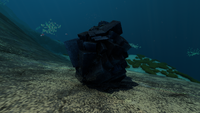
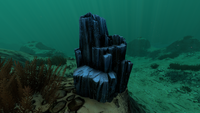
Large Resource Deposits are large quantities of a single Raw Material. Unlike stone outcrops, the materials cannot be harvested by hand; instead they must be broken down using the Prawn Suit Drill Arm.
Types of Deposits
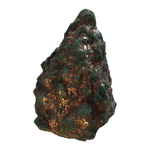
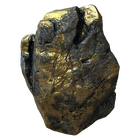
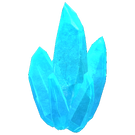
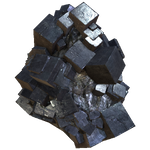
| Appearance | Material | Quantity | Biome(s) |
|---|---|---|---|
| Copper Ore | 8 - 16 | ||
| Gold | 9 - 18 | ||
| Kyanite | 0 - 12 (Short)
0 - 22 (Tall) |
||
| Lead | 8 - 16 | ||
| Lithium | 8 - 16 | ||
| Magnetite | 7 - 14 | ||
| Nickel Ore | 8 - 16 | ||
| Quartz | 7 - 14 | ||
| Salt Deposit | 7 - 14 | ||
| Silver Ore | 9 - 18 | ||
| Titanium | 8 - 16 | ||
| Uraninite Crystal | 7 - 14 |
Unique Deposits
|
Spoiler alert: The following section contains story related material. | ||||||||
|---|---|---|---|---|---|---|---|---|
|
Gallery
<tabber> Screenshots=
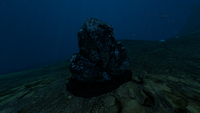
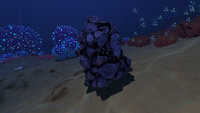
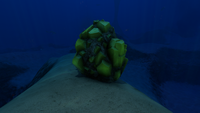
The large form of Copper
The large form of Gold
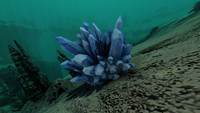
The large form of Kyanite
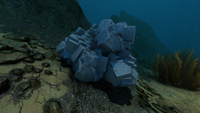
The large form of Lead
The large form of Lithium
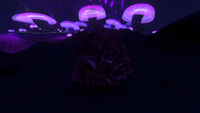
The large form of Magnetite
The large form of Nickel
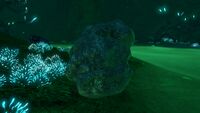
The large form of Quartz
The large form of Salt
The large form of Silver Ore
The large form of Titanium
The large form of Uraninite
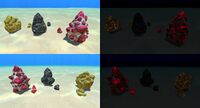
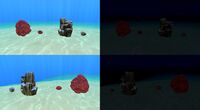
Image found on trello featuring unused large Ruby and Crystalline Sulfur deposits
Image found on trello featuring an unused large Mercury Ore deposit, modeled prior to Mercury's removal from the game
|-| Unique Deposits=
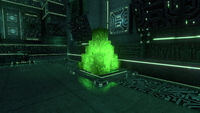
The large form of the Ion Cube in the Alien Thermal Plant
|-| Sketchfab Models=
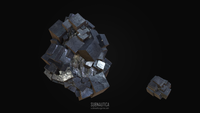
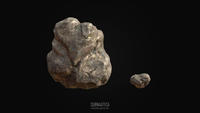
The Large Lead Deposit model from Sketchfab
The Large Nickel Deposit model from Sketchfab
The Large Quartz Deposit model from Sketchfab
|-| Removed Deposits=
Large Diamond deposit which has been removed from the game.
</tabber>
Trivia
- Kyanite is one of the few resources in Subnautica that is not guaranteed to eject smaller pieces when drilling chunks from a large node. This is not a bug.
- There is a 0.000000471431432% chance for a large Kyanite deposit to yield 22 Kyanite pieces.
- There are two Large Resource Deposit models that currently do not appear in Subnautica, the large Ruby and Crystalline Sulfur deposits. It is unknown if any of these will ever appear in Subnautica. [1]
- There used to be Large Resource Deposits of Diamonds.
References
- Alien Technology
- Blood Kelp Zone
- Blood Kelp Caves
- Bone Fields Caves
- Bulb Zone
- Bulb Zone Caves
- Crag Field
- Crash Zone
- Deep Grand Reef
- Deep Sparse Reef
- Dunes
- Dunes Caves
- Floating Island
- Grand Reef
- Grand Reef Caves
- Grassy Plateaus
- Inactive Lava Zone
- Jellyshroom Cave
- Lava Lakes
- Lost River
- Mountains
- Mountain Island
- Mountain Range Caves
- Mushroom Forest
- Raw Material
- Underwater Islands

