
Fragments (Below Zero): Difference between revisions
No edit summary |
Chucky Mota (talk | contribs) m (I'm dumb) Tags: Manual revert Visual edit mobile web edit mobile edit |
||
| (13 intermediate revisions by 10 users not shown) | |||
| Line 1: | Line 1: | ||
{{SubnauticaLink |
{{SubnauticaLink}} |
||
'''Fragments''' are broken pieces of advanced technology that can be analyzed by the [[Scanner]] to create [[Blueprints]]. Many fragments can be found littering the sea floor of various [[ |
'''Fragments''' are broken pieces of advanced technology that can be analyzed by the [[Scanner (Below Zero)|Scanner]] to create [[Blueprints (Below Zero)|Blueprints]]. Many fragments can be found littering the sea floor of various [[Biomes (Below Zero)|Biomes]]. |
||
Fragment spawns are semi-randomised, meaning that they have defined spawning areas but can spawn randomly within that area. This means that fragments will be found in different places in each save. |
Fragment spawns are semi-randomised, meaning that they have defined spawning areas but can spawn randomly within that area. This means that fragments will be found in different places in each save. [[Sea Monkey Nest]]s also contain certain fragments. |
||
Should the Scanner be used on fragments of items the player has already fully analyzed, it will grant two [[Titanium (Below Zero)|Titanium]] instead. |
|||
[[Sea Monkey Nest]]s also contain certain fragments. |
|||
==Fragments List== |
==Fragments List== |
||
| Line 14: | Line 14: | ||
! class="unsortable" style="width: 15%; text-align: center;" |Item ID |
! class="unsortable" style="width: 15%; text-align: center;" |Item ID |
||
|- |
|- |
||
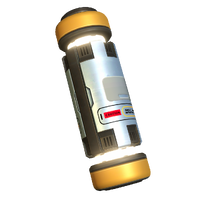
| style="text-align:center; font-size:12px;" |[[File:Beacon Fragment.png|200px|center|link=Beacon]][[Beacon]] |
| style="text-align:center; font-size:12px;" |[[File:Beacon Fragment.png|200px|center|link=Beacon (Below Zero)]][[Beacon (Below Zero)|Beacon]] |
||
| style="text-align:left; font-size:12px;" | |
| style="text-align:left; font-size:12px;" | |
||
* [[Arctic Kelp Forest]] |
* [[Arctic Kelp Forest]] |
||
| Line 27: | Line 27: | ||
| style="text-align:center; font-size:12px;" |''coldsuitfragment'' |
| style="text-align:center; font-size:12px;" |''coldsuitfragment'' |
||
|- |
|- |
||
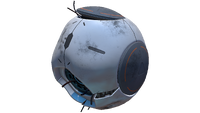
| style="text-align:center; font-size:12px;" |[[File:Grav Trap Fragment.png|200px|center|link=Grav Trap]][[Grav Trap]] |
| style="text-align:center; font-size:12px;" |[[File:Grav Trap Fragment.png|200px|center|link=Grav Trap (Below Zero)]][[Grav Trap (Below Zero)|Grav Trap]] |
||
| style="text-align:left; font-size:12px;" | |
| style="text-align:left; font-size:12px;" | |
||
* [[Arctic Kelp Forest]] |
* [[Arctic Kelp Forest]] |
||
| Line 33: | Line 33: | ||
| style="text-align:center; font-size:12px;" |''gravspherefragment'' |
| style="text-align:center; font-size:12px;" |''gravspherefragment'' |
||
|- |
|- |
||
| style="text-align:center; font-size:12px;" |[[File:BuilderFragment.png|125px|center|link=Habitat Builder]][[Habitat Builder]] |
| style="text-align:center; font-size:12px;" |[[File:BuilderFragment.png|125px|center|link=Habitat Builder (Below Zero)]][[Habitat Builder (Below Zero)|Habitat Builder]] |
||
| style="text-align:left; font-size:12px;" | |
| style="text-align:left; font-size:12px;" | |
||
* [[Delta Station]] |
* [[Delta Station]] |
||
| Line 48: | Line 48: | ||
| style="text-align:center; font-size:12px;" |''hydraulicfluidfragment'' |
| style="text-align:center; font-size:12px;" |''hydraulicfluidfragment'' |
||
|- |
|- |
||
| style="text-align:center; font-size:12px;" |[[File: |
| style="text-align:center; font-size:12px;" |[[File:Laser Cutter Fragment.png|200px|center|link=Laser Cutter (Below Zero)]][[Laser Cutter (Below Zero)|Laser Cutter]] |
||
| style="text-align:left; font-size:12px;" | |
| style="text-align:left; font-size:12px;" | |
||
*[[Arctic Kelp Caves]] |
*[[Arctic Kelp Caves]] |
||
** [[Sea Monkey Nest]]s |
** [[Sea Monkey Nest]]s |
||
* [[Koppa Mining Site]] |
* [[Koppa Mining Site]] |
||
* [[Mercury II]] ( |
* [[Mercury II]] (Stern) |
||
* [[Phi Robotics Center]] |
* [[Phi Robotics Center]] |
||
* [[Twisty Bridges]] |
* [[Twisty Bridges]] |
||
| Line 60: | Line 60: | ||
|- |
|- |
||
| style="text-align:center; font-size:12px;" |[[File: |
| style="text-align:center; font-size:12px;" |[[File:Mineral Detector Fragment.png|150px|center|link=Mineral Detector]][[Mineral Detector]] |
||
| style="text-align:left; font-size:12px;" | |
| style="text-align:left; font-size:12px;" | |
||
* [[Arctic Kelp Forest]] |
* [[Arctic Kelp Forest]] |
||
| Line 68: | Line 68: | ||
| style="text-align:center; font-size:12px;" |''metaldetectorfragment'' |
| style="text-align:center; font-size:12px;" |''metaldetectorfragment'' |
||
|- |
|- |
||
| style="text-align:center; font-size:12px;" |<tabber>1=[[File:Mobile Vehicle Bay Fragments 1.png|200px|center|link=Mobile Vehicle Bay]][[Mobile Vehicle Bay]]|-|2=[[File:Mobile Vehicle Bay Fragments 2.png|200px|center|link=Mobile Vehicle Bay]][[Mobile Vehicle Bay]]|-|3=[[File:Mobile Vehicle Bay Fragments 3.png|200px|center|link=Mobile Vehicle Bay]][[Mobile Vehicle Bay]]|-|4=[[File:Mobile Vehicle Bay Fragments 4.png|200px|center|link=Mobile Vehicle Bay]][[Mobile Vehicle Bay]]|-|5=[[File:Mobile Vehicle Bay Fragments 5.png|200px|center|link=Mobile Vehicle Bay]][[Mobile Vehicle Bay]]</tabber> |
| style="text-align:center; font-size:12px;" |<tabber>1=[[File:Mobile Vehicle Bay Fragments 1.png|200px|center|link=Mobile Vehicle Bay (Below Zero)]][[Mobile Vehicle Bay (Below Zero)|Mobile Vehicle Bay]]|-|2=[[File:Mobile Vehicle Bay Fragments 2.png|200px|center|link=Mobile Vehicle Bay (Below Zero)]][[Mobile Vehicle Bay (Below Zero)|Mobile Vehicle Bay]]|-|3=[[File:Mobile Vehicle Bay Fragments 3.png|200px|center|link=Mobile Vehicle Bay (Below Zero)]][[Mobile Vehicle Bay (Below Zero)|Mobile Vehicle Bay]]|-|4=[[File:Mobile Vehicle Bay Fragments 4.png|200px|center|link=Mobile Vehicle Bay (Below Zero)]][[Mobile Vehicle Bay (Below Zero)|Mobile Vehicle Bay]]|-|5=[[File:Mobile Vehicle Bay Fragments 5.png|200px|center|link=Mobile Vehicle Bay (Below Zero)]][[Mobile Vehicle Bay (Below Zero)|Mobile Vehicle Bay]]</tabber> |
||
| style="text-align:left; font-size:12px;" | |
| style="text-align:left; font-size:12px;" | |
||
* [[Arctic Kelp Caves]] |
* [[Arctic Kelp Caves]] |
||
| Line 81: | Line 81: | ||
| style="text-align:left; font-size:12px;" | |
| style="text-align:left; font-size:12px;" | |
||
* [[Mercury II]] |
* [[Mercury II]] |
||
| style="text-align:center; font-size:12px;" | |
| style="text-align:center; font-size:12px;" |3 |
||
| style="text-align:center; font-size:12px;" |''radiotowerppufragment'' |
| style="text-align:center; font-size:12px;" |''radiotowerppufragment'' |
||
|- |
|- |
||
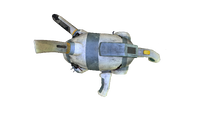
| style="text-align:center; font-size:12px;" |[[File:DivereelFragment.png|200px|center|link=Pathfinder Tool]][[Pathfinder Tool]] |
| style="text-align:center; font-size:12px;" |[[File:DivereelFragment.png|200px|center|link=Pathfinder Tool (Below Zero)]][[Pathfinder Tool (Below Zero)|Pathfinder Tool]] |
||
| style="text-align:left; font-size:12px;" | |
| style="text-align:left; font-size:12px;" | |
||
* [[Arctic Kelp Forest]] |
* [[Arctic Kelp Forest]] |
||
| Line 91: | Line 91: | ||
| style="text-align:center; font-size:12px;" |''divereel'' |
| style="text-align:center; font-size:12px;" |''divereel'' |
||
|- |
|- |
||
| style="text-align:center; font-size:12px;" |<tabber>1=[[File:FrozenLeviathanPrawnSuit.png|200px|center|link=Prawn Suit]][[Prawn Suit]]|-|2=[[File:PrawnSuit2.png|200px|center|link=Prawn Suit]][[Prawn Suit]]|-|3=[[File:PrawnSuit3.png|200px|center|link=Prawn Suit]][[Prawn Suit]]|-|4=[[File:PrawnSuit4.png|200px|center|link=Prawn Suit]][[Prawn Suit]]|-|5=[[File:PrawnSuit5.png|200px|center|link=Prawn Suit]][[Prawn Suit]]</tabber> |
| style="text-align:center; font-size:12px;" |<tabber>1=[[File:FrozenLeviathanPrawnSuit.png|200px|center|link=Prawn Suit (Below Zero)]][[Prawn Suit (Below Zero)|Prawn Suit]]|-|2=[[File:PrawnSuit2.png|200px|center|link=Prawn Suit (Below Zero)]][[Prawn Suit (Below Zero)|Prawn Suit]]|-|3=[[File:PrawnSuit3.png|200px|center|link=Prawn Suit (Below Zero)]][[Prawn Suit (Below Zero)|Prawn Suit]]|-|4=[[File:PrawnSuit4.png|200px|center|link=Prawn Suit (Below Zero)]][[Prawn Suit (Below Zero)|Prawn Suit]]|-|5=[[File:PrawnSuit5.png|200px|center|link=Prawn Suit (Below Zero)]][[Prawn Suit (Below Zero)|Prawn Suit]]</tabber> |
||
| style="text-align:left; font-size:12px;" | |
| style="text-align:left; font-size:12px;" | |
||
* [[Koppa Mining Site]] |
* [[Koppa Mining Site]] |
||
| Line 99: | Line 99: | ||
| style="text-align:center; font-size:12px;" |''exosuitfragment'' |
| style="text-align:center; font-size:12px;" |''exosuitfragment'' |
||
|- |
|- |
||
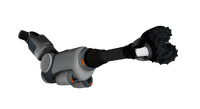
| style="text-align:center; font-size:12px;" |[[File:DrillArmFragment.png|200px|center|link=Prawn Suit Drill Arm]][[Prawn Suit Drill Arm]] |
| style="text-align:center; font-size:12px;" |[[File:DrillArmFragment.png|200px|center|link=Prawn Suit Drill Arm (Below Zero)]][[Prawn Suit Drill Arm (Below Zero)|Prawn Suit Drill Arm]] |
||
| style="text-align:left; font-size:12px;" | |
| style="text-align:left; font-size:12px;" | |
||
* [[Koppa Mining Site]] |
* [[Koppa Mining Site]] |
||
| Line 106: | Line 106: | ||
| style="text-align:center; font-size:12px;" |''exosuitdrillarmfragment'' |
| style="text-align:center; font-size:12px;" |''exosuitdrillarmfragment'' |
||
|- |
|- |
||
| style="text-align:center; font-size:12px;" |[[File:Unknown.png|200px|center|link=Prawn Suit Grappling Arm]][[Prawn Suit Grappling Arm]] |
| style="text-align:center; font-size:12px;" |[[File:Unknown.png|200px|center|link=Prawn Suit Grappling Arm (Below Zero)]][[Prawn Suit Grappling Arm (Below Zero)|Prawn Suit Grappling Arm]] |
||
| style="text-align:left; font-size:12px;" | |
| style="text-align:left; font-size:12px;" | |
||
* [[Lilypads Crevice]] |
* [[Lilypads Crevice]] |
||
| Line 113: | Line 113: | ||
| style="text-align:center; font-size:12px;" |''exosuitgrapplingarmfragment'' |
| style="text-align:center; font-size:12px;" |''exosuitgrapplingarmfragment'' |
||
|- |
|- |
||
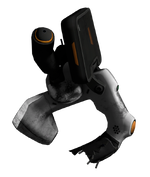
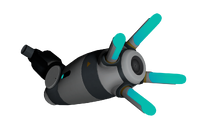
| style="text-align:center; font-size:12px;" |[[File:PropulsionArmFragment.png|200px|center|link=Prawn Suit Propulsion Cannon]][[Prawn Suit Propulsion Cannon]] |
| style="text-align:center; font-size:12px;" |[[File:PropulsionArmFragment.png|200px|center|link=Prawn Suit Propulsion Cannon (Below Zero)]][[Prawn Suit Propulsion Cannon (Below Zero)|Prawn Suit Propulsion Cannon]] |
||
| style="text-align:left; font-size:12px;" | |
| style="text-align:left; font-size:12px;" | |
||
* [[Crystal Caves]] |
* [[Crystal Caves]] |
||
| Line 119: | Line 119: | ||
| style="text-align:center; font-size:12px;" |''exosuitpropulsionarmfragment'' |
| style="text-align:center; font-size:12px;" |''exosuitpropulsionarmfragment'' |
||
|- |
|- |
||
| style="text-align:center; font-size:12px;" |[[File:Unknown.png|200px|center|link=Prawn Suit Thermal Reactor]][[Prawn Suit Thermal Reactor]] |
| style="text-align:center; font-size:12px;" |[[File:Unknown.png|200px|center|link=Prawn Suit Thermal Reactor (Below Zero)]][[Prawn Suit Thermal Reactor (Below Zero)|Prawn Suit Thermal Reactor]] |
||
| style="text-align:left; font-size:12px;" | |
| style="text-align:left; font-size:12px;" | |
||
* [[Lilypads Crevice]] |
* [[Lilypads Crevice]] |
||
| Line 128: | Line 128: | ||
| style="text-align:center; font-size:12px;" | |
| style="text-align:center; font-size:12px;" | |
||
[[File:TorpedoArmFragment.png|200px|center|link=Prawn Suit Torpedo Arm]][[Prawn Suit Torpedo Arm]] |
[[File:TorpedoArmFragment.png|200px|center|link=Prawn Suit Torpedo Arm (Below Zero)]][[Prawn Suit Torpedo Arm (Below Zero)|Prawn Suit Torpedo Arm]] |
||
| style="text-align:left; font-size:12px;" | |
| style="text-align:left; font-size:12px;" | |
||
* [[Crystal Caves]] |
* [[Crystal Caves]] |
||
| Line 134: | Line 134: | ||
| style="text-align:center; font-size:12px;" |''exosuittorpedoarmfragment'' |
| style="text-align:center; font-size:12px;" |''exosuittorpedoarmfragment'' |
||
|- |
|- |
||
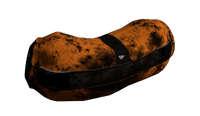
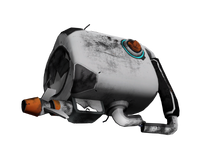
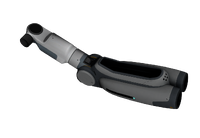
| style="text-align:center; font-size:12px;" |[[File:Damaged Propulsion Cannon.png|200px|center|link=Propulsion Cannon]][[Propulsion Cannon]] |
| style="text-align:center; font-size:12px;" |[[File:Damaged Propulsion Cannon.png|200px|center|link=Propulsion Cannon (Below Zero)]][[Propulsion Cannon (Below Zero)|Propulsion Cannon]] |
||
| style="text-align:left; font-size:12px;" | |
| style="text-align:left; font-size:12px;" | |
||
* [[ |
* [[Sea Monkey Nest]]s |
||
** [[ |
** [[Arctic Kelp Caves]] |
||
* [[Arctic Kelp Forest]] |
** [[Arctic Kelp Forest]] |
||
| style="text-align:center; font-size:12px;" |2 |
| style="text-align:center; font-size:12px;" |2 |
||
| style="text-align:center; font-size:12px;" |''propulsioncannonfragment'' |
| style="text-align:center; font-size:12px;" |''propulsioncannonfragment'' |
||
|- |
|- |
||
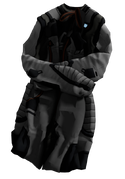
| style="text-align:center; font-size:12px;" |[[File:Unknown.png|200px|center|link=Reinforced Dive Suit]][[Reinforced Dive Suit]] |
| style="text-align:center; font-size:12px;" |[[File:Unknown.png|200px|center|link=Reinforced Dive Suit (Below Zero)]][[Reinforced Dive Suit (Below Zero)|Reinforced Dive Suit]] |
||
| style="text-align:left; font-size:12px;" | |
| style="text-align:left; font-size:12px;" | |
||
* [[Mercury II]] (Bow) |
* [[Mercury II]] (Bow) |
||
| Line 174: | Line 174: | ||
| style="text-align:center; font-size:12px;" |''seatruckaquariummodulefragment'' |
| style="text-align:center; font-size:12px;" |''seatruckaquariummodulefragment'' |
||
|- |
|- |
||
| style="text-align:center; font-size:12px;" |<tabber>1=[[File: |
| style="text-align:center; font-size:12px;" |<tabber>1=[[File:DockingModuleFragment 1.png|200px|center|link=Seatruck Docking Module]][[Seatruck Docking Module]]|-|2=[[File:DockingModuleFragment 2.png|200px|center|link=Seatruck Docking Module]][[Seatruck Docking Module]]|-|3=[[File:DockingModuleFragment 3.png|200px|center|link=Seatruck Docking Module]][[Seatruck Docking Module]]</tabber> |
||
| style="text-align:left; font-size:12px;" | |
| style="text-align:left; font-size:12px;" | |
||
* [[Deep Purple Vents]] |
* [[Deep Purple Vents]] |
||
| Line 206: | Line 206: | ||
| style="text-align:center; font-size:12px;" |''seatruckstoragemodulefragment'' |
| style="text-align:center; font-size:12px;" |''seatruckstoragemodulefragment'' |
||
|- |
|- |
||
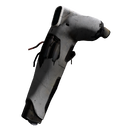
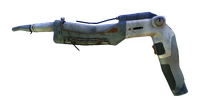
| style="text-align:center; font-size:12px;" |[[File:Damaged Seaglide.png|200px|center|link=Seaglide]][[Seaglide]] |
| style="text-align:center; font-size:12px;" |[[File:Damaged Seaglide.png|200px|center|link=Seaglide (Below Zero)]][[Seaglide (Below Zero)|Seaglide]] |
||
| style="text-align:left; font-size:12px;" | |
| style="text-align:left; font-size:12px;" | |
||
* [[Arctic Kelp Caves]] |
* [[Arctic Kelp Caves]] |
||
| Line 234: | Line 234: | ||
| style="text-align:center; font-size:12px;" |''spypenguinfragment'' |
| style="text-align:center; font-size:12px;" |''spypenguinfragment'' |
||
|- |
|- |
||
| style="text-align:center; font-size:12px;" |[[File: |
| style="text-align:center; font-size:12px;" |[[File:TOM Fragment.png|150px|center|link=Test Override Module]][[Test Override Module]] |
||
| style="text-align:left; font-size:12px;" | |
| style="text-align:left; font-size:12px;" | |
||
* [[Marguerit Maida's Base]] |
* [[Marguerit Maida's Base]] |
||
| Line 240: | Line 240: | ||
| style="text-align:center; font-size:12px;" |''radiotowertomfragment'' |
| style="text-align:center; font-size:12px;" |''radiotowertomfragment'' |
||
|- |
|- |
||
| style="text-align:center; font-size:12px;" |<tabber>1=[[File:Thermal Plant Fragment 1.png|200px|center|link=Thermal Plant]][[Thermal Plant]]|-|2=[[File:Thermal Plant Fragment 2.png|200px|center|link=Thermal Plant]][[Thermal Plant]]|-|3=[[File:Thermal Plant Fragment 3.png|200px|center|link=Thermal Plant]][[Thermal Plant]]|-|4=[[File:Thermal Plant Fragment 4.png|200px|center|link=Thermal Plant]][[Thermal Plant]]</tabber> |
| style="text-align:center; font-size:12px;" |<tabber>1=[[File:Thermal Plant Fragment 1.png|200px|center|link=Thermal Plant (Below Zero)]][[Thermal Plant (Below Zero)|Thermal Plant]]|-|2=[[File:Thermal Plant Fragment 2.png|200px|center|link=Thermal Plant (Below Zero)]][[Thermal Plant (Below Zero)|Thermal Plant]]|-|3=[[File:Thermal Plant Fragment 3.png|200px|center|link=Thermal Plant (Below Zero)]][[Thermal Plant (Below Zero)|Thermal Plant]]|-|4=[[File:Thermal Plant Fragment 4.png|200px|center|link=Thermal Plant (Below Zero)]][[Thermal Plant (Below Zero)|Thermal Plant]]</tabber> |
||
| style="text-align:left; font-size:12px;" | |
| style="text-align:left; font-size:12px;" | |
||
* [[Koppa Mining Site]] |
* [[Koppa Mining Site]] |
||
* [[Tree Spires]] |
* [[Tree Spires]] |
||
** [[Tree Spires|Large Tree Spire]] |
|||
** [[Tree Spires|Tree Spires Fissure]] |
|||
| style="text-align:center; font-size:12px;" |2 |
| style="text-align:center; font-size:12px;" |2 |
||
| style="text-align:center; font-size:12px;" |''thermalplantfragment'' |
| style="text-align:center; font-size:12px;" |''thermalplantfragment'' |
||
|- |
|- |
||
| style="text-align:center; font-size:12px;" |[[File:Unknown.png|200px|center|link=Ultra High Capacity Tank]][[Ultra High Capacity Tank]] |
| style="text-align:center; font-size:12px;" |[[File:Unknown.png|200px|center|link=Ultra High Capacity Tank (Below Zero)]][[Ultra High Capacity Tank (Below Zero)|Ultra High Capacity Tank]] |
||
| style="text-align:left; font-size:12px;" | |
| style="text-align:left; font-size:12px;" | |
||
* [[ |
* [[Sea Monkey Nest]]s |
||
** [[ |
** [[Arctic Kelp Caves]] |
||
** [[Lilypads Crevice]] |
|||
| style="text-align:center; font-size:12px;" |3 |
| style="text-align:center; font-size:12px;" |3 |
||
| style="text-align:center; font-size:12px;" |highcapacitytankfragment |
| style="text-align:center; font-size:12px;" |highcapacitytankfragment |
||
Latest revision as of 05:23, 1 August 2024
This article is about {{#explode:Fragments (Below Zero)|(}} in Subnautica. [[{{#explode:Fragments (Below Zero)|(}} (Below Zero)|Click here]] for information on this subject in Below Zero.
Fragments are broken pieces of advanced technology that can be analyzed by the Scanner to create Blueprints. Many fragments can be found littering the sea floor of various Biomes.
Fragment spawns are semi-randomised, meaning that they have defined spawning areas but can spawn randomly within that area. This means that fragments will be found in different places in each save. Sea Monkey Nests also contain certain fragments.
Should the Scanner be used on fragments of items the player has already fully analyzed, it will grant two Titanium instead.
Fragments List
| Item | Locations | Number | Item ID |
|---|---|---|---|
| 1 | beaconfragment | ||
 |
1 | coldsuitfragment | |
 |
2 | gravspherefragment | |
 |
1 | builderfragment | |
 |
|
1 | hydraulicfluidfragment |
 |
3 | lasercutterfragment | |
 |
1 | metaldetectorfragment | |
<tabber>1=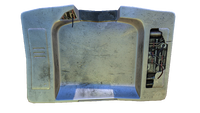 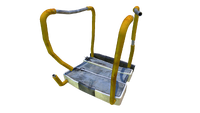 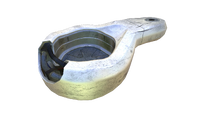 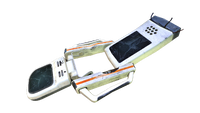 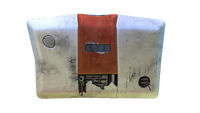 |
3 | constructorfragment | |
 |
3 | radiotowerppufragment | |
 |
1 | divereel | |
<tabber>1=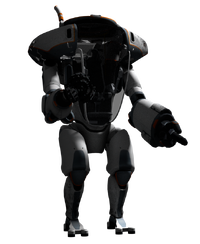   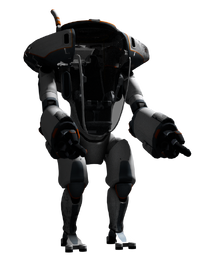 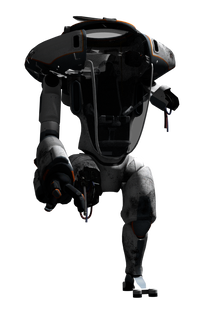 |
4 | exosuitfragment | |
 |
|
2 | exosuitdrillarmfragment |
 |
2 | exosuitgrapplingarmfragment | |
 |
2 | exosuitpropulsionarmfragment | |
|
2 | exosuitthermalreactormodulefragment | |
 |
2 | exosuittorpedoarmfragment | |
 |
2 | propulsioncannonfragment | |
|
|
1 | reinforceddivesuitfragment |
<tabber>1=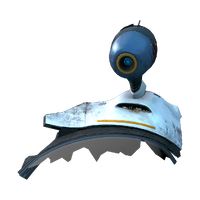  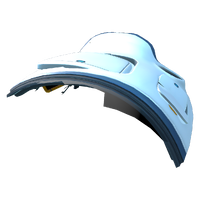 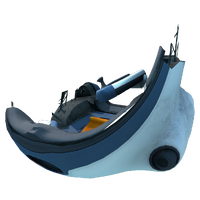 |
3 | seatruckfragment | |
|
2 | seatruckupgradeafterburnerfragment | |
<tabber>1=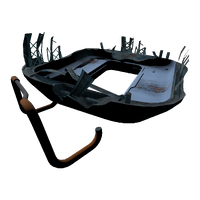 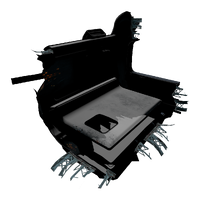 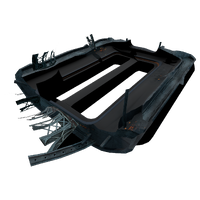 |
3 | seatruckaquariummodulefragment | |
<tabber>1=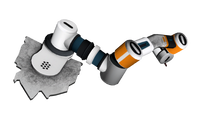 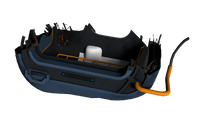 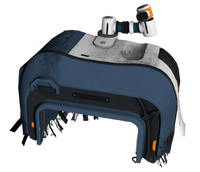 |
3 | seatruckdockingmodulefragment | |
|
3 | seatruckfabricatormodulefragment | |
|
2 | seatruckupgradehorsepowerfragment | |
|
3 | seatrucksleepermodulefragment | |
|
3 | seatruckstoragemodulefragment | |
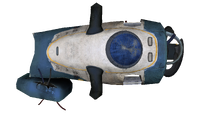 |
3 | seaglidefragment | |
|
3 | hoverbikefragment | |
|
1 | spypenguinfragment | |
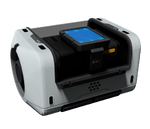 |
1 | radiotowertomfragment | |
<tabber>1=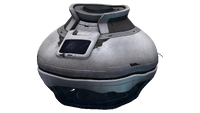 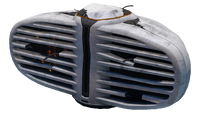 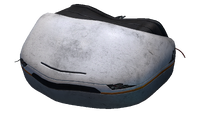 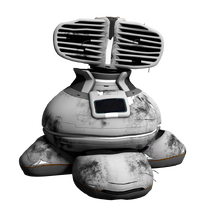 |
2 | thermalplantfragment | |
|
3 | highcapacitytankfragment |