
Sea Monkey Nest: Difference between revisions
No edit summary |
(Undo revision 42126 by 212.129.53.242 (talk)) |
||
| Line 3: | Line 3: | ||
|biome=[[Arctic Kelp Caves]] |
|biome=[[Arctic Kelp Caves]] |
||
|debugspawn= ''seamonkeynest1 (nonfunctional)'' ''seamonkeynest2 (nonfunctional)'' ''seamonkeynest3 (nonfunctional)'' ''seamonkeynest4 (nonfunctional)'' ''seamonkeynest5 (nonfunctional)'' |
|debugspawn= ''seamonkeynest1 (nonfunctional)'' ''seamonkeynest2 (nonfunctional)'' ''seamonkeynest3 (nonfunctional)'' ''seamonkeynest4 (nonfunctional)'' ''seamonkeynest5 (nonfunctional)'' |
||
}} |
|||
'''Sea Monkey Nests''' are important locations in Subnautica: Below Zero. The [[Sea Monkey]] has a habit of stealing interesting objects and returning them to its nesting grounds, therefore many [[fragments]] of [[Alterra Corporation|Alterra]] technology can be found in their nests for the player to scan. |
|||
Up to three [[Eggs|Sea Monkey Eggs]] can be found inside a nest. The player can use the [[Survival Knife]] or the [[Propulsion Cannon]] to remove the roof and pick up the eggs. |
Up to three [[Eggs|Sea Monkey Eggs]] can be found inside a nest. The player can use the [[Survival Knife]] or the [[Propulsion Cannon]] to remove the roof and pick up the eggs. |
||
| Line 21: | Line 22: | ||
| rowspan="5" style="text-align:center; font-size:12px;" |2 |
| rowspan="5" style="text-align:center; font-size:12px;" |2 |
||
| rowspan="5" style="text-align:center; font-size:12px;" |''lasercutter'' |
| rowspan="5" style="text-align:center; font-size:12px;" |''lasercutter'' |
||
| style="text-align:center; font-size:12px |
| style="text-align:center; font-size:12px;" | 50 -115 -175 |
||
|- |
|- |
||
| style="text-align:center; font-size:12px |
| style="text-align:center; font-size:12px;" | 196 -145 -5 |
||
|- |
|- |
||
| style="text-align:center; font-size:12px |
| style="text-align:center; font-size:12px;" | -725 -222 -611 |
||
|- |
|- |
||
| style="text-align:center; font-size:12px |
| style="text-align:center; font-size:12px;" | -653 -204 -621 |
||
|- |
|- |
||
| style="text-align:center; font-size:12px |
| style="text-align:center; font-size:12px;" | -462 -138 -89 |
||
|- |
|- |
||
| rowspan="5" style="text-align:center; font-size:12px;" |[[File:Mobile Vehicle Bay.png|80px|center|link=Mobile Vehicle Bay]][[Mobile Vehicle Bay]] |
| rowspan="5" style="text-align:center; font-size:12px;" |[[File:Mobile Vehicle Bay.png|80px|center|link=Mobile Vehicle Bay]][[Mobile Vehicle Bay]] |
||
| rowspan="5" style="text-align:center; font-size:12px;" |2 |
| rowspan="5" style="text-align:center; font-size:12px;" |2 |
||
| rowspan="5" style="text-align:center; font-size:12px;" |''constructor'' |
| rowspan="5" style="text-align:center; font-size:12px;" |''constructor'' |
||
| style="text-align:center; font-size:12px |
| style="text-align:center; font-size:12px;" | 179 -103 -8 |
||
|- |
|- |
||
| style="text-align:center; font-size:12px |
| style="text-align:center; font-size:12px;" | 130 -123 0 |
||
|- |
|- |
||
| style="text-align:center; font-size:12px |
| style="text-align:center; font-size:12px;" | 127 -53 64 |
||
|- |
|- |
||
| style="text-align:center; font-size:12px |
| style="text-align:center; font-size:12px;" | -505 -102 -206 |
||
|- |
|- |
||
| style="text-align:center; font-size:12px |
| style="text-align:center; font-size:12px;" | -580 -91 -35 |
||
|- |
|- |
||
| rowspan="5" style="text-align:center; font-size:12px;" |[[File:Propulsion Cannon.png|80px|center|link=Propulsion Cannon]][[Propulsion Cannon]] |
| rowspan="5" style="text-align:center; font-size:12px;" |[[File:Propulsion Cannon.png|80px|center|link=Propulsion Cannon]][[Propulsion Cannon]] |
||
| rowspan="5" style="text-align:center; font-size:12px;" |2 |
| rowspan="5" style="text-align:center; font-size:12px;" |2 |
||
| rowspan="5" style="text-align:center; font-size:12px;" |''propulsioncannon'' |
| rowspan="5" style="text-align:center; font-size:12px;" |''propulsioncannon'' |
||
| style="text-align:center; font-size:12px |
| style="text-align:center; font-size:12px;" | 71 -139 -85 |
||
|- |
|- |
||
| style="text-align:center; font-size:12px |
| style="text-align:center; font-size:12px;" | 266 -112 -107 |
||
|- |
|- |
||
| style="text-align:center; font-size:12px |
| style="text-align:center; font-size:12px;" | -653 -183 -585 |
||
|- |
|- |
||
| style="text-align:center; font-size:12px |
| style="text-align:center; font-size:12px;" | -480 -143 -136 |
||
|- |
|- |
||
| style="text-align:center; font-size:12px |
| style="text-align:center; font-size:12px;" | -498 -139 -162 |
||
|- |
|- |
||
| rowspan="4" style="text-align:center; font-size:12px;" |[[File:Seaglide.png|80px|center|link=Seaglide]][[Seaglide]] |
| rowspan="4" style="text-align:center; font-size:12px;" |[[File:Seaglide.png|80px|center|link=Seaglide]][[Seaglide]] |
||
| rowspan="4" style="text-align:center; font-size:12px;" |2 |
| rowspan="4" style="text-align:center; font-size:12px;" |2 |
||
| rowspan="4" style="text-align:center; font-size:12px;" |''seaglide'' |
| rowspan="4" style="text-align:center; font-size:12px;" |''seaglide'' |
||
| style="text-align:center; font-size:12px |
| style="text-align:center; font-size:12px;" | -427 -57 10 |
||
|- |
|- |
||
| style="text-align:center; font-size:12px |
| style="text-align:center; font-size:12px;" | -444 -81 12 |
||
|- |
|- |
||
| style="text-align:center; font-size:12px |
| style="text-align:center; font-size:12px;" | -171 -46 -110 |
||
|- |
|- |
||
| style="text-align:center; font-size:12px |
| style="text-align:center; font-size:12px;" | -37 -55 -26 |
||
|- |
|- |
||
| rowspan="3" style="text-align:center; font-size:12px;" |[[File:Ultra High Capacity Tank.png|80px|center|link=Ultra High Capacity Tank]][[Ultra High Capacity Tank]] |
| rowspan="3" style="text-align:center; font-size:12px;" |[[File:Ultra High Capacity Tank.png|80px|center|link=Ultra High Capacity Tank]][[Ultra High Capacity Tank]] |
||
| rowspan="3" style="text-align:center; font-size:12px;" |2 |
| rowspan="3" style="text-align:center; font-size:12px;" |2 |
||
| rowspan="3" style="text-align:center; font-size:12px;" |''highcapacitytank'' |
| rowspan="3" style="text-align:center; font-size:12px;" |''highcapacitytank'' |
||
| style="text-align:center; font-size:12px |
| style="text-align:center; font-size:12px;" |145 -100 -82 |
||
|- |
|- |
||
| style="text-align:center; font-size:12px |
| style="text-align:center; font-size:12px;" | -506 -133 4 |
||
|- |
|- |
||
| style="text-align:center; font-size:12px |
| style="text-align:center; font-size:12px;" | -472 -82 -88 |
||
|} |
|} |
||
Revision as of 14:32, 18 September 2019
<infobox> <title source="title1"><default>Sea Monkey Nest</default></title>
<image source="image4"></image> <label>Category</label> <label>Category</label> <label>Description</label> <label>Hull Integrity</label> <label>Health</label> <label>Blueprint Source</label> <label>Acquired From</label> <label>Fragments</label> <label>Build Time</label> <label>Size</label> <label>Damage</label> <label>Drill Yield</label> <label>Biome</label> <label>Location</label> <label>Coordinates</label> <label>Perks</label> <label>Penalties</label> <label>Attribute</label> <label>Drops</label>
<label>Debug Spawn</label> <format> * {{#explode:seamonkeynest1 (nonfunctional) seamonkeynest2 (nonfunctional) seamonkeynest3 (nonfunctional) seamonkeynest4 (nonfunctional) seamonkeynest5 (nonfunctional)||1}} </format> <label>Debug Spawn</label> <format> * {{#explode:{{{item_id}}}||1}} </format><label>Music</label> <group layout="horizontal"> <label>Food</label> <label>H2O</label> </group> <label>Bioreactor</label> <label>Byproduct</label> <group collapse="open" class="tab-fragment"> <header>Fragments</header> <image source="image2"></image> <label>Item</label> <label>Description</label> <label>Location</label> <label>Fragments</label> <label>Attribute</label> <label>Debug Spawn</label> <format>{{{debugspawn2}}}</format> <image source="image3"></image> <label>Item</label> <label>Description</label> <label>Location</label> <label>Fragments</label> <label>Attribute</label> <label>Debug Spawn</label> <format>{{{debugspawn3}}}</format> <image source="image5"></image> <label>Item</label> <label>Description</label> <label>Location</label> <label>Fragments</label> <label>Attribute</label> <label>Debug Spawn</label> <format>{{{debugspawn4}}}</format> </group> <group collapse="open" class="tab-fragment"> <header>Data Boxes</header> <image source="image6"></image> <label>Location</label> </group> </infobox> Sea Monkey Nests are important locations in Subnautica: Below Zero. The Sea Monkey has a habit of stealing interesting objects and returning them to its nesting grounds, therefore many fragments of Alterra technology can be found in their nests for the player to scan. Up to three Sea Monkey Eggs can be found inside a nest. The player can use the Survival Knife or the Propulsion Cannon to remove the roof and pick up the eggs.
Appearance
The nests appear to be composed of packed sediment with plant matter intertwined to give structural support. Several large chunks of metal stolen from humans can be seen embedded into the nest walls, offering a protective layer. It is likely that this is an alternative expression of a natural behaviour. A thin lattice structure is present over the opening to the nest.
Fragments
| Item | # of Scans | Blueprint ID | Location |
|---|---|---|---|
 |
2 | lasercutter | 50 -115 -175 |
| 196 -145 -5 | |||
| -725 -222 -611 | |||
| -653 -204 -621 | |||
| -462 -138 -89 | |||
 |
2 | constructor | 179 -103 -8 |
| 130 -123 0 | |||
| 127 -53 64 | |||
| -505 -102 -206 | |||
| -580 -91 -35 | |||
 |
2 | propulsioncannon | 71 -139 -85 |
| 266 -112 -107 | |||
| -653 -183 -585 | |||
| -480 -143 -136 | |||
| -498 -139 -162 | |||
 |
2 | seaglide | -427 -57 10 |
| -444 -81 12 | |||
| -171 -46 -110 | |||
| -37 -55 -26 | |||
 |
2 | highcapacitytank | 145 -100 -82 |
| -506 -133 4 | |||
| -472 -82 -88 |
Gallery

Side view
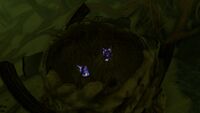
Two Sea Monkey eggs inside a nest

