
Fauna: Difference between revisions
Flammingwolf (talk | contribs) (→Trivia) |
No edit summary |
||
| Line 1: | Line 1: | ||
{{ExperimentalMode}} |
|||
{{Spoiler}} |
|||
{{Tłumaczone}} |
|||
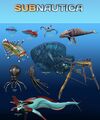
'''Fauna''' is the scientific term for the animals of a region. '''Fauna''' in ''[[Subnautica]]'' can be found all over the planet, from the deepest darkest depths of the secretive [[Lost River]] to the vibrant [[Safe Shallows]]. Even to the fiery pits of the [[Inactive Lava Zone|lava zone]]. |
|||
To [[Formy Życia|formy życia]] spotykane na całym [[Planeta 4546B|świecie]] Subnautici, od najgłębszych najciemniejszych głębi do tętniącej życiem [[Bezpieczna Płycizna|Bezpiecznej Płycizny]]. |
|||
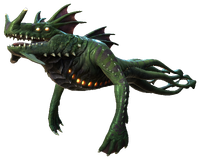
There is a large variety of '''Fauna''', ranging from the minuscule, cave-dwelling [[Rockgrub]], to the colossal [[Sea Dragon Leviathan]] that spews molten minerals from its mouth. '''Fauna''' on [[Planet 4546B]] are capable of enduring and adapting to various environments, although unable to thrive due to the presence of the [[Kharaa Bacterium]]. Certain species of small '''Fauna''' can sometimes be seen forming [[Shoal of Fish|shoals]]. |
|||
Świat zwierzęcy jest bardzo zróżnicowany, poczynając od węgorzy używających bioelektryczności do obrony przed większymi drapieżnikami a także do obezwładniania swoich ofiar, a kończąc na potężnych [[Sea Dragon Leviathan|Sea Dragons]] plujących wrzącą lawą. |
|||
'''Fauna''' on Planet 4546B only have one gender, which is capable of both laying eggs and fertilizing them. Two parents are still needed in the majority of cases. '''Fauna''' on 4546B also have yellow blood. |
|||
== Przyszłe plany == |
|||
The player can scan '''Fauna''' with the [[Scanner]], allowing them to view information about the creatures in their [[PDA]]. |
|||
* W przyszłych aktualizacjach, używając [[Przetaczarka|przetaczarki]] będzie można zdobyć DNA z różnych okazów fauny, w celu stworzenia kilku rodzajów serum, każde z innymi efektami i implementacjami w różnych ulepszeniach. |
|||
== |
== Obecna lista fauny w grze == |
||
=== |
===Mięsożercy=== |
||
{| |
{| style="width: 100%;" class="article-table sortable" border="0" cellpadding="1" cellspacing="1" |
||
|- |
|- |
||
! class="unsortable" style="width: 25%; text-align: center;" |Fauna |
! class="unsortable" style="width: 25%; text-align: center;" |Fauna |
||
! class="unsortable" style="width: 25%; text-align: center;" | |
! class="unsortable" style="width: 25%; text-align: center;" |Nastawienie |
||
! class="unsortable" style="width: 25%; text-align: center;" | |
! class="unsortable" style="width: 25%; text-align: center;" |DNA |
||
! class="unsortable" style="width: 25%; text-align: center;" |Biom |
|||
|- |
|- |
||
| style="text-align:center; font-size:12px;" |[[ |
| style="text-align:center; font-size:12px;" |[[Plik:Ampeel.png|thumb|link=Ampeel]][[Ampeel]] |
||
| style="text-align:center; font-size:12px;" |[[:Category:Attitude: Agresywny|Agresywny]] |
|||
''Shocker'' |
|||
| style="text-align:center; font-size:12px;" | |
| style="text-align:center; font-size:12px;" | - |
||
| style="text-align:left; font-size:12px;" | |
| style="text-align:left; font-size:12px;" | |
||
* [[ |
* [[Strefa krwistych wodorostów]] |
||
* [[ |
* [[Jaskinie krwistych wodorostów]] |
||
* [[ |
* [[Strefa bulwowa]] |
||
|- |
|- |
||
| style="text-align:center; font-size:12px;" |[[ |
| style="text-align:center; font-size:12px;" |[[Plik:IMG_4936.png|thumb|link=Biter]][[Biter]] |
||
| style="text-align:center; font-size:12px;" |[[:Category:Attitude: Agresywny|Agresywny]] |
|||
''Biter'' |
|||
| style="text-align:center; font-size:12px;" | |
| style="text-align:center; font-size:12px;" | - |
||
| style="text-align:left; font-size:12px;" | |
| style="text-align:left; font-size:12px;" | |
||
*[[ |
* [[Trawiasty Płaskowyż]] |
||
* [[ |
* [[Jaskinia żelogrzybów]] |
||
* [[ |
* [[Górzyste Wyspy]] |
||
* [[ |
* [[Góry]] |
||
* [[Jaskinie pasma górskiego]] |
|||
* [[Mountains]] |
|||
* [[Mountain Island]] |
|||
* [[Mountain Range Caves]] |
|||
|- |
|- |
||
| style="text-align:center; font-size:12px;" |[[ |
| style="text-align:center; font-size:12px;" |[[Plik:IMG_4937.png|thumb|Blighter]] |
||
| style="text-align:center; font-size:12px;" |[[:Category:Attitude: Agresywny|Agresywny]] |
|||
''Blighter'' |
|||
| style="text-align:center; font-size:12px;" | |
| style="text-align:center; font-size:12px;" | - |
||
| style="text-align:left; font-size:12px;" | |
| style="text-align:left; font-size:12px;" | |
||
* [[ |
* [[Strefa krwistych wodorostów]] |
||
* [[ |
* [[Jaskinie krwistych wodorostów]] |
||
* [[Zaginiona Rzeka]] |
|||
|- |
|- |
||
| style="text-align:center; font-size:12px;" |[[ |
| style="text-align:center; font-size:12px;" |[[Plik:IMG_4938.png|thumb|link=Boneshark]][[Boneshark]] |
||
| style="text-align:center; font-size:12px;" |[[:Category:Attitude: Agresywny|Agresywny]] |
|||
''Boneshark'' |
|||
| style="text-align:center; font-size:12px;" | |
| style="text-align:center; font-size:12px;" | - |
||
| style="text-align:left; font-size:12px;" | |
| style="text-align:left; font-size:12px;" | |
||
* [[ |
* [[Strefa bulwowa]] |
||
*[[ |
* [[Grzybowy Las]] |
||
* [[ |
* [[Podwodne Wyspy]] |
||
* [[Mushroom Forest]] |
|||
* [[Primary Containment Facility#Aquarium|Primary Containment Facility Aquarium]] |
|||
* [[Underwater Islands Caves]] |
|||
* [[Underwater Islands]] |
|||
|- |
|- |
||
| style="text-align:center; font-size:12px;" |[[ |
| style="text-align:center; font-size:12px;" |[[Plik:IMG_4939.png|thumb|link=Crabsnake]][[Crabsnake]] |
||
| style="text-align:center; font-size:12px;" |[[:Category:Attitude: Agresywny|Agresywny]] |
|||
''Crabsnake'' |
|||
| style="text-align:center; font-size:12px;" | |
| style="text-align:center; font-size:12px;" | - |
||
| style="text-align:left; font-size:12px;" | |
| style="text-align:left; font-size:12px;" | |
||
* [[ |
* [[Jaskinia żelogrzybów]] |
||
|- |
|- |
||
| style="text-align:center; font-size:12px;" |[[File: |
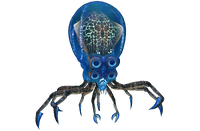
| style="text-align:center; font-size:12px;" |[[File:Crabsquid_backgroundless.png|200px|center|link=Crabsquid]][[Crabsquid]] |
||
| style="text-align:center; font-size:12px;" |[[:Category:Attitude: Agresywny|Agresywny]] |
|||
''Crabsquid'' |
|||
| style="text-align:center; font-size:12px;" | |
| style="text-align:center; font-size:12px;" | - |
||
| style="text-align:left; font-size:12px;" | |
| style="text-align:left; font-size:12px;" | |
||
* [[ |
* [[Zaginiona Rzeka]] |
||
* [[ |
* [[Strefa krwistych wodorostów]] |
||
* [[ |
* [[Głęboka wielka rafa]] |
||
* [[Lost River]] |
|||
|- |
|- |
||
| style="text-align:center; font-size:12px;" |[[File:Crash Fauna.png|200px|center|link=Crashfish]][[Crashfish]] |
| style="text-align:center; font-size:12px;" |[[File:Crash Fauna.png|200px|center|link=Crashfish]][[Crashfish]] |
||
| style="text-align:center; font-size:12px;" |[[:Category:Attitude: Agresywny|Agresywny]] |
|||
''Crash'' |
|||
| style="text-align:center; font-size:12px;" | |
| style="text-align:center; font-size:12px;" | - |
||
| style="text-align:left; font-size:12px;" | |
| style="text-align:left; font-size:12px;" | |
||
* [[ |
* [[Jaskinie Bezpiecznej Płycizny]] |
||
* [[ |
* [[Bezpieczna Płycizna]] |
||
* [[ |
* [[Jaskinie Lasu wodorostów]] |
||
|- |
|- |
||
| style="text-align:center; font-size:12px;" | |
| style="text-align:center; font-size:12px;" |[[File:LavaLizardTest.png|200px|center|link=Lava Lizard]][[Lava Lizard]] |
||
| style="text-align:center; font-size:12px;" |[[:Category:Attitude: Agresywny|Agresywny]] |
|||
[[File:Ghost_Leviathan_Fauna.png|center|200px|link=Ghost Leviathan]][[Ghost Leviathan]] |
|||
| style="text-align:center; font-size:12px;" | - |
|||
''ghostleviathan'' |
|||
| style="text-align:center; font-size:12px;" |[[:Category:Attitude: Aggressive|Aggressive]] |
|||
| style="text-align:left; font-size:12px;" | |
|||
* [[Dead Zone]] |
|||
* [[Grand Reef]] |
|||
* [[Lost River|Lost River Bones Field]] |
|||
* [[Lost River|Lost River Ghost Forest]] |
|||
* [[Blood Kelp Zone|Northern Blood Kelp Zone]] |
|||
|- |
|||
| style="text-align:center; font-size:12px;" |[[File:Lava Lizard Fauna A.png|200px|center|link=Lava Lizard]][[Lava Lizard]] |
|||
''lavalizard'' |
|||
| style="text-align:center; font-size:12px;" |[[:Category:Attitude: Aggressive|Aggressive]] |
|||
| style="text-align:left; font-size:12px;" | |
| style="text-align:left; font-size:12px;" | |
||
* [[ |
* [[Strefa Nieaktywnej Lawy]] |
||
* [[ |
* [[Strefa Aktywnej Lawy]] |
||
* [[Inactive Lava Zone]] |
|||
|- |
|- |
||
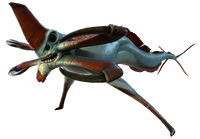
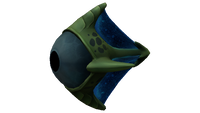
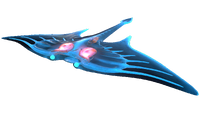
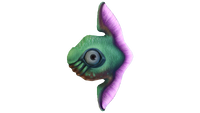
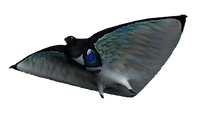
| style="text-align:center; font-size:12px;" |[[File:Mesmer Fauna.png|200px|center|link=Mesmer]][[Mesmer]] |
| style="text-align:center; font-size:12px;" |[[File:Mesmer Fauna.png|200px|center|link=Mesmer]][[Mesmer]] |
||
| style="text-align:center; font-size:12px;" |[[:Category:Attitude: Defensywny|Defensywny]] |
|||
''mesmer'' |
|||
| style="text-align:center; font-size:12px;" | |
| style="text-align:center; font-size:12px;" | - |
||
| style="text-align:left; font-size:12px;" | |
| style="text-align:left; font-size:12px;" | |
||
* [[ |
* [[Trawiasty Płaskowyż]] |
||
* [[ |
* [[Jaskinie Lasu wodorostów]] |
||
* [[ |
* [[Strefa bulwowa]] |
||
* [[ |
* [[Grzybowy Las]] |
||
* [[ |
* [[Zaginiona Rzeka]] |
||
|- |
|- |
||
| style="text-align:center; font-size:12px;" |[[File:Reaper Leviathan Fauna.png| |
| style="text-align:center; font-size:12px;" |[[File:Reaper Leviathan Fauna.png|200px|center|link=Reaper Leviathan]][[Reaper Leviathan]] |
||
| style="text-align:center; font-size:12px;" |[[:Category:Attitude: Agresywny|Agresywny]] |
|||
''reaperleviathan'' |
|||
| style="text-align:center; font-size:12px;" | |
| style="text-align:center; font-size:12px;" | - |
||
| style="text-align:left; font-size:12px;" | |
| style="text-align:left; font-size:12px;" | |
||
* [[Aurora]] |
* [[Aurora]] |
||
* [[ |
* [[Strefa katastrofy]] |
||
*[[ |
* [[Diuny]] |
||
* [[ |
* [[Górzyste Wyspy]] |
||
* [[ |
* [[Góry]] |
||
* [[Mountains]] |
|||
|- |
|- |
||
| style="text-align:center; font-size:12px;" |[[File:Spine Eel Fauna.png| |
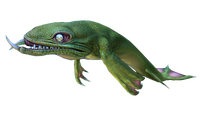
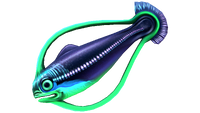
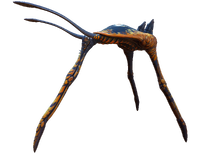
| style="text-align:center; font-size:12px;" |[[File:Spine Eel Fauna.png|200px|link=River Prowler]][[River Prowler]] |
||
| style="text-align:center; font-size:12px;" | [[:Category:Attitude: Agresywny|Agresywny]] |
|||
''spineeel'' |
|||
| style="text-align:center; font-size:12px;" | |
| style="text-align:center; font-size:12px;" | - |
||
| style="text-align:left; font-size:12px;" | |
| style="text-align:left; font-size:12px;" | |
||
* [[ |
* [[Zaginiona Rzeka]] |
||
|- |
|- |
||
| style="text-align:center; font-size:12px;" |[[File: |
| style="text-align:center; font-size:12px;" |[[File:Sea_Dragon_Leviathan_Fauna.png|200px|center|link=Sea Dragon Leviathan]][[Sea Dragon Leviathan]] |
||
| style="text-align:center; font-size:12px;" | [[:Category:Attitude: Agresywny|Agresywny]] |
|||
''sandshark'' |
|||
| style="text-align:center; font-size:12px;" | |
| style="text-align:center; font-size:12px;" | - |
||
| style="text-align:left; font-size:12px;" | |
| style="text-align:left; font-size:12px;" | |
||
* [[ |
* [[Strefa Nieaktywnej Lawy]] |
||
* [[ |
* [[Strefa Aktywnej Lawy]] |
||
* [[Grassy Plateaus]] |
|||
|- |
|- |
||
| style="text-align:center; font-size:12px;" |[[File: |
| style="text-align:center; font-size:12px;" |[[File:Sandshark Fauna.png|200px|center|link=Sand Shark]][[Sand Shark]] |
||
| style="text-align:center; font-size:12px;" |[[:Category:Attitude: Agresywny|Agresywny]] |
|||
''seadragon'' |
|||
| style="text-align:center; font-size:12px;" | |
| style="text-align:center; font-size:12px;" | - |
||
| style="text-align:left; font-size:12px;" | |
| style="text-align:left; font-size:12px;" | |
||
* [[ |
* [[Jaskinie]] |
||
* [[ |
* [[Strefa katastrofy]] |
||
* [[Diuny]] |
|||
|- |
|||
* [[Trawiasty Płaskowyż]] |
|||
| style="text-align:center; font-size:12px;" |[[File: Sea Emperor Fauna.png |235px|center|link=Sea Emperor Leviathan]][[Sea Emperor Leviathan]] |
|||
| style="text-align:center; font-size:12px;" | [[:Category:Attitude: Passive|Passive]] |
|||
| style="text-align:left; font-size:12px;" | |
|||
*Adult |
|||
** [[Primary Containment Facility#Aquarium|Primary Containment Facility Aquarium]] |
|||
*Juvenile |
|||
** [[Blood Kelp Zone]] |
|||
** [[Crag Field]] |
|||
** [[Dunes]] |
|||
** [[Grand Reef]] |
|||
** [[Mountains]] |
|||
|- |
|- |
||
| style="text-align:center; font-size:12px;" |[[File:Stalker Fauna.png|200px|center|link=Stalker]][[Stalker]] |
| style="text-align:center; font-size:12px;" |[[File:Stalker Fauna.png|200px|center|link=Stalker]][[Stalker]] |
||
| style="text-align:center; font-size:12px;" |[[:Category:Attitude: Agresywny|Agresywny]] |
|||
''stalker'' |
|||
| style="text-align:center; font-size:12px;" | |
| style="text-align:center; font-size:12px;" | - |
||
| style="text-align:left; font-size:12px;" | |
| style="text-align:left; font-size:12px;" | |
||
* [[ |
* [[Strefa katastrofy]] |
||
* [[ |
* [[Las wodorostów]] |
||
* [[Kelp Forest Caves]] |
|||
* [[Primary Containment Facility#Aquarium|Primary Containment Facility Aquarium]] |
|||
|- |
|- |
||
| style="text-align:center; font-size:12px;" |[[File:Warper Fauna.png|200px|center|link=Warper]][[Warper]] |
| style="text-align:center; font-size:12px;" |[[File:Warper Fauna.png|200px|center|link=Warper]][[Warper]] |
||
''warper'' |
|||
| style="text-align:center; font-size:12px;" | |
| style="text-align:center; font-size:12px;" | |
||
Zależne |
|||
*[[:Category:Attitude: Aggressive|Aggressive]] when target is infected with the [[Kharaa Bacterium]] |
|||
| style="text-align:center; font-size:12px;" | - |
|||
*[[:Category:Attitude: Passive|Passive]] when target is not infected |
|||
| style="text-align:left; font-size:12px;" | |
| style="text-align:left; font-size:12px;" | |
||
* [[ |
* [[Strefa Aktywnej Lawy]] |
||
* [[ |
* [[Strefa Nieaktywnej Lawy]] |
||
* [[ |
* [[Zaginiona Rzeka]] |
||
* [[ |
* [[Górzyste wyspy]] |
||
* [[ |
* [[Wielka Rafa]] |
||
* [[ |
* [[Głęboka Wielka Rafa]] |
||
* [[ |
* [[Diuny]] |
||
* [[ |
* [[Bazy Prekursorów]] |
||
* [[Mountain Island]] |
|||
* [[Sea Treader's Path]] |
|||
|} |
|} |
||
{{Clear}} |
{{Clear}} |
||
=== |
===Roślinożercy=== |
||
{| class="article-table sortable" style="width: 100%;" cellspacing="1" cellpadding="1" border="0" |
{| class="article-table sortable" style="width: 100%;" cellspacing="1" cellpadding="1" border="0" |
||
|- |
|- |
||
! class="unsortable" style="width: 25%; text-align: center;" |Fauna |
! class="unsortable" style="width: 25%; text-align: center;" |Fauna |
||
! class="unsortable" style="width: 25%; text-align: center;" | |
! class="unsortable" style="width: 25%; text-align: center;" |Nastawienie |
||
! class="unsortable" style="width: 25%; text-align: center;" |DNA |
|||
! class="unsortable" style="width: 25%; text-align: center;" | |
! class="unsortable" style="width: 25%; text-align: center;" |Biom |
||
|- |
|- |
||
| style="text-align:center; font-size:12px;" |[[File:Airsack_Fauna.png|200px|center|link=Bladderfish]][[Bladderfish]] |
| style="text-align:center; font-size:12px;" |[[File:Airsack_Fauna.png|200px|center|link=Bladderfish]][[Bladderfish]] |
||
| style="text-align:center; font-size:12px;" |[[:Category:Attitude: Pasywny|Pasywny]] |
|||
''bladderfish'' |
|||
| style="text-align:center; font-size:12px;" | |
| style="text-align:center; font-size:12px;" | - |
||
| style="text-align:left; font-size:12px;" | |
| style="text-align:left; font-size:12px;" | |
||
* [[ |
* [[Trawiasty Płaskowyż]] |
||
* [[ |
* [[Las wodorostów]] |
||
* [[ |
* [[Grzybowy Las]] |
||
* [[Bezpieczna Płycizna]] |
|||
* [[Primary Containment Facility#Aquarium|Primary Containment Facility Aquarium]] |
|||
* [[ |
* [[Podwodne Wyspy]] |
||
* [[ |
* [[Wielka Rafa]] |
||
* [[Underwater Islands]] |
|||
|- |
|- |
||
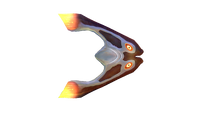
| style="text-align:center; font-size:12px;" |[[File:Boomerang Fauna.png|200px|center|link=Boomerang]][[Boomerang]] |
| style="text-align:center; font-size:12px;" |[[File:Boomerang Fauna.png|200px|center|link=Boomerang]][[Boomerang]] |
||
| style="text-align:center; font-size:12px;" |[[:Category:Attitude: Pasywny|Pasywny]] |
|||
''boomerang'' |
|||
| style="text-align:center; font-size:12px;" | |
| style="text-align:center; font-size:12px;" | - |
||
| style="text-align:left; font-size:12px;" | |
| style="text-align:left; font-size:12px;" | |
||
* [[ |
* [[Strefa katastrofy]] |
||
* [[ |
* [[Głęboka Wielka Rafa]] |
||
* [[ |
* [[Wielka Rafa]] |
||
* [[ |
* [[Trawiasty Płaskowyż]] |
||
* [[ |
* [[Jaskinie Lasu wodorostów]] |
||
* [[ |
* [[Strefa bulwowa]] |
||
* [[ |
* [[Jaskinie pasma górskiego]] |
||
* [[ |
* [[Bezpieczna Płycizna]] |
||
* [[ |
* [[Podwodne Wyspy]] |
||
* [[Bulb Zone]] |
|||
* [[Primary Containment Facility#Aquarium|Primary Containment Facility Aquarium]] |
|||
* [[Mountain Island]] |
|||
* [[Mountain Range Caves]] |
|||
* [[Mushroom Forest]] |
|||
* [[Safe Shallows]] |
|||
* [[Safe Shallows Caves]] |
|||
* [[Sea Treader's Path]] |
|||
* [[Sea Treader's Tunnel Caves]] |
|||
* [[Sparse Reef]] |
|||
* [[Underwater Islands Caves]] |
|||
* [[Underwater Islands]] |
|||
|- |
|- |
||
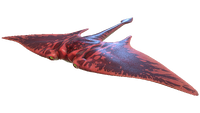
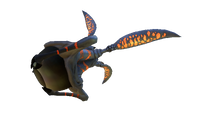
| style="text-align:center; font-size:12px;" |[[File:Red Ghost Ray Fauna.png|200px|center|link=Crimson Ray]][[Crimson Ray]] |
| style="text-align:center; font-size:12px;" |[[File:Red Ghost Ray Fauna.png|200px|center|link=Crimson Ray]][[Crimson Ray]] |
||
| style="text-align:center; font-size:12px;" |[[:Category:Attitude: Pasywny|Pasywny]] |
|||
''ghostrayred'' |
|||
| style="text-align:center; font-size:12px;" | |
| style="text-align:center; font-size:12px;" | - |
||
| style="text-align:left; font-size:12px;" | |
| style="text-align:left; font-size:12px;" | |
||
* [[ |
* [[Strefa Aktywnej Lawy]] |
||
* [[ |
* [[Strefa Nieaktywnej Lawy]] |
||
|- |
|||
| style="text-align:center; font-size:12px;" |[[File:Cute Fish Fauna.png|200px|center|link=Cuddlefish]][[Cuddlefish]] |
|||
''cutefish'' |
|||
| style="text-align:center; font-size:12px;" |[[:Category:Attitude: Passive|Passive]] |
|||
| style="text-align:left; font-size:12px;" | |
|||
* [[Alien Caches|Lost River Laboratory]] |
|||
* [[Degasi Seabases|Deep Grand Reef Degasi Base]] |
|||
* [[Dunes|Dunes Sinkhole]] |
|||
* [[Mushroom Forest Caves]] |
|||
|- |
|- |
||
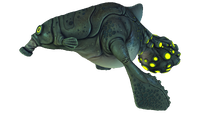
| style="text-align:center; font-size:12px;" |[[File:Eyeye Fauna.png|200px|center|link=Eyeye]][[Eyeye]] |
| style="text-align:center; font-size:12px;" |[[File:Eyeye Fauna.png|200px|center|link=Eyeye]][[Eyeye]] |
||
| style="text-align:center; font-size:12px;" |[[:Category:Attitude: Pasywny|Pasywny]] |
|||
''eyeye'' |
|||
| style="text-align:center; font-size:12px;" | |
| style="text-align:center; font-size:12px;" | - |
||
| style="text-align:left; font-size:12px;" | |
| style="text-align:left; font-size:12px;" | |
||
* [[ |
* [[Strefa katastrofy]] |
||
* [[ |
* [[Diuny]] |
||
* [[ |
* [[Wielka Rafa]] |
||
* [[ |
* [[Jaskinia żelogrzybów]] |
||
* [[ |
* [[Las wodorostów]] |
||
* [[ |
* [[Strefa bulwowa]] |
||
* [[ |
* [[Jaskinie Strefy bulwowej]] |
||
* [[Sea Treader's Path]] |
|||
* [[Sea Treader's Tunnel Caves]] |
|||
|- |
|- |
||
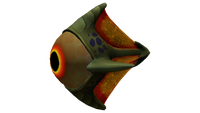
| style="text-align:center; font-size:12px;" |[[File:Garryfish Fauna.png|200px|center|link=Garryfish]][[Garryfish]] |
| style="text-align:center; font-size:12px;" |[[File:Garryfish Fauna.png|200px|center|link=Garryfish]][[Garryfish]] |
||
| style="text-align:center; font-size:12px;" |[[:Category:Attitude: Pasywny|Pasywny]] |
|||
''garryfish'' |
|||
| style="text-align:center; font-size:12px;" | |
| style="text-align:center; font-size:12px;" | - |
||
| style="text-align:left; font-size:12px;" | |
| style="text-align:left; font-size:12px;" | |
||
*[[ |
* [[Diuny]] |
||
* [[Jaskinie Bezpiecznej Płycizny]] |
|||
* [[Dunes]] |
|||
* [[Bezpieczna Płycizna]] |
|||
* [[Primary Containment Facility#Aquarium|Primary Containment Facility Aquarium]] |
|||
* [[ |
* [[Podwodne Wyspy]] |
||
* [[Safe Shallows Caves]] |
|||
* [[Underwater Islands Caves]] |
|||
* [[Underwater Islands]] |
|||
|- |
|- |
||
| style="text-align:center; font-size:12px;" |[[File:Gasopod Fauna.png|200px|center|link=Gasopod]][[Gasopod]] |
| style="text-align:center; font-size:12px;" |[[File:Gasopod Fauna.png|200px|center|link=Gasopod]][[Gasopod]] |
||
| style="text-align:center; font-size:12px;" |[[:Category:Attitude: Defensywny|Defensywny]] |
|||
''gasopod'' |
|||
| style="text-align:center; font-size:12px;" | |
| style="text-align:center; font-size:12px;" | - |
||
| style="text-align:left; font-size:12px;" | |
| style="text-align:left; font-size:12px;" | |
||
* [[ |
* [[Bezpieczna Płycizna]] |
||
* [[Dunes]] |
|||
* [[Safe Shallows]] |
|||
|- |
|- |
||
| style="text-align:center; font-size:12px;" |[[File:Ghost_Ray_Fauna.png|200px|center|link=Ghostray]][[Ghostray]] |
| style="text-align:center; font-size:12px;" |[[File:Ghost_Ray_Fauna.png|200px|center|link=Ghostray]][[Ghostray]] |
||
| style="text-align:center; font-size:12px;" |[[:Category:Attitude: Pasywny|Pasywny]] |
|||
''ghostrayblue'' |
|||
| style="text-align:center; font-size:12px;" | |
| style="text-align:center; font-size:12px;" | - |
||
| style="text-align:left; font-size:12px;" | |
| style="text-align:left; font-size:12px;" | |
||
* [[ |
* [[Zaginiona Rzeka]] |
||
|- |
|- |
||
| style="text-align:center; font-size:12px;" |[[File:Holefish Fauna.png|200px|center|link=Holefish]][[Holefish]] |
| style="text-align:center; font-size:12px;" |[[File:Holefish Fauna.png|200px|center|link=Holefish]][[Holefish]] |
||
| style="text-align:center; font-size:12px;" |[[:Category:Attitude: Pasywny|Pasywny]] |
|||
''holefish'' |
|||
| style="text-align:center; font-size:12px;" | |
| style="text-align:center; font-size:12px;" | - |
||
| style="text-align:left; font-size:12px;" | |
| style="text-align:left; font-size:12px;" | |
||
* [[ |
* [[Strefa katastrofy]] |
||
* [[Jaskinie Strefy bulwowej]] |
|||
* [[Primary Containment Facility#Aquarium|Primary Containment Facility Aquarium]] |
|||
* [[ |
* [[Jaskinie Grzybowego Lasu]] |
||
* [[ |
* [[Bezpieczna Płycizna]] |
||
* [[Safe Shallows]] |
|||
*[[Safe Shallows Caves]] |
|||
|- |
|- |
||
| style="text-align:center; font-size:12px;" |[[File:Hoopfish Fauna.png|200px|center|link=Hoopfish]][[Hoopfish]] |
| style="text-align:center; font-size:12px;" |[[File:Hoopfish Fauna.png|200px|center|link=Hoopfish]][[Hoopfish]] |
||
| style="text-align:center; font-size:12px;" |[[:Category:Attitude: Pasywny|Pasywny]] |
|||
''hoopfish'' |
|||
| style="text-align:center; font-size:12px;" | |
| style="text-align:center; font-size:12px;" | - |
||
| style="text-align:left; font-size:12px;" | |
| style="text-align:left; font-size:12px;" | |
||
* [[ |
* [[Wielka Rafa]] |
||
* [[ |
* [[Jaskinie Lasu wodorostów]] |
||
* [[ |
* [[Strefa bulwowa]] |
||
* [[Ścieżka Morskiego Stąpacza]] |
|||
* [[Bulb Zone]] |
|||
* [[Jaskinie Ścieżki Morskiego Stąpacza]] |
|||
* [[Primary Containment Facility#Aquarium|Primary Containment Facility Aquarium]] |
|||
* [[ |
* [[Bezpieczna Płycizna]] |
||
* [[Podwodne Wyspy]] |
|||
* [[Sea Treader's Tunnel Caves]] |
|||
* [[Underwater Islands]] |
|||
|- |
|- |
||
| style="text-align:center; font-size:12px;" |[[File:Hoverfish Fauna.png|200px|center|link=Hoverfish]][[Hoverfish]] |
| style="text-align:center; font-size:12px;" |[[File:Hoverfish Fauna.png|200px|center|link=Hoverfish]][[Hoverfish]] |
||
| style="text-align:center; font-size:12px;" |[[:Category:Attitude: Pasywny|Pasywny]] |
|||
''hoverfish'' |
|||
| style="text-align:center; font-size:12px;" | |
| style="text-align:center; font-size:12px;" | - |
||
| style="text-align:left; font-size:12px;" | |
| style="text-align:left; font-size:12px;" | |
||
* [[ |
* [[Strefa katastrofy]] |
||
*[[ |
* [[Trawiasty Płaskowyż]] |
||
* [[Las wodorostów]] |
|||
* [[Primary Containment Facility#Aquarium|Primary Containment Facility Aquarium]] |
|||
* [[Kelp Forest]] |
|||
|- |
|- |
||
| style="text-align:center; font-size:12px;" |[[File:Jellyray Fauna.png|200px|center|link=Jellyray]][[Jellyray]] |
| style="text-align:center; font-size:12px;" |[[File:Jellyray Fauna.png|200px|center|link=Jellyray]][[Jellyray]] |
||
| style="text-align:center; font-size:12px;" |[[:Category:Attitude: Pasywny|Pasywny]] |
|||
''jellyray'' |
|||
| style="text-align:center; font-size:12px;" | |
| style="text-align:center; font-size:12px;" | - |
||
| style="text-align:left; font-size:12px;" | |
| style="text-align:left; font-size:12px;" | |
||
* [[ |
* [[Głęboka Wielka Rafa]] |
||
* [[ |
* [[Grzybowy Las]] |
||
|- |
|- |
||
| style="text-align:center; font-size:12px;" |[[File:Lavaboomerang.png|200px|center|link= |
| style="text-align:center; font-size:12px;" |[[File:Lavaboomerang.png|200px|center|link=Lava Boomerang]][[Lava Boomerang]] |
||
| style="text-align:center; font-size:12px;" |[[:Category:Attitude: Pasywny|Pasywny]] |
|||
''lavaboomerang'' |
|||
| style="text-align:center; font-size:12px;" | |
| style="text-align:center; font-size:12px;" | - |
||
| style="text-align:left; font-size:12px;" | |
| style="text-align:left; font-size:12px;" | |
||
* [[ |
* [[Strefa Nieaktywnej Lawy]] |
||
* [[ |
* [[Strefa Aktywnej Lawy]] |
||
|- |
|||
* [[Inactive Lava Zone]] |
|||
| style="text-align:center; font-size:12px;" |[[File:Lava Eyeye.PNG|200px|center|link=Lava Eyeye]][[Lava Eyeye]] |
|||
| style="text-align:center; font-size:12px;" |[[:Category:Attitude: Pasywny|Pasywny]] |
|||
| style="text-align:center; font-size:12px;" | - |
|||
| style="text-align:left; font-size:12px;" | |
|||
* [[Strefa Aktywnej Lawy]] |
|||
* [[Strefa Nieaktywnej Lawy]] |
|||
|- |
|- |
||
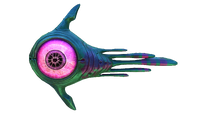
| style="text-align:center; font-size:12px;" |[[File:Oculus Fauna.png|200px|center|link=Oculus]][[Oculus]] |
| style="text-align:center; font-size:12px;" |[[File:Oculus Fauna.png|200px|center|link=Oculus]][[Oculus]] |
||
| style="text-align:center; font-size:12px;" |[[:Category:Attitude: Pasywny|Pasywny]] |
|||
''oculus'' |
|||
| style="text-align:center; font-size:12px;" | |
| style="text-align:center; font-size:12px;" | - |
||
| style="text-align:left; font-size:12px;" | |
| style="text-align:left; font-size:12px;" | |
||
* [[Jaskinia żelogrzybów]] |
|||
* [[Primary Containment Facility#Aquarium|Primary Containment Facility Aquarium]] |
|||
* [[Jellyshroom Cave]] |
|||
|- |
|- |
||
| style="text-align:center; font-size:12px;" |[[File:Peeper Fauna.png|200px|center|link=Peeper]][[Peeper]] |
| style="text-align:center; font-size:12px;" |[[File:Peeper Fauna.png|200px|center|link=Peeper]][[Peeper]] |
||
| style="text-align:center; font-size:12px;" |[[:Category:Attitude: Pasywny|Pasywny]] |
|||
''peeper'' |
|||
| style="text-align:center; font-size:12px;" | |
| style="text-align:center; font-size:12px;" | - |
||
| style="text-align:left; font-size:12px;" | |
| style="text-align:left; font-size:12px;" | |
||
* [[Strefa katastrofy]] |
|||
* [[Primary Containment Facility#Aquarium|Primary Containment Facility Aquarium]] |
|||
* [[ |
* [[Las wodorostów]] |
||
*[[ |
* [[Bezpieczna Płycizna]] |
||
* [[Dunes]] |
|||
* [[Grand Reef]] |
|||
* [[Safe Shallows]] |
|||
* [[Sparse Reef]] |
|||
* [[Mountains]] |
|||
* [[Mushroom Forest|Northeastern Mushroom Forest]] |
|||
|- |
|- |
||
| style="text-align:center; font-size:12px;" |[[File: |
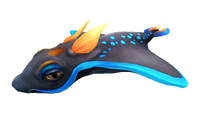
| style="text-align:center; font-size:12px;" |[[File:Rabbitray Fauna.png|200px|center|link=Rabbit Ray]][[Rabbit Ray]] |
||
| style="text-align:center; font-size:12px;" |[[:Category:Attitude: Pasywny|Pasywny]] |
|||
''rabbitray'' |
|||
| style="text-align:center; font-size:12px;" | |
| style="text-align:center; font-size:12px;" | - |
||
| style="text-align:left; font-size:12px;" | |
|||
* [[Crash Zone]] |
|||
* [[Kelp Forest]] |
|||
* [[Primary Containment Facility#Aquarium|Primary Containment Facility Aquarium]] |
|||
* [[Safe Shallows]] |
|||
|- |
|||
| style="text-align:center; font-size:12px;" |[[File:Lava Eyeye.PNG|200px|center|link=Red Eyeye]][[Red Eyeye]] |
|||
''lavaeyeye'' |
|||
| style="text-align:center; font-size:12px;" |[[:Category:Attitude: Passive|Passive]] |
|||
| style="text-align:left; font-size:12px;" | |
| style="text-align:left; font-size:12px;" | |
||
* [[ |
* [[Strefa katastrofy]] |
||
* [[ |
* [[Las wodorostów]] |
||
* [[ |
* [[Bezpieczna Płycizna]] |
||
|- |
|||
| style="text-align:center; font-size:12px;" |[[File:Reefback Fauna.png|200px|center|link=Reefback]][[Reefback]] |
| style="text-align:center; font-size:12px;" |[[File:Reefback Fauna.png|200px|center|link=Reefback]][[Reefback]] |
||
| style="text-align:center; font-size:12px;" |[[:Category:Attitude: Pasywny|Pasywny]] |
|||
''reefback'' |
|||
| style="text-align:center; font-size:12px;" | |
| style="text-align:center; font-size:12px;" | - |
||
| style="text-align:left; font-size:12px;" | |
| style="text-align:left; font-size:12px;" | |
||
* [[ |
* [[Strefa krwistych wodorostów]] |
||
* [[ |
* [[Trawiasty Płaskowyż]] |
||
* [[ |
* [[Strefa bulwowa]] |
||
* [[ |
* [[Grzybowy Las]] |
||
* [[ |
* [[Pusta rafa]] |
||
* [[ |
* [[Podwodne Wyspy]] |
||
* [[Underwater Islands]] |
|||
|- |
|- |
||
| style="text-align:center; font-size:12px;" |[[File:Reginald Fauna.png|200px|center|link=Reginald]][[Reginald]] |
| style="text-align:center; font-size:12px;" |[[File:Reginald Fauna.png|200px|center|link=Reginald]][[Reginald]] |
||
| style="text-align:center; font-size:12px;" |[[:Category:Attitude: Pasywny|Pasywny]] |
|||
''reginald'' |
|||
| style="text-align:center; font-size:12px;" | |
| style="text-align:center; font-size:12px;" | - |
||
| style="text-align:left; font-size:12px;" | |
| style="text-align:left; font-size:12px;" | |
||
* [[ |
* [[Strefa katastrofy]] |
||
* [[ |
* [[Wielka Rafa]] |
||
*[[ |
* [[Trawiasty Płaskowyż]] |
||
* [[ |
* [[Góry]] |
||
* [[ |
* [[Jaskinie pasma górskiego]] |
||
* [[ |
* [[Pusta rafa]] |
||
* [[ |
* [[Jaskinie Trawiastego Płaskowyżu]] |
||
* [[Zaginiona Rzeka]] |
|||
* [[Primary Containment Facility#Aquarium|Primary Containment Facility Aquarium]] |
|||
* [[Lost River]] |
|||
* [[Mountain Range Caves]] |
|||
* [[Mountains]] |
|||
* [[Sparse Reef]] |
|||
|- |
|- |
||
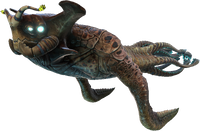
| style="text-align:center; font-size:12px;" |[[File:Sea Treader Fauna.png|200px|center|link=Sea Treader]][[Sea Treader]] |
| style="text-align:center; font-size:12px;" |[[File:Sea Treader Fauna.png|200px|center|link=Sea Treader]][[Sea Treader]] |
||
| style="text-align:center; font-size:12px;" |[[:Category:Attitude: Defensywny|Defensywny]] |
|||
''seatreader'' |
|||
| style="text-align:center; font-size:12px;" | |
| style="text-align:center; font-size:12px;" | - |
||
| style="text-align:left; font-size:12px;" | |
| style="text-align:left; font-size:12px;" | |
||
* [[ |
* [[Wielka Rafa]] |
||
* [[ |
* [[Ścieżka Morskiego Stąpacza]] |
||
* [[ |
* [[Jaskinie Ścieżki Morskiego Stąpacza]] |
||
|- |
|||
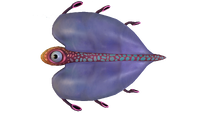
| style="text-align:center; font-size:12px;" |[[File:Skyray Fauna.png|200px|center|link=Skyray]][[Skyray]] |
|||
''skyray'' |
|||
| style="text-align:center; font-size:12px;" |[[:Category:Attitude: Passive|Passive]] |
|||
| style="text-align:left; font-size:12px;" | |
|||
* [[Crash Zone]] |
|||
* [[Floating Island]] |
|||
* [[Mountain Island]] |
|||
* [[Lifepod 5]] |
|||
|- |
|- |
||
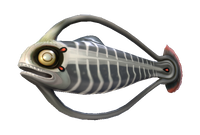
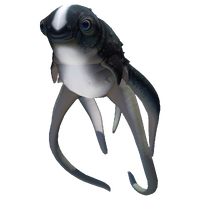
| style="text-align:center; font-size:12px;" |[[File:Spadefish Fauna.png|200px|center|link=Spadefish]][[Spadefish]] |
| style="text-align:center; font-size:12px;" |[[File:Spadefish Fauna.png|200px|center|link=Spadefish]][[Spadefish]] |
||
| style="text-align:center; font-size:12px;" |[[:Category:Attitude: Pasywny|Pasywny]] |
|||
''spadefish'' |
|||
| style="text-align:center; font-size:12px;" | |
| style="text-align:center; font-size:12px;" | - |
||
| style="text-align:left; font-size:12px;" | |
| style="text-align:left; font-size:12px;" | |
||
* [[ |
* [[wydmy]] |
||
* [[ |
* [[Trawiasty Płaskowyż]] |
||
* [[ |
* [[Jaskinie Grzybowego Lasu]] |
||
* [[ |
* [[Grzybowy Las]] |
||
* [[ |
* [[Pusta rafa]] |
||
* [[ |
* [[Podwodne Wyspy]] |
||
* [[ |
* [[Ścieżka Morskiego Stąpacza]] |
||
* [[Wielka Rafa]] |
|||
* [[Sea Treader's Tunnel Caves]] |
|||
* [[Jaskinie Ścieżki Morskiego Stąpacza]] |
|||
* [[Sparse Reef]] |
|||
* [[Underwater Islands]] |
|||
|- |
|- |
||
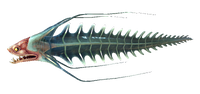
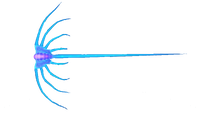
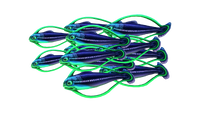
| style="text-align:center; font-size:12px;" |[[File:Blood Hoopfish Fauna.png|200px|center|link=Spinefish]][[Spinefish]] |
| style="text-align:center; font-size:12px;" |[[File:Blood Hoopfish Fauna.png|200px|center|link=Spinefish]][[Spinefish]] |
||
| style="text-align:center; font-size:12px;" |[[:Category:Attitude: Pasywny|Pasywny]] |
|||
''spinefish'' |
|||
| style="text-align:center; font-size:12px;" | |
| style="text-align:center; font-size:12px;" | - |
||
| style="text-align:left; font-size:12px;" | |
| style="text-align:left; font-size:12px;" | |
||
* [[ |
* [[Strefa krwistych wodorostów]] |
||
* [[ |
* [[Jaskinie krwistych wodorostów]] |
||
* [[ |
* [[Zaginiona Rzeka]] |
||
* [[Bone Fields Caves]] |
|||
|} |
|} |
||
{{Clear}} |
{{Clear}} |
||
=== |
===Pasożyty i padlinożercy=== |
||
{| class="article-table sortable" style="width: 100%;" cellspacing="1" cellpadding="1" border="0" |
{| class="article-table sortable" style="width: 100%;" cellspacing="1" cellpadding="1" border="0" |
||
|- |
|- |
||
! class="unsortable" style="width: 25%; text-align: center;" |Fauna |
! class="unsortable" style="width: 25%; text-align: center;" |Fauna |
||
! class="unsortable" style="width: 25%; text-align: center;" |Attitude |
! class="unsortable" style="width: 25%; text-align: center;" |Attitude |
||
! class="unsortable" style="width: 25%; text-align: center;" | |
! class="unsortable" style="width: 25%; text-align: center;" |DNA |
||
! class="unsortable" style="width: 25%; text-align: center;" |Biom |
|||
|- |
|||
| style="text-align:center; font-size:12px;" |[[File:Amoeboid Fauna.png|200px|center|link=Amoeboid]][[Amoeboid]] |
|||
| style="text-align:center; font-size:12px;" |[[:Category:Attitude: Passive|Passive]] |
|||
| style="text-align:left; font-size:12px;" | |
|||
* [[Disease Research Facility]] |
|||
* [[Lost River]] |
|||
** [[Lost River|Bone Fields]] |
|||
** [[Lost River|Ghost Canyon]] |
|||
** [[Lost River|Ghost Forest]] |
|||
** [[Lost River|Junction]] |
|||
** [[Lost River|Mountains Corridor]] |
|||
|- |
|- |
||
| style="text-align:center; font-size:12px;" |[[File:Bleeder Fauna-0.png|200px|center|link=Bleeder]][[Bleeder]] |
| style="text-align:center; font-size:12px;" |[[File:Bleeder Fauna-0.png|200px|center|link=Bleeder]][[Bleeder]] |
||
| style="text-align:center; font-size:12px;" |[[:Category:Attitude: Agresywny|Agresywny]] |
|||
''bleeder'' |
|||
| style="text-align:center; font-size:12px;" | |
| style="text-align:center; font-size:12px;" | - |
||
| style="text-align:left; font-size:12px;" | |
| style="text-align:left; font-size:12px;" | |
||
* [[Aurora]] |
* [[Aurora]] |
||
* [[ |
* [[Głęboka Pusta rafa]] |
||
* [[ |
* [[Trawiasty płaskowyż]] |
||
* [[ |
* [[Jaskinie Trawiastego płaskowyżu]] |
||
* [[ |
* [[Las wodorostów]] |
||
* [[ |
* [[Jaskinie Lasu wodorostów]] |
||
* [[ |
* [[Zaginiona Rzeka]] |
||
* [[ |
* [[Pusta rafa]] |
||
|- |
|- |
||
| style="text-align:center; font-size:12px;" |[[File:Blood Crawler Fauna.png|200px|center|link=Blood Crawler]][[Blood Crawler]] |
| style="text-align:center; font-size:12px;" |[[File:Blood Crawler Fauna.png|200px|center|link=Blood Crawler]][[Blood Crawler]] |
||
| style="text-align:center; font-size:12px;" |[[:Category:Attitude: Agresywny|Agresywny]] |
|||
''shuttlebug'' |
|||
| style="text-align:center; font-size:12px;" | |
| style="text-align:center; font-size:12px;" | - |
||
| style="text-align:left; font-size:12px;" | |
| style="text-align:left; font-size:12px;" | |
||
* [[ |
* [[Strefa krwistych wodorostów]] |
||
* [[ |
* [[Jaskinie krwistych wodorostów]] |
||
* [[ |
* [[Zaginiona Rzeka]] |
||
|- |
|- |
||
| style="text-align:center; font-size:12px;" |[[File:Cave Crawler (01).png|200px|center|link=Cave Crawler]][[Cave Crawler]] |
| style="text-align:center; font-size:12px;" |[[File:Cave Crawler (01).png|200px|center|link=Cave Crawler]][[Cave Crawler]] |
||
| style="text-align:center; font-size:12px;" |[[:Category:Attitude: Agresywny|Agresywny]] |
|||
''cavecrawler'' |
|||
| style="text-align:center; font-size:12px;" | |
| style="text-align:center; font-size:12px;" | - |
||
| style="text-align:left; font-size:12px;" | |
| style="text-align:left; font-size:12px;" | |
||
* [[Aurora]] |
* [[Aurora]] |
||
* [[ |
* [[Diuny]] |
||
* |
*[[Jaskinie diun]] |
||
* |
*[[Pływająca wyspa]] |
||
* [[ |
* [[Górska wyspa]] |
||
*[[Primary Containment Facility Aquarium]] |
|||
* [[Mountain Range Caves]] |
|||
* [[Jaskinie pasma górskiego]] |
|||
* [[Primary Containment Facility#Aquarium|Primary Containment Facility Aquarium]] |
|||
* [[ |
* [[Jaskinie Podwodnych wysp]] |
||
|- |
|- |
||
| style="text-align:center; font-size:12px;" |[[File:Floater Fauna-0.png|200px|center|link=Floater]][[Floater]] |
| style="text-align:center; font-size:12px;" |[[File:Floater Fauna-0.png|200px|center|link=Floater]][[Floater]] |
||
| style="text-align:center; font-size:12px;" |[[:Category:Attitude: Pasywny|Pasywny]] |
|||
''floater'' |
|||
| style="text-align:center; font-size:12px;" | |
| style="text-align:center; font-size:12px;" | - |
||
| style="text-align:left; font-size:12px;" | |
| style="text-align:left; font-size:12px;" | |
||
* [[ |
* [[Trawiasty Płaskowyż]] |
||
* [[ |
* [[Bezpieczna Płycizna]] |
||
* [[ |
* [[Pływająca wyspa]] |
||
* [[ |
* [[Podwodne Wyspy]] |
||
* [[Strefa krwistych wodorostów]] |
|||
* [[Underwater Islands]] |
|||
|- |
|- |
||
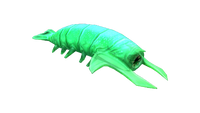
| style="text-align:center; font-size:12px;" |[[File:Lava Larva Fauna.png|200px|center|link=Lava Larva]][[Lava Larva]] |
| style="text-align:center; font-size:12px;" |[[File:Lava Larva Fauna.png|200px|center|link=Lava Larva]][[Lava Larva]] |
||
| style="text-align:center; font-size:12px;" |[[:Category:Attitude: Pasywny|Pasywny]] |
|||
''lavalarva'' |
|||
| style="text-align:center; font-size:12px;" | |
| style="text-align:center; font-size:12px;" | - |
||
| style="text-align:left; font-size:12px;" | |
| style="text-align:left; font-size:12px;" | |
||
* [[ |
* [[Strefa Aktywnej lawy]] |
||
* [[Strefa Nieaktywnej lawy]] |
|||
* [[Inactive Lava Zone Corridor]] |
|||
* [[Inactive Lava Zone]] |
|||
|- |
|- |
||
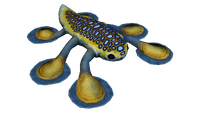
| style="text-align:center; font-size:12px;" |[[File:Rockgrub Fauna.png|200px|center|link=Rockgrub]][[Rockgrub]] |
| style="text-align:center; font-size:12px;" |[[File:Rockgrub Fauna.png|200px|center|link=Rockgrub]][[Rockgrub]] |
||
| style="text-align:center; font-size:12px;" |[[:Category:Attitude: Pasywny|Pasywny]] |
|||
''rockgrub'' |
|||
| style="text-align:center; font-size:12px;" | |
| style="text-align:center; font-size:12px;" | - |
||
| style="text-align:left; font-size:12px;" | |
| style="text-align:left; font-size:12px;" | |
||
* [[ |
* [[Jaskinie]] |
||
* [[ |
* [[Diuny]] |
||
* [[ |
* [[Strefa bulwowa]] |
||
* [[ |
* [[Jaskinie Strefy bulwowej]] |
||
* [[ |
* [[Pusta rafa]] |
||
* [[Sparse Reef]] |
|||
|- |
|- |
||
| style="text-align:center; font-size:12px;" |[[File:Jumper Fauna.png|200px|center|link=Shuttlebug]][[Shuttlebug]] |
| style="text-align:center; font-size:12px;" |[[File:Jumper Fauna.png|200px|center|link=Shuttlebug]][[Shuttlebug]] |
||
| style="text-align:center; font-size:12px;" |[[:Category:Attitude: Pasywny|Pasywny]] |
|||
''jumper'' |
|||
| style="text-align:center; font-size:12px;" | |
| style="text-align:center; font-size:12px;" | - |
||
| style="text-align:left; font-size:12px;" | |
| style="text-align:left; font-size:12px;" | |
||
* [[ |
* [[Strefa katastrofy]] |
||
* [[ |
* [[Diuny]] |
||
* [[ |
* [[Strefa bulwowa]] |
||
* [[ |
* [[Góry]] |
||
* [[ |
* [[Jaskinie pasma górskiego]] |
||
* [[ |
* [[Jaskinie Grzybowego lasu]] |
||
* [[ |
* [[Pusta rafa]] |
||
* [[Ścieżka Morskiego Stąpacza]] |
|||
* [[Mountains]] |
|||
* [[Jaskinie Ścieżki Morskiego Stąpacza]] |
|||
* [[Mushroom Forest Caves]] |
|||
* [[Jaskinie Trawiastego płaskowyżu]] |
|||
* [[Primary Containment Facility#Aquarium|PCF Aquarium]] |
|||
* [[Sea Treader's Path]] |
|||
* [[Sea Treader's Tunnel Caves]] |
|||
* [[Sparse Reef]] |
|||
|} |
|} |
||
{{Clear}} |
{{Clear}} |
||
==Extinct Species== |
|||
===Inne istoty=== |
|||
{| class="article-table sortable" style="width: 100%;" border="0" cellpaddig="1" cellspacing="1" |
|||
{| class="article-table sortable" style="width: 100%;" cellspacing="1" cellpadding="1" border="0" |
|||
|- |
|- |
||
! class="unsortable" style="width: 25%; text-align: center;" | |
! class="unsortable" style="width: 25%; text-align: center;" |Fauna |
||
! class="unsortable" style="width: 25%; text-align: center;" | |
! class="unsortable" style="width: 25%; text-align: center;" |Nastawienie |
||
! class="unsortable" style="width: 25%; text-align: center;" | |
! class="unsortable" style="width: 25%; text-align: center;" |DNA |
||
! class="unsortable" style="width: 25%; text-align: center;" | |
! class="unsortable" style="width: 25%; text-align: center;" |Biom |
||
|- |
|- |
||
| style="text-align:center; font-size:12px;" |[[File: |
| style="text-align:center; font-size:12px;" |[[File:Shoal of Fish Fauna.png|200px|center|link=Shoal of Fish]][[Shoal of Fish]] |
||
| style="text-align:center; font-size:12px;" | |
| style="text-align:center; font-size:12px;" |[[:Category:Attitude: Pasywny|Pasywny]] |
||
| style="text-align:center; font-size:12px;" | - |
|||
* ''N/A'' |
|||
| style="text-align:center; font-size:12px;" |Tens if not hundreds of millions of years old |
|||
| style="text-align:left; font-size:12px;" | |
| style="text-align:left; font-size:12px;" | |
||
* [[ |
* [[Biomes|All Biomes]] |
||
* [[Reginald]] |
|||
* [[Eyeye]] |
|||
* [[Oculus]] |
|||
* [[Red Eyeye]] |
|||
|- |
|- |
||
| style="text-align:center; font-size:12px;" |[[File: |
| style="text-align:center; font-size:12px;" |[[File:Skyray Fauna.png|200px|center|link=Skyray]][[Skyray]] |
||
| style="text-align:center; font-size:12px;" | |
| style="text-align:center; font-size:12px;" |[[:Category:Attitude: Pasywny|Pasywny]] |
||
| style="text-align:center; font-size:12px;" | - |
|||
* ''N/A'' |
|||
| style="text-align:center; font-size:12px;" |Many millions of years old |
|||
| style="text-align:left; font-size:12px;" | |
| style="text-align:left; font-size:12px;" | |
||
* [[ |
* [[Aurora]] |
||
* [[ |
* [[Strefa katastrofy]] |
||
* [[ |
* [[Pływająca wyspa]] |
||
* [[ |
* [[Górska wyspa]] |
||
* [[Bezpieczna Płycizna]] |
|||
|- |
|- |
||
| style="text-align:center; font-size:12px;" |[[File: |
| style="text-align:center; font-size:12px;" |[[File:Starfish Fauna.png|200px|center|link=Starfish]][[Starfish]] |
||
| style="text-align:center; font-size:12px;" | |
| style="text-align:center; font-size:12px;" |[[:Category:Attitude: Pasywny|Pasywny]] |
||
| style="text-align:center; font-size:12px;" | - |
|||
* [[Lost River Laboratory Cache]] |
|||
| style="text-align:center; font-size:12px;" |1,000,000 years |
|||
| style="text-align:left; font-size:12px;" | |
|||
* ''Unknown'' |
|||
|- |
|||
| style="text-align:center; font-size:12px;" |[[File:Gargantuan Skull.png|200px|center|link=Gargantuan Fossil]][[Gargantuan Fossil]] |
|||
| style="text-align:center; font-size:12px;" | |
|||
* [[Lost River|Lost River Bones Field]] |
|||
* Lost River Ghost Forest |
|||
| style="text-align:center; font-size:12px;" |3,000,000 years |
|||
| style="text-align:left; font-size:12px;" | |
|||
* ''Unknown'' |
|||
|- |
|||
| style="text-align:center; font-size:12px;" |[[File:Disease Research Facility Skeleton.png|200px|center|link=Research Specimen Theta]][[Research Specimen Theta]] |
|||
| style="text-align:center; font-size:12px;" | |
|||
* [[Disease Research Facility]] |
|||
| style="text-align:center; font-size:12px;" |1000 years |
|||
| style="text-align:left; font-size:12px;" | |
| style="text-align:left; font-size:12px;" | |
||
* [[ |
* [[Porzucone bazy]] |
||
* [[ |
* [[Jaskinia żelogrzybów]] |
||
* [[Sand Shark]] |
|||
* [[Boneshark]] |
|||
* [[Rockgrub]] |
|||
|} |
|} |
||
{{ |
{{Clear}} |
||
===Possible Expansion Pack Additions=== |
|||
===W rozwoju=== |
|||
{| class="article-table sortable" style="width: 100%;" cellspacing="1" cellpadding="1" border="0" |
{| class="article-table sortable" style="width: 100%;" cellspacing="1" cellpadding="1" border="0" |
||
|- |
|||
! class="unsortable" style="width: 25%; text-align: center;" |Fauna |
! class="unsortable" style="width: 25%; text-align: center;" |Fauna |
||
! class="unsortable" style="width: 25%; text-align: center;" |Attitude |
! class="unsortable" style="width: 25%; text-align: center;" |Attitude |
||
! class="unsortable" style="width: 25%; text-align: center;" |DNA |
|||
! class="unsortable" style="width: 25%; text-align: center;" |Biome |
! class="unsortable" style="width: 25%; text-align: center;" |Biome |
||
|- |
|- |
||
| style="text-align:center; font-size:12px;" |[[File:Bloomplankton-1.png|200px|center|link=Bloom Plankton]][[Bloom Plankton]] |
| style="text-align:center; font-size:12px;" |[[File:Bloomplankton-1.png|200px|center|link=Bloom Plankton]][[Bloom Plankton]] |
||
| style="text-align:center; font-size:12px;" |[[:Category:Attitude: Pasywny|Pasywny]] |
|||
''bloom'' |
|||
| style="text-align:center; font-size:12px;" | |
| style="text-align:center; font-size:12px;" | - |
||
| style="text-align:left; font-size:12px;" | |
| style="text-align:left; font-size:12px;" | |
||
*- |
* - |
||
|- |
|- |
||
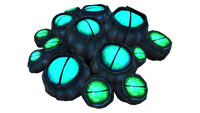
| style="text-align:center; font-size:12px;" |[[File: |
| style="text-align:center; font-size:12px;" |[[File:Blue Barnacles Fauna.png|200px|center|link=Blue Barnacles]][[Blue Barnacles]] |
||
| style="text-align:center; font-size:12px;" | - |
|||
| style="text-align:center; font-size:12px;" | - |
| style="text-align:center; font-size:12px;" | - |
||
| style="text-align:left; font-size:12px;" | |
| style="text-align:left; font-size:12px;" | |
||
* [[Twisty Bridges]] |
|||
*- |
|||
|- |
|- |
||
| style="text-align:center; font-size:12px;" | |
| style="text-align:center; font-size:12px;" |[[File:Cute Fish Fauna.png|200px|center|link=Cutefish]][[Cutefish]] |
||
| style="text-align:center; font-size:12px;" |[[:Category:Attitude: Pasywny|Pasywny]] |
|||
[[File:Rock Puncher Fauna.png|200px|link=Rock Puncher]] |
|||
| style="text-align:center; font-size:12px;" | - |
|||
| style="text-align:left; font-size:12px;" | |
|||
* - |
|||
|- |
|||
| style="text-align:center; font-size:12px;" |[[File: Sea Emperor Fauna.png |200px|center|link=Sea Emperor]][[Sea Emperor]] |
|||
| style="text-align:center; font-size:12px;" | pasywny |
|||
| style="text-align:center; font-size:12px;" | - |
|||
| style="text-align:left; font-size:12px;" | |
|||
lavazone |
|||
|- |
|||
| style="text-align:center; font-size:12px;" |[[File:Baby Leviathan Fauna.png|200px|center|link=Sea Emperor Juvenile]][[Sea Emperor Juvenile]] |
|||
| style="text-align:center; font-size:12px;" | pasywny |
|||
| style="text-align:center; font-size:12px;" | - |
|||
| style="text-align:left; font-size:12px;" | |
|||
lavazone |
|||
|} |
|||
{{Clear}} |
|||
===Niepotwierdzone=== |
|||
[[Rock Puncher]] |
|||
{| class="article-table sortable" style="width: 100%;" cellspacing="1" cellpadding="1" border="0" |
|||
|+ |
|||
|- |
|||
! class="unsortable" style="width: 25%; text-align: center;" |Fauna |
|||
! class="unsortable" style="width: 25%; text-align: center;" |Nastawienie |
|||
! class="unsortable" style="width: 25%; text-align: center;" |DNA |
|||
! class="unsortable" style="width: 25%; text-align: center;" |Biom |
|||
|- |
|||
| style="text-align:center; font-size:12px;" |[[File:Rock Puncher Fauna.png|200px|link=Rock Puncher]][[Rock Puncher]] |
|||
| style="text-align:center; font-size:12px;" | - |
|||
| style="text-align:center; font-size:12px;" | - |
| style="text-align:center; font-size:12px;" | - |
||
| style="text-align:left; font-size:12px;" | |
| style="text-align:left; font-size:12px;" | |
||
| Line 622: | Line 521: | ||
|} |
|} |
||
== |
== Galeria == |
||
<gallery position="left" widths="200" spacing="small" captionalign="left"> |
<gallery position="left" widths="200" spacing="small" captionalign="left"> |
||
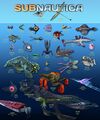
Subnautica Fauna Sheet 1.png|Subnautica Fauna [http://forums.unknownworlds.com/discussion/135933/subnautica-creature-chart Sheet 1] |
|||
unspecified.jpg|Subnautica '''Fauna''' Sheet 1 |
|||
Fauna Concept Art.jpg|Various Fauna [[Concept Art]] |
|||
unspecified.jpg|Updated Subnautica Fauna Sheet 1 |
|||
unspecified2.jpg|Updated Subnautica Fauna Sheet 2 |
|||
</gallery> |
</gallery> |
||
== |
== Ciekawostki == |
||
* Fauna miała posiadać wrodzone cechy, które powodowałyby unikalne zachowania. Te cechy to np. "Płodny" (czasami składają jaja, które można wykluć), "Alfa" (atakują gracza, jeśli inne stworzenia zostały zabite przez gracza w bezpośrednim sąsiedztwie), "Złożony" (okazy wymagają więcej czasu, aby je skanować), "Większy" (okazy mają większy rozmiar i wagę), ... Nie wiadomo, czy te atrybuty są obecnie wdrażane, czy też będą wdrażane w przyszłych aktualizacjach. |
|||
* In the future it may be possible to ride certain fauna.<ref>https://trello.com/c/LIxTNSqq/6506-ride-fish-anims-system</ref> |
|||
* Po aktualizacji Dangerous Creatures cała fauna ma żółtą krew. Przed tą aktualizacją fauna miała czerwoną krew. Wynika to z faktu, że ESRB przyznaje Subnautice wyższą ocenę niż oczekiwano z powodu czerwonej krwi. |
|||
* [[Cute Fish]] jest obecnie jedyną możliwą do zdobycia fauną w fazie rozwoju, którą można uzyskać za pośrednictwem konsoli do debugowania i będzie przyznawana tylko graczom, którzy zakupili wersję [[subnautica] wczesnego dostępu). |
|||
== Trivia == |
|||
* '''Fauna''' were intended to posses inherent attributes, that would have caused them to exhibit unique behaviors. These included, e.g., "Fertile" (occasionally lay eggs that can be hatched), "Alpha" (attacked the player if other creatures were killed by the player in the immediate vicinity), "Complex" (specimens take longer to scan), "Greater" (specimens are of larger size and weight), ... Whether these attributes are currently implemented or will be implemented in future updates is unknown. |
|||
* As of the Dangerous Creatures update, all fauna have yellow blood. Before this update, fauna had red blood. This is due to the ESRB giving Subnautica a higher rating than expected due to red blood. |
|||
* If you hold a small animal in your hand when a carnivorous '''fauna''' is about to attack, it will eat the animal out of your hand, instead of attacking you. |
|||
* It seems to be possible to stop small fauna (like the bladderfish) from spawning by catching every single one of them. The console could be used to spawn new ones, however it is uncertain whether this will increase the population over time. |
|||
* In the very early stages, there was an unused Sandworm that could only be spawned using the console, it would stay in one place under the ground and when the player or an npc was right above it, it would spring up and would do 1 damage but at a very fast rate. It never had any animations, except it shooting out of the ground and back into its hole. |
|||
** There was also an unused Grabcrab that would leave its burrow and search for items to drag back to it's hole. Its burrow also had the same model as the Grabcrab. |
|||
== |
== Przypisy == |
||
<references/> |
<references /> |
||
{{Navbox Fauna}} |
{{Navbox Fauna}} |
||
[[Category:Fauna]] |
[[Category:Fauna]] |
||
Revision as of 17:37, 23 February 2018

|
This seems new This article contains information that is updated for the latest Experimental Version of Subnautica. Players using stable mode may find this information inaccurate. |
To formy życia spotykane na całym świecie Subnautici, od najgłębszych najciemniejszych głębi do tętniącej życiem Bezpiecznej Płycizny.
Świat zwierzęcy jest bardzo zróżnicowany, poczynając od węgorzy używających bioelektryczności do obrony przed większymi drapieżnikami a także do obezwładniania swoich ofiar, a kończąc na potężnych Sea Dragons plujących wrzącą lawą.
Przyszłe plany
- W przyszłych aktualizacjach, używając przetaczarki będzie można zdobyć DNA z różnych okazów fauny, w celu stworzenia kilku rodzajów serum, każde z innymi efektami i implementacjami w różnych ulepszeniach.
Obecna lista fauny w grze
Mięsożercy
| Fauna | Nastawienie | DNA | Biom |
|---|---|---|---|
| thumb|link=AmpeelAmpeel | Agresywny | - | |
| thumb|link=BiterBiter | Agresywny | - | |
| thumb|Blighter | Agresywny | - | |
| thumb|link=BonesharkBoneshark | Agresywny | - | |
| thumb|link=CrabsnakeCrabsnake | Agresywny | - | |
 |
Agresywny | - | |
| Crashfish | Agresywny | - | |
 |
Agresywny | - | |
 |
Defensywny | - | |
 |
Agresywny | - | |
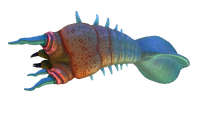
 River Prowler River Prowler
|
Agresywny | - | |
 |
Agresywny | - | |
 |
Agresywny | - | |
 |
Agresywny | - | |
 |
Zależne |
- |
Roślinożercy
| Fauna | Nastawienie | DNA | Biom | ||||
|---|---|---|---|---|---|---|---|
 |
Pasywny | - | |||||
 |
Pasywny | - | |||||
 |
Pasywny | - | |||||
 |
Pasywny | - | |||||
 |
Pasywny | - | |||||
 |
Defensywny | - | |||||
 |
Pasywny | - | |||||
 |
Pasywny | - | |||||
 |
Pasywny | - | |||||
 |
Pasywny | - | |||||
 |
Pasywny | - | |||||
 |
Pasywny | - | |||||
 |
Pasywny | - | |||||
 |
Pasywny | - | |||||
 |
Pasywny | - | |||||
 |
Pasywny | - | 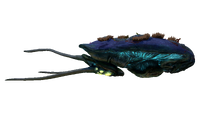 |
Pasywny | - | ||
 |
Pasywny | - | |||||
 |
Defensywny | - | |||||
 |
Pasywny | - | |||||
 |
Pasywny | - |
Pasożyty i padlinożercy
| Fauna | Attitude | DNA | Biom |
|---|---|---|---|
 |
Agresywny | - | |
 |
Agresywny | - | |
 |
Agresywny | - | |
 |
Pasywny | - | |
 |
Pasywny | - | |
 |
Pasywny | - | |
 |
Pasywny | - |
Inne istoty
| Fauna | Nastawienie | DNA | Biom |
|---|---|---|---|
 |
Pasywny | - | |
 |
Pasywny | - | |
 |
Pasywny | - |
W rozwoju
| Fauna | Attitude | DNA | Biome |
|---|---|---|---|
 |
Pasywny | - |
|
 |
- | - | |
 |
Pasywny | - |
|
 |
pasywny | - |
lavazone |
 |
pasywny | - |
lavazone |
Niepotwierdzone
| Fauna | Nastawienie | DNA | Biom |
|---|---|---|---|
 Rock Puncher Rock Puncher
|
- | - |
|
Galeria

Subnautica Fauna Sheet 1
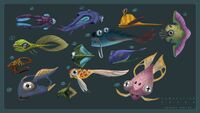
Various Fauna Concept Art
Updated Subnautica Fauna Sheet 1
Updated Subnautica Fauna Sheet 2


Ciekawostki
- Fauna miała posiadać wrodzone cechy, które powodowałyby unikalne zachowania. Te cechy to np. "Płodny" (czasami składają jaja, które można wykluć), "Alfa" (atakują gracza, jeśli inne stworzenia zostały zabite przez gracza w bezpośrednim sąsiedztwie), "Złożony" (okazy wymagają więcej czasu, aby je skanować), "Większy" (okazy mają większy rozmiar i wagę), ... Nie wiadomo, czy te atrybuty są obecnie wdrażane, czy też będą wdrażane w przyszłych aktualizacjach.
- Po aktualizacji Dangerous Creatures cała fauna ma żółtą krew. Przed tą aktualizacją fauna miała czerwoną krew. Wynika to z faktu, że ESRB przyznaje Subnautice wyższą ocenę niż oczekiwano z powodu czerwonej krwi.
- Cute Fish jest obecnie jedyną możliwą do zdobycia fauną w fazie rozwoju, którą można uzyskać za pośrednictwem konsoli do debugowania i będzie przyznawana tylko graczom, którzy zakupili wersję [[subnautica] wczesnego dostępu).
Przypisy
Lua error in package.lua at line 80: module 'Dev:Navbox' not found.